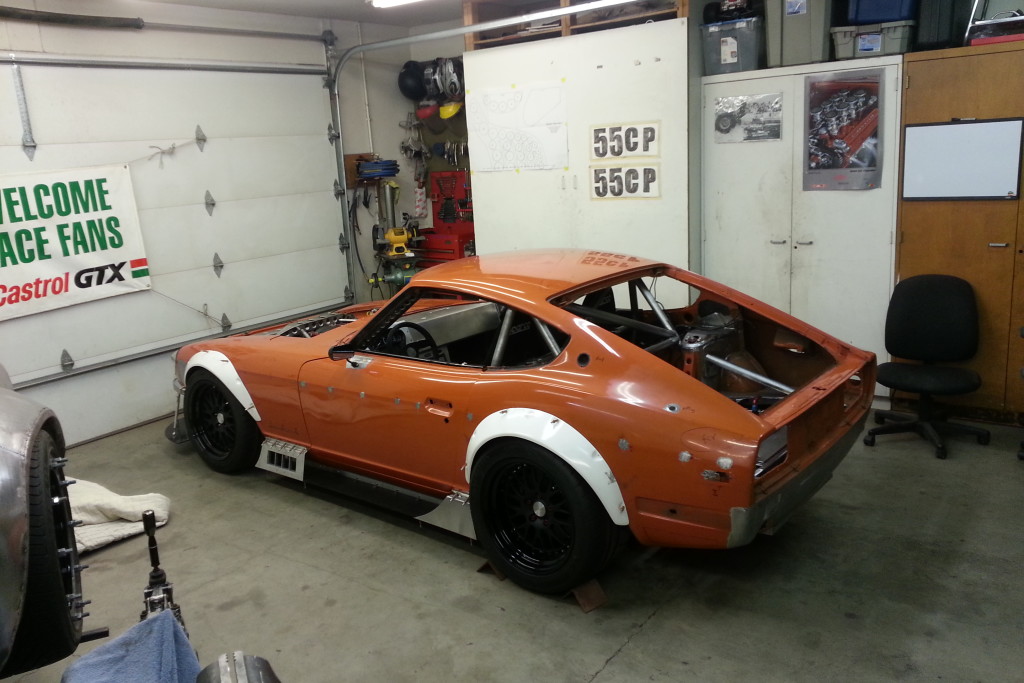
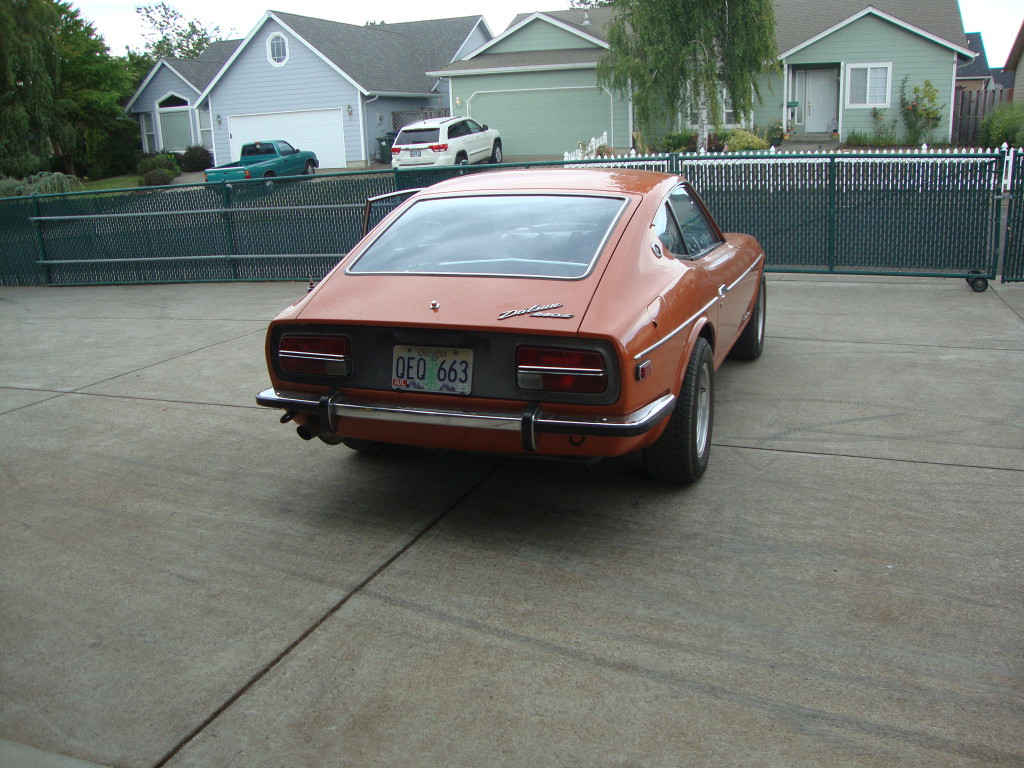
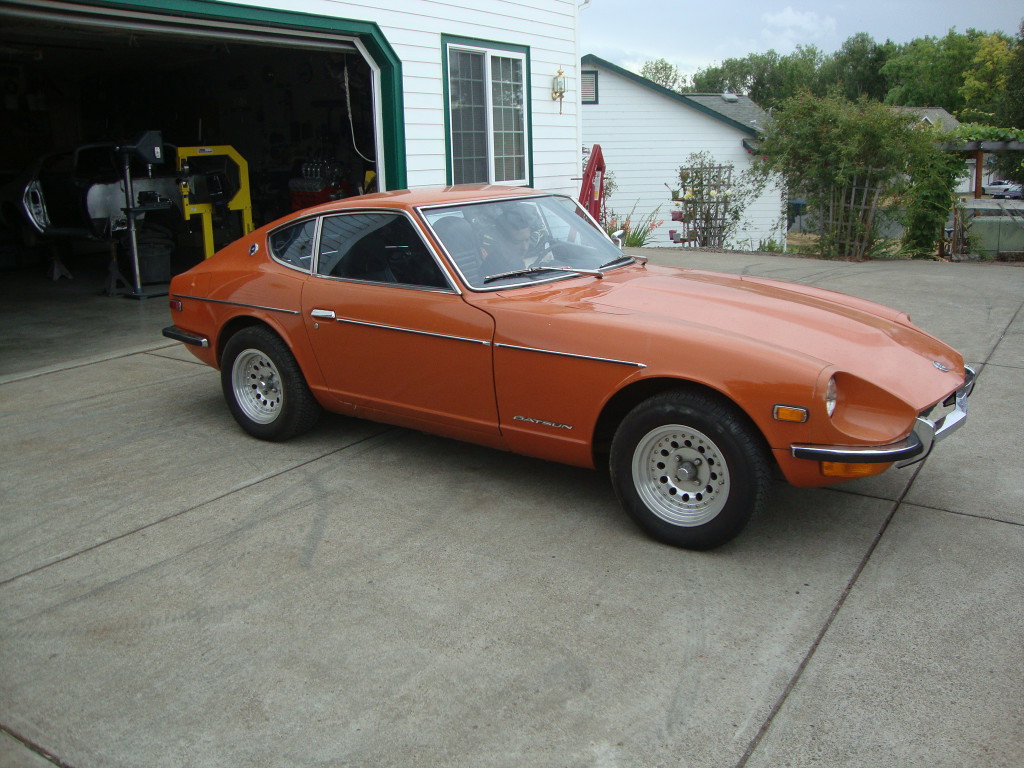
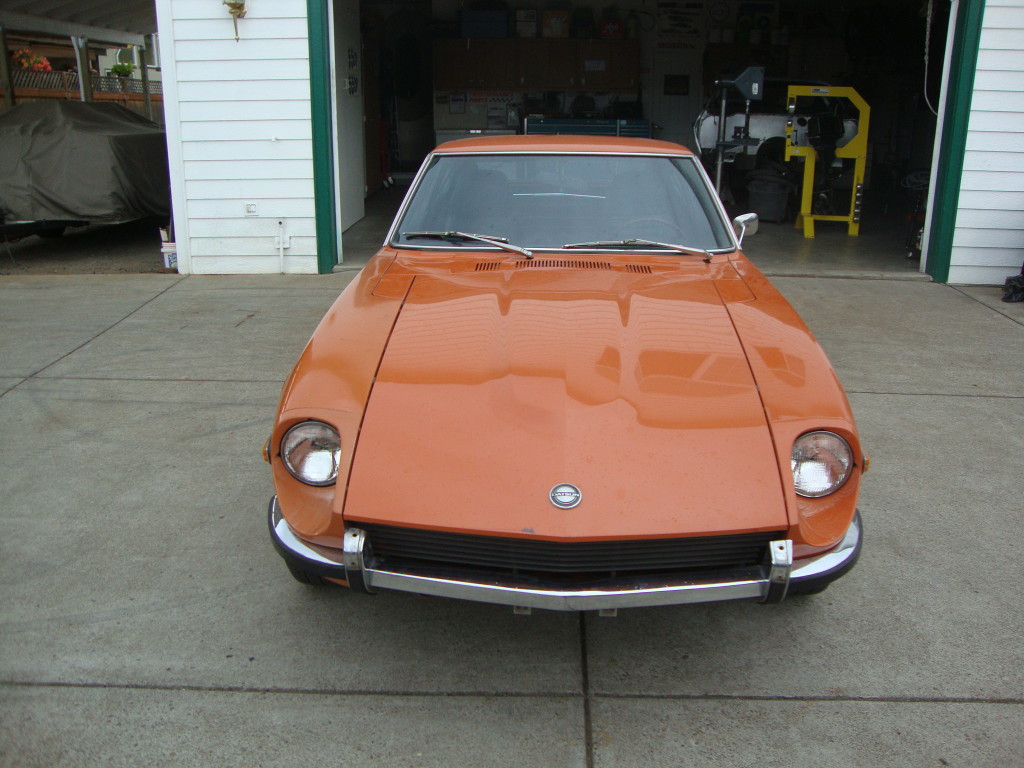
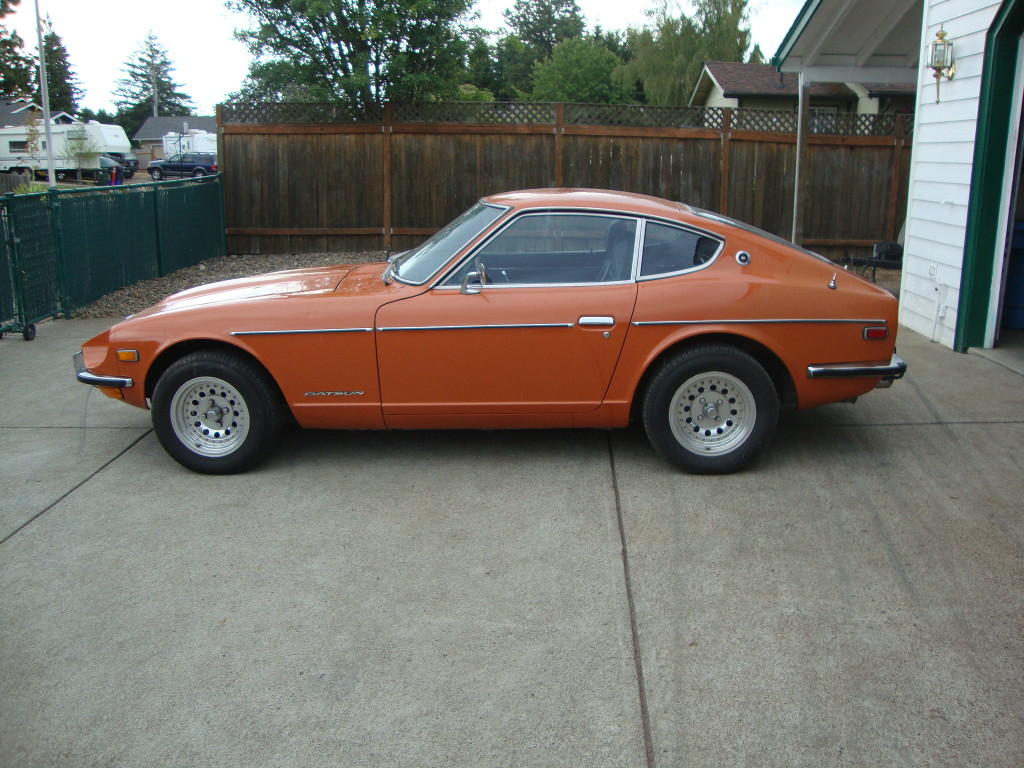
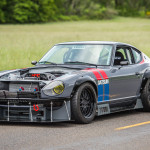
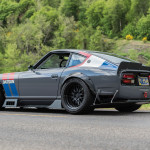
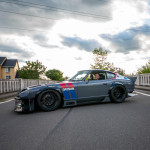
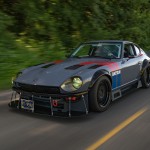
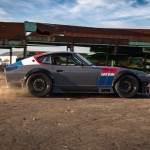
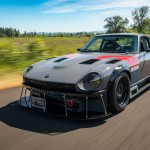
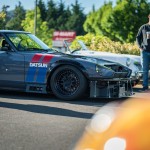
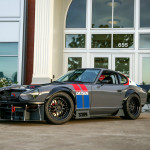
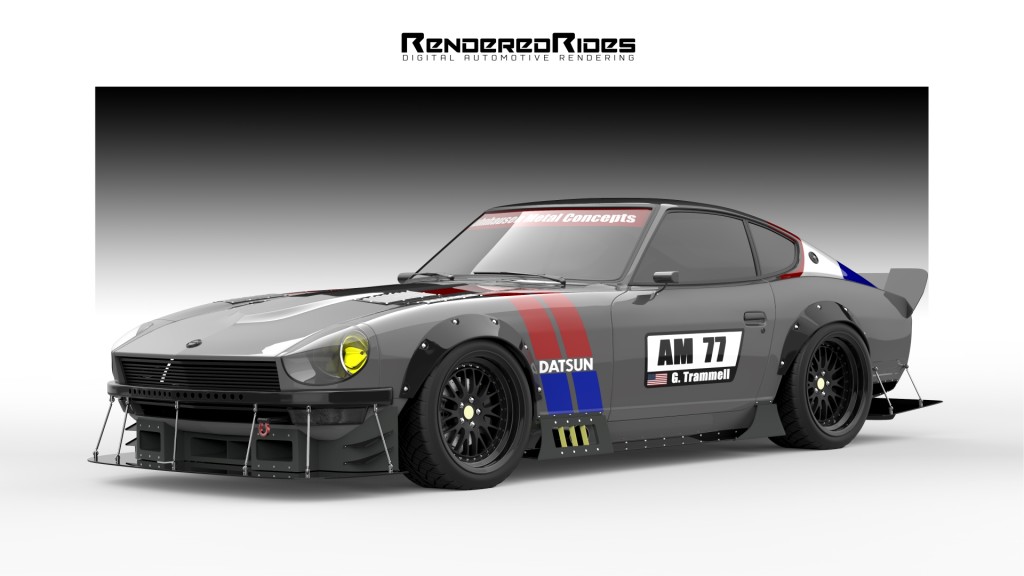
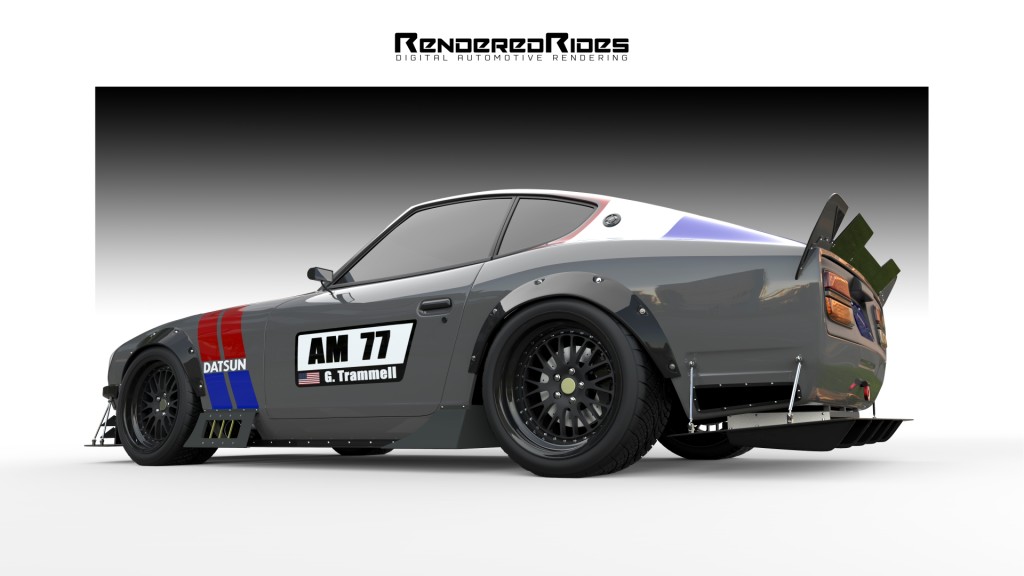
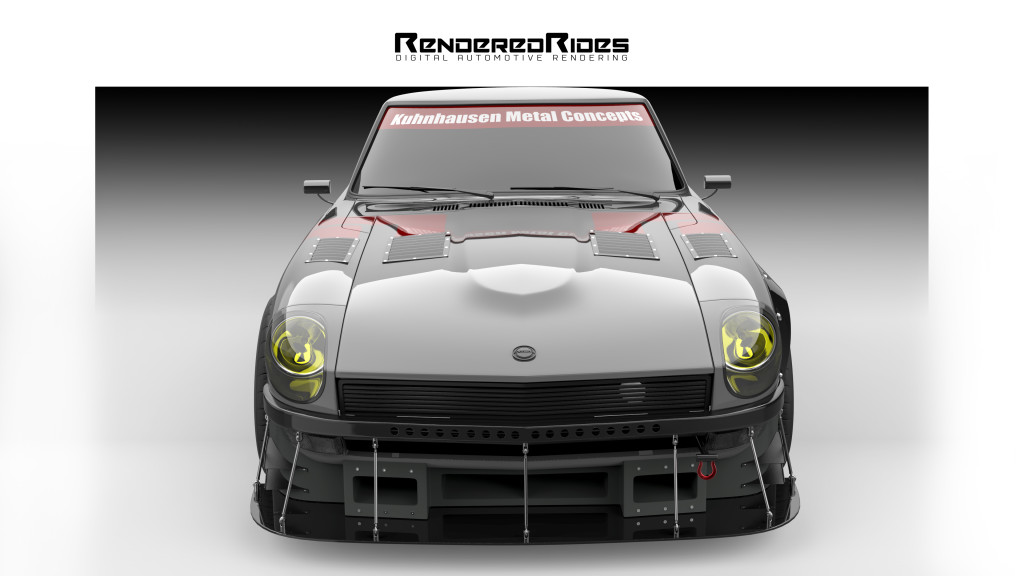
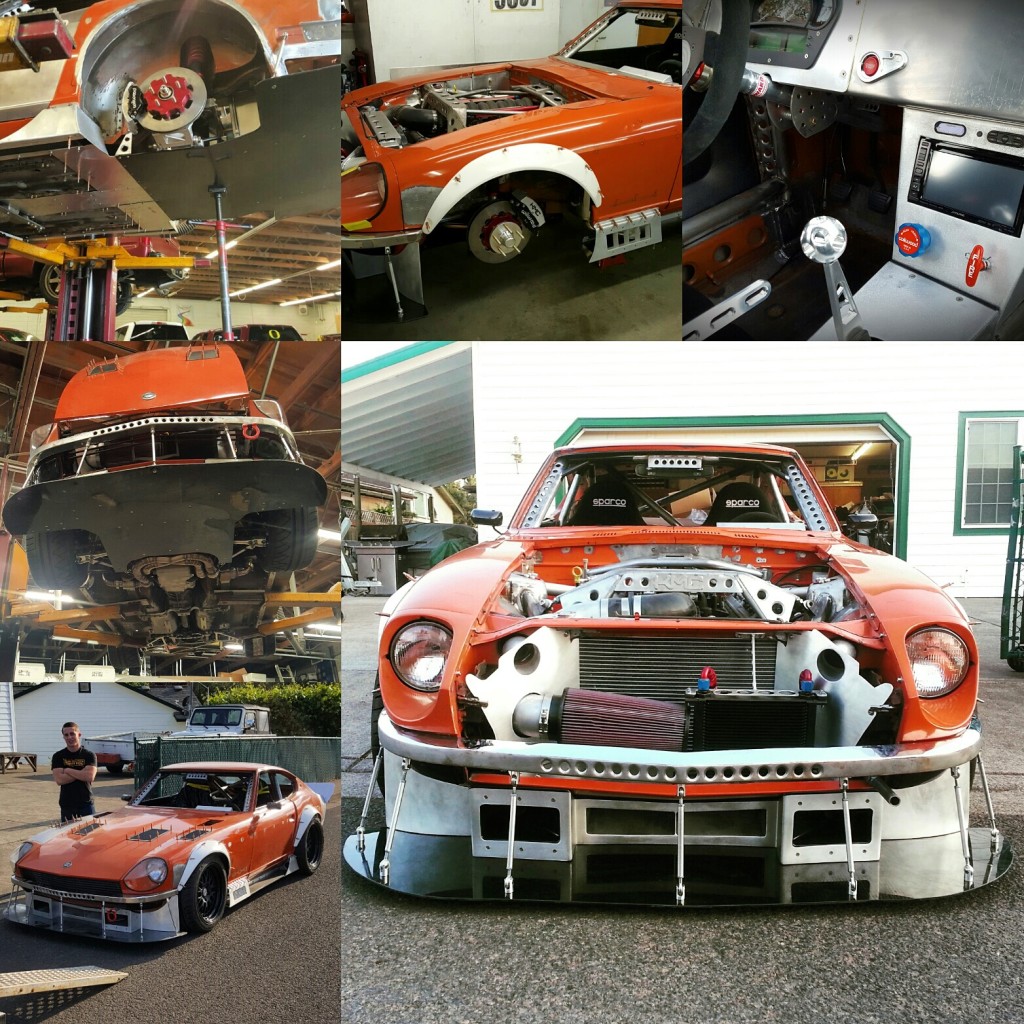
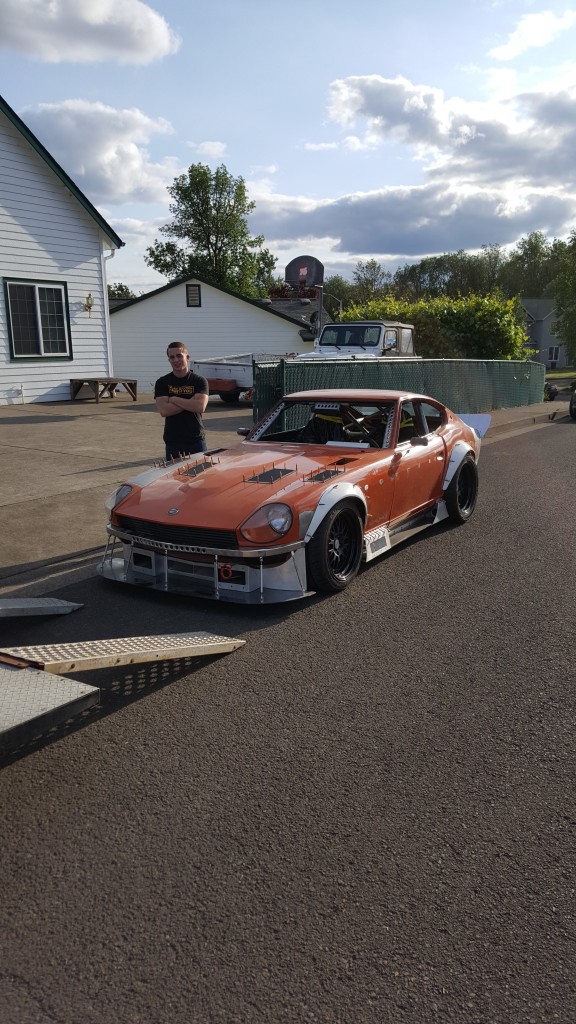
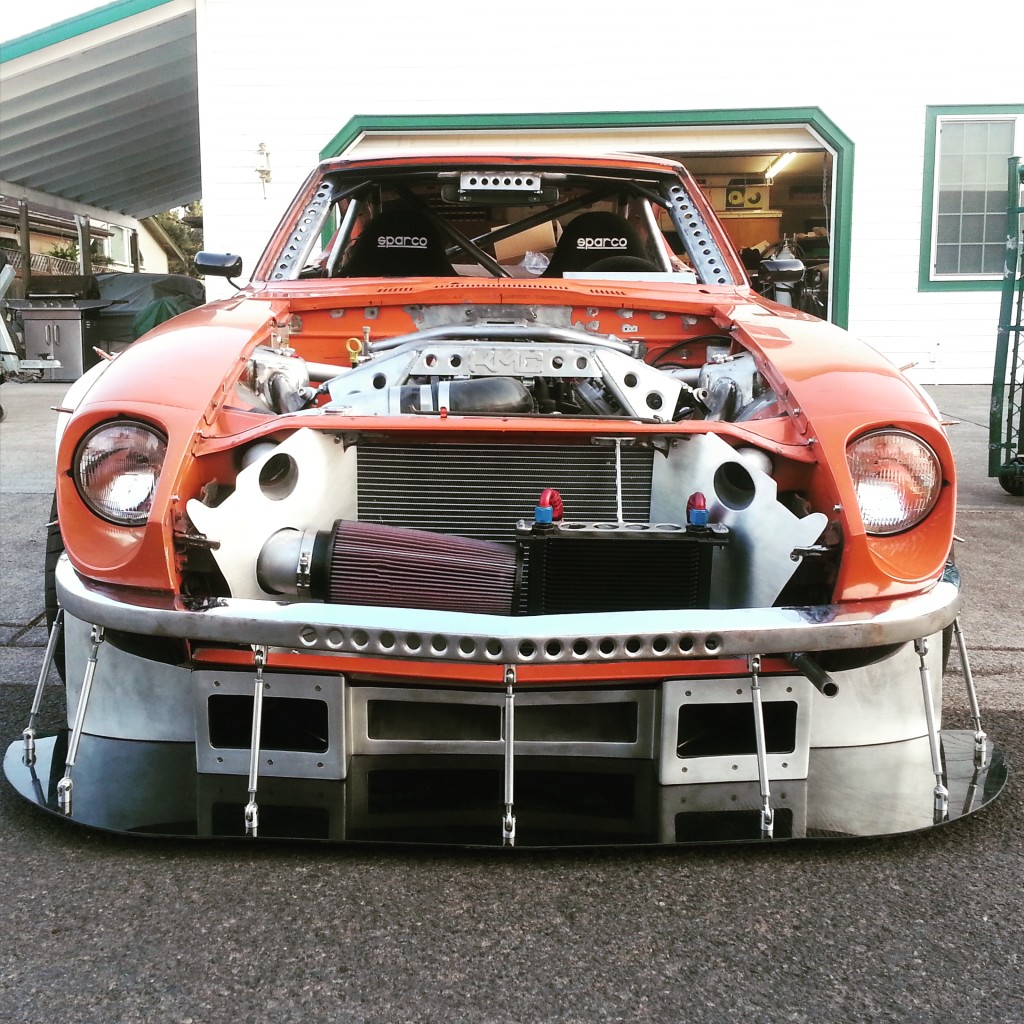
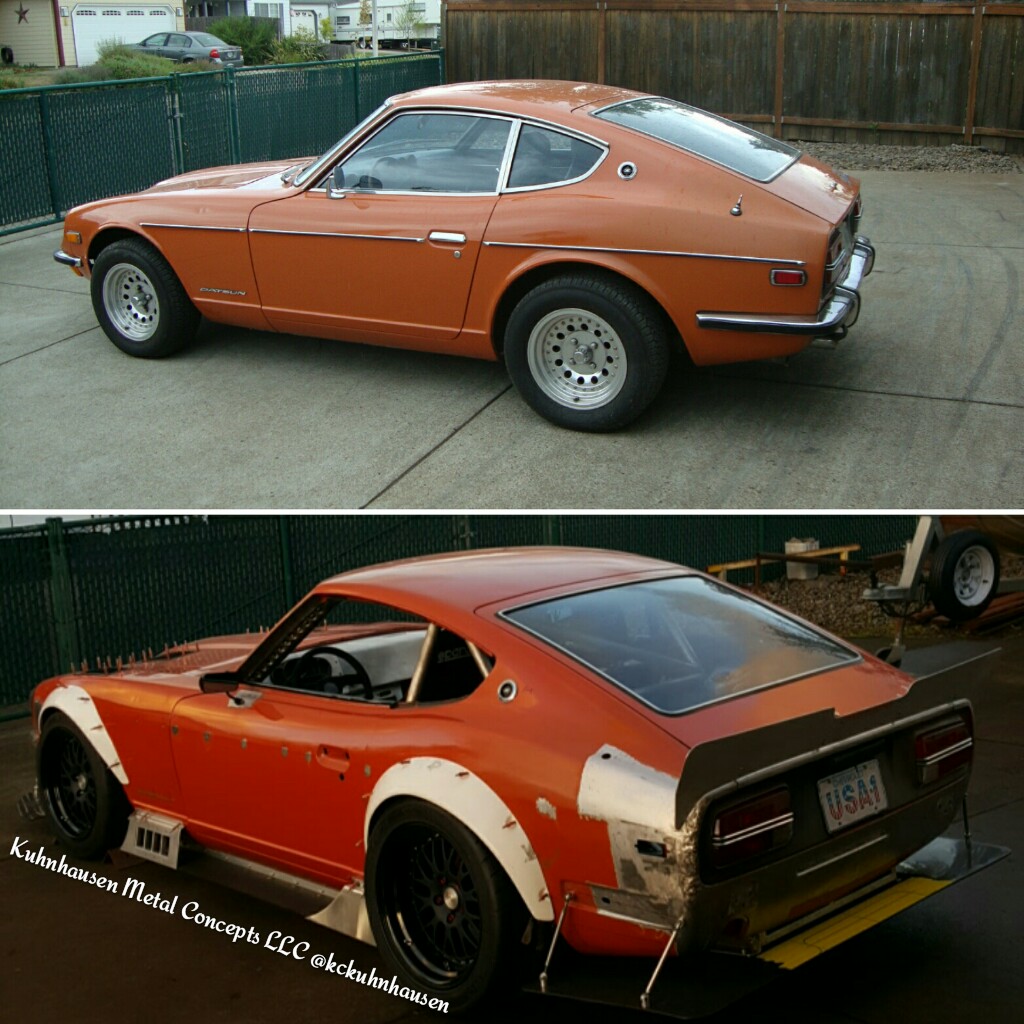
“InZanity” ’72 Datsun 240z


-
- The digitized version of what I have been seeing since the get go
-
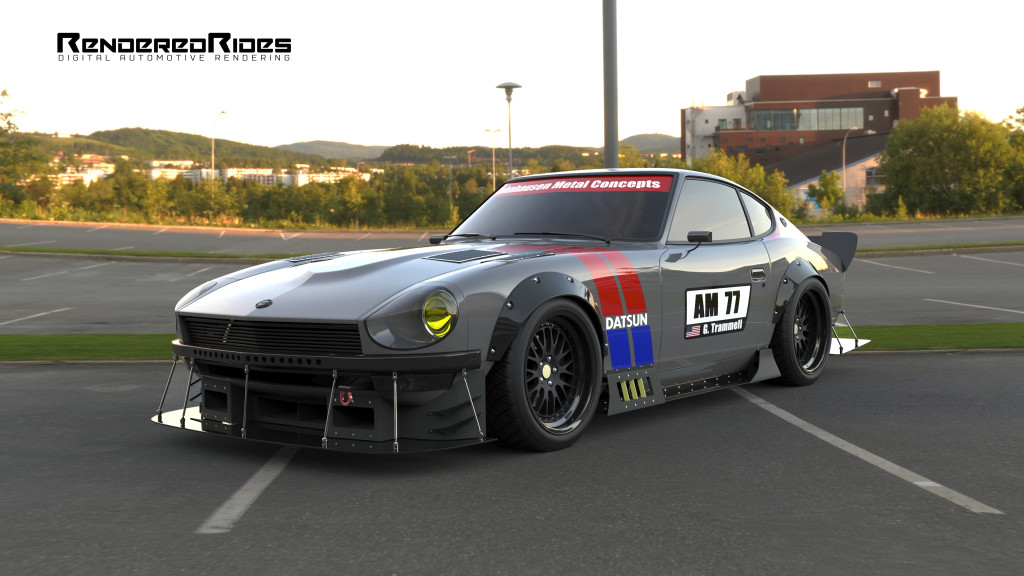
- The goal was to modernize the 240z without losing its soul. I think mission accomplished
-
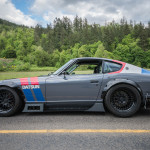
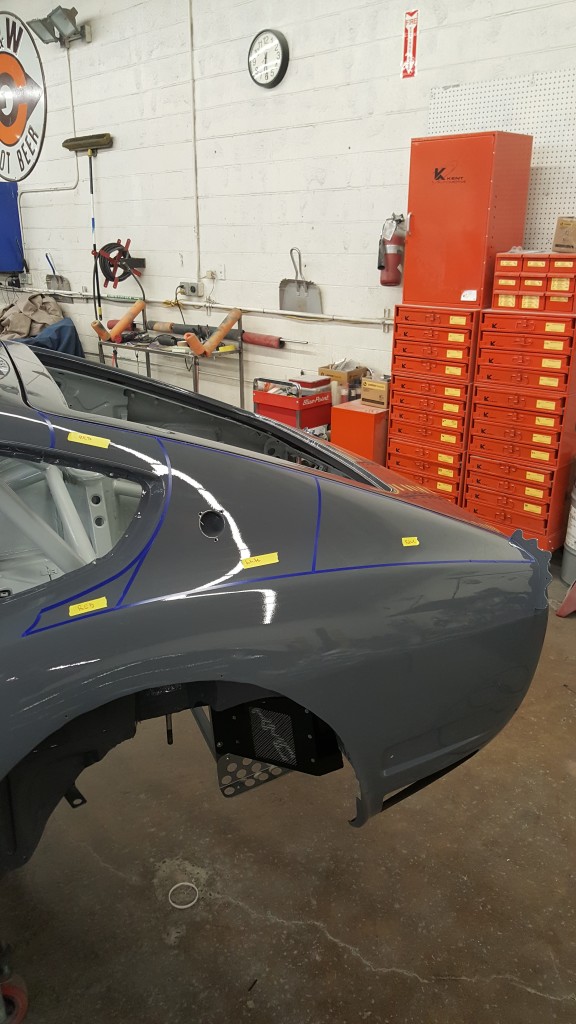
- look at the style lines, those are crisp and accurate
-
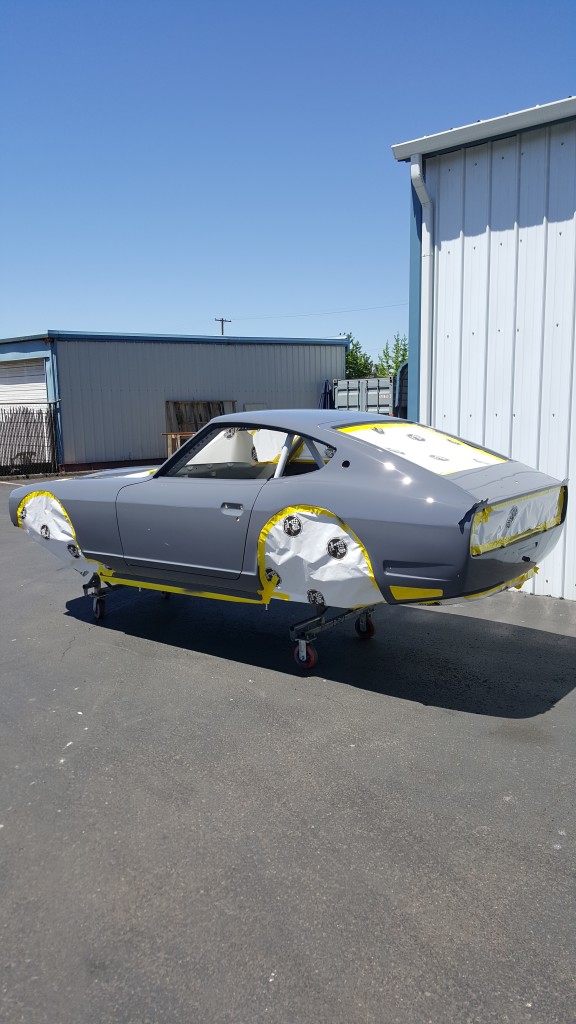
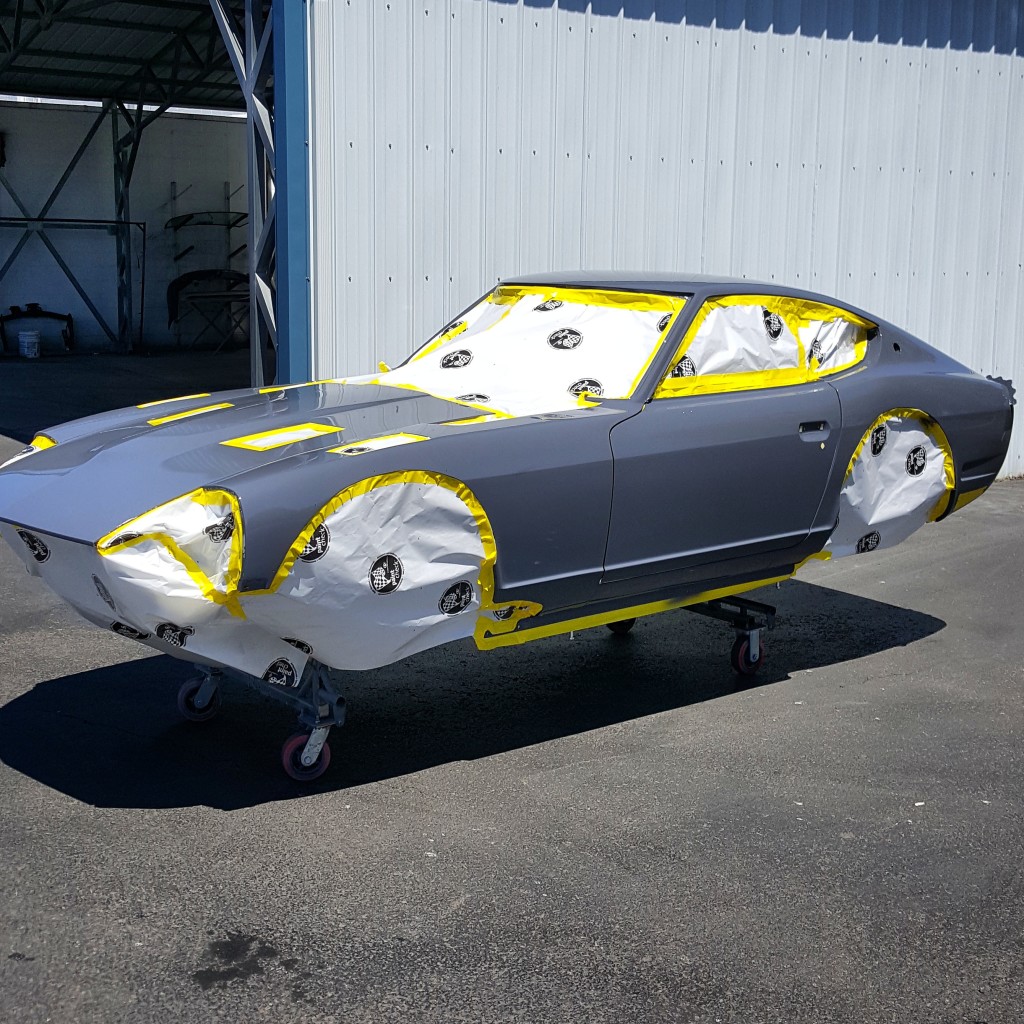
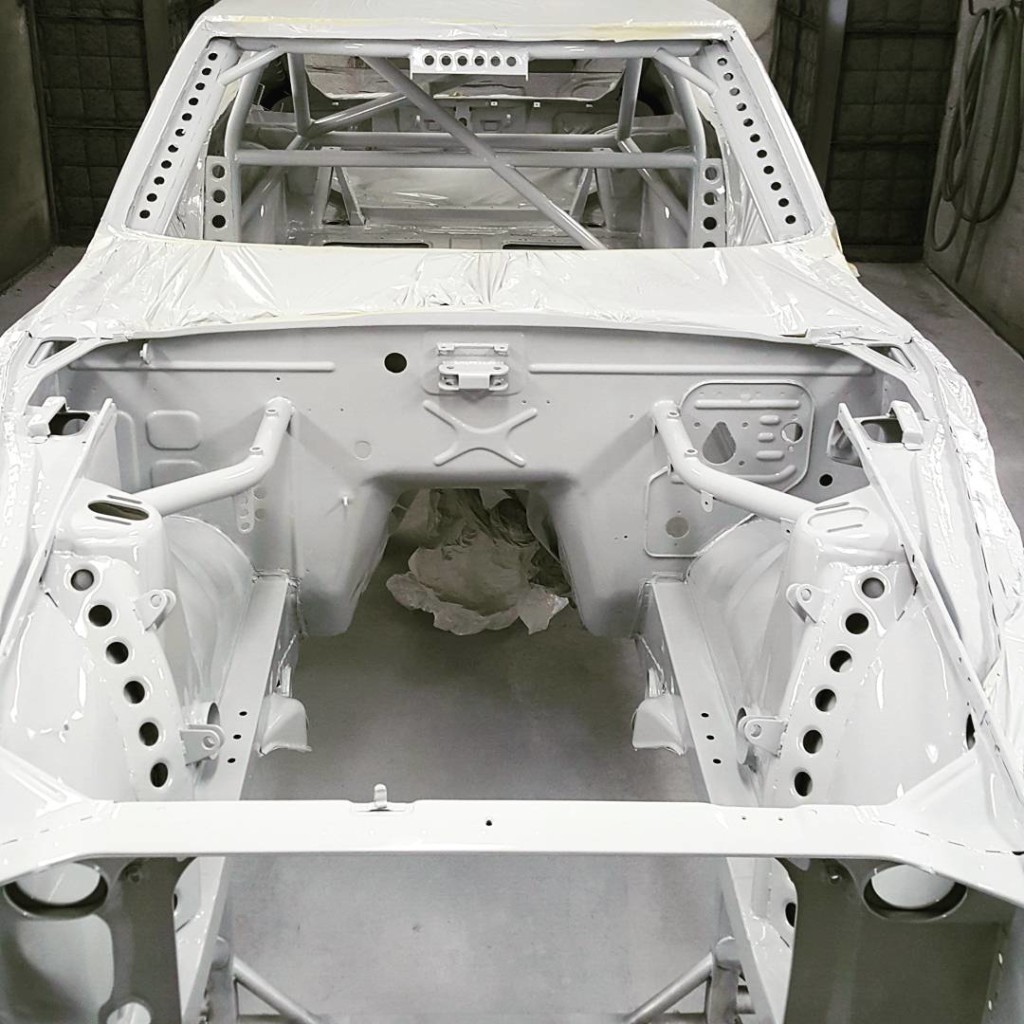
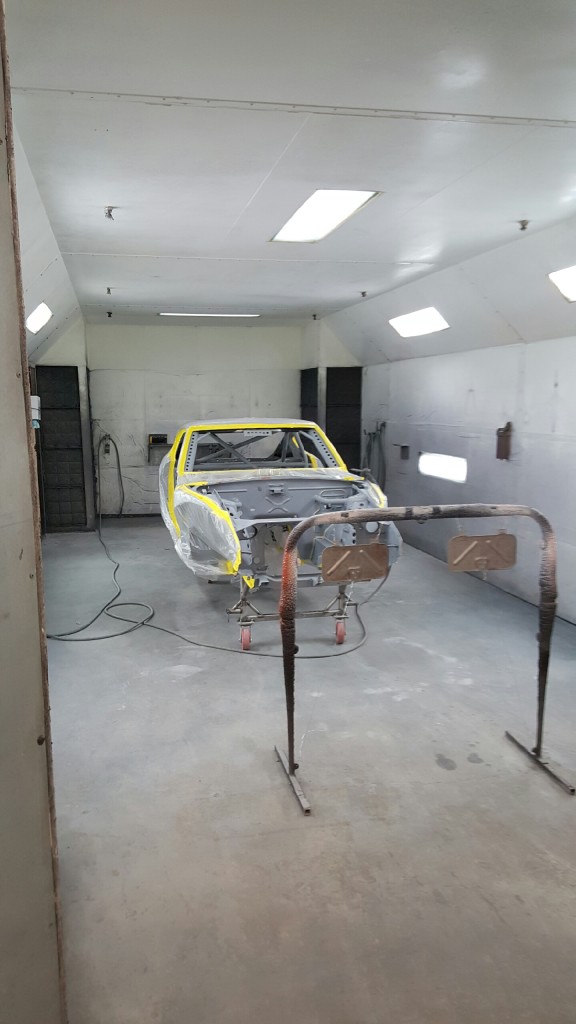
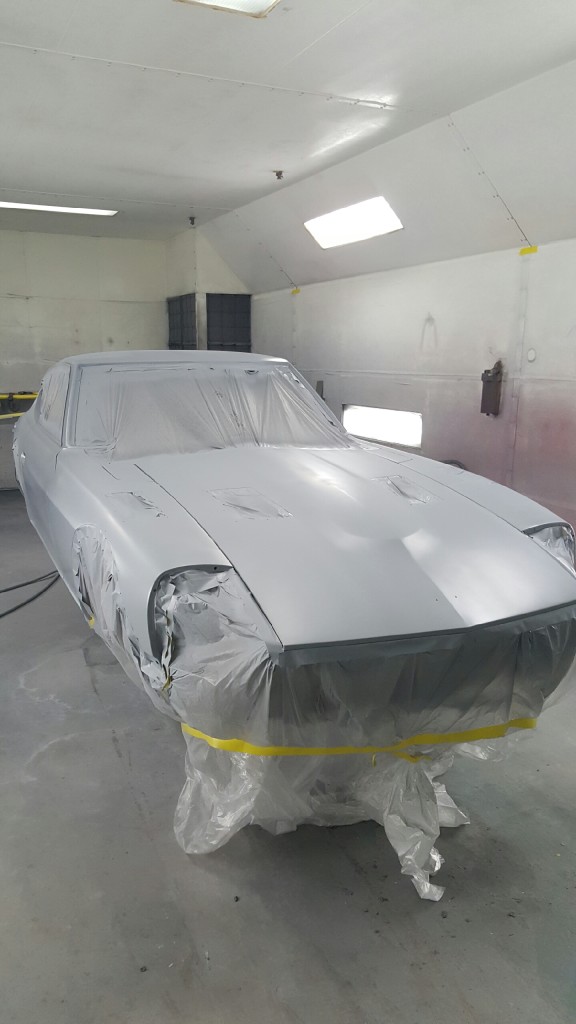
- fresh out of the booth, ready for color sanding and buff
-
- laying out ideas for some vinyl graphics. much tape was wasted, but I created a design that works from all angles and looks great
-
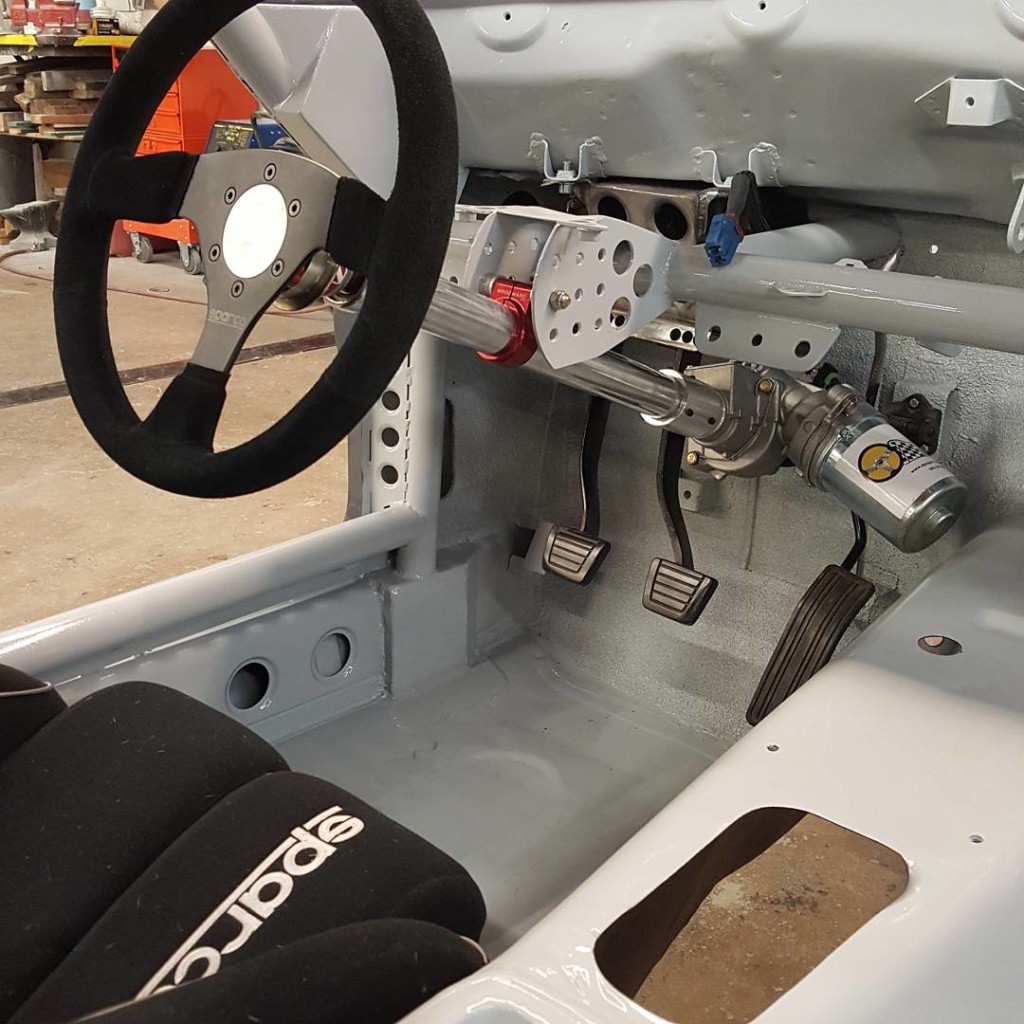
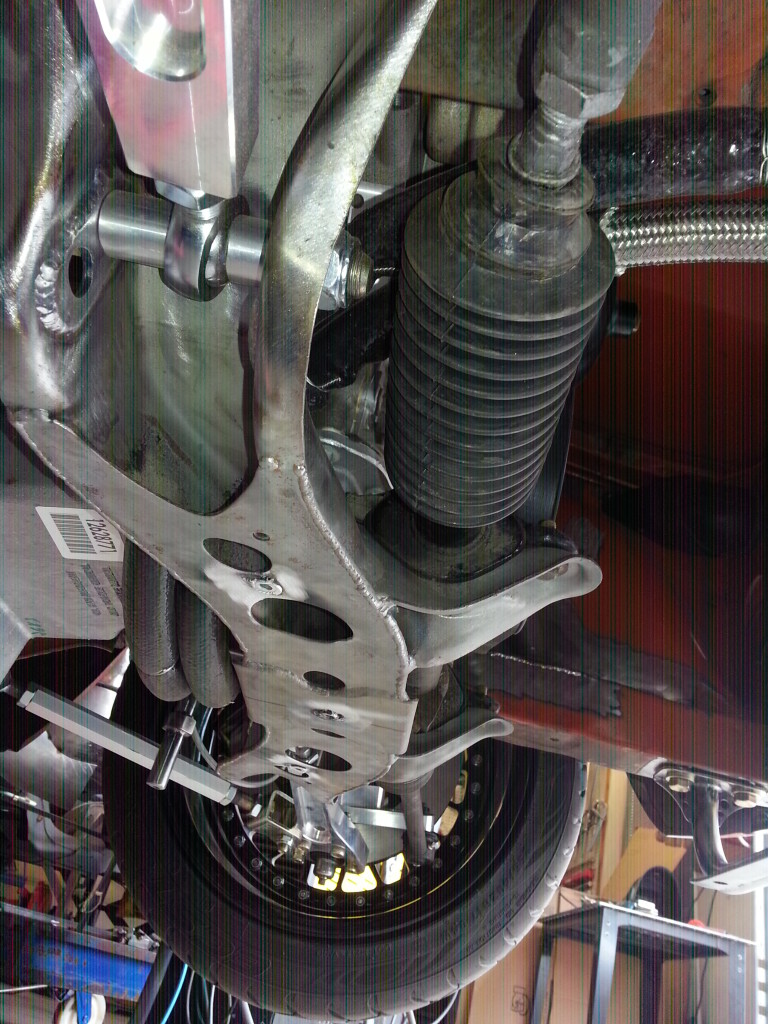
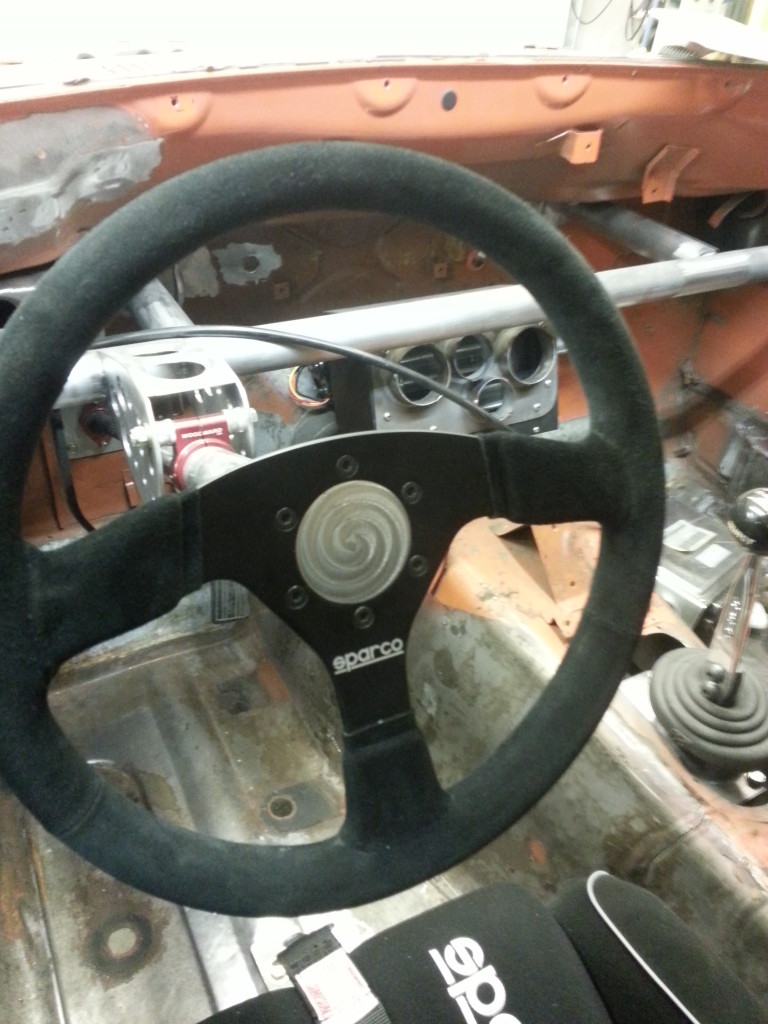
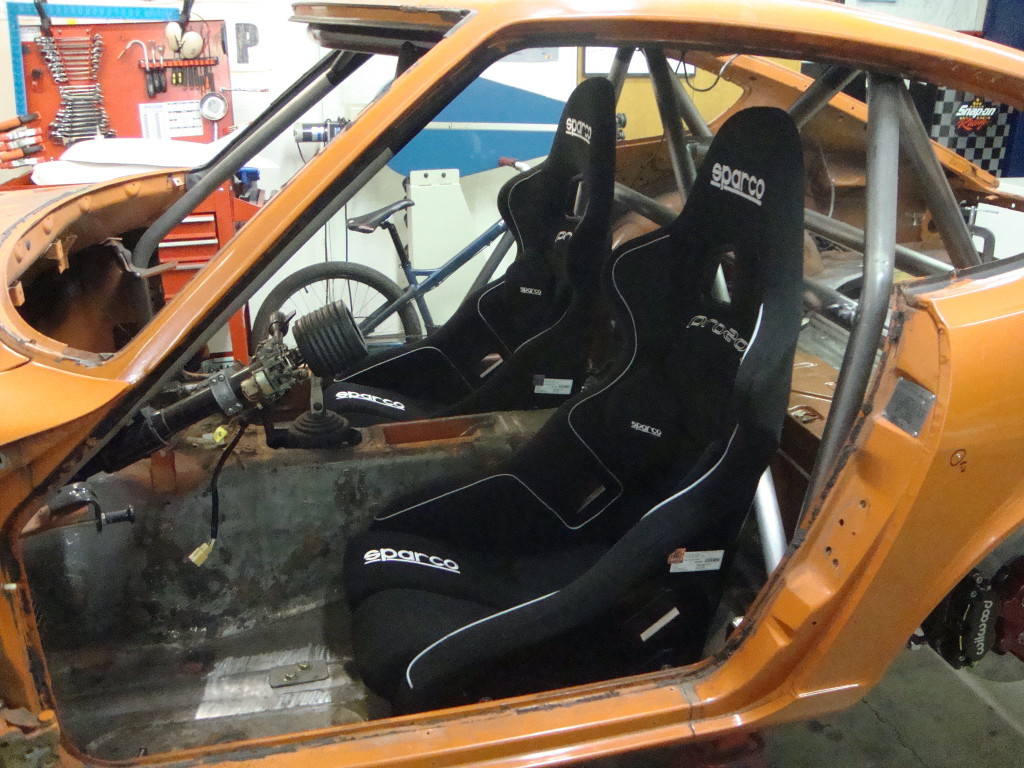
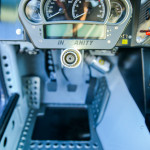
- modern electronic power steering with adjustable input… in a 72 240z
-
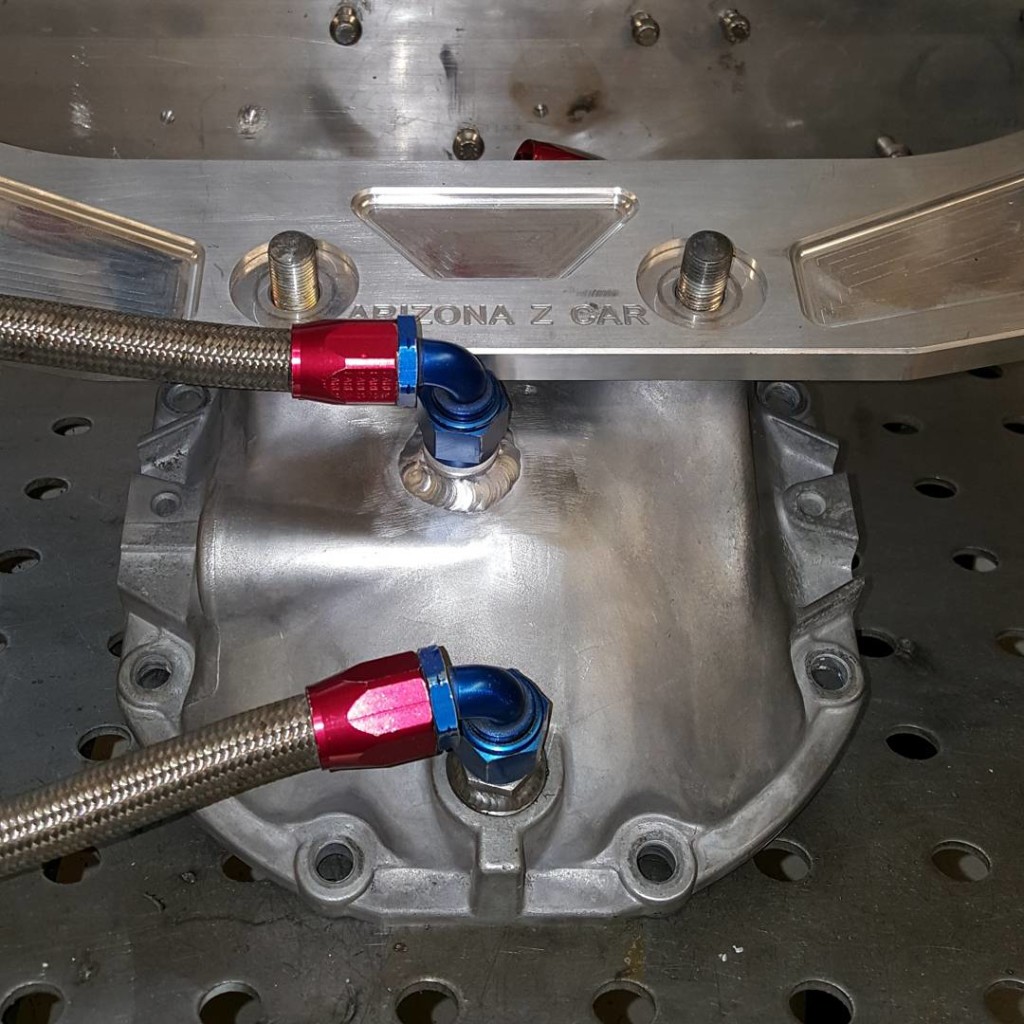
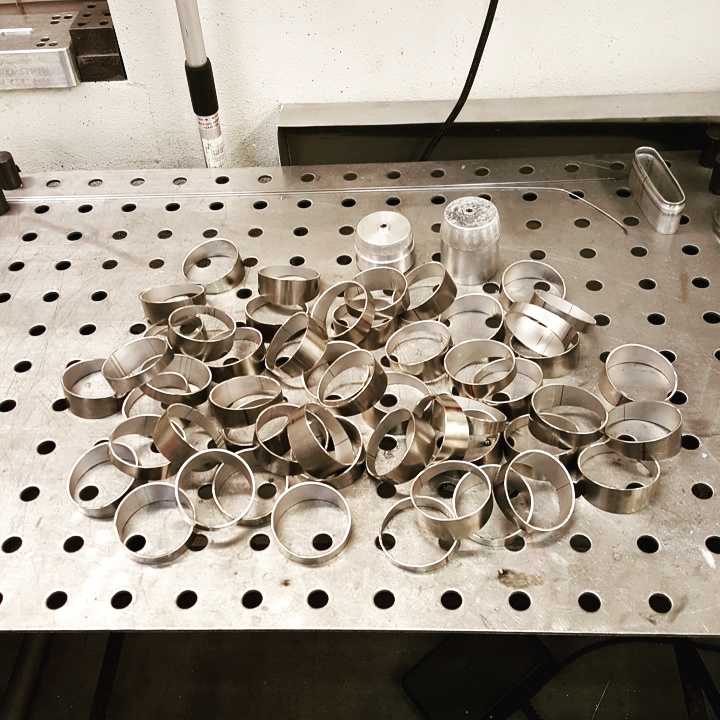
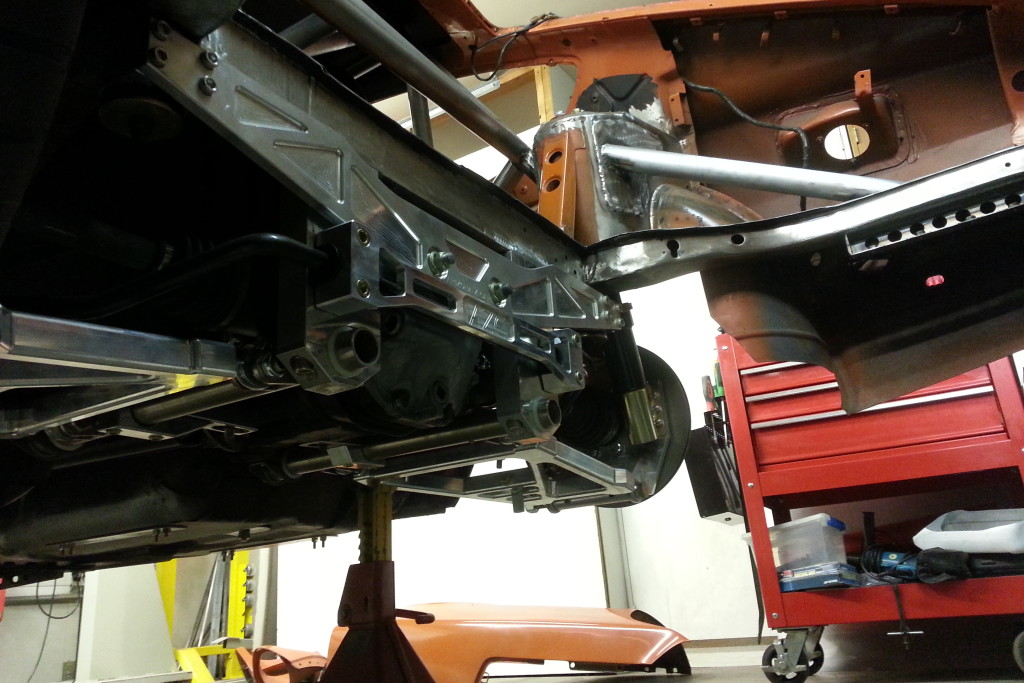
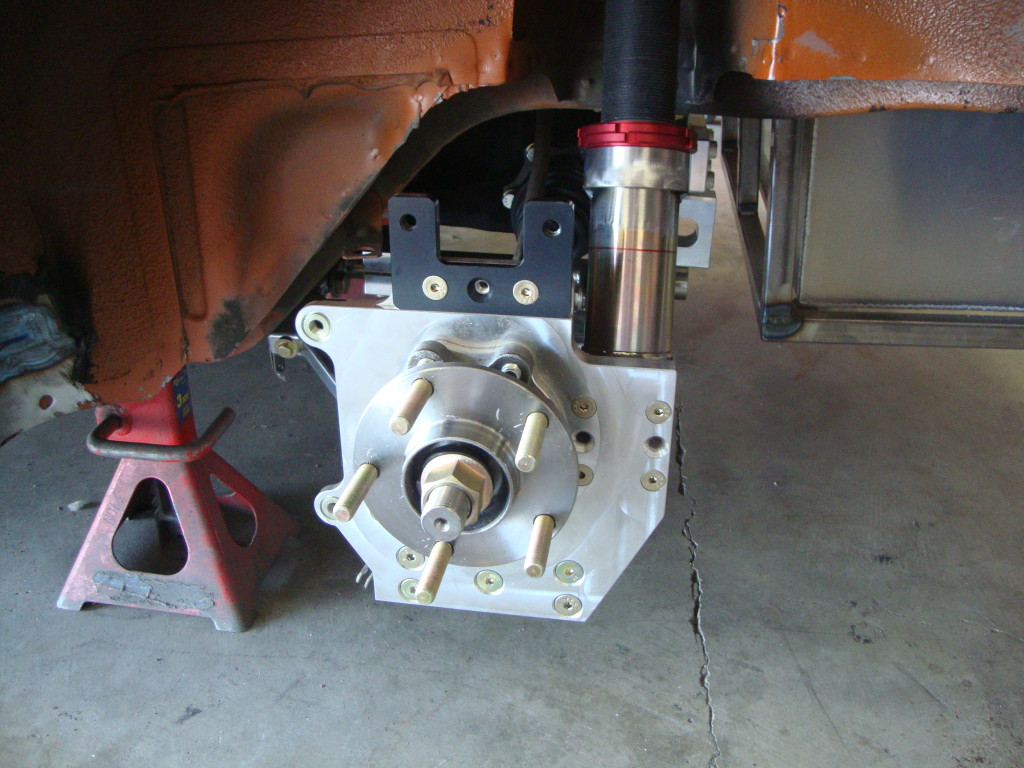
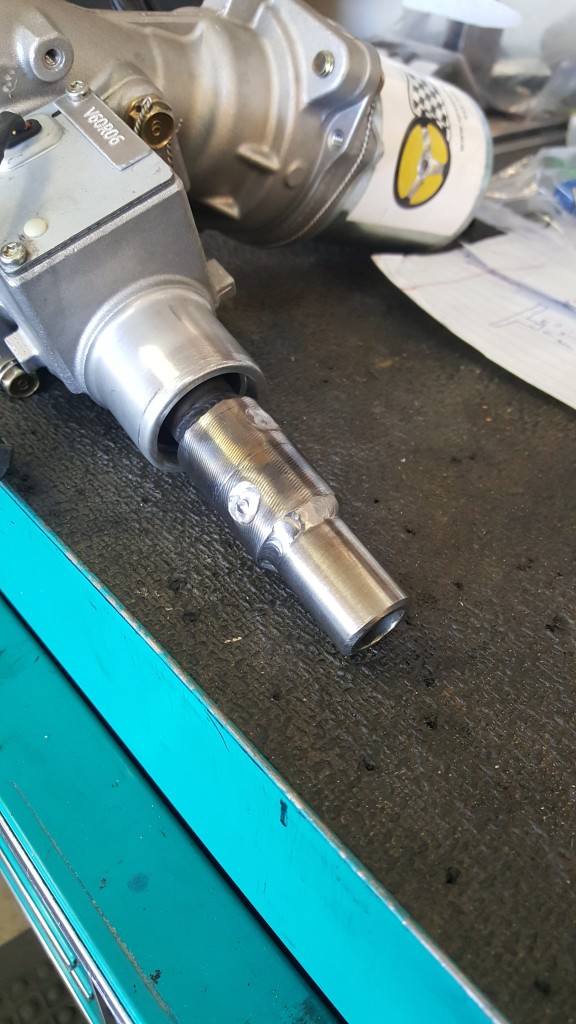
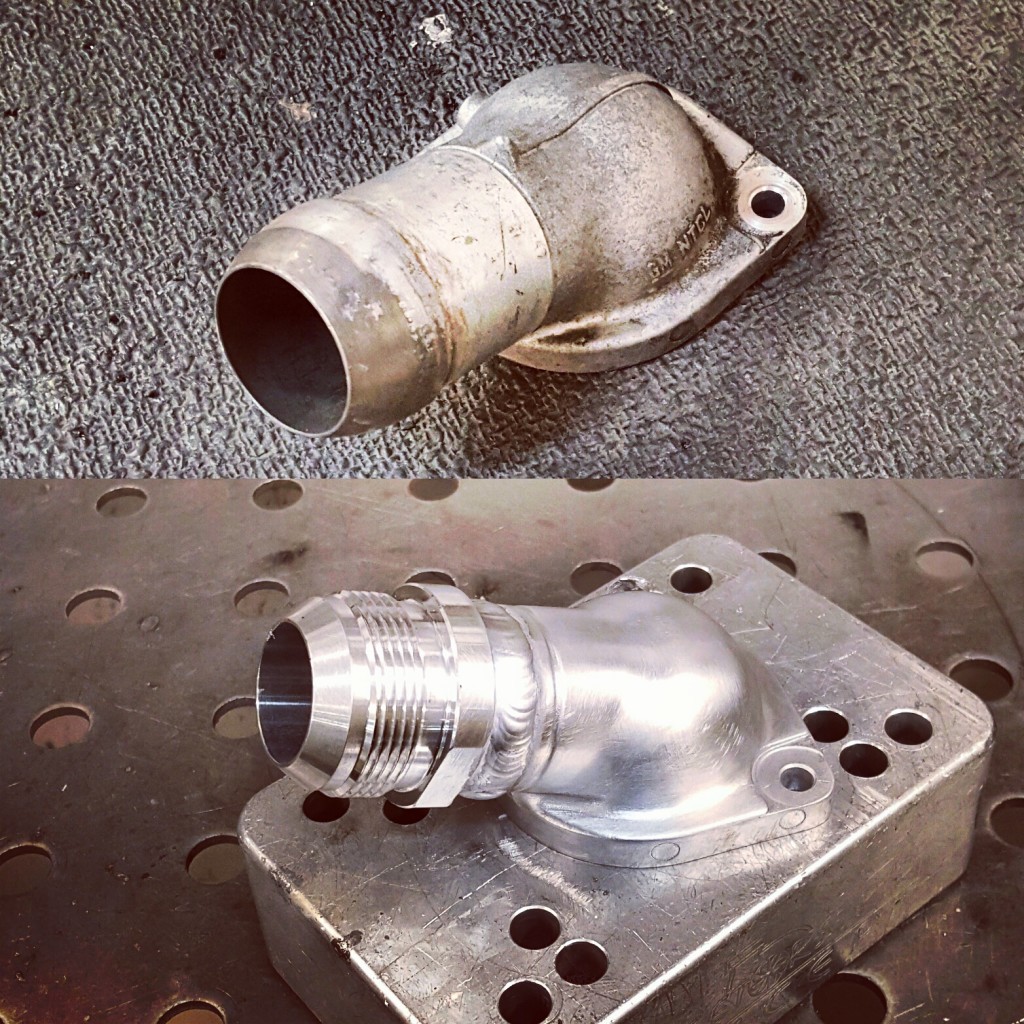
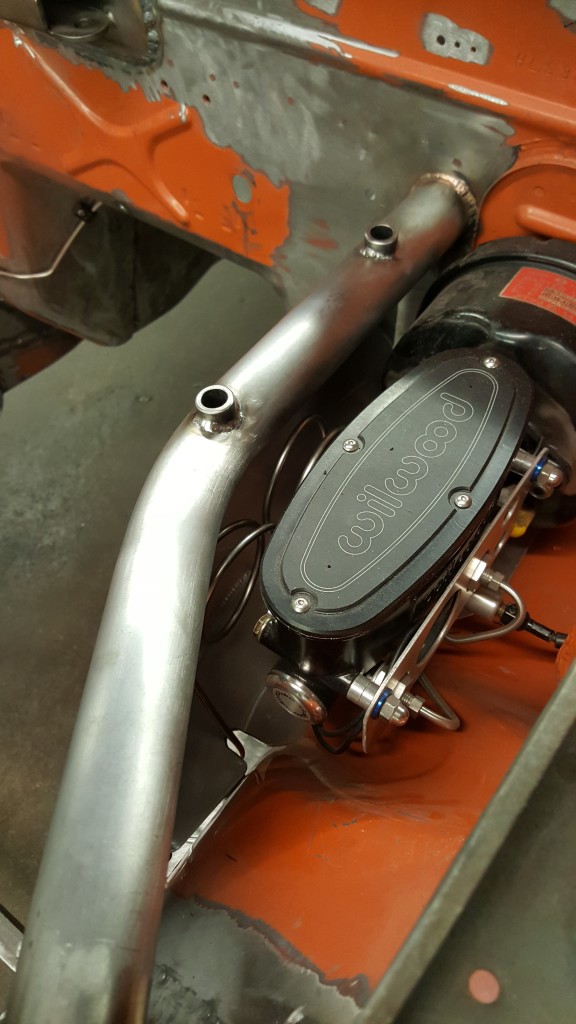
- the highlt modified rear differential cover.
-
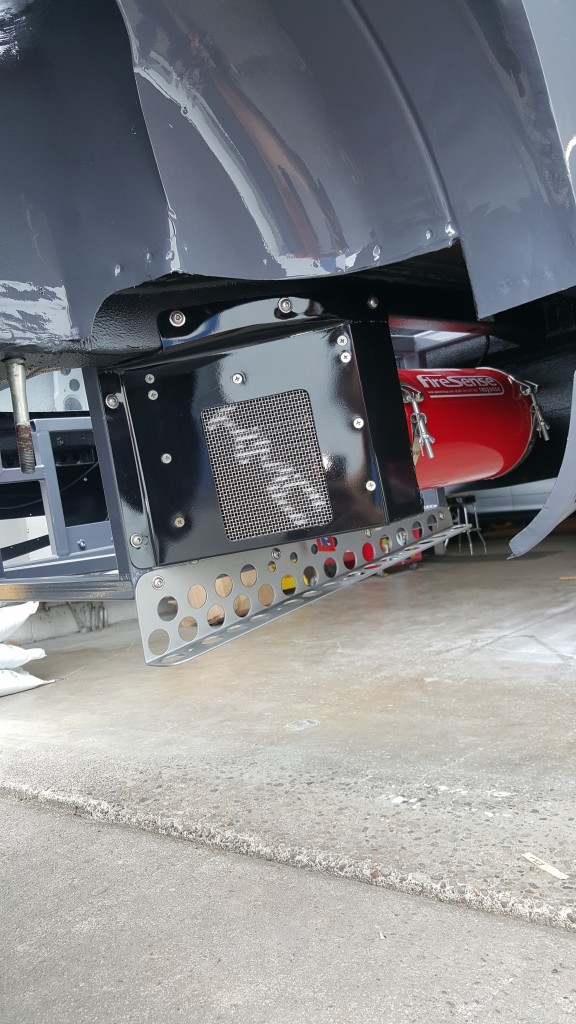
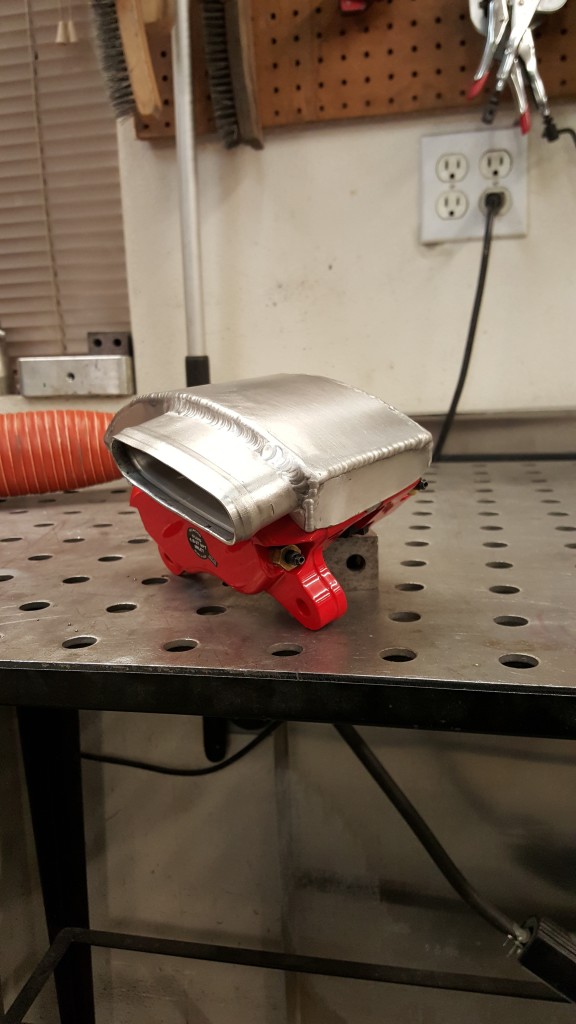
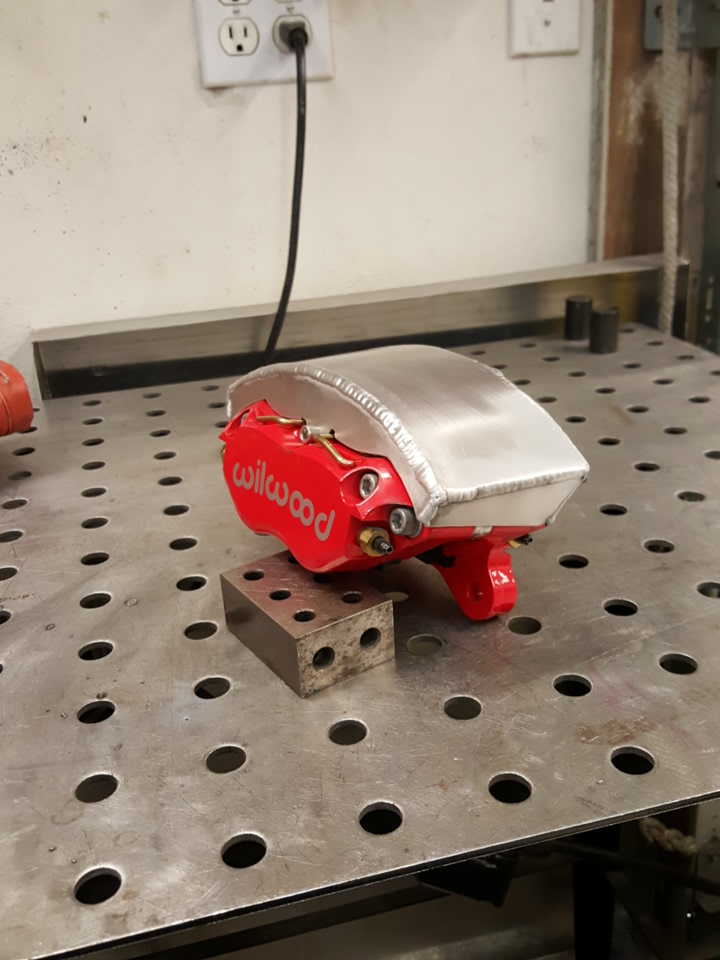
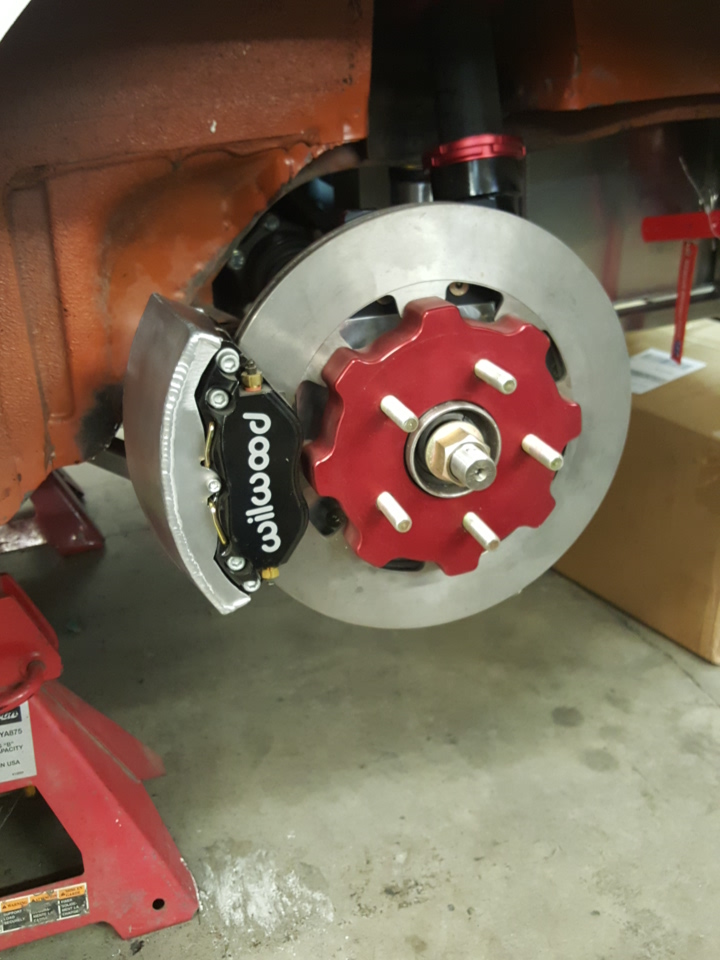
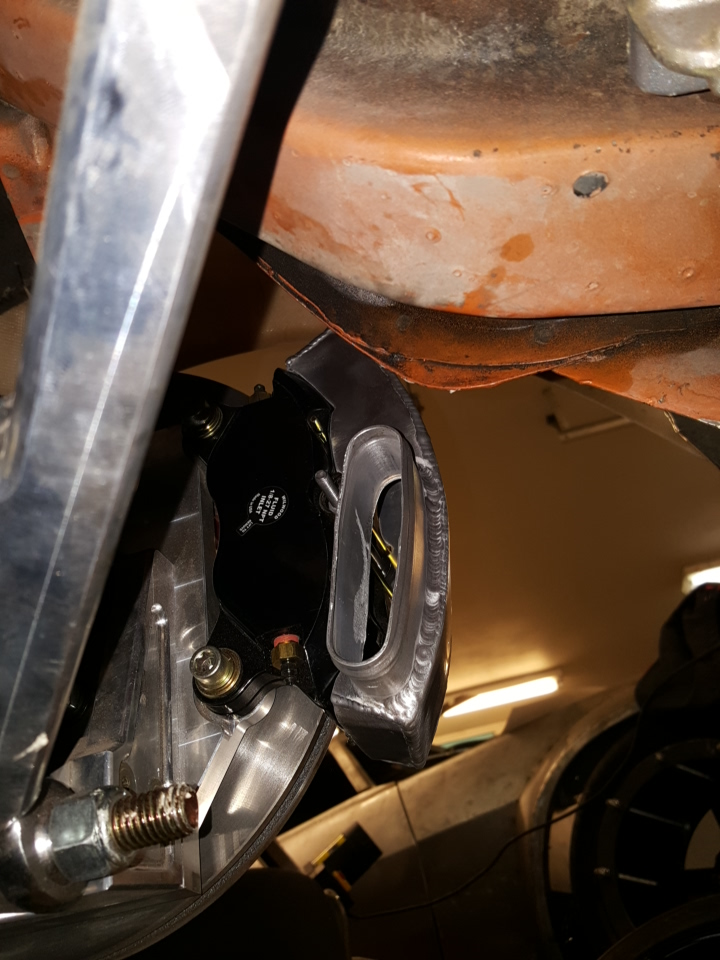
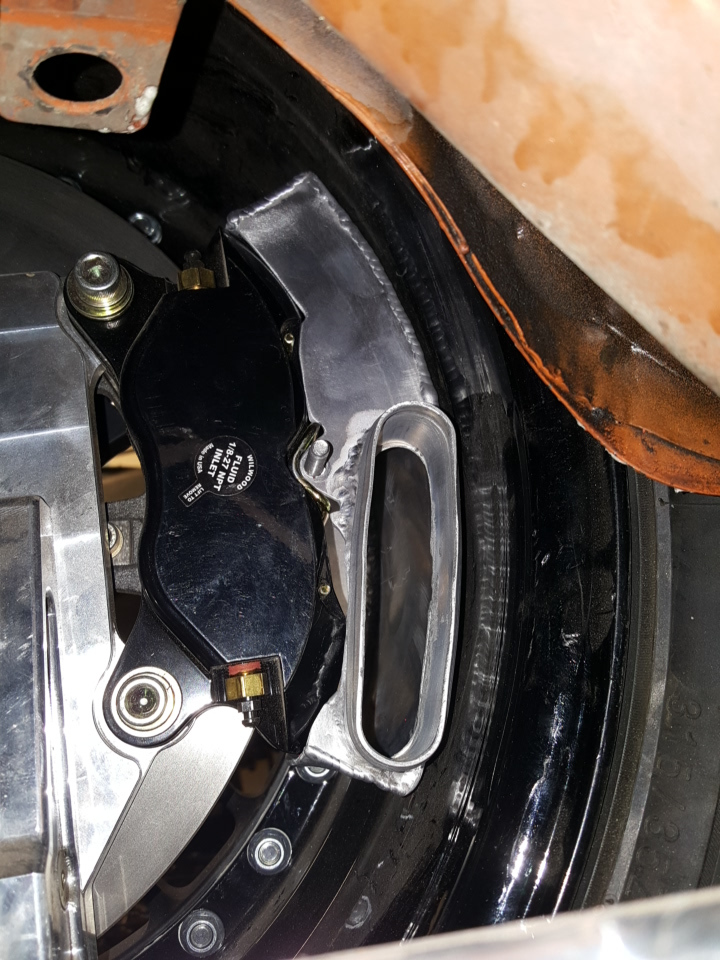
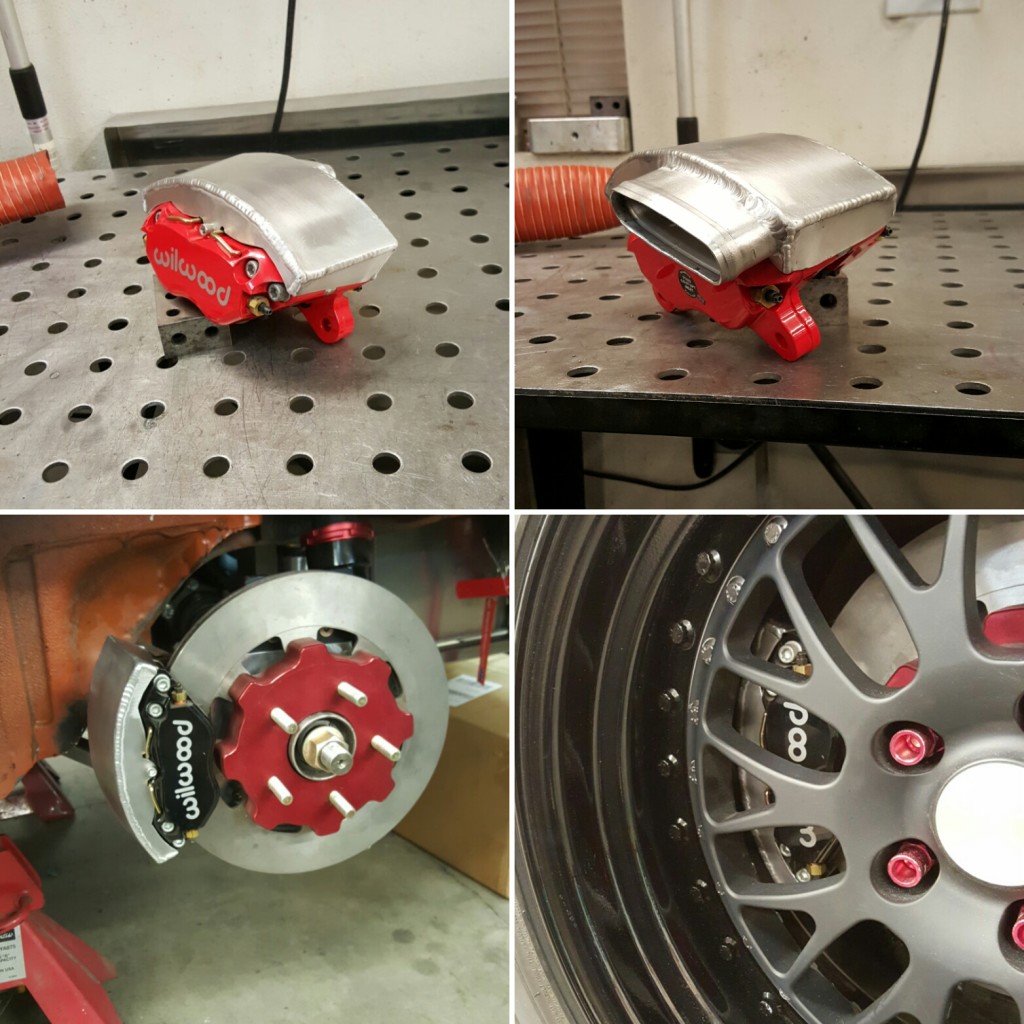
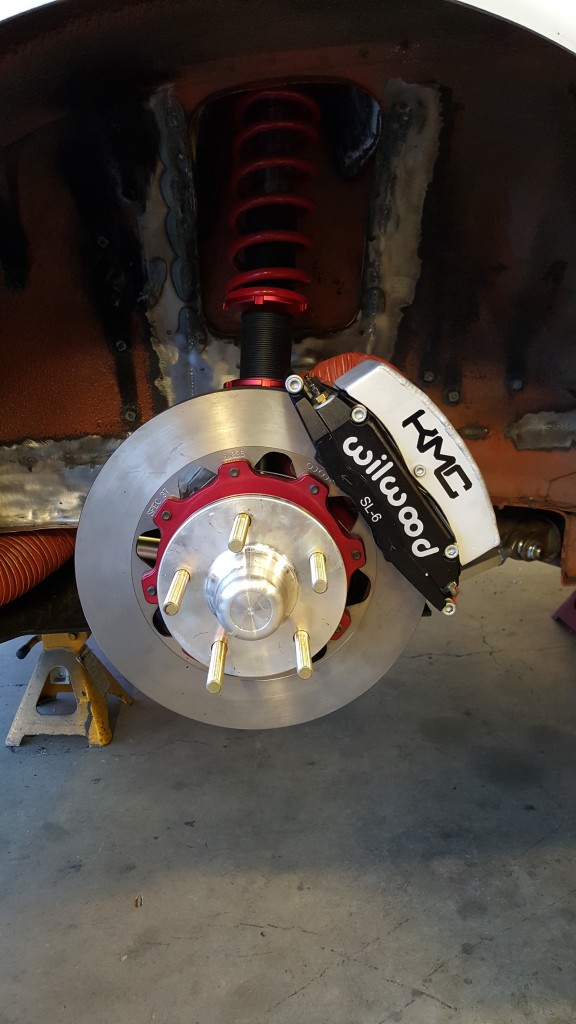
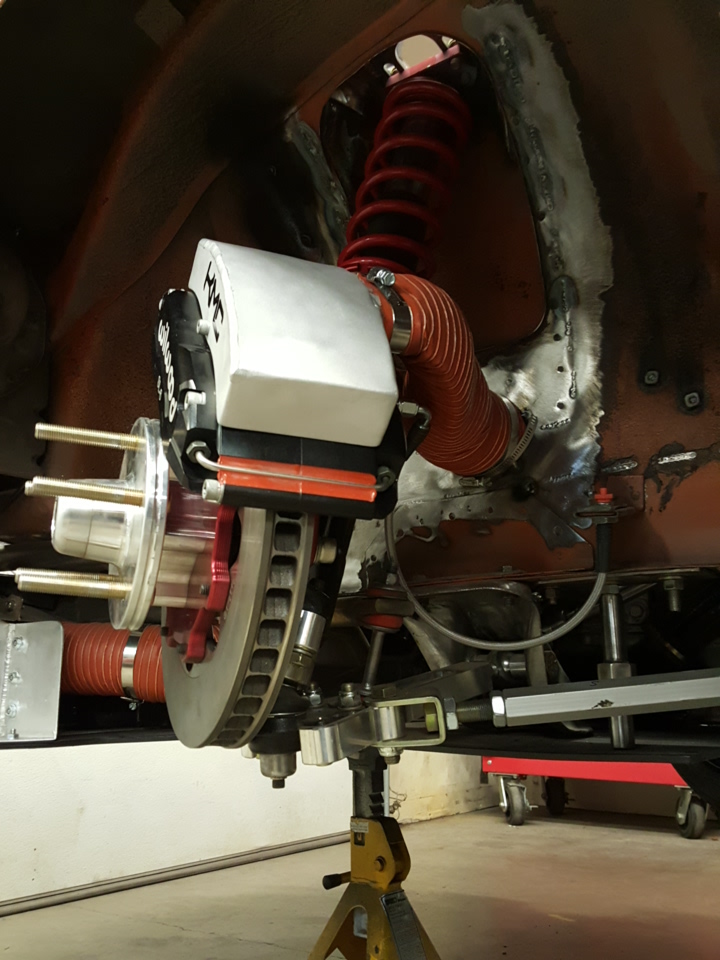
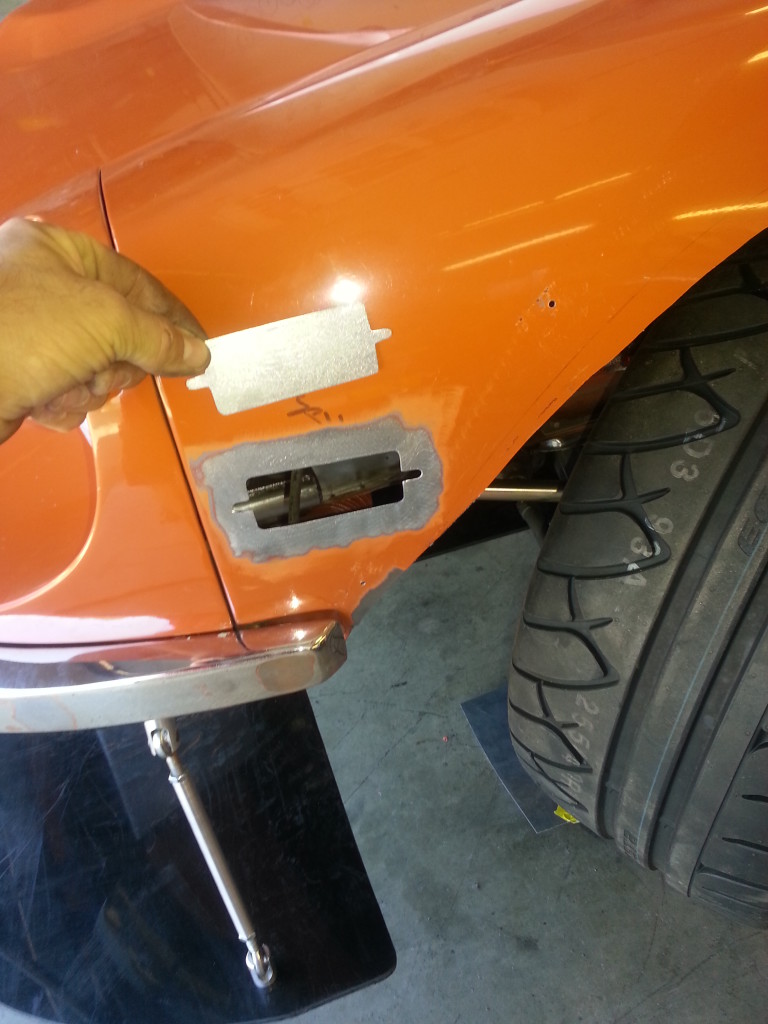
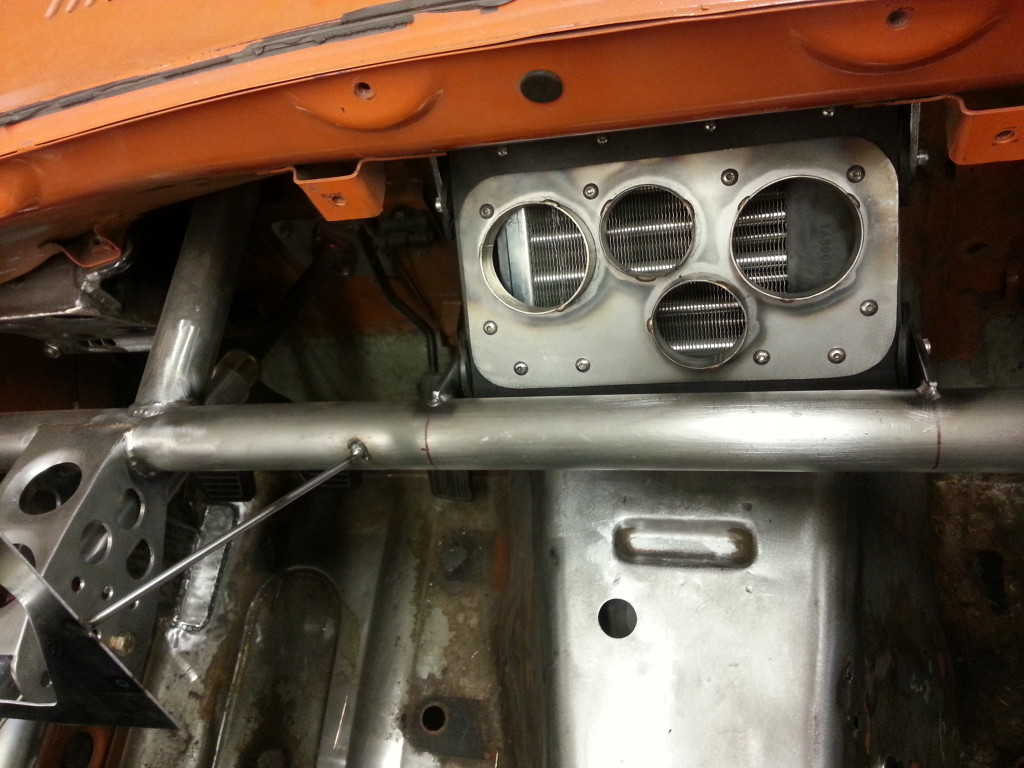
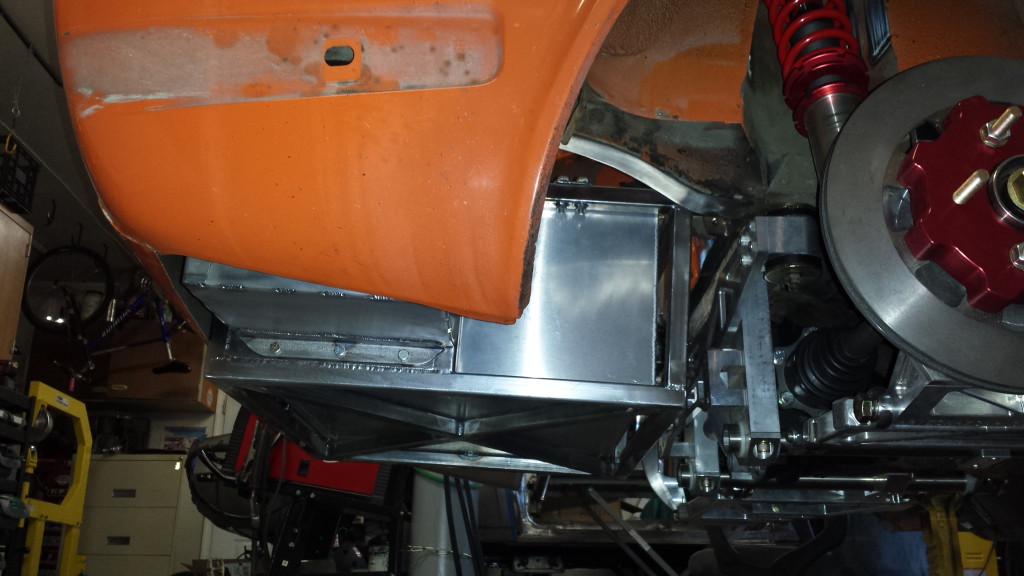
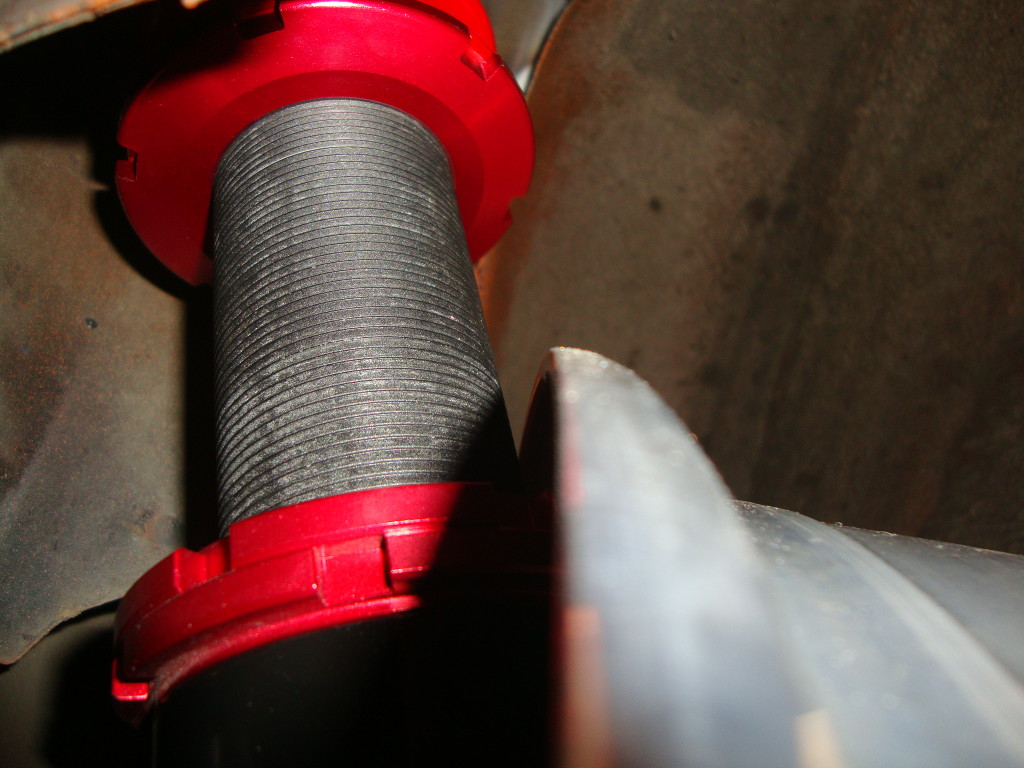
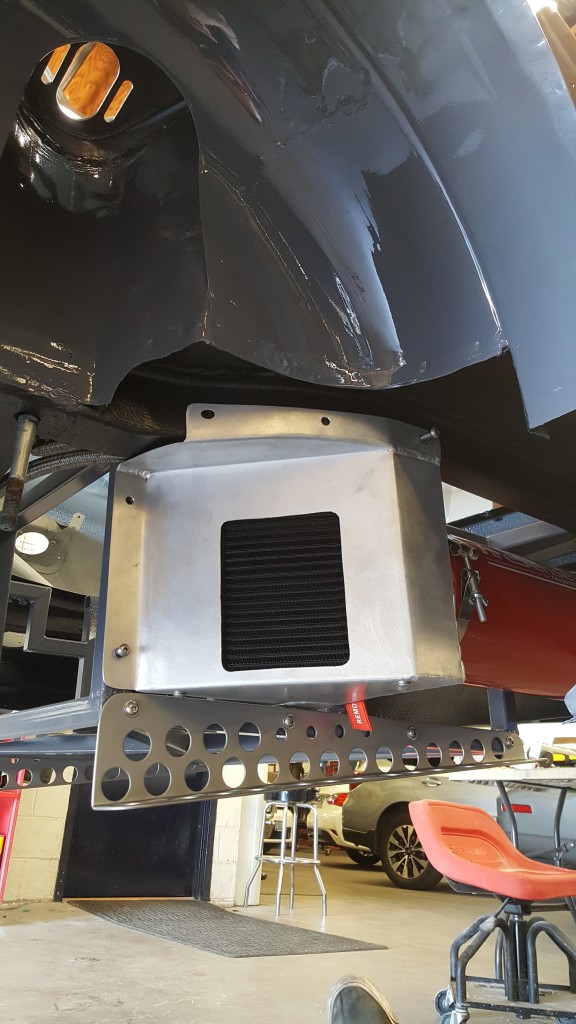
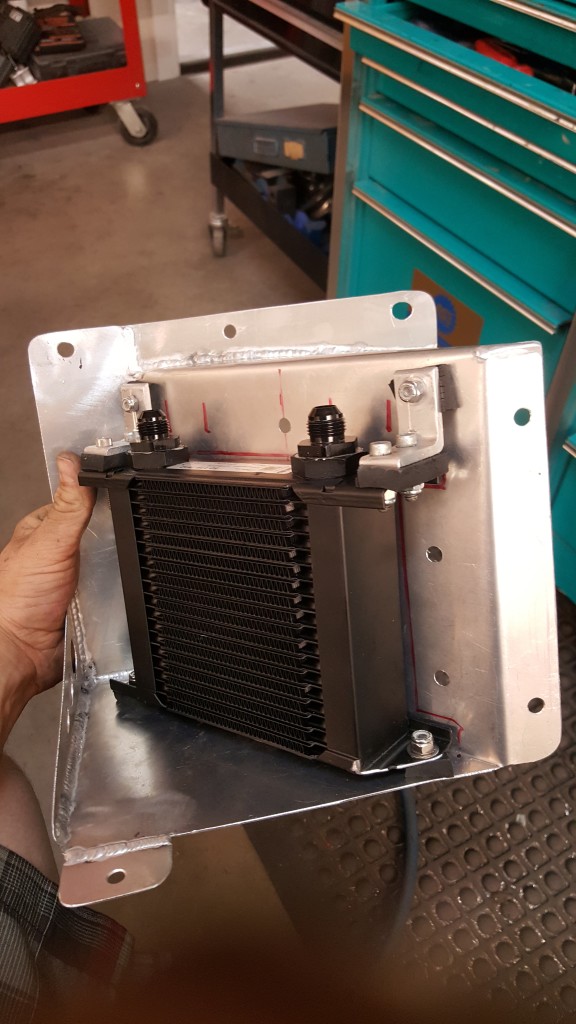
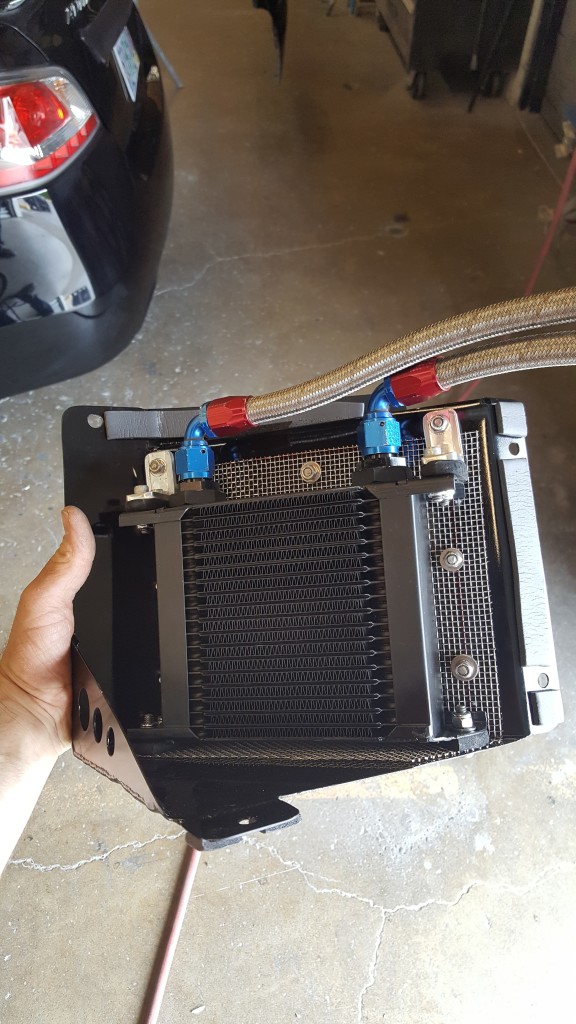
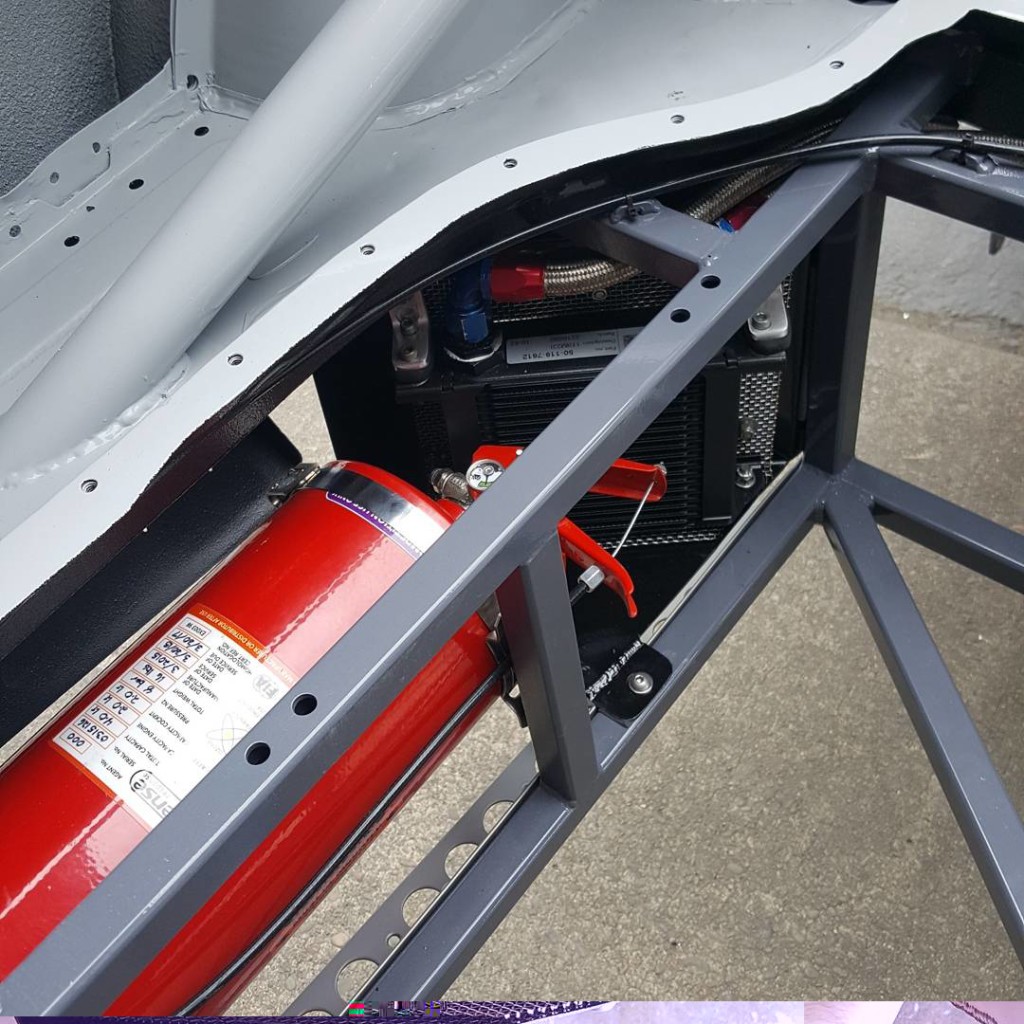
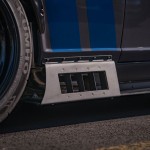
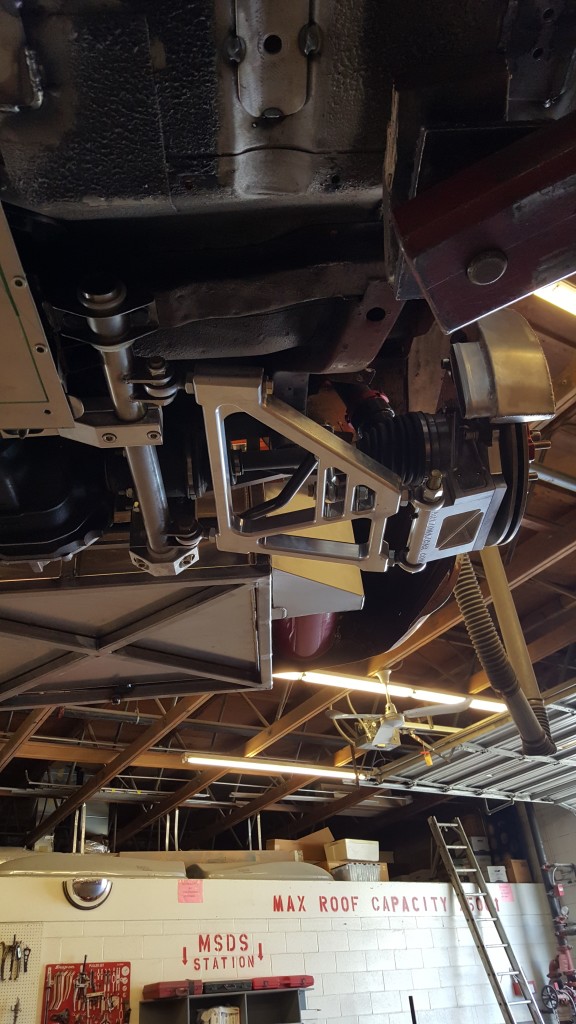
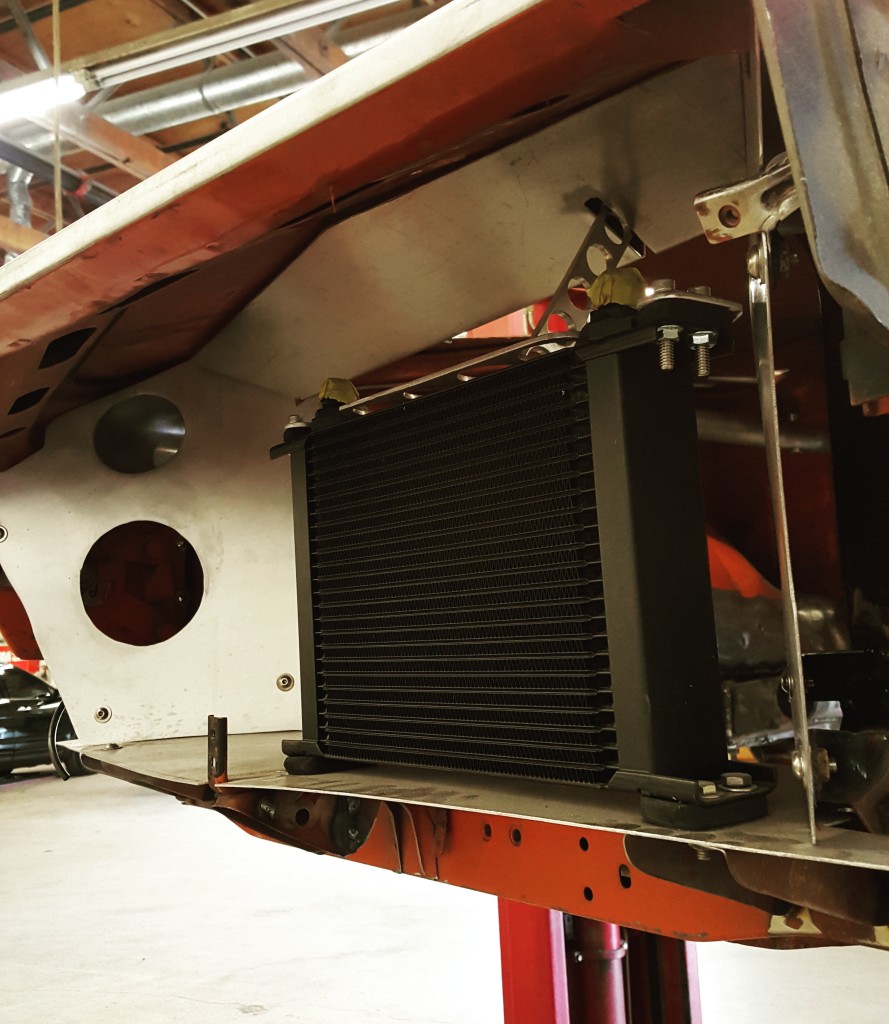
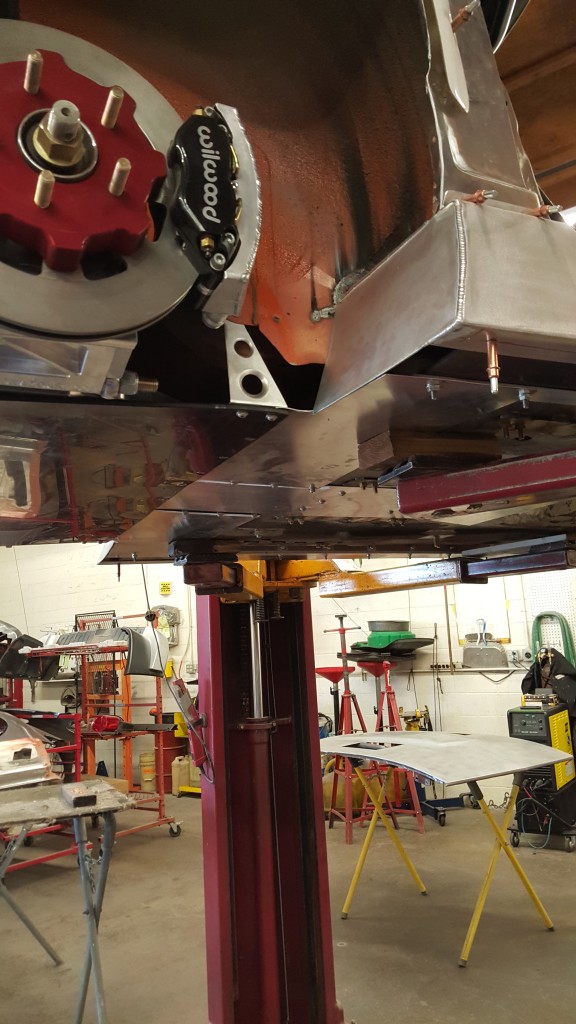
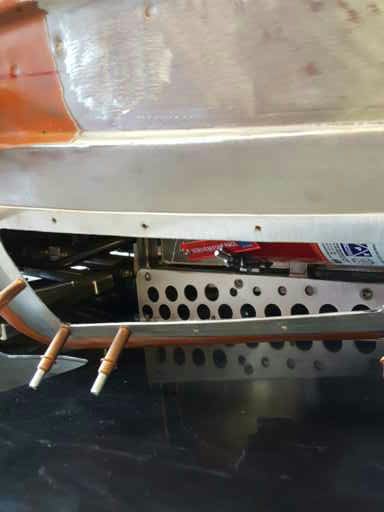
- one of my favorite pieces, this light gauge alloy shield hides the rear differential cooler behind the wheel
-
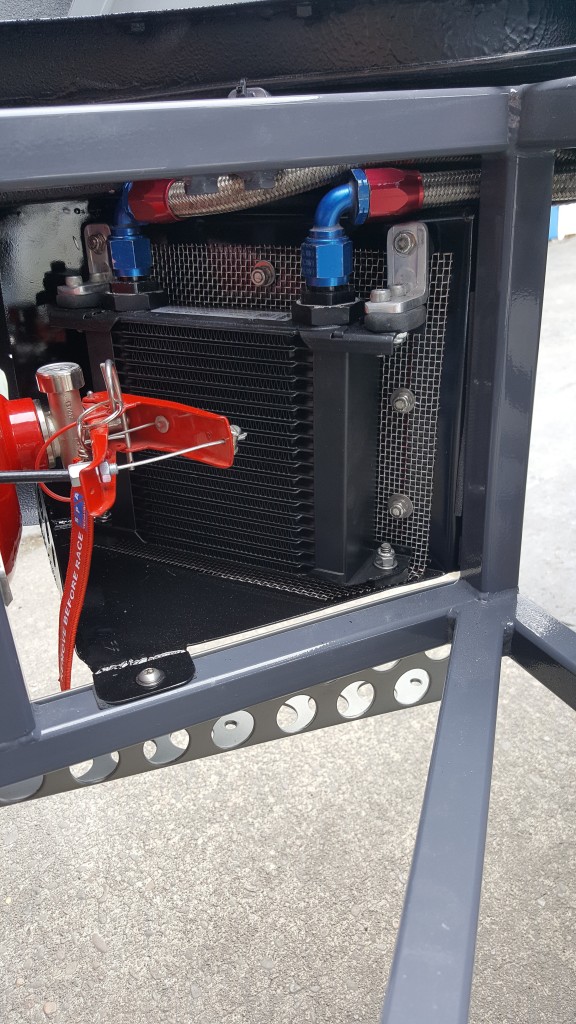
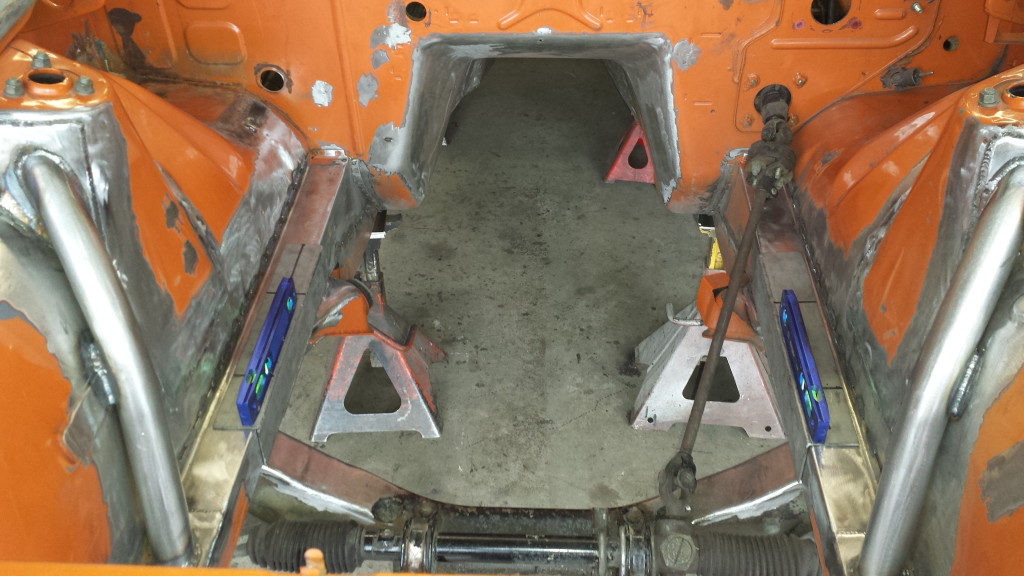
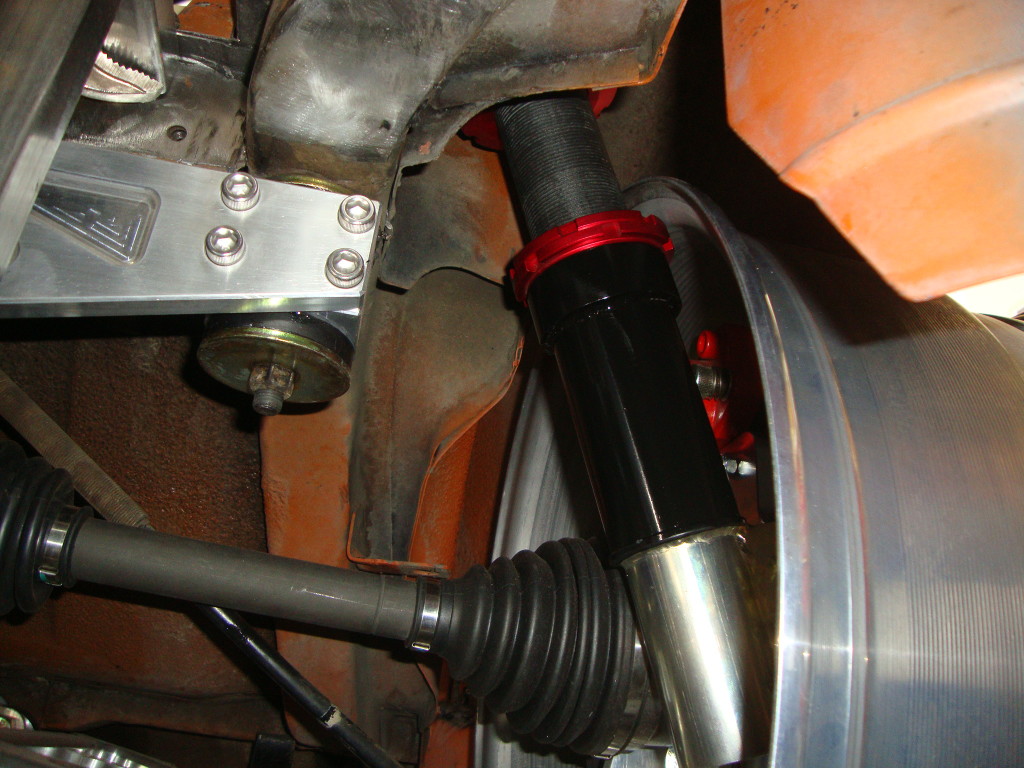
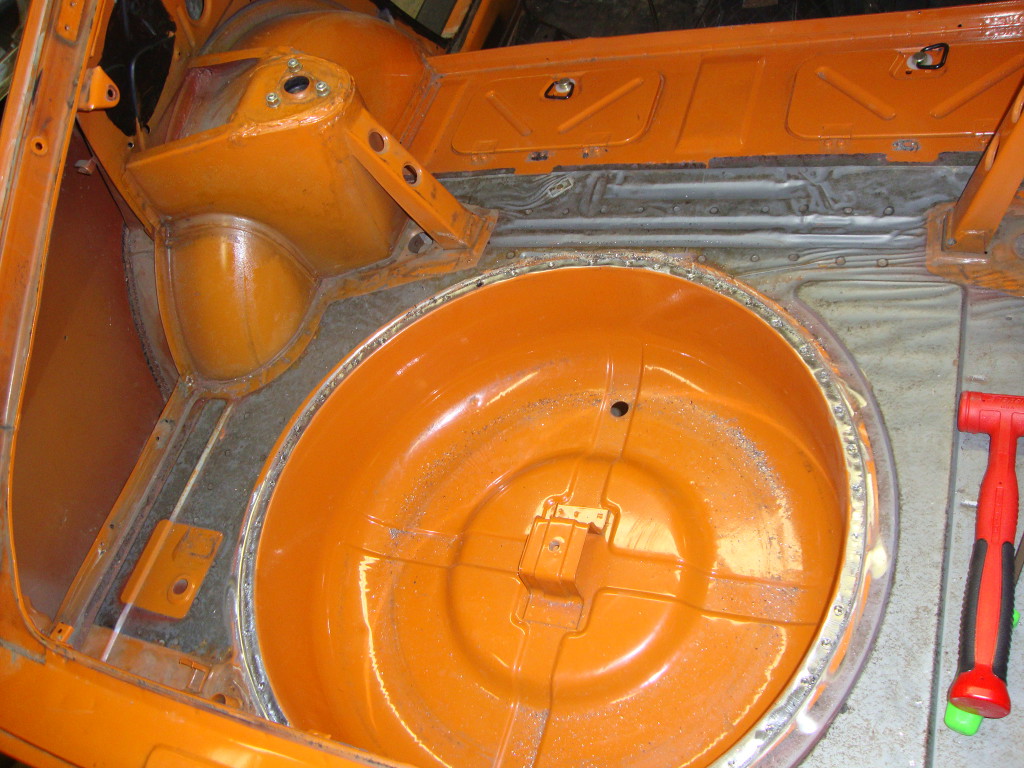
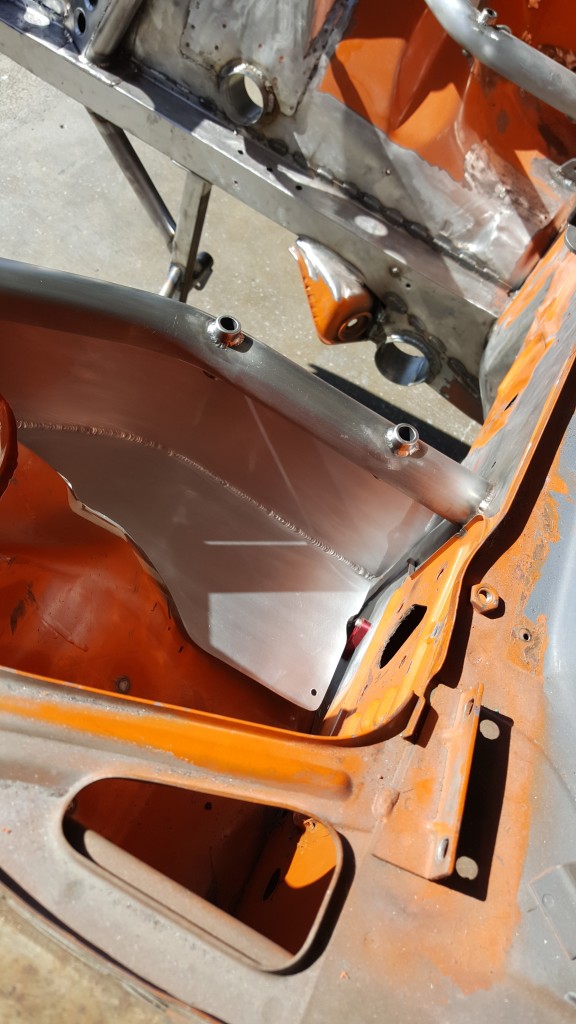
- no room to spare
-
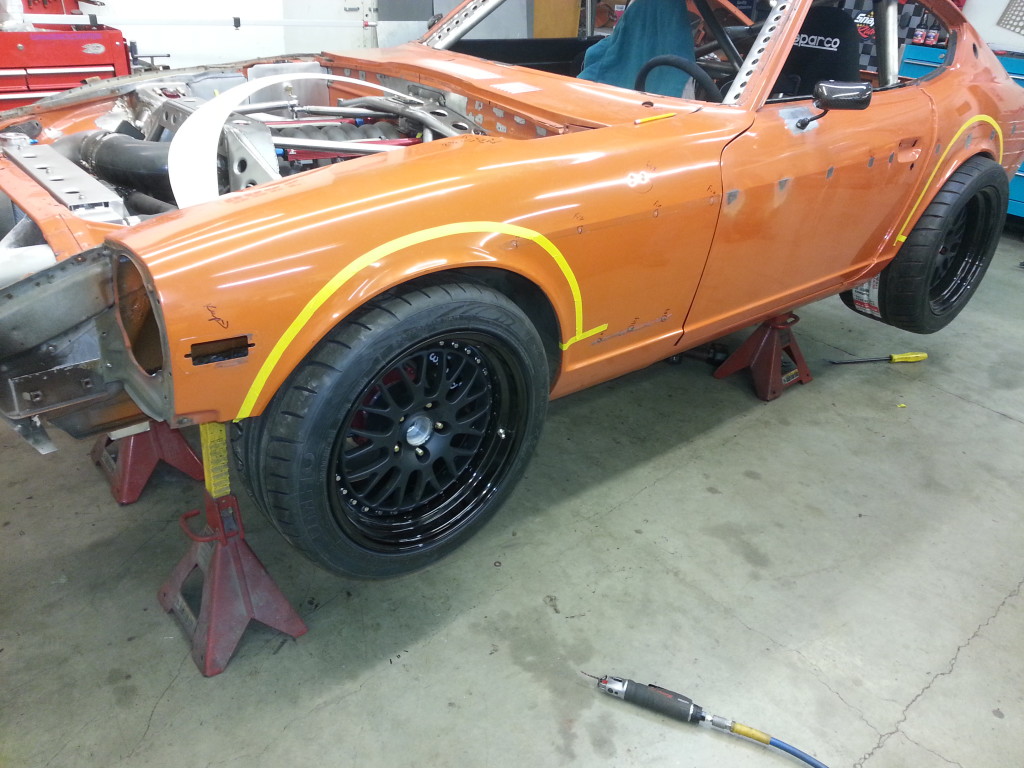
- details you will see from outside the car
-
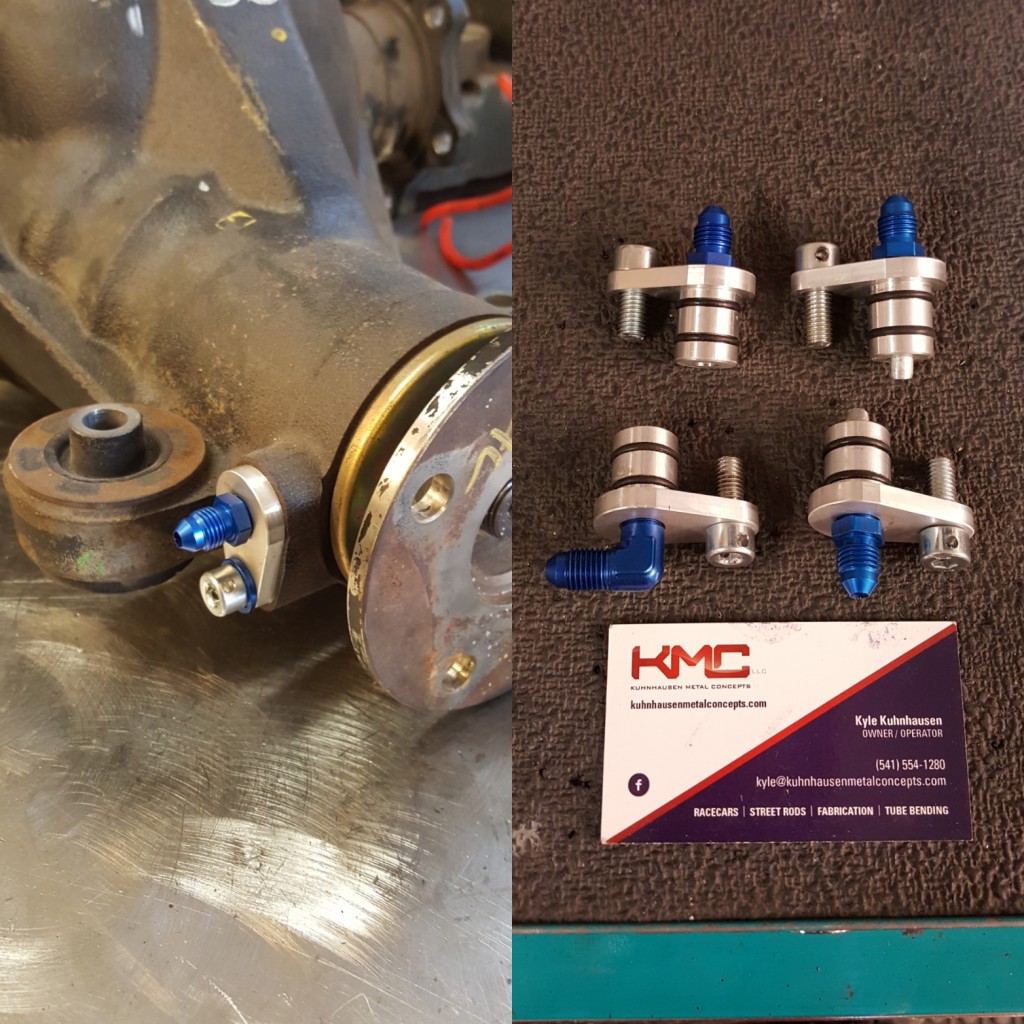
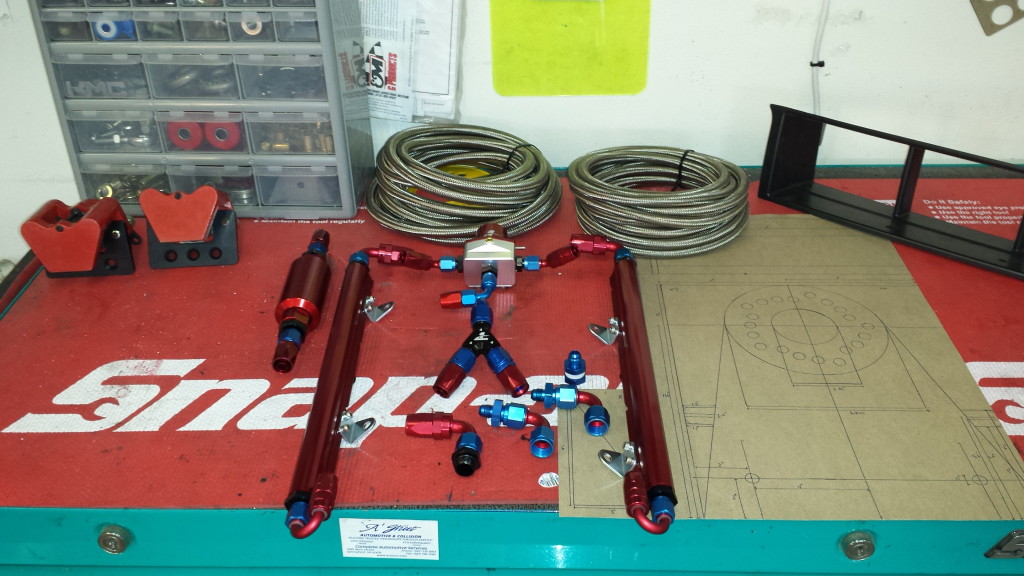
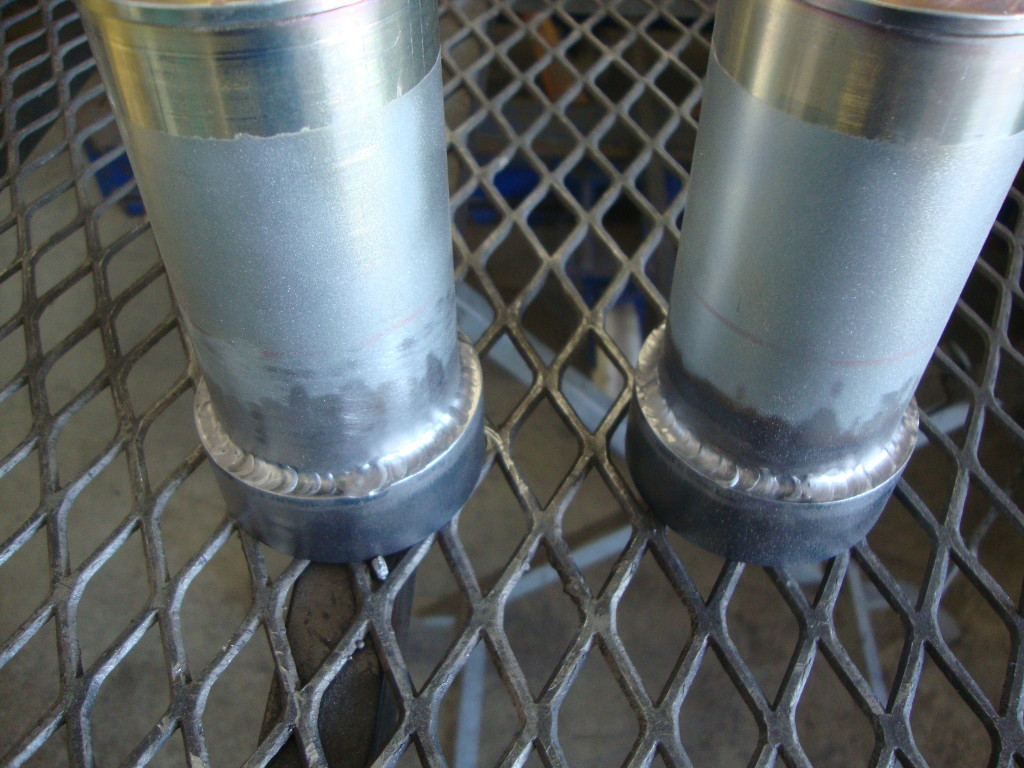
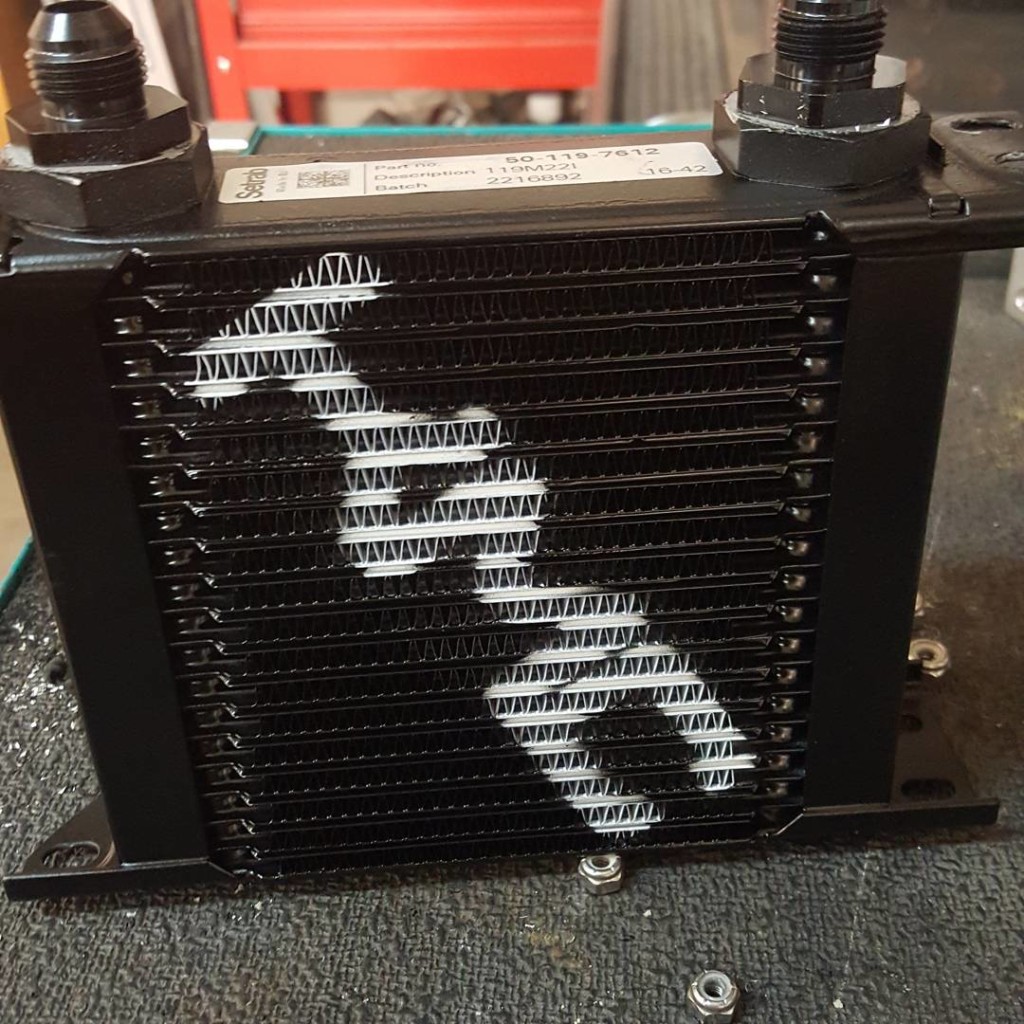
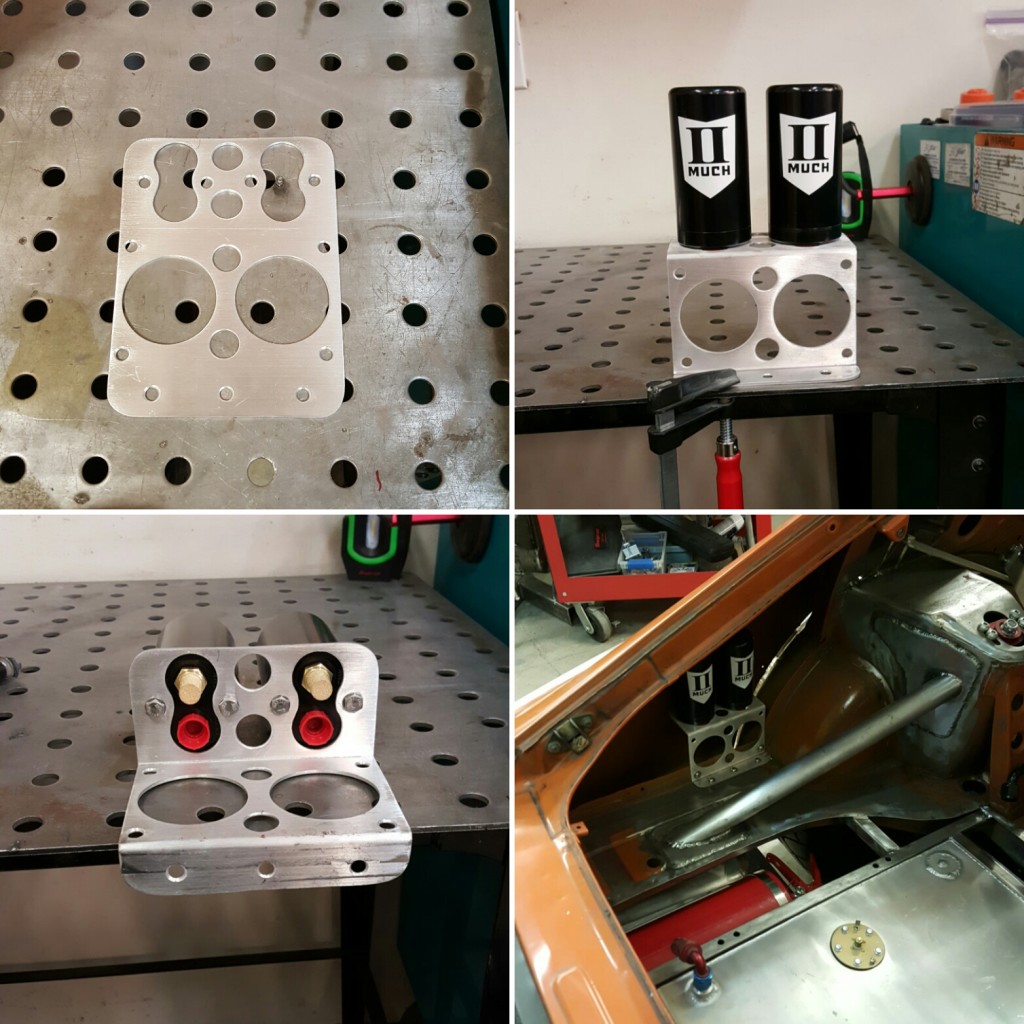
- I designed these custom cnc snout oilers to hugely upgrade the differential oiling system
-
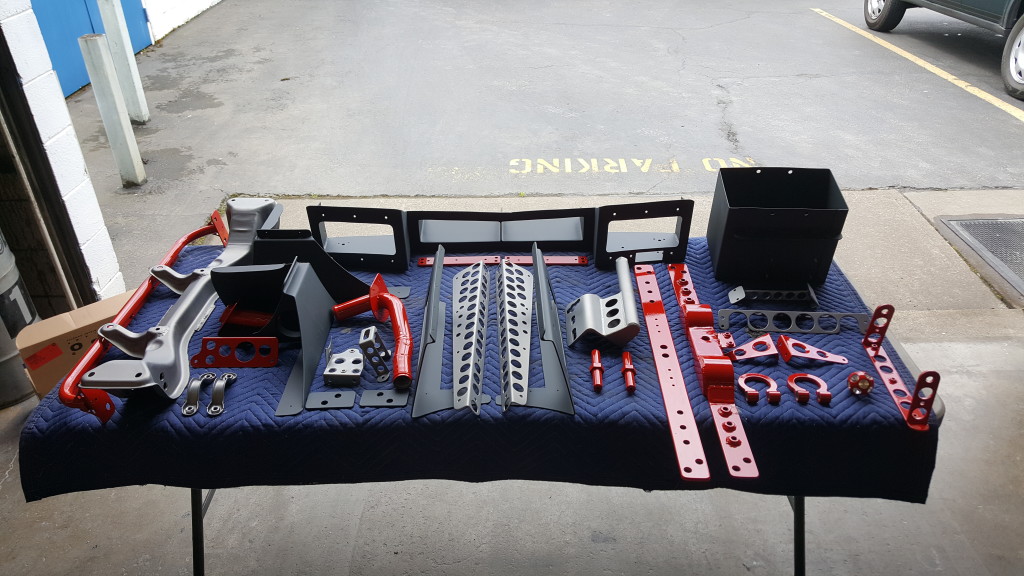
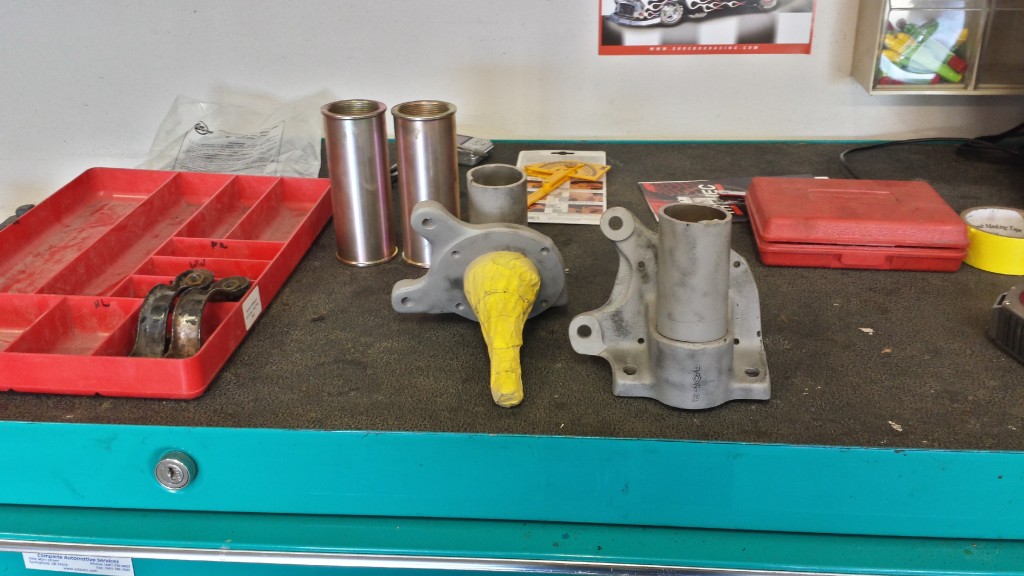
- fresh powdercoated goodies ready for assembly
-
- One hell of a well executed design if you ask me
-
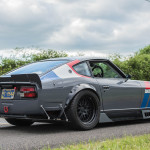
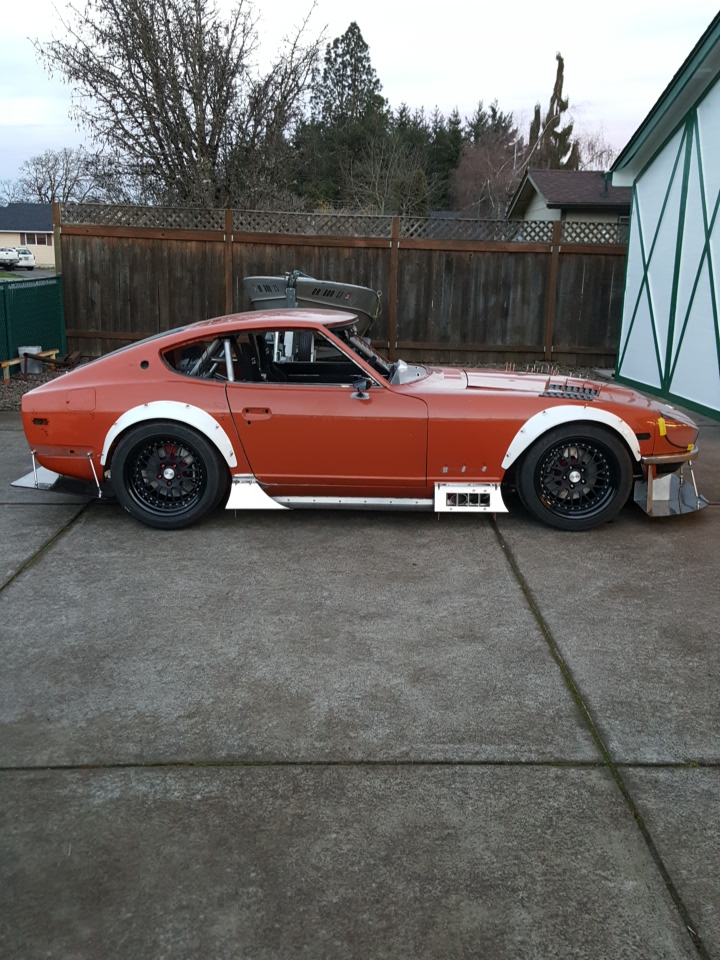
- my favorite color ever, it brings this chassis decades ahead, dare I say to modern times
-
- these colors should play very well together. A bit more interesting than plain satin black
-
- a taste of what is to come…
-
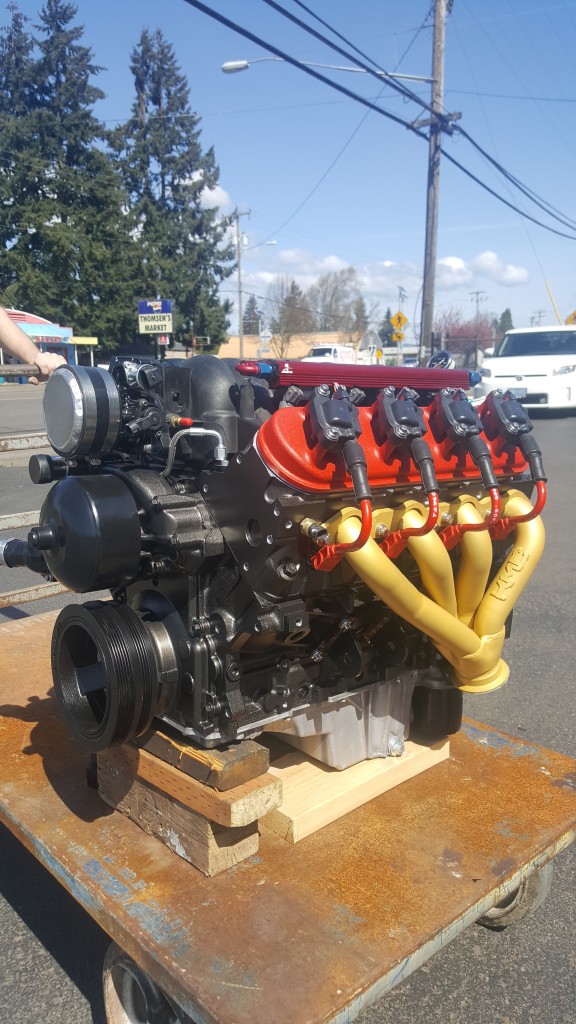
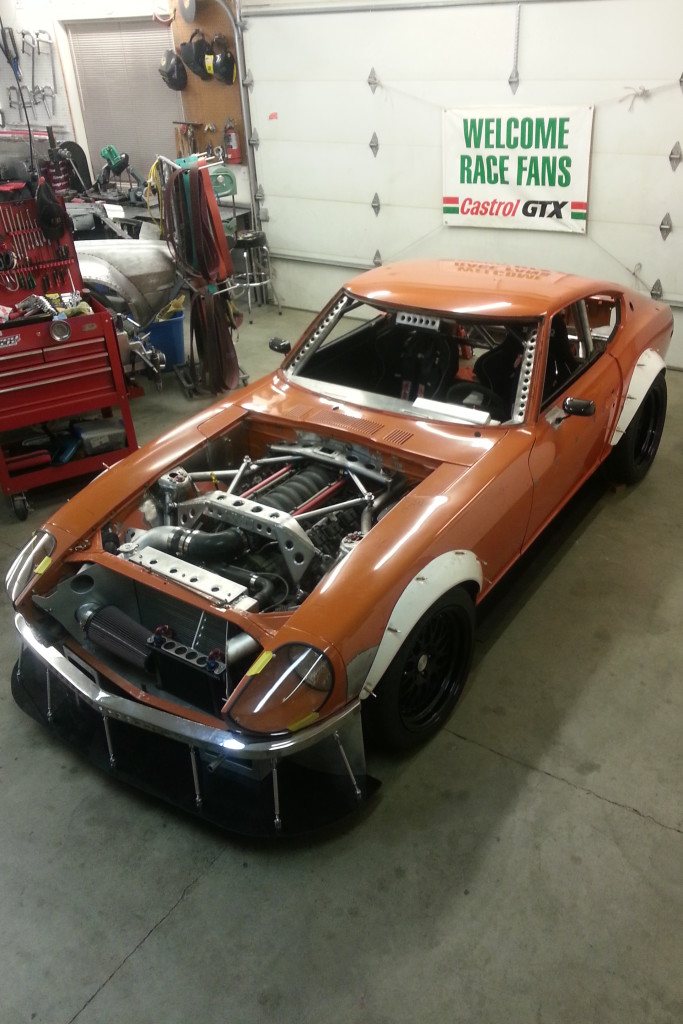
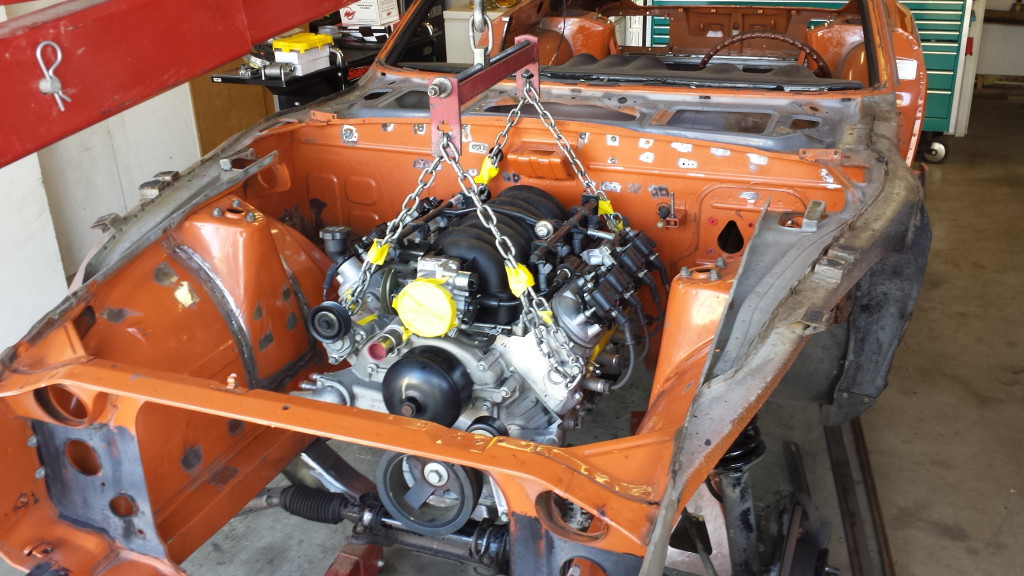
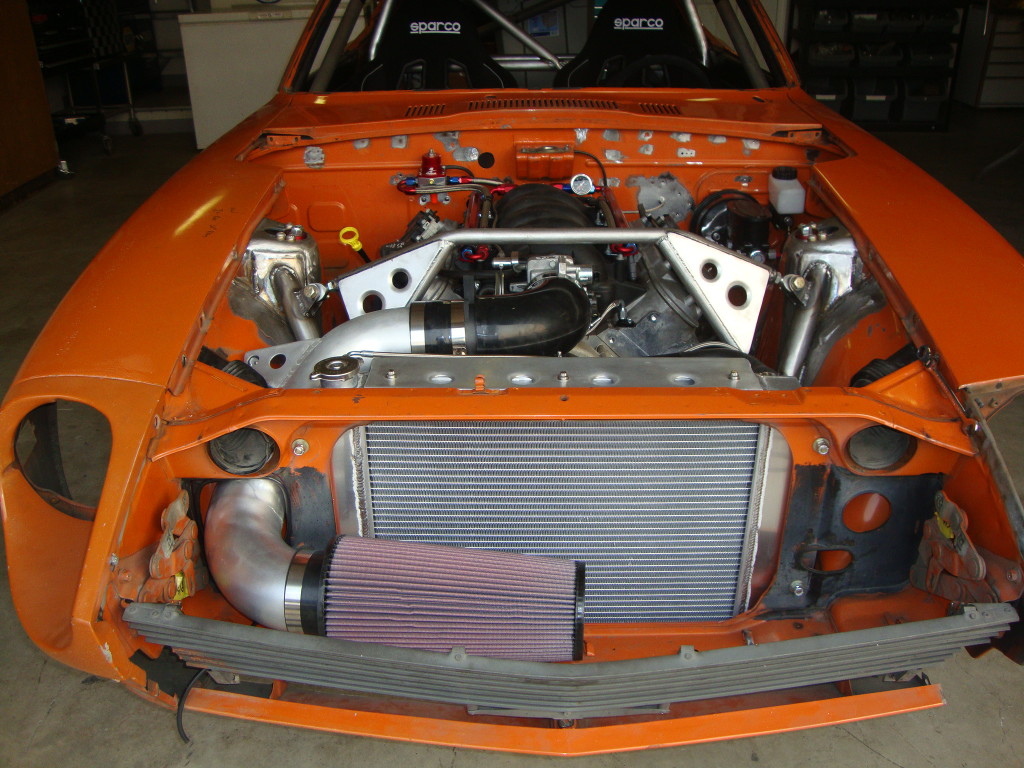
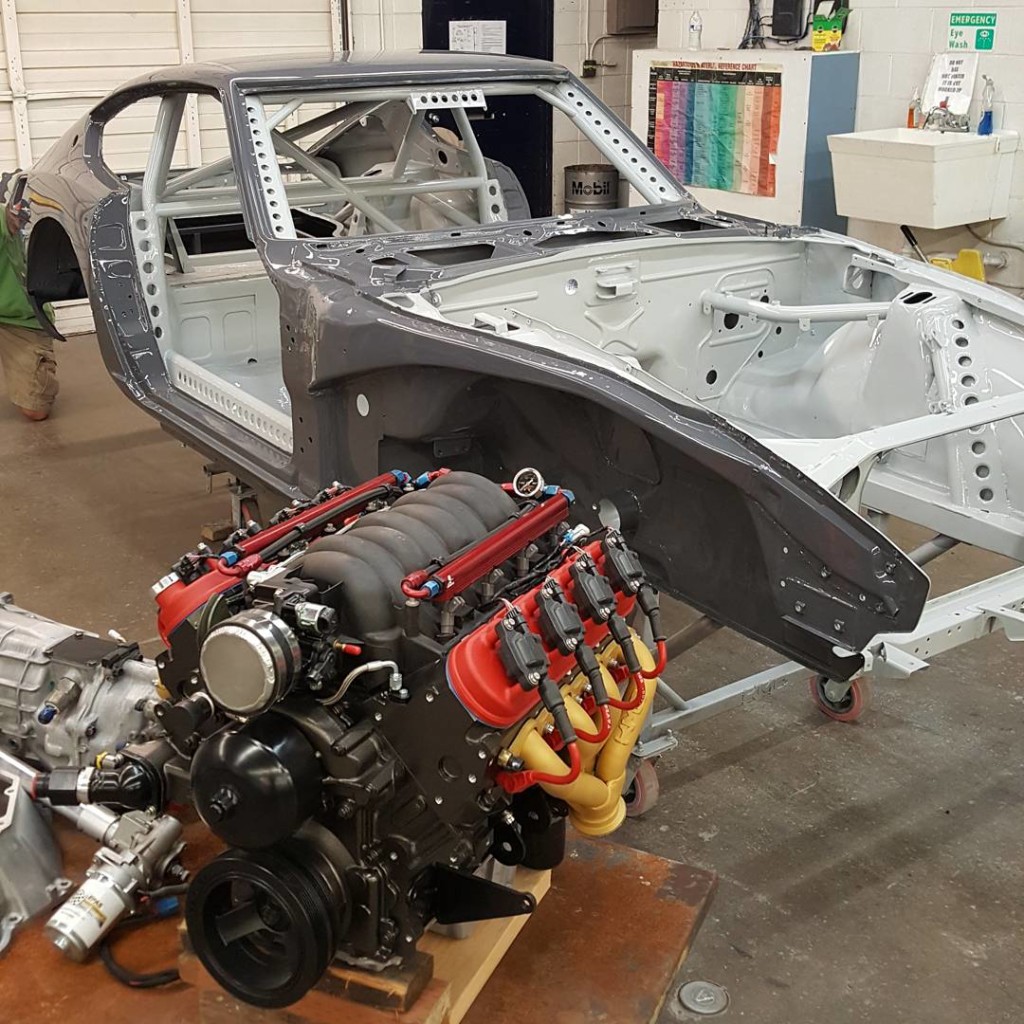
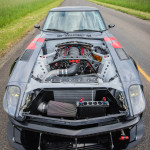
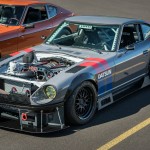
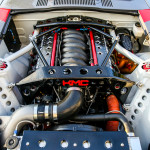
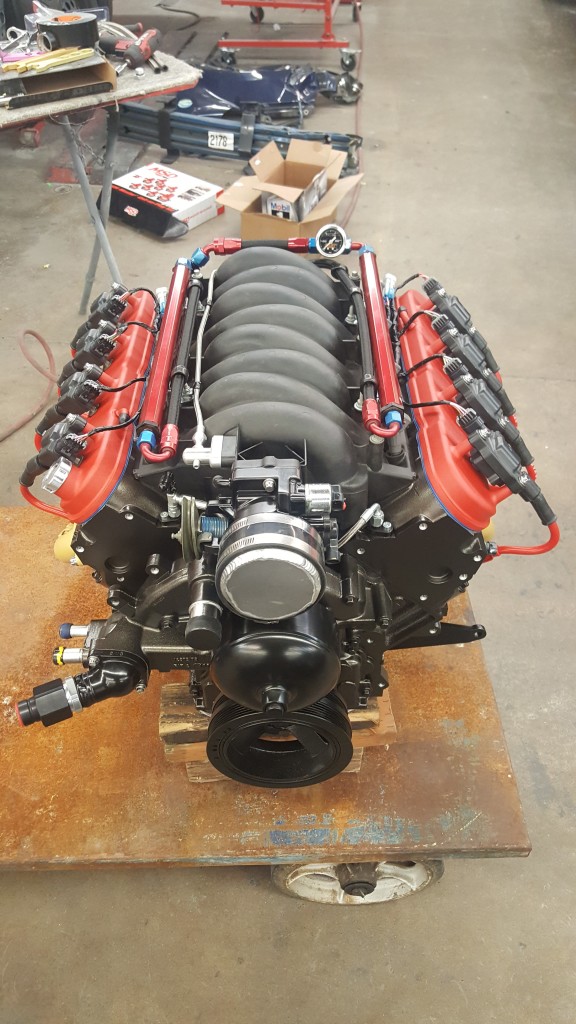
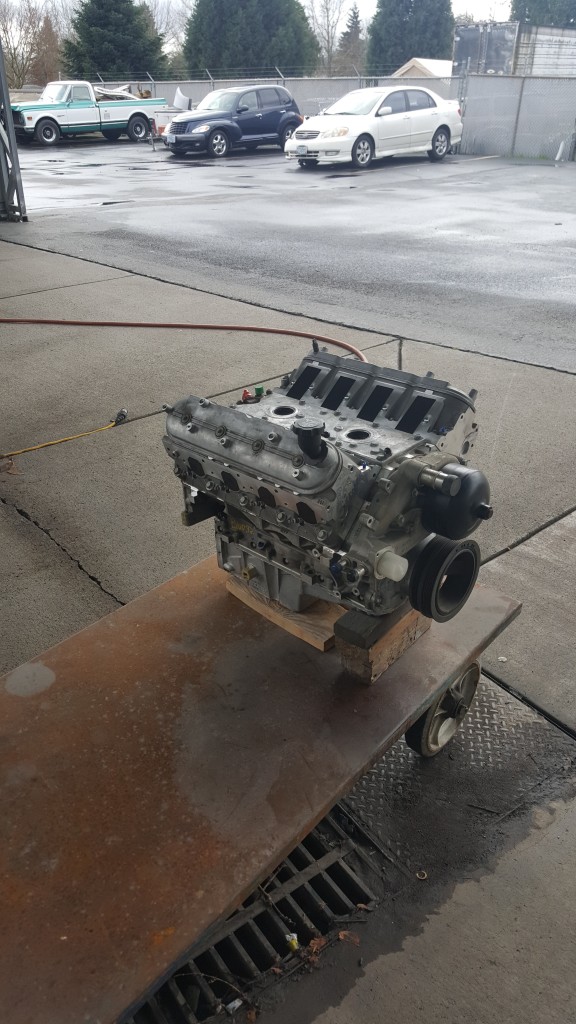
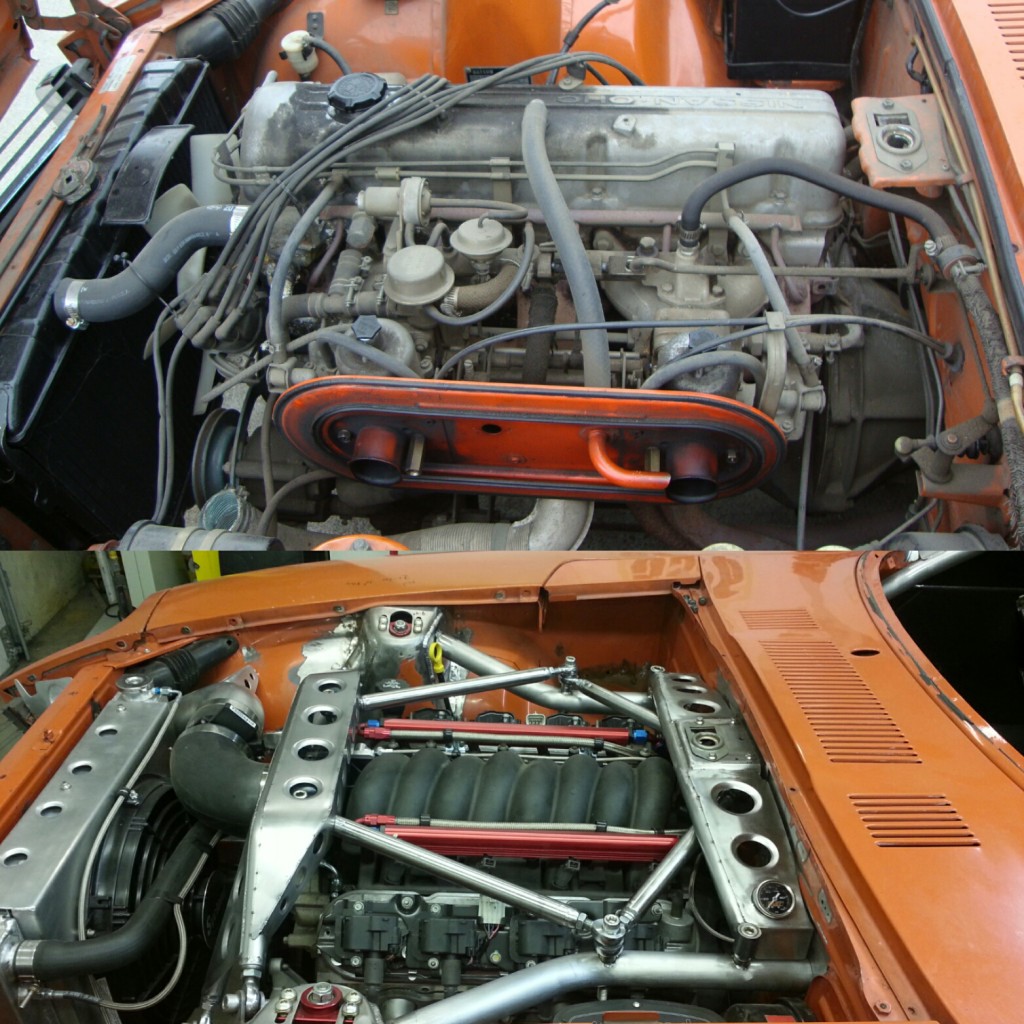
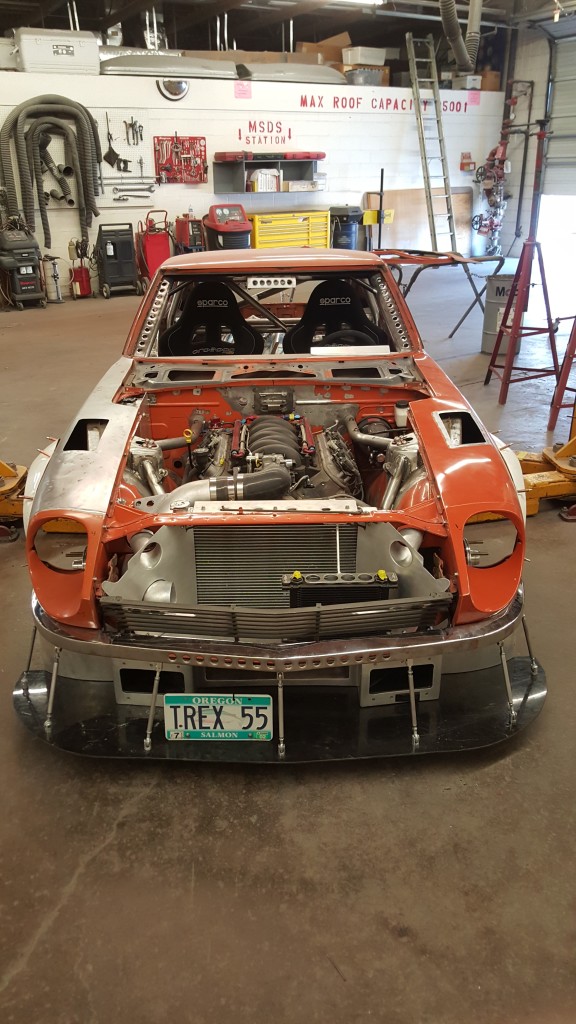
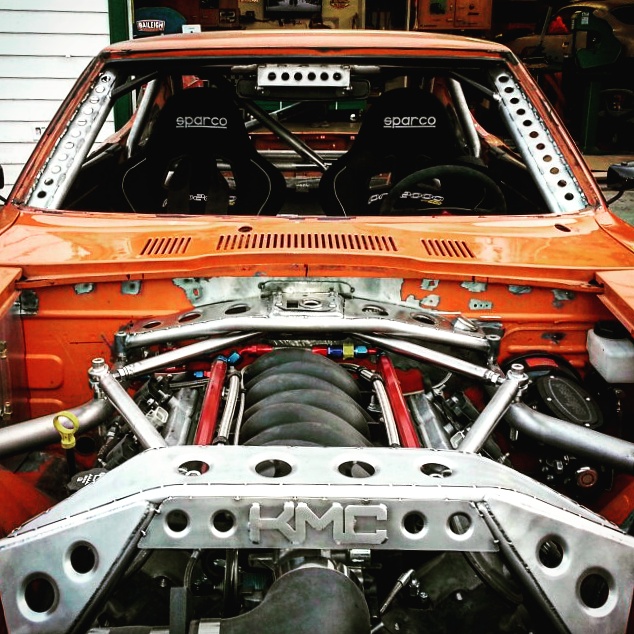
- I rolled the LS1 plant out into the sun for inspection
-
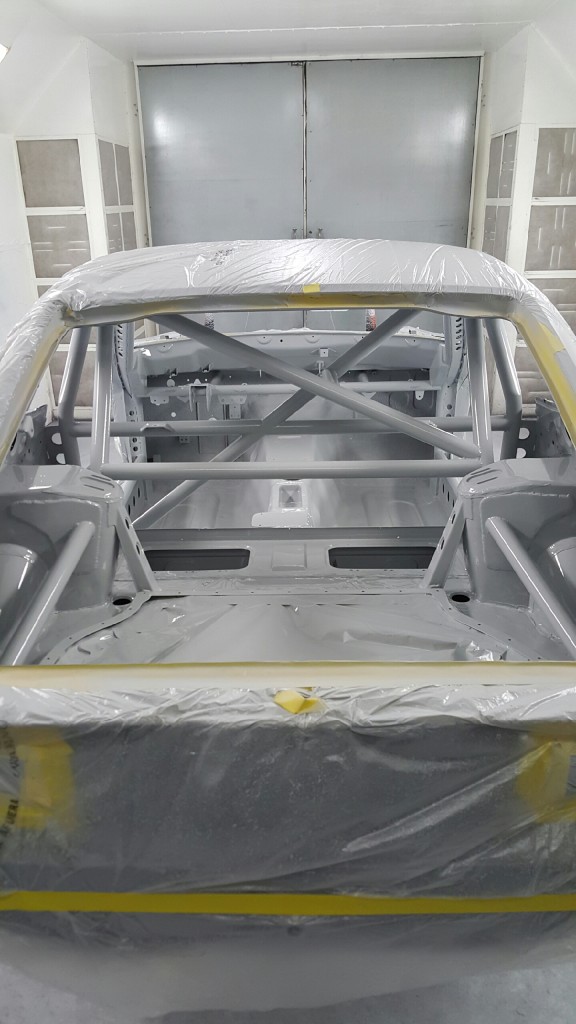
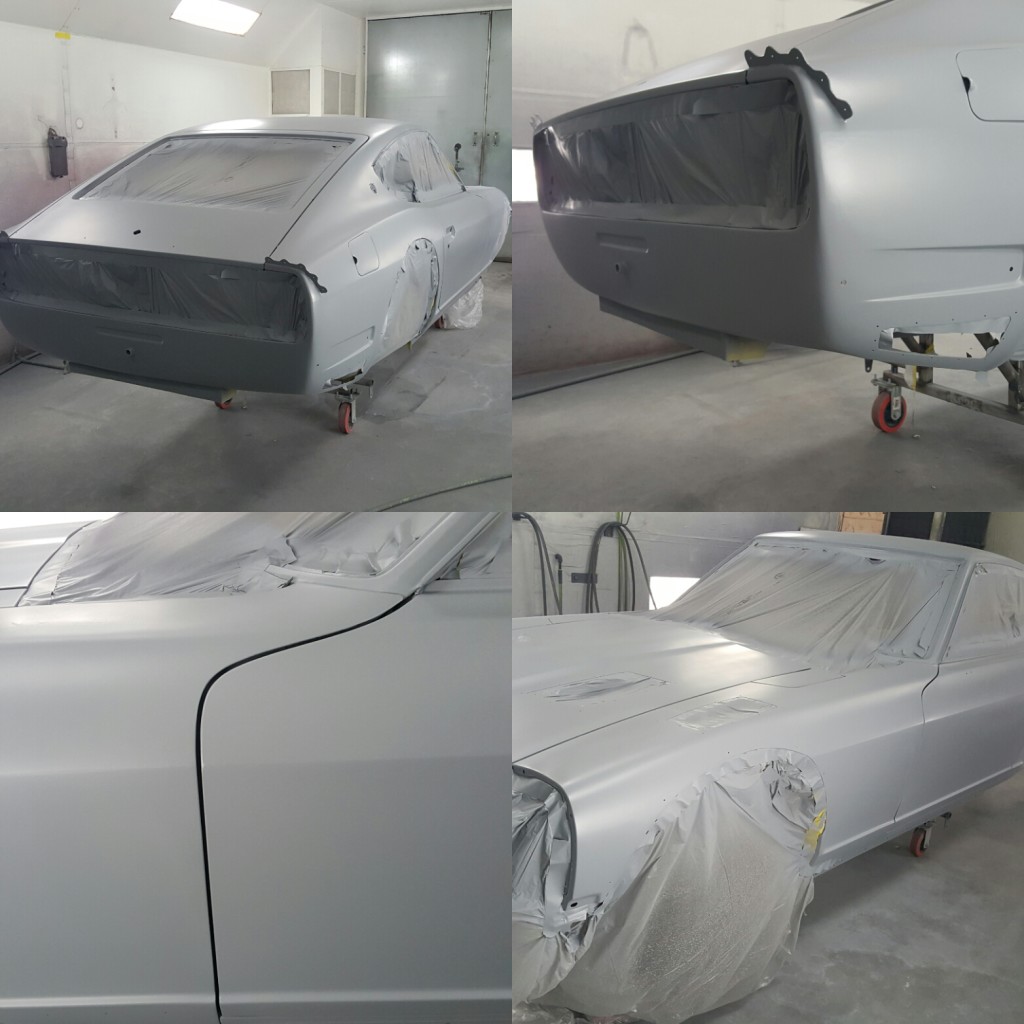
- A quick wet up shows how tight the style lines are after just 400 grit
-
- All those hours surely were worthwhile
-
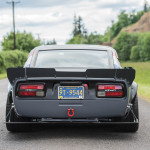
- You see this in your rear view, its already too late
-
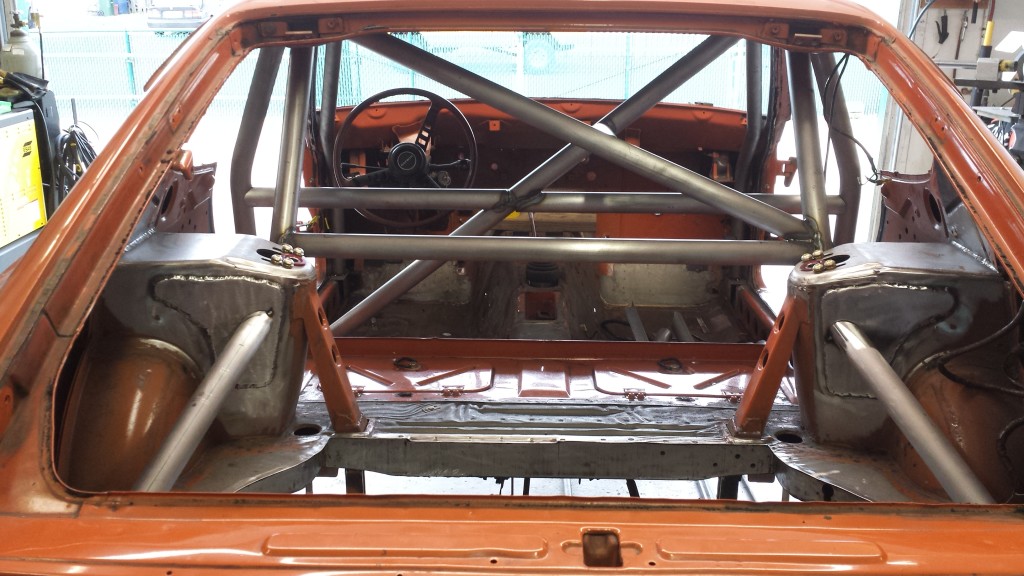
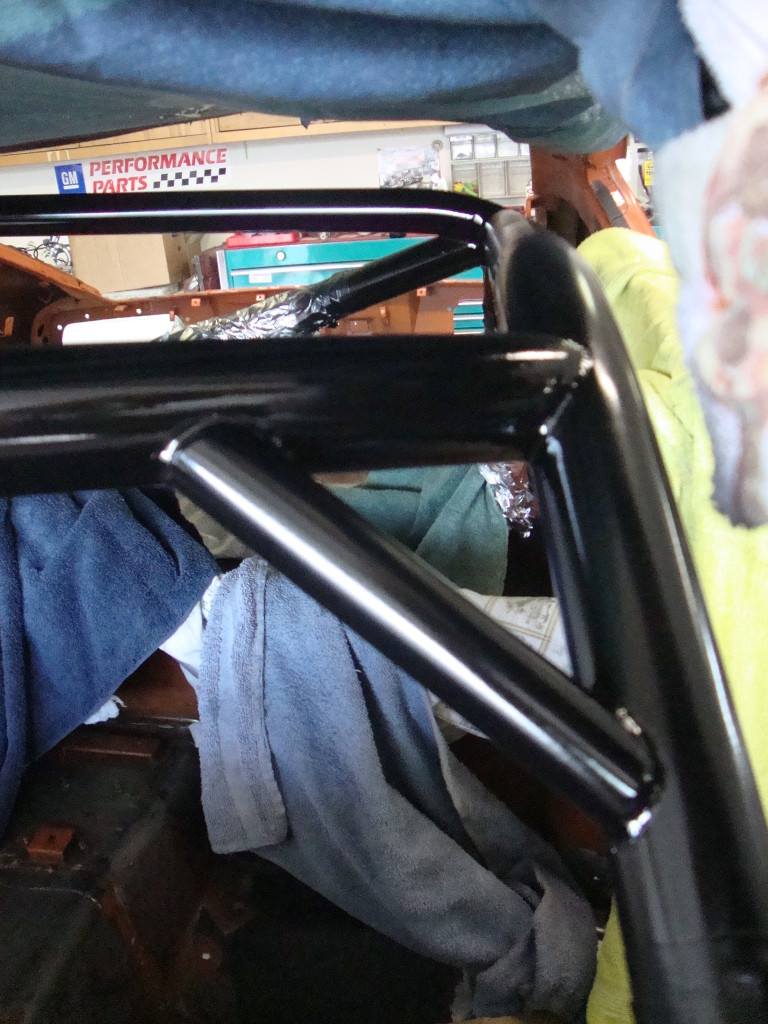
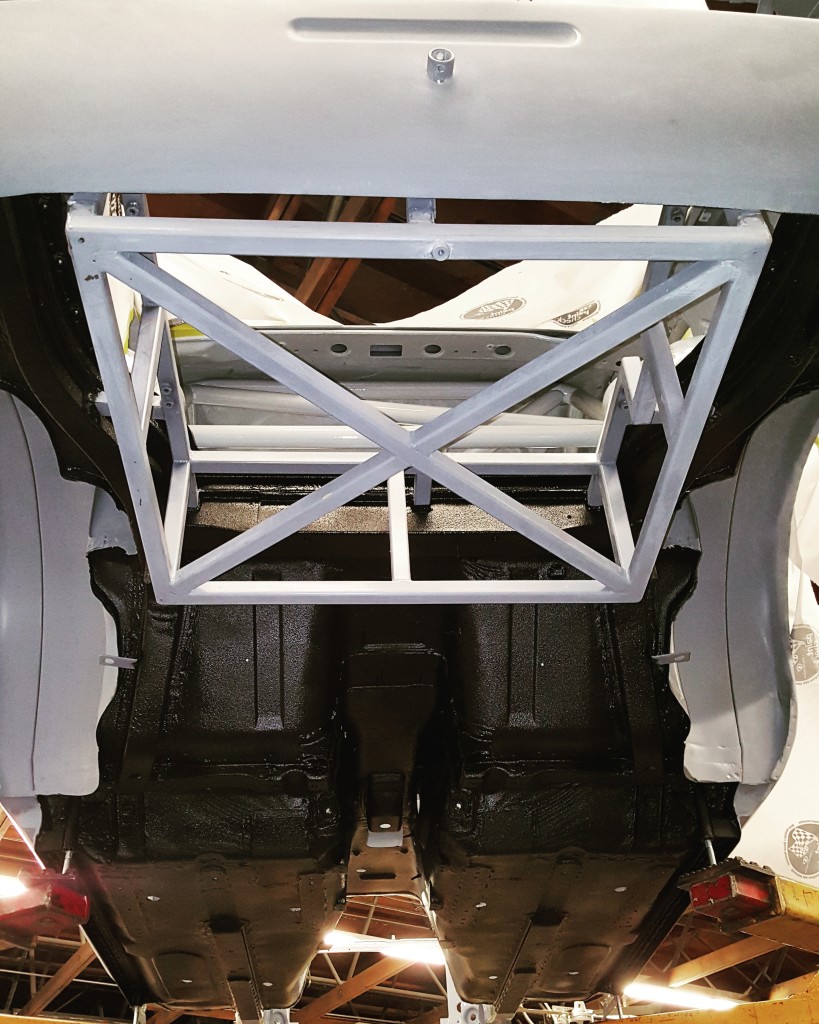
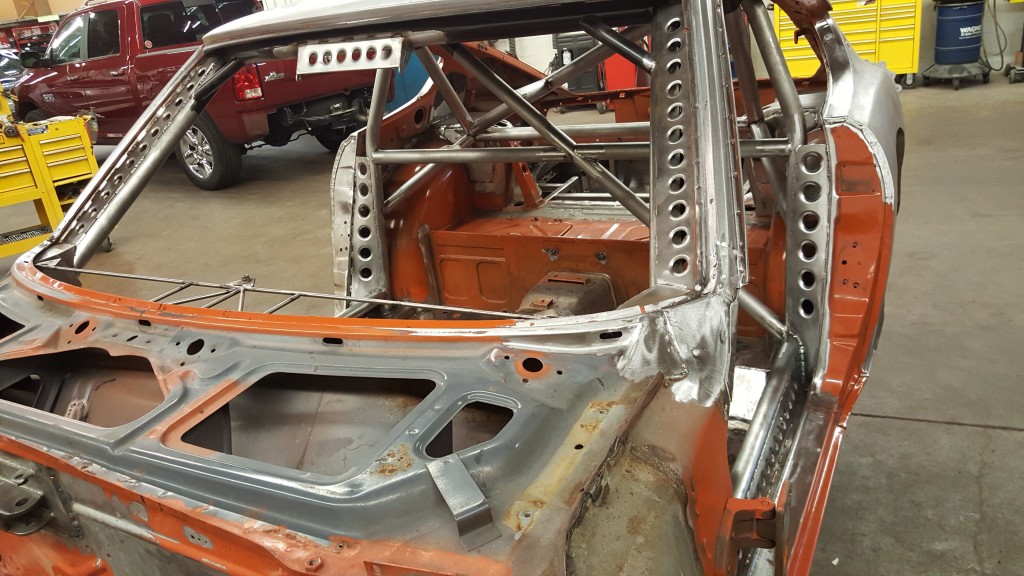
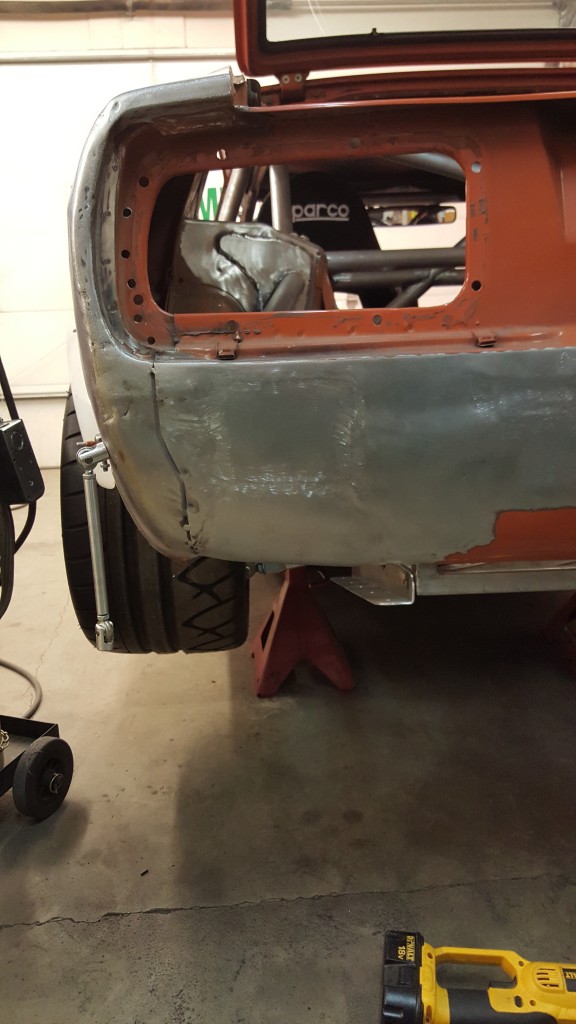
- I met the flared hole quota on this cage I do believe
-
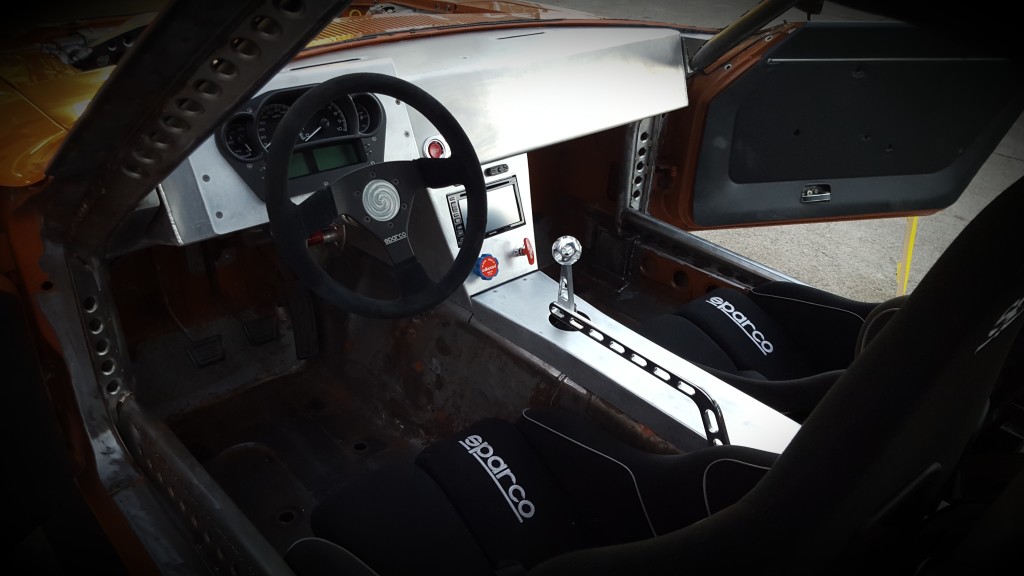
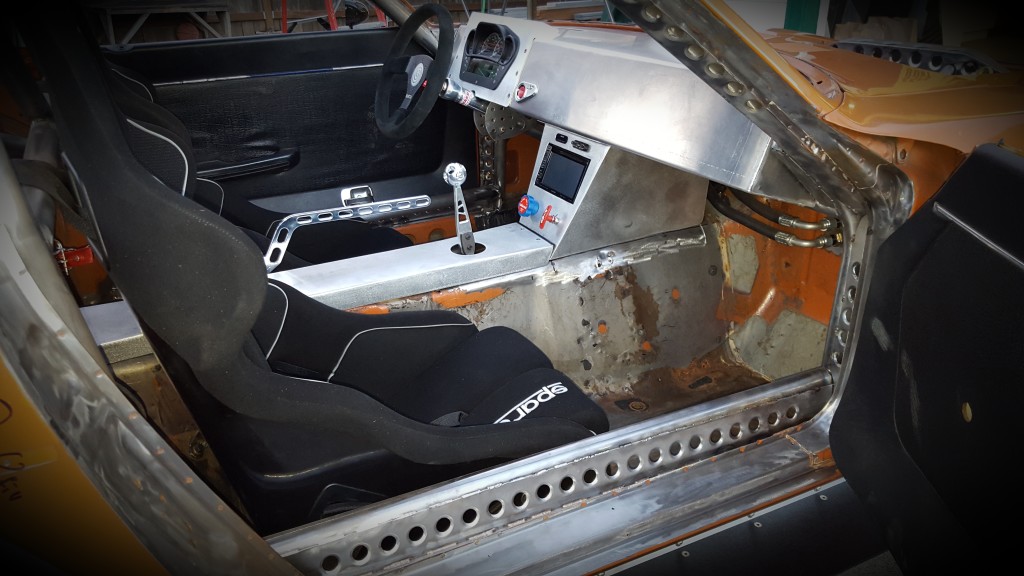
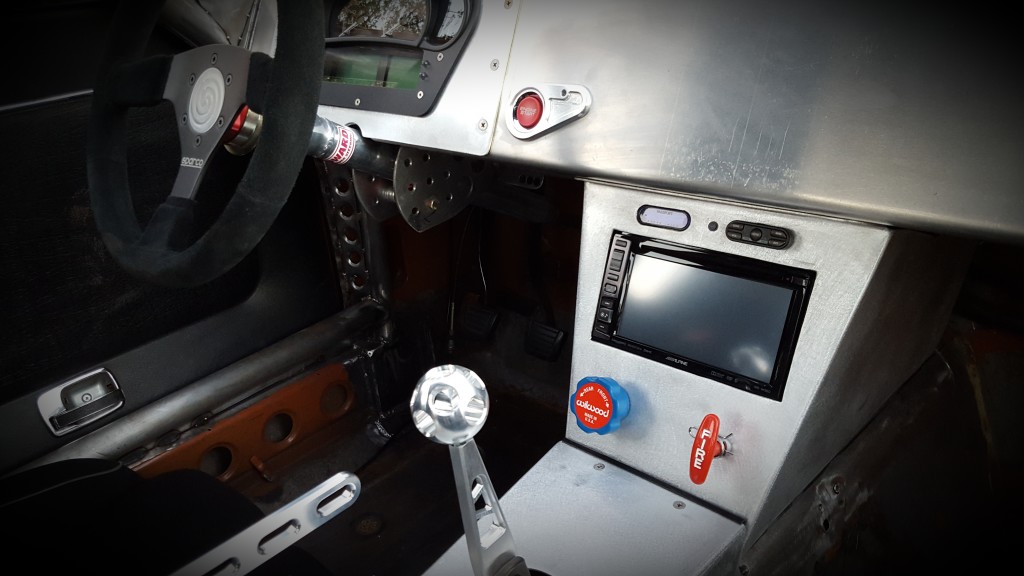
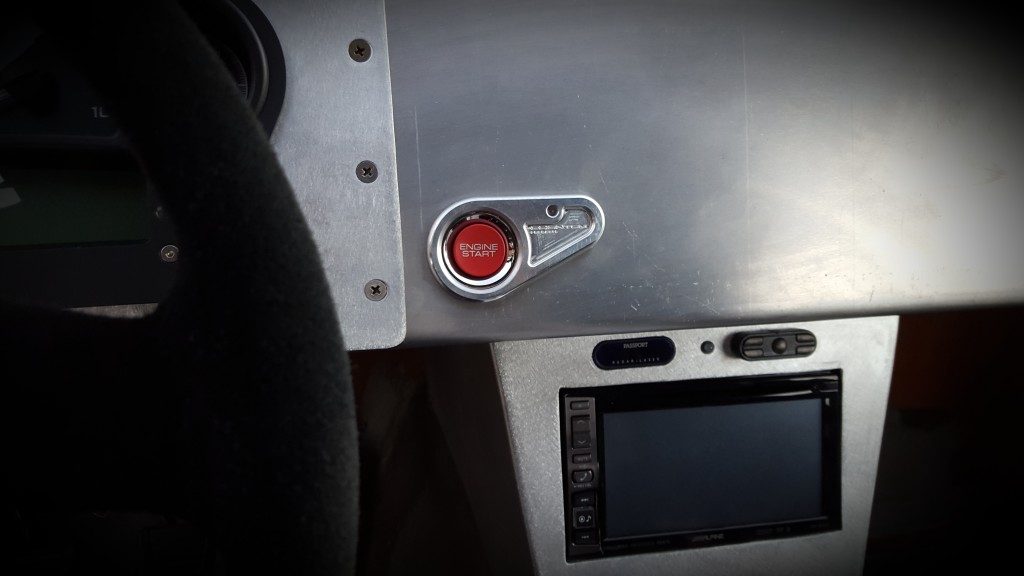
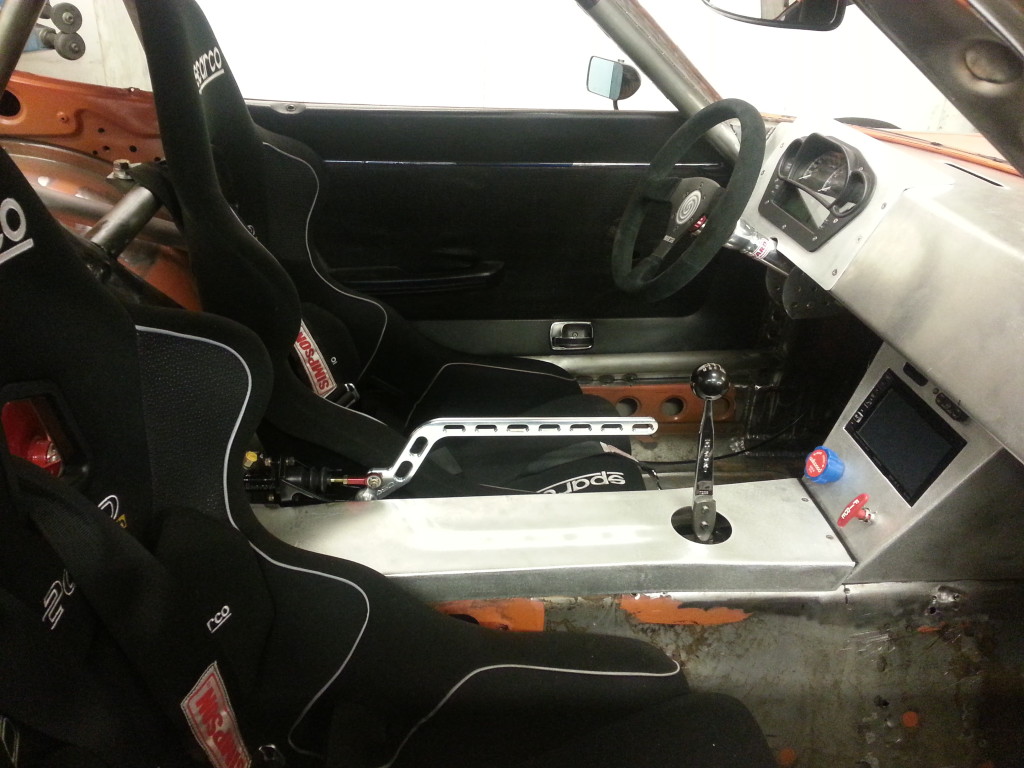
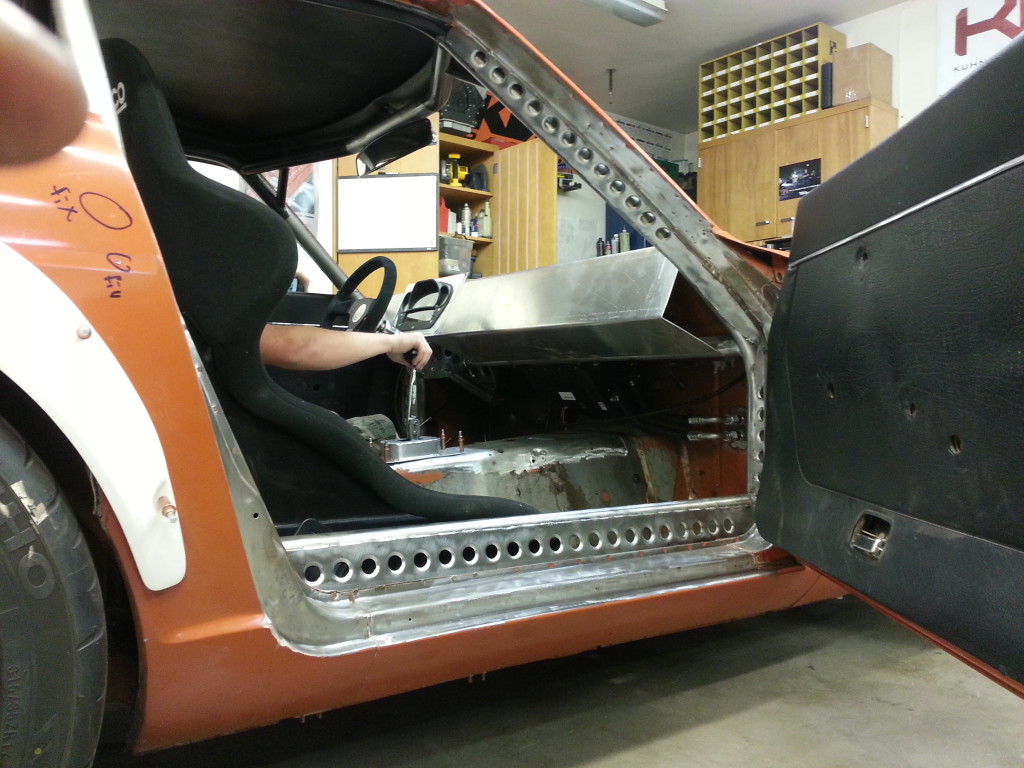
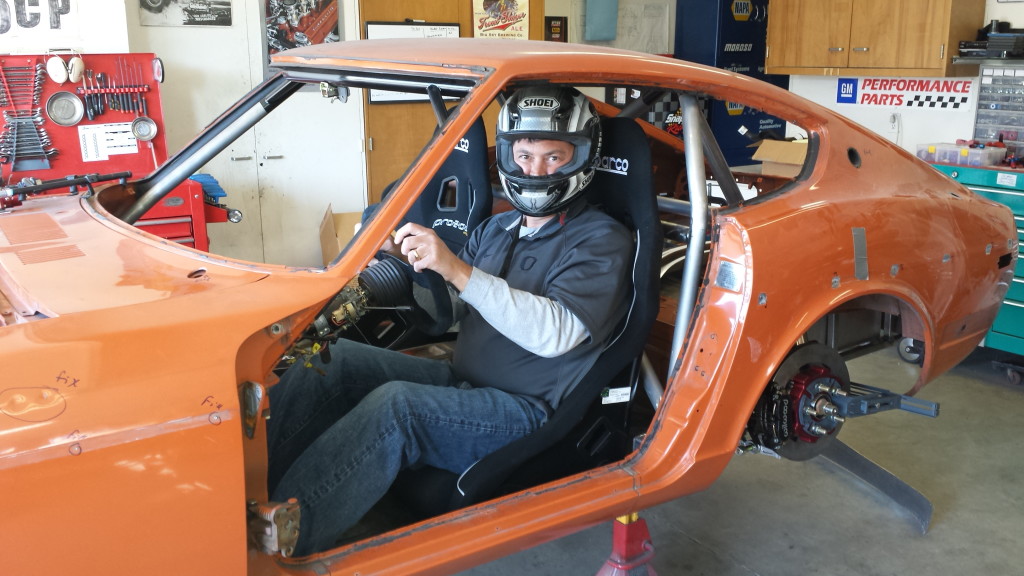
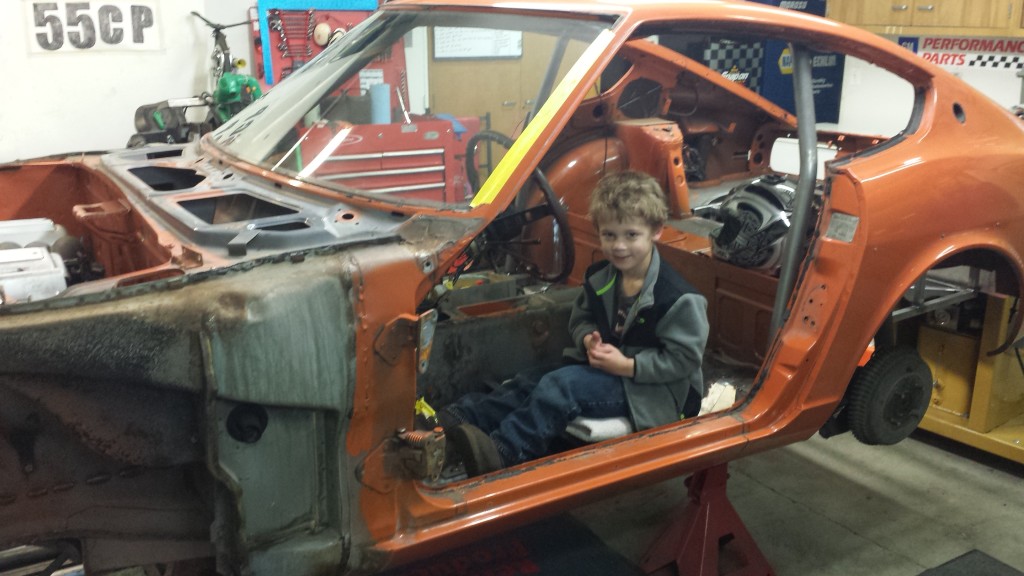
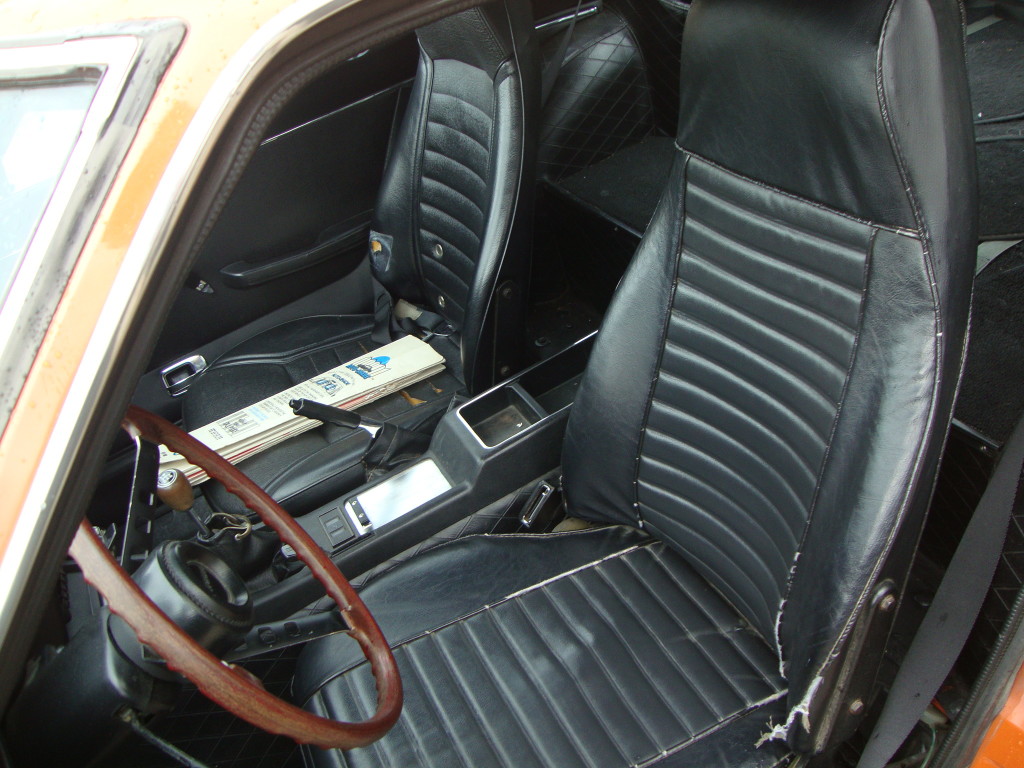
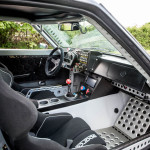
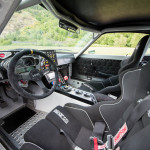
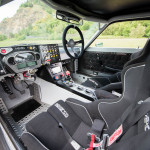
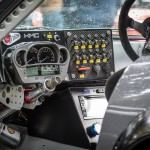
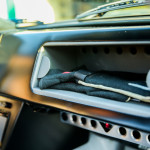
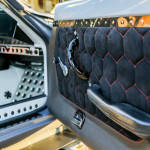
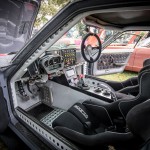
- An interior that means business
-

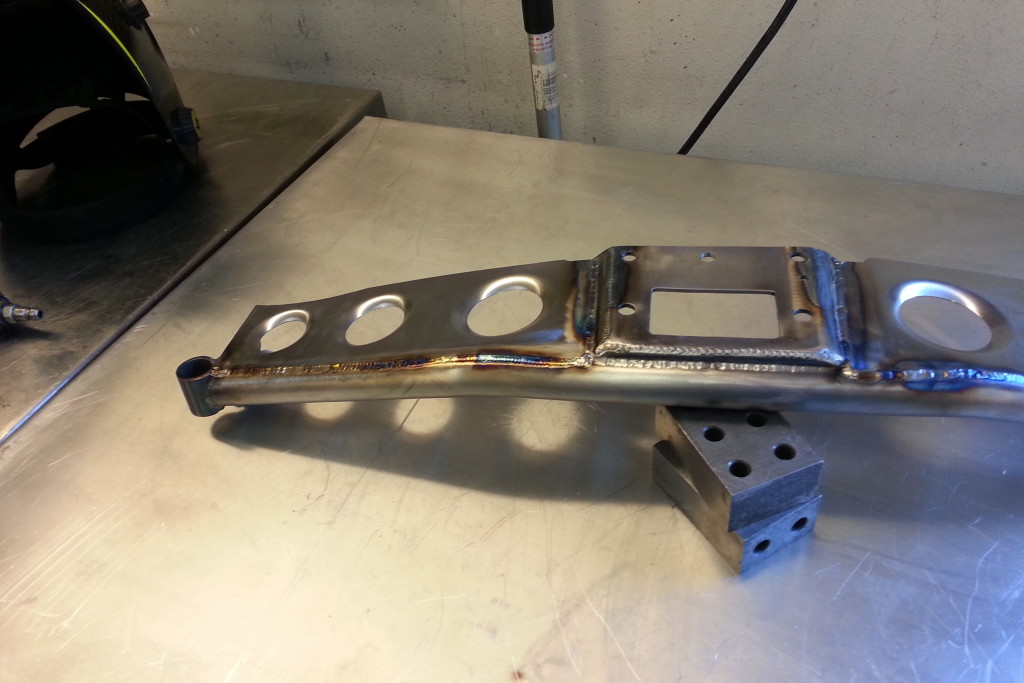
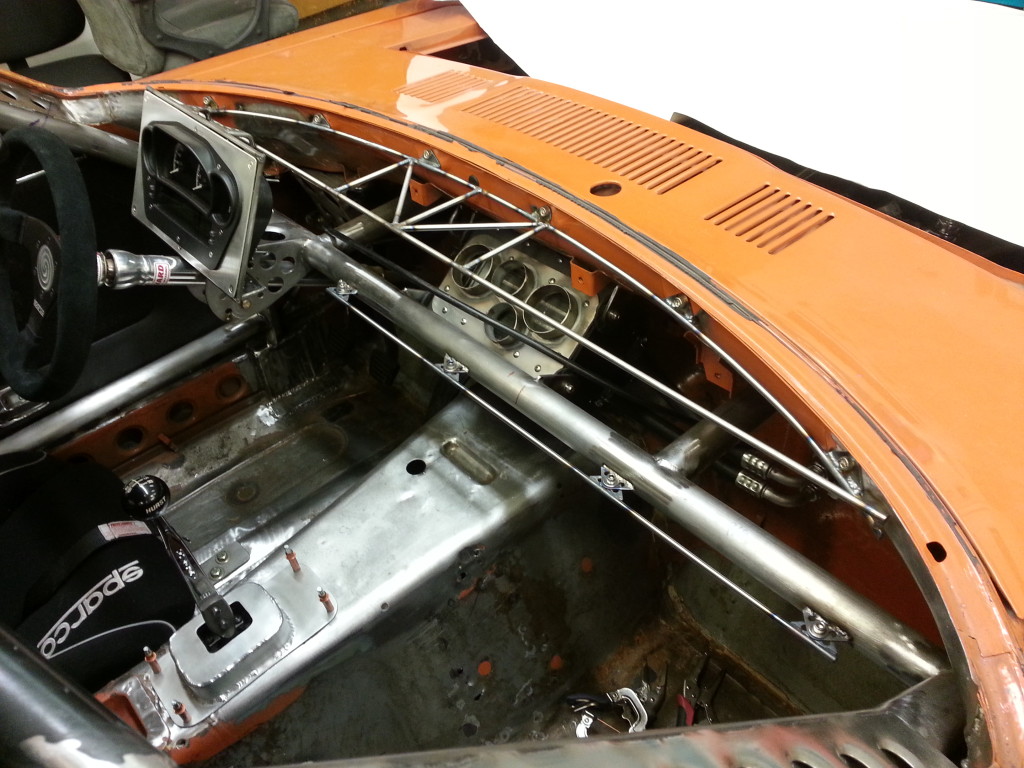
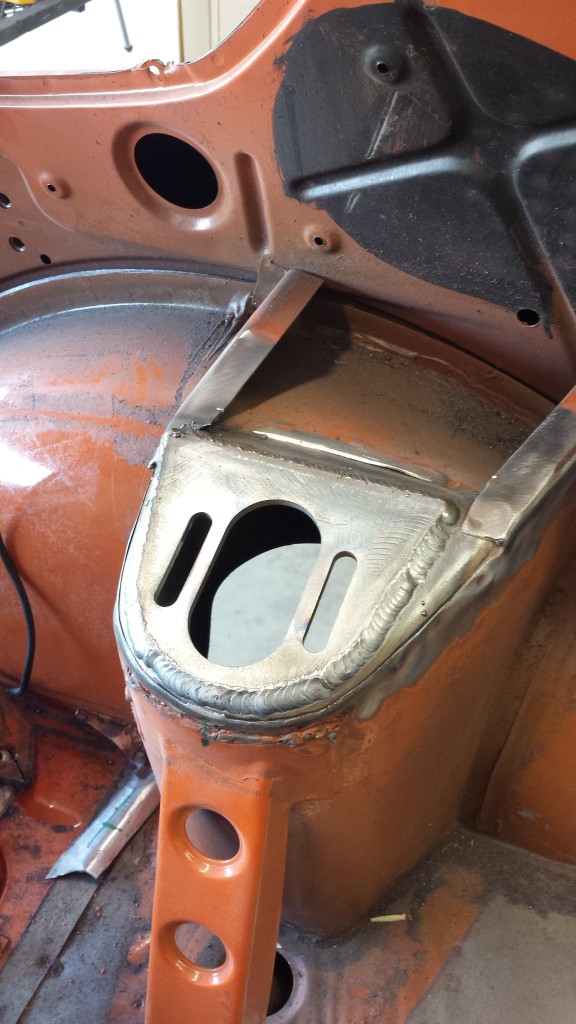
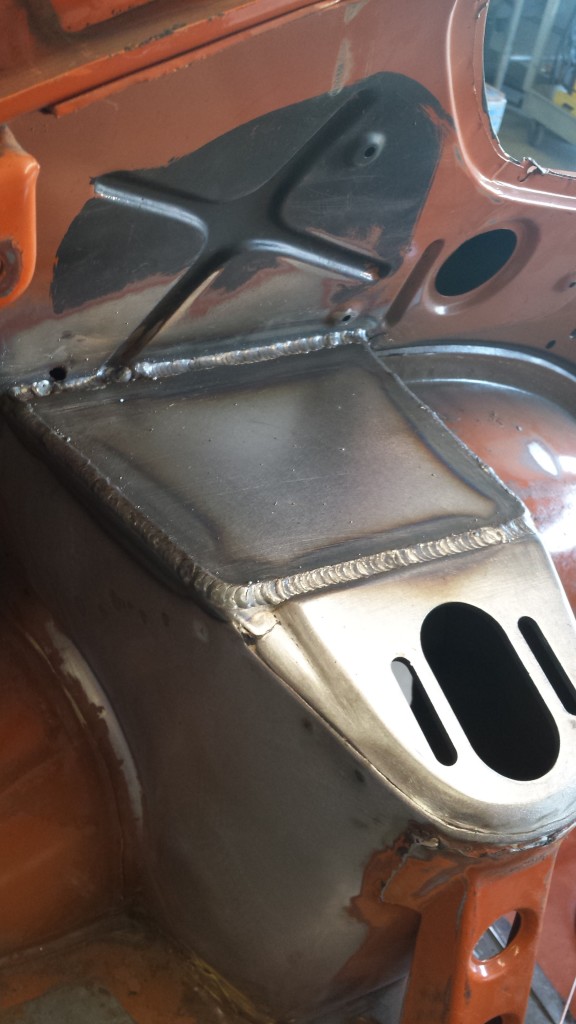
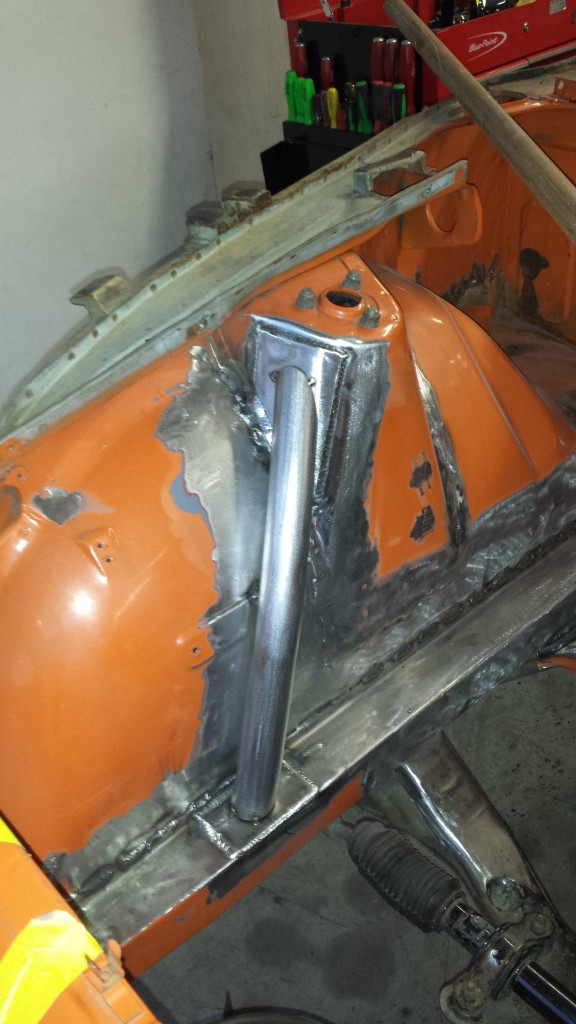
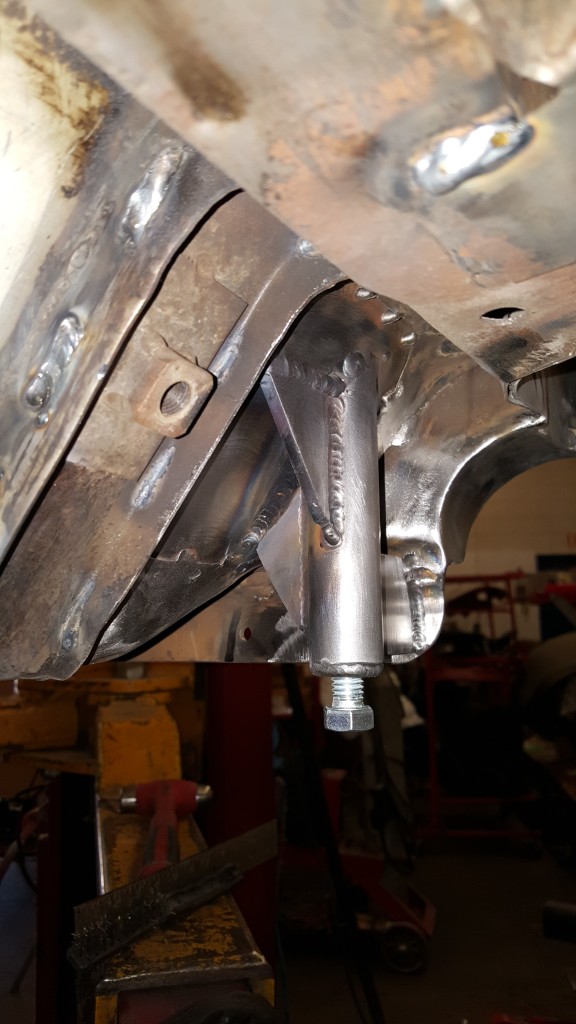
- Finish welding the strut tower center support
-
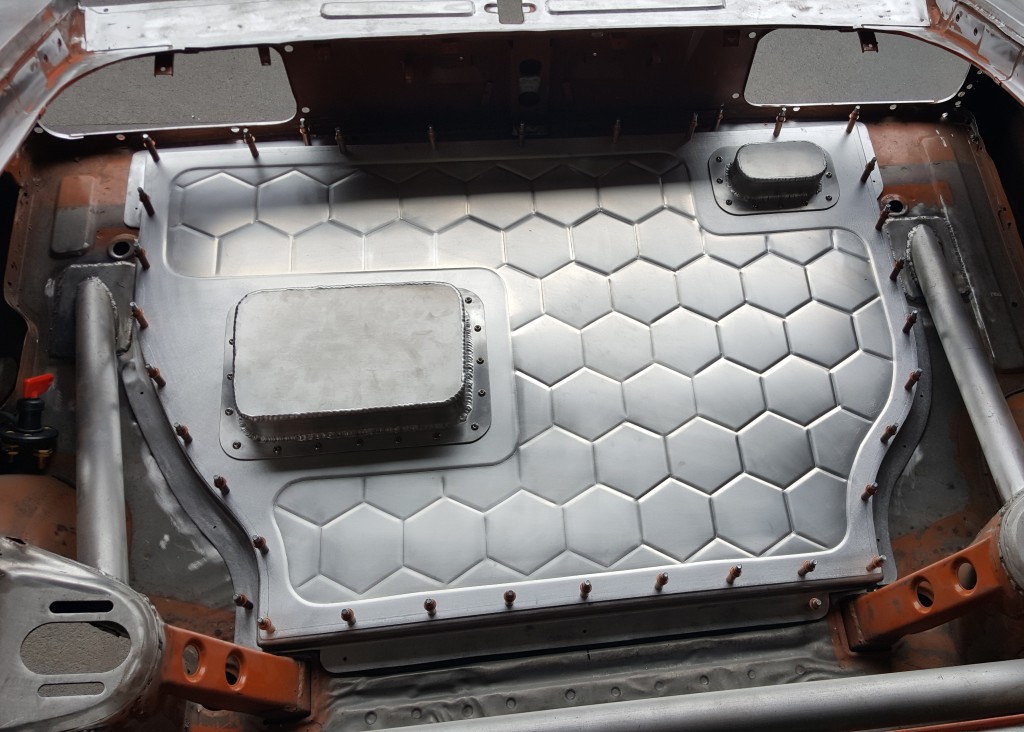
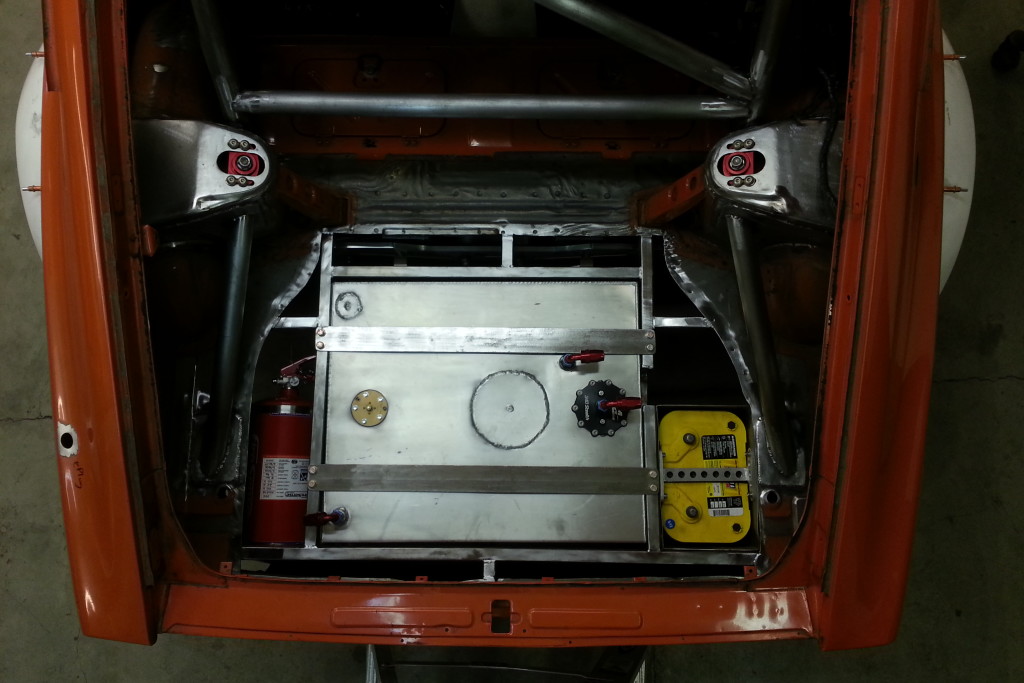
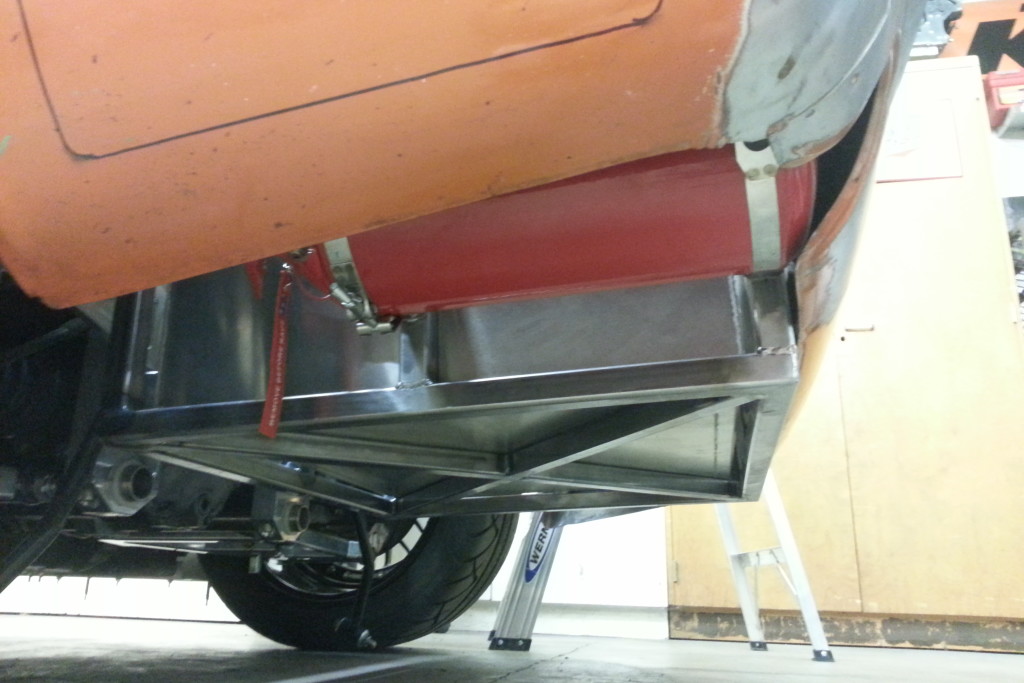
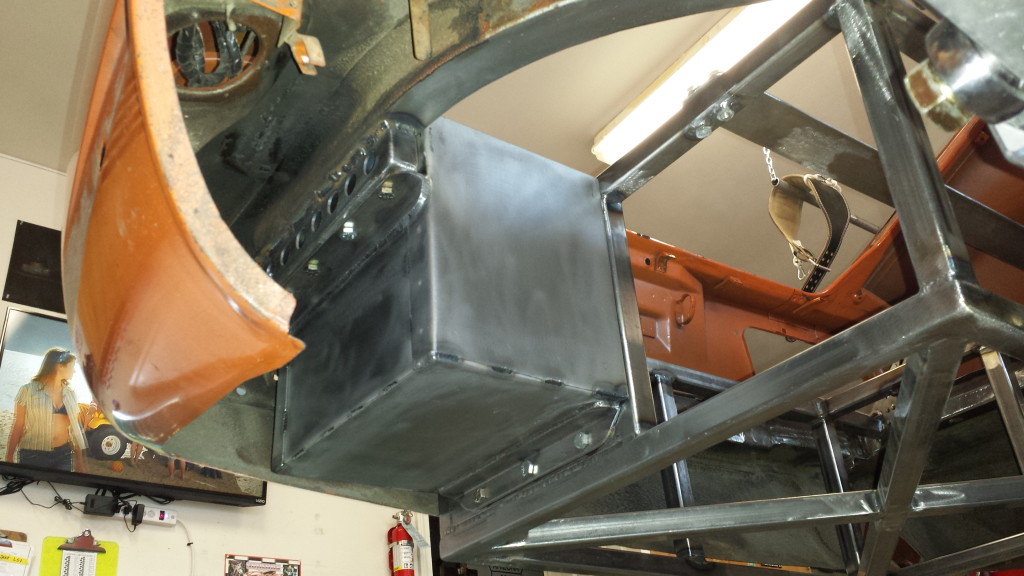
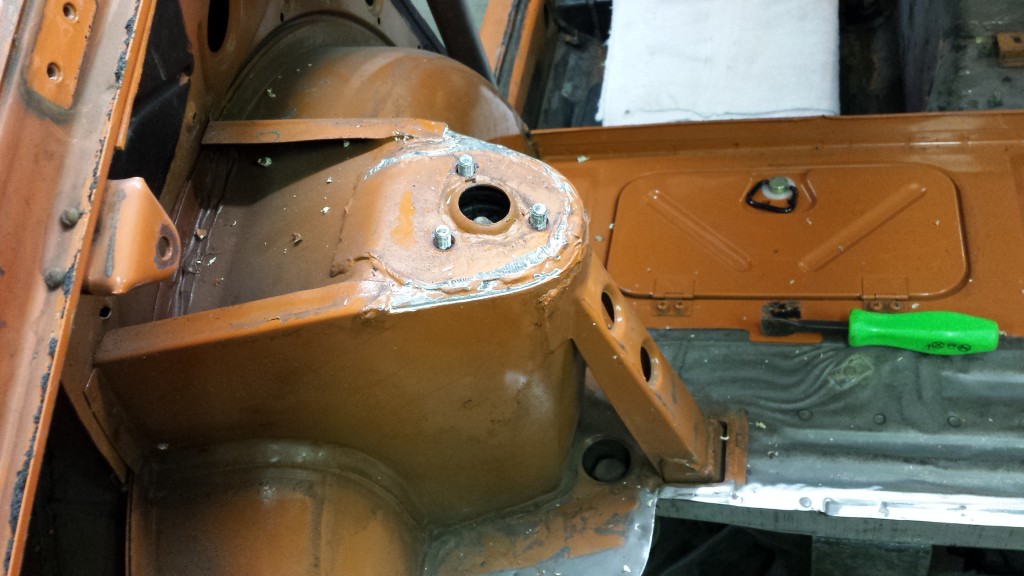
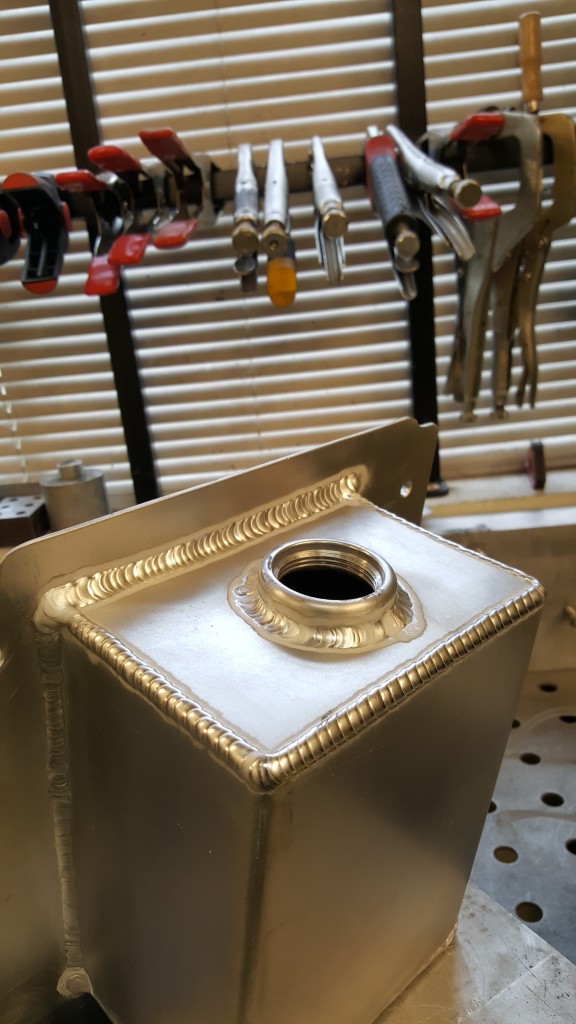
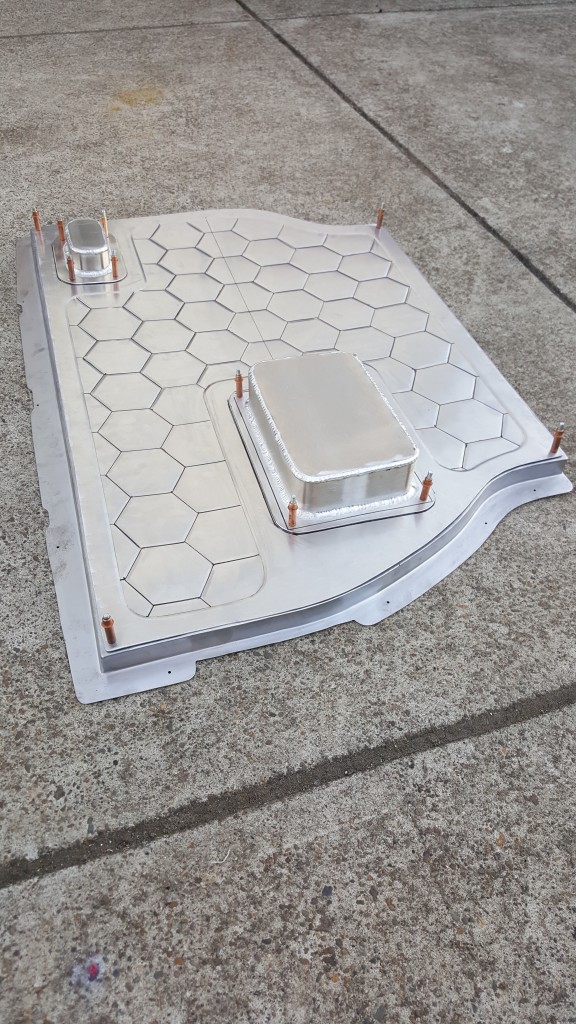
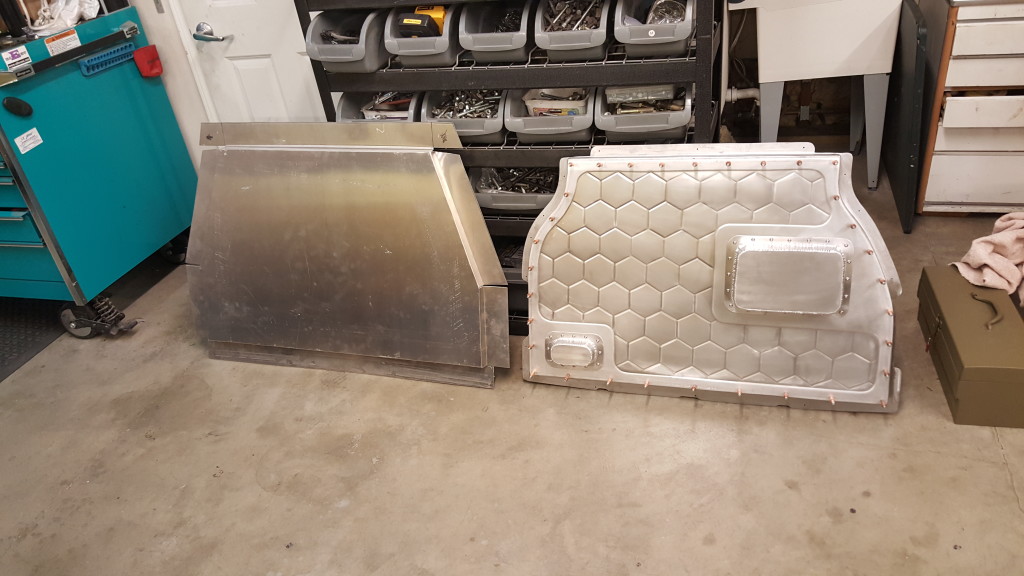
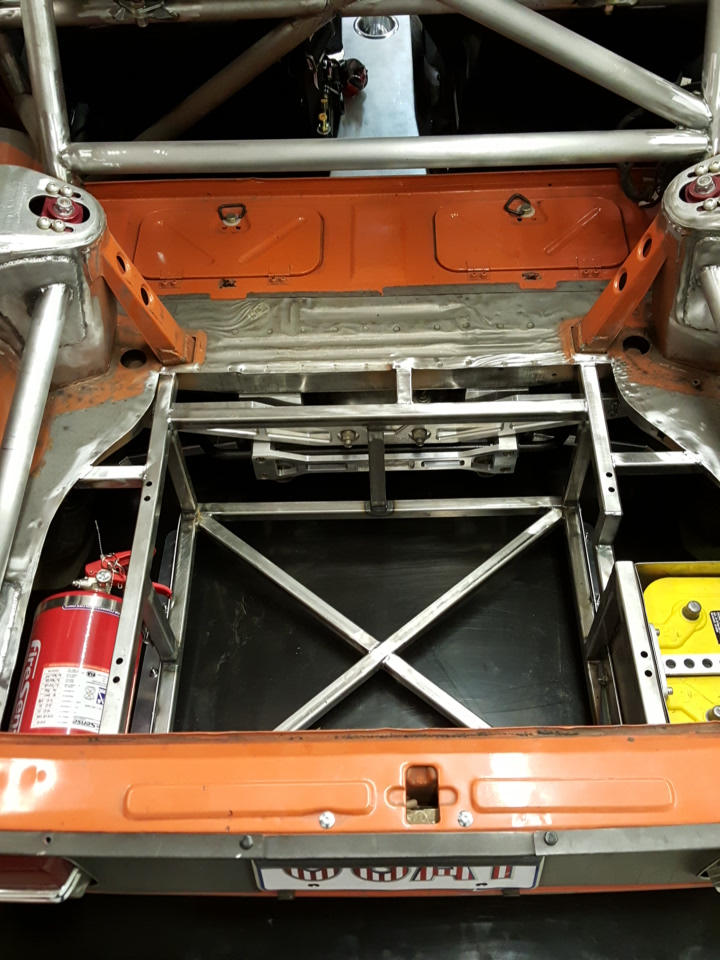
- A rear fuel cell firewall with a twist
-
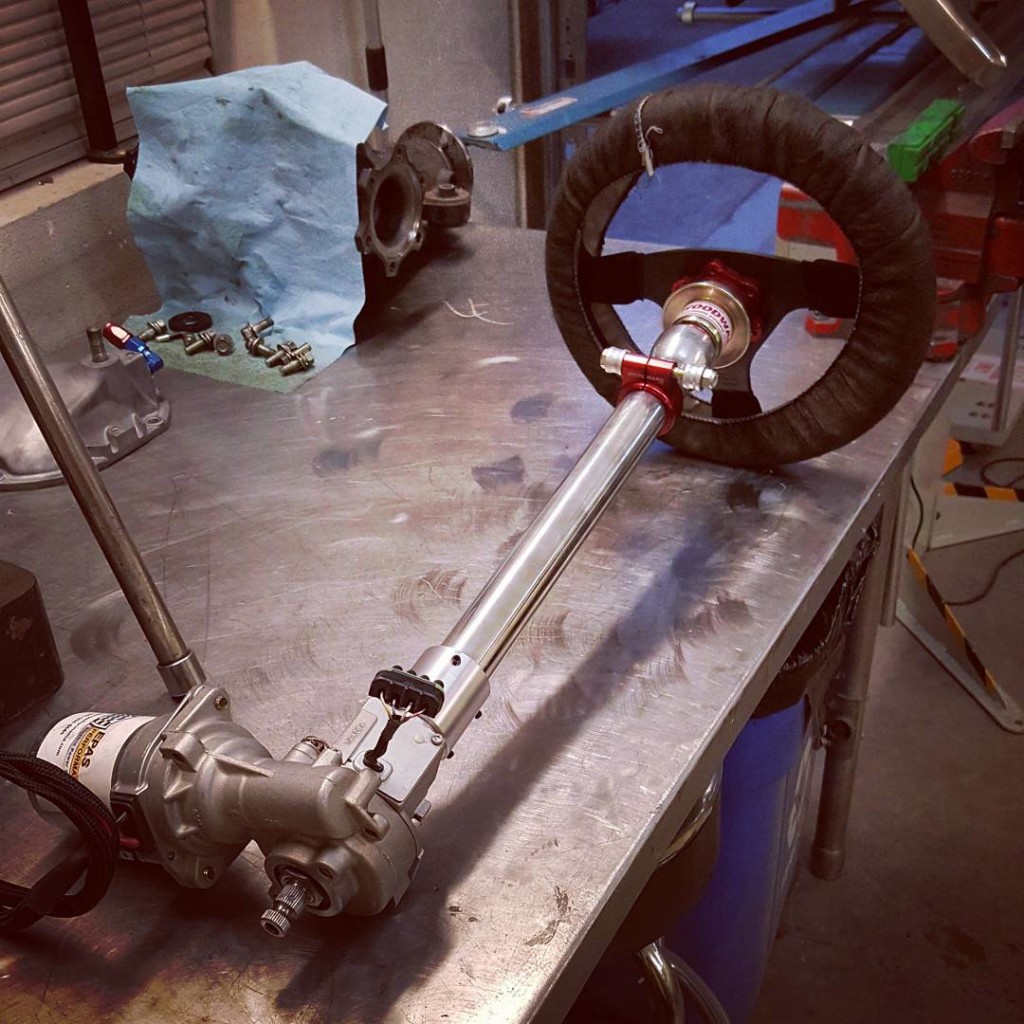
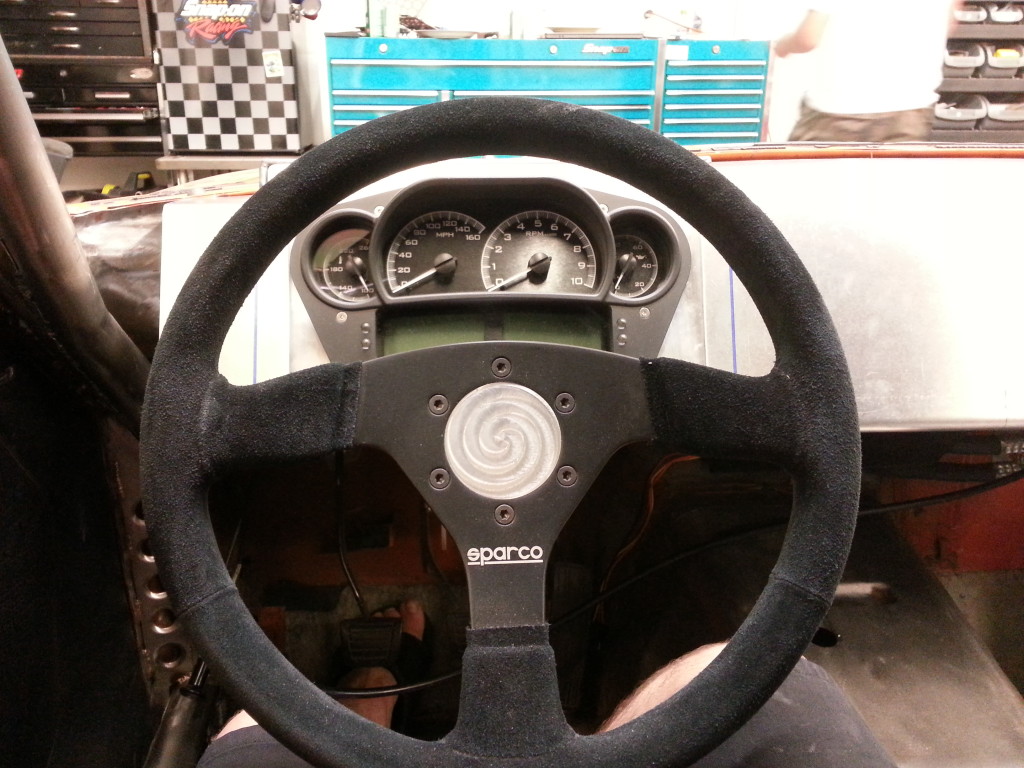
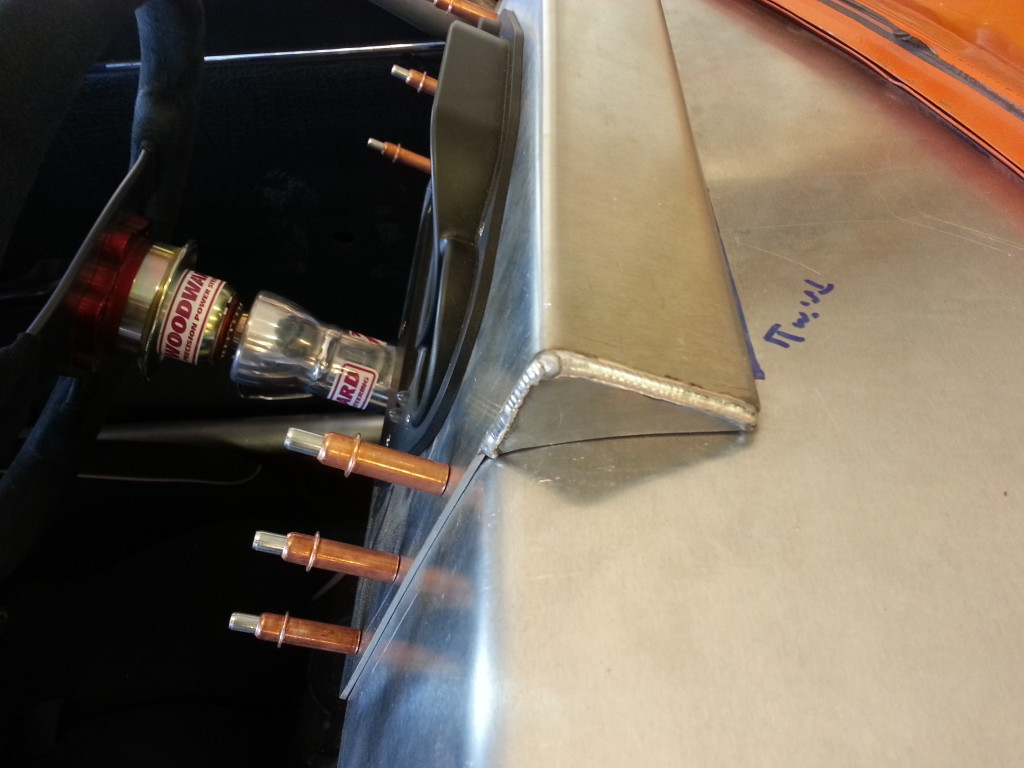
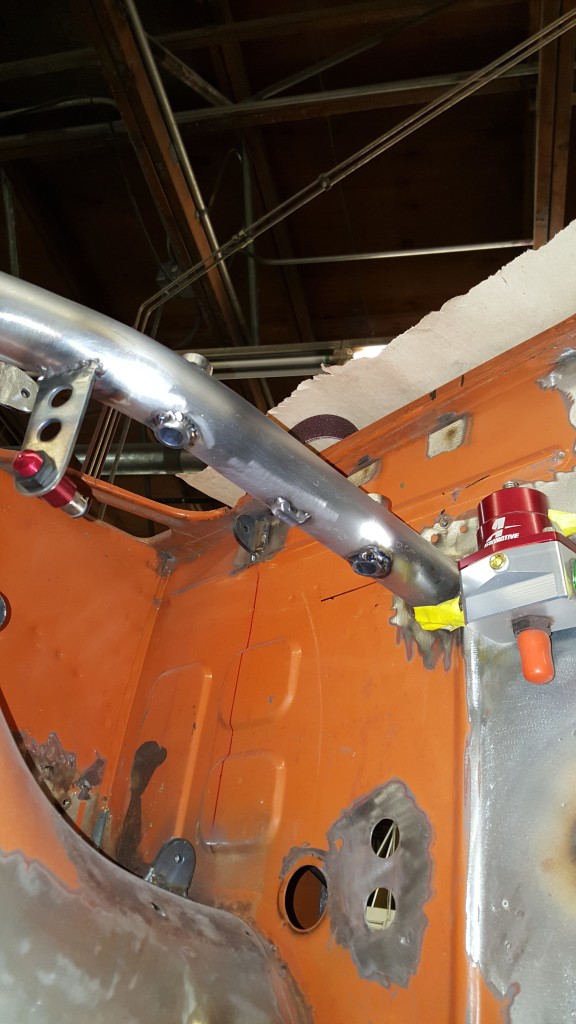
- Presto, electric power steering on a Woodward column. All hidden under the dash.
-
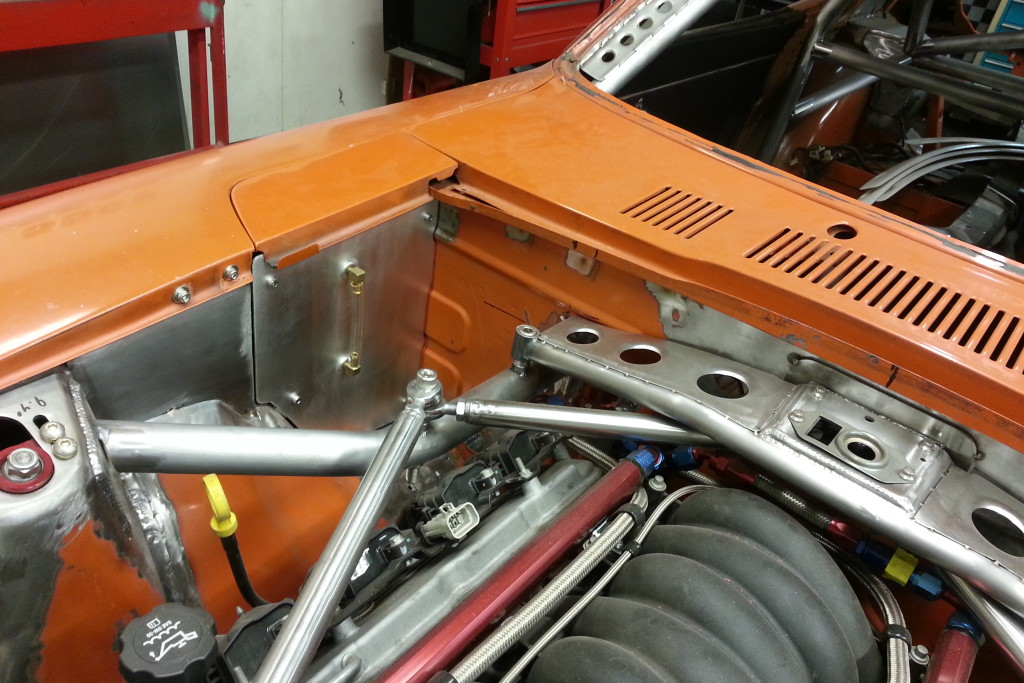
- layers upon layers of custom fabrication and planning
-
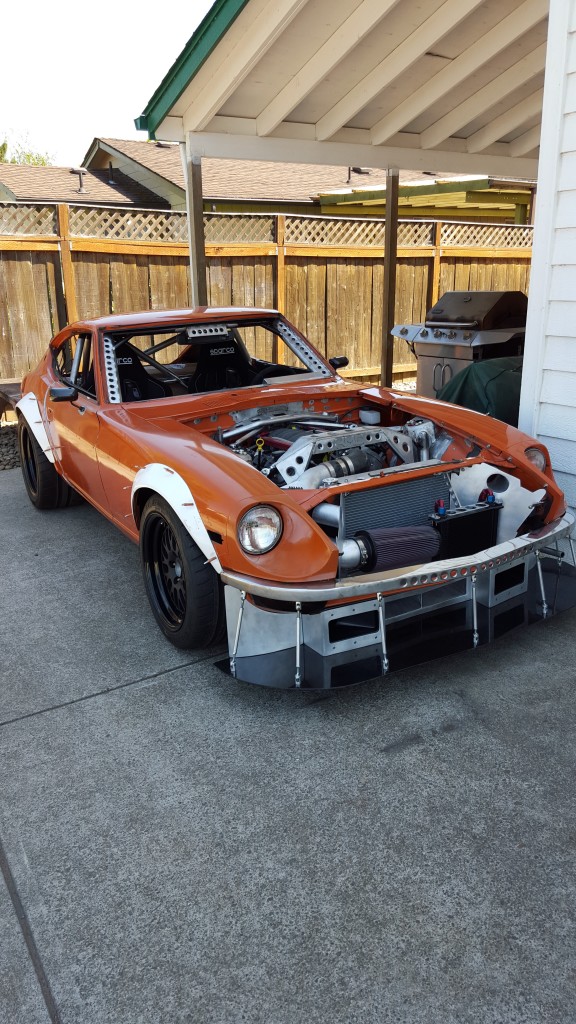
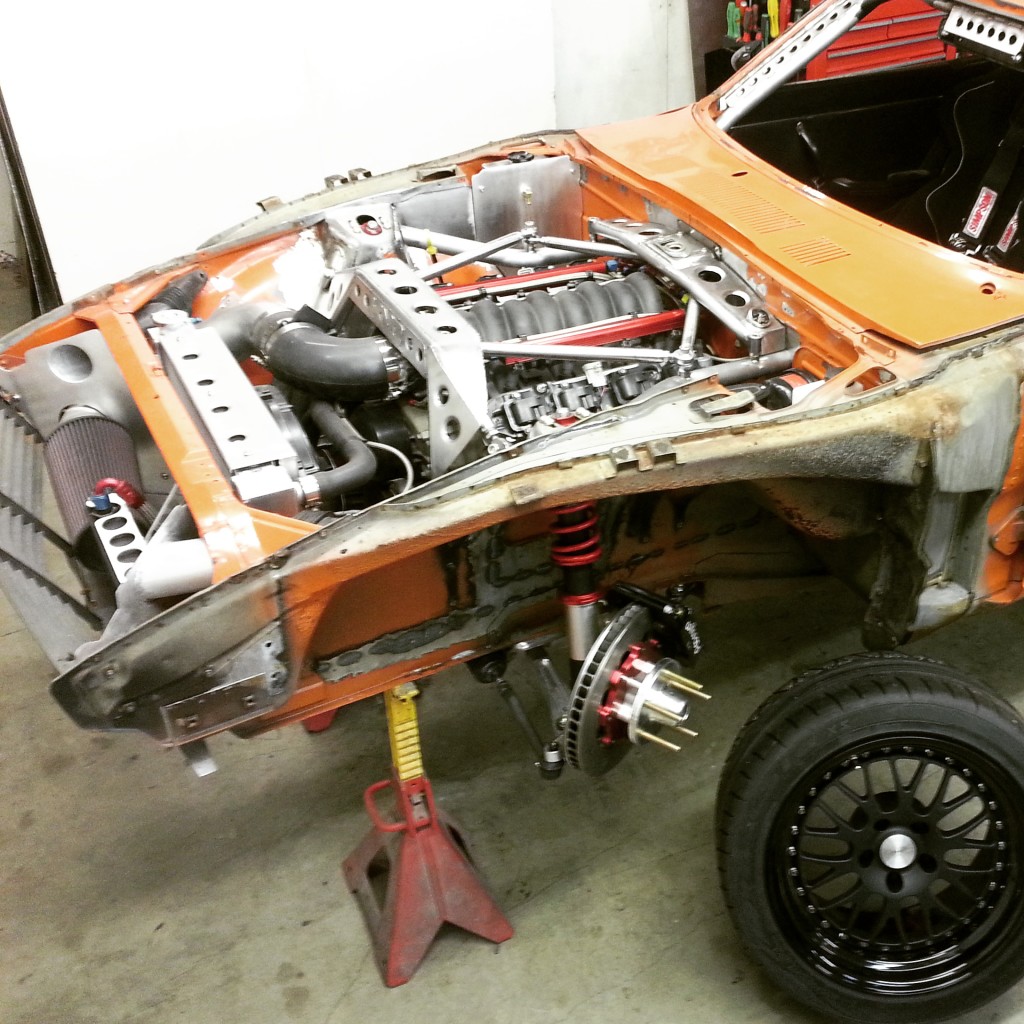
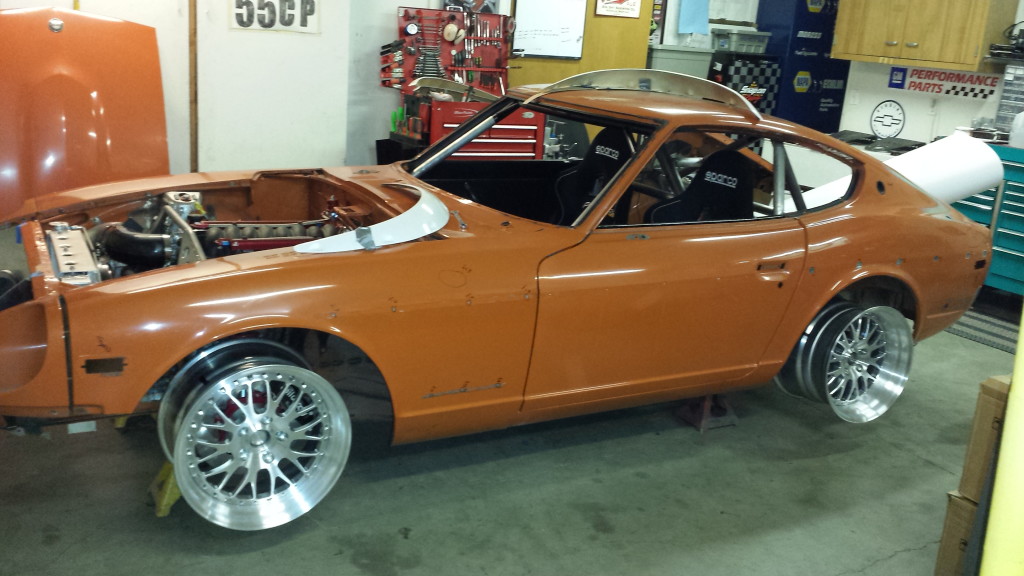
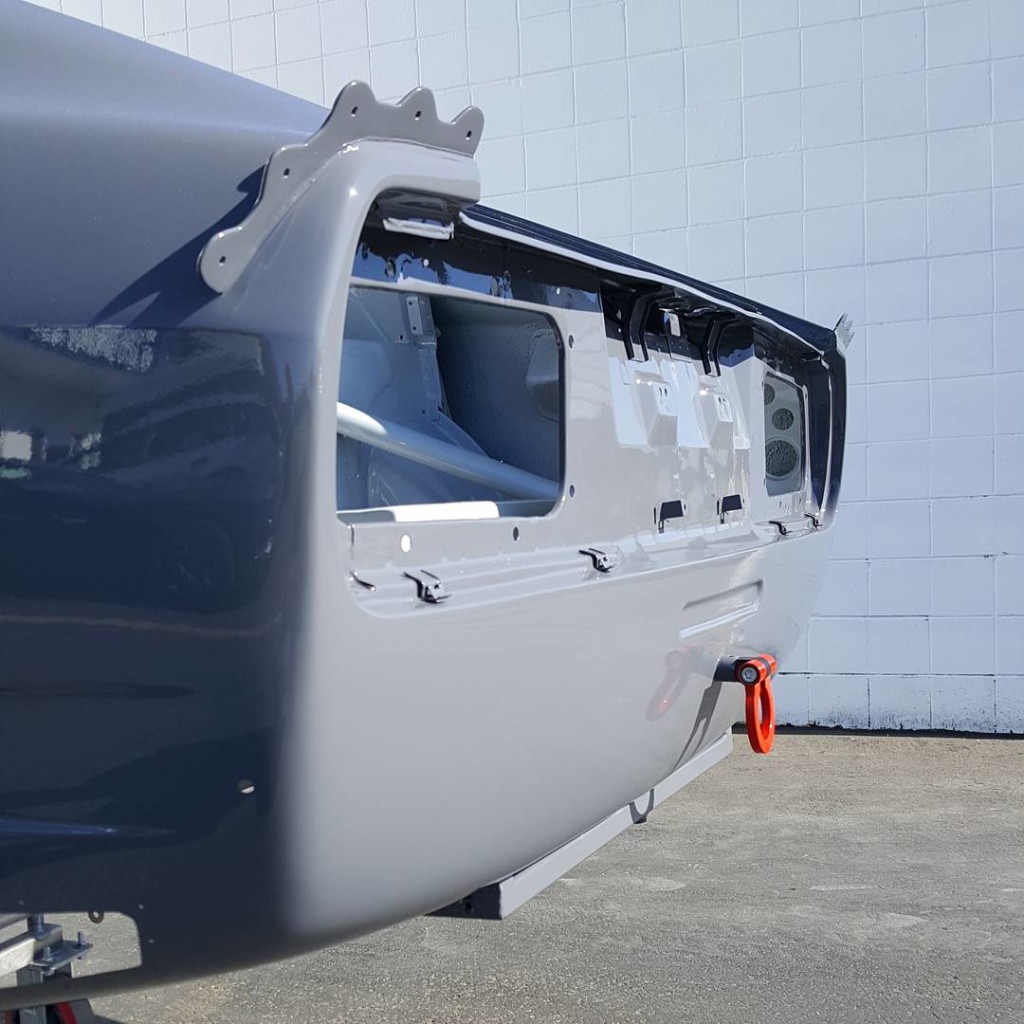
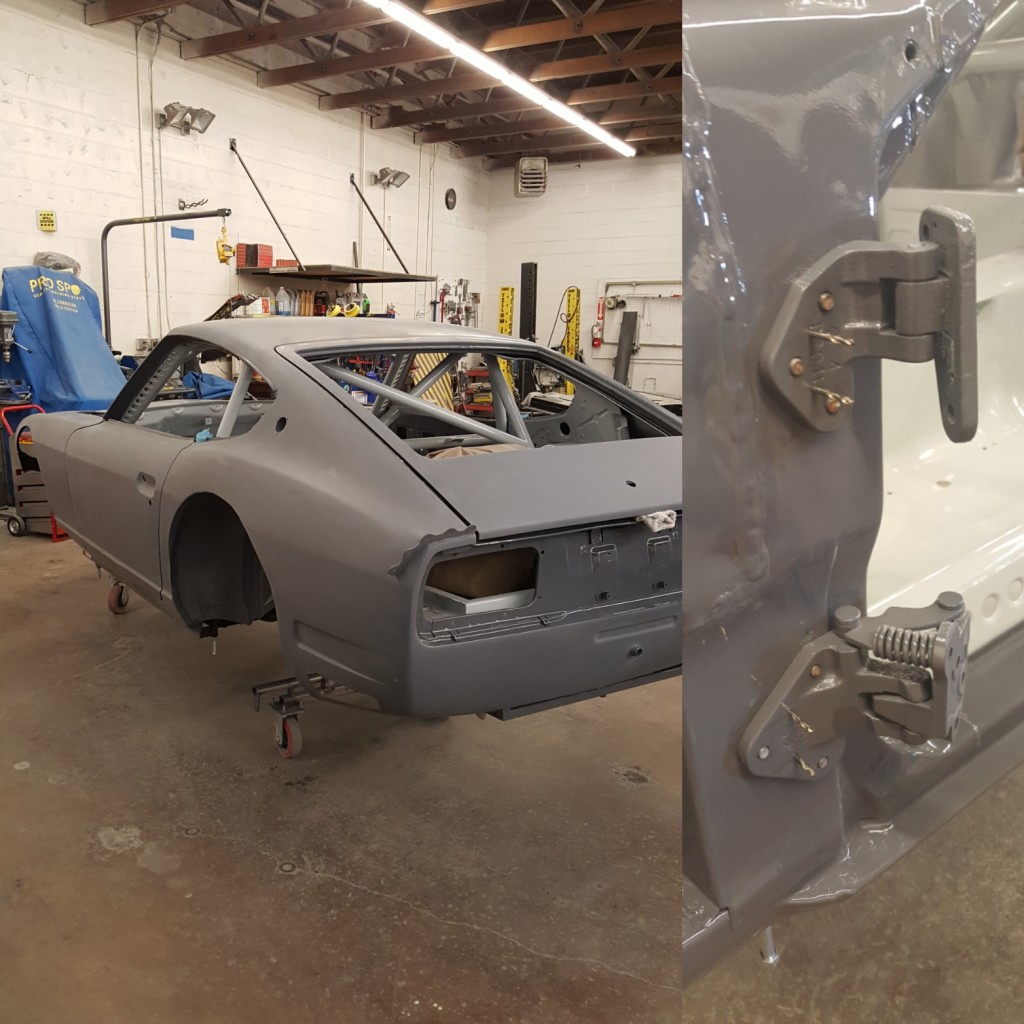
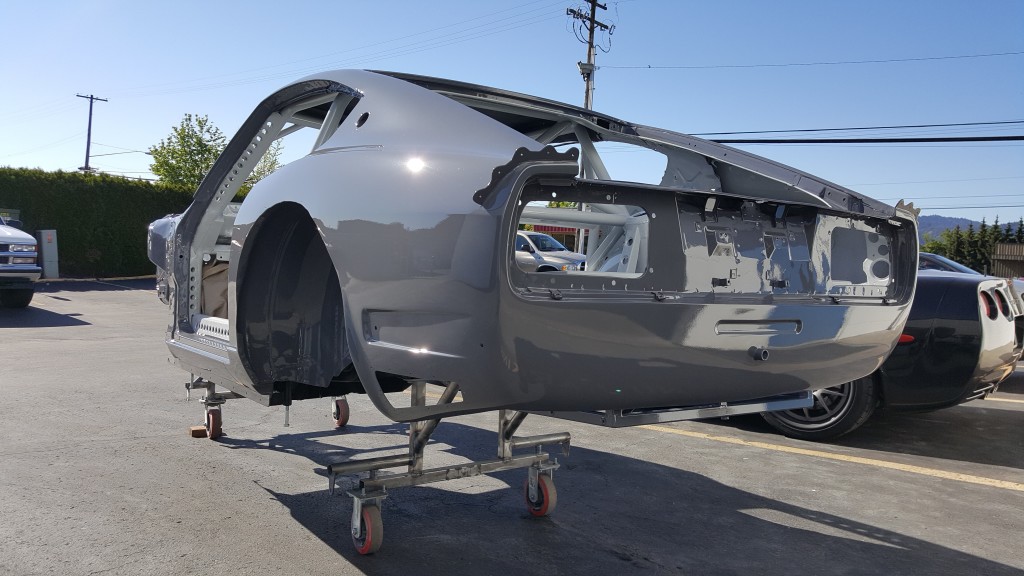
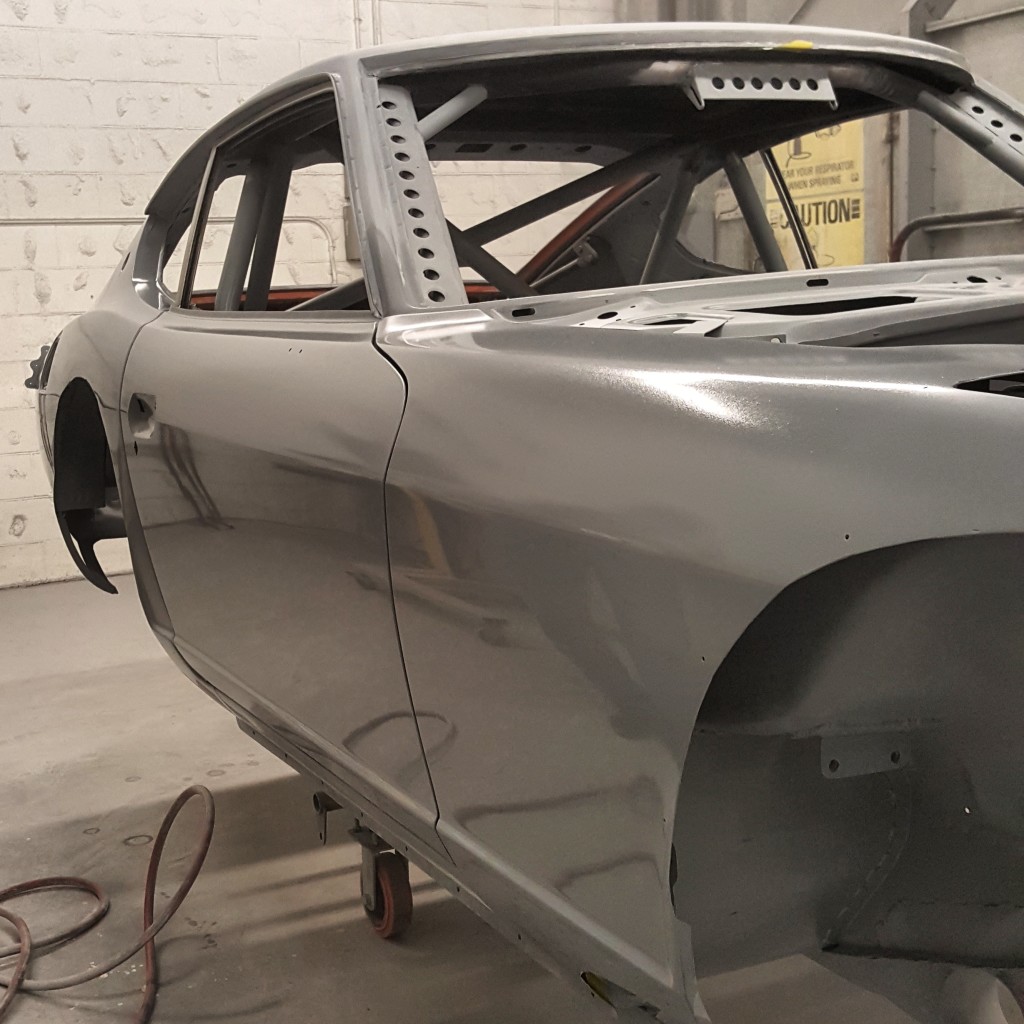
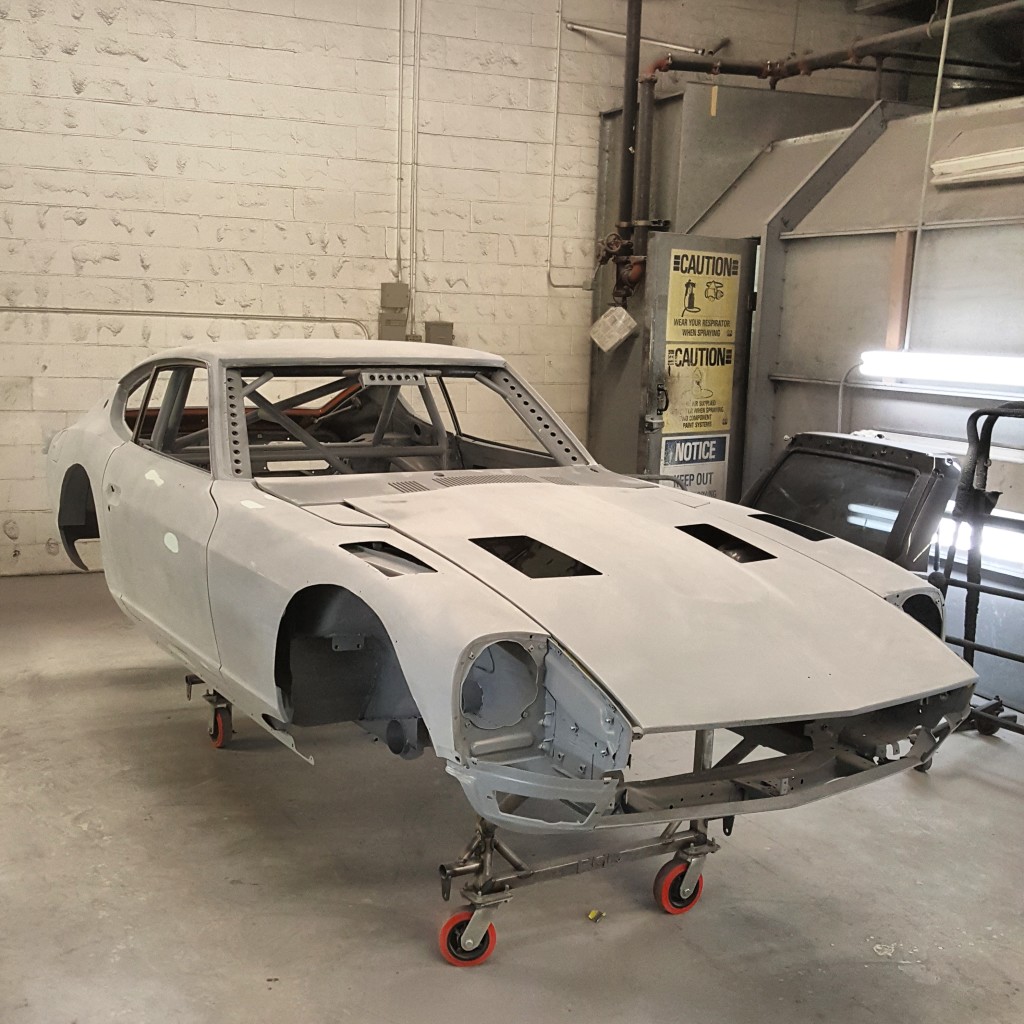
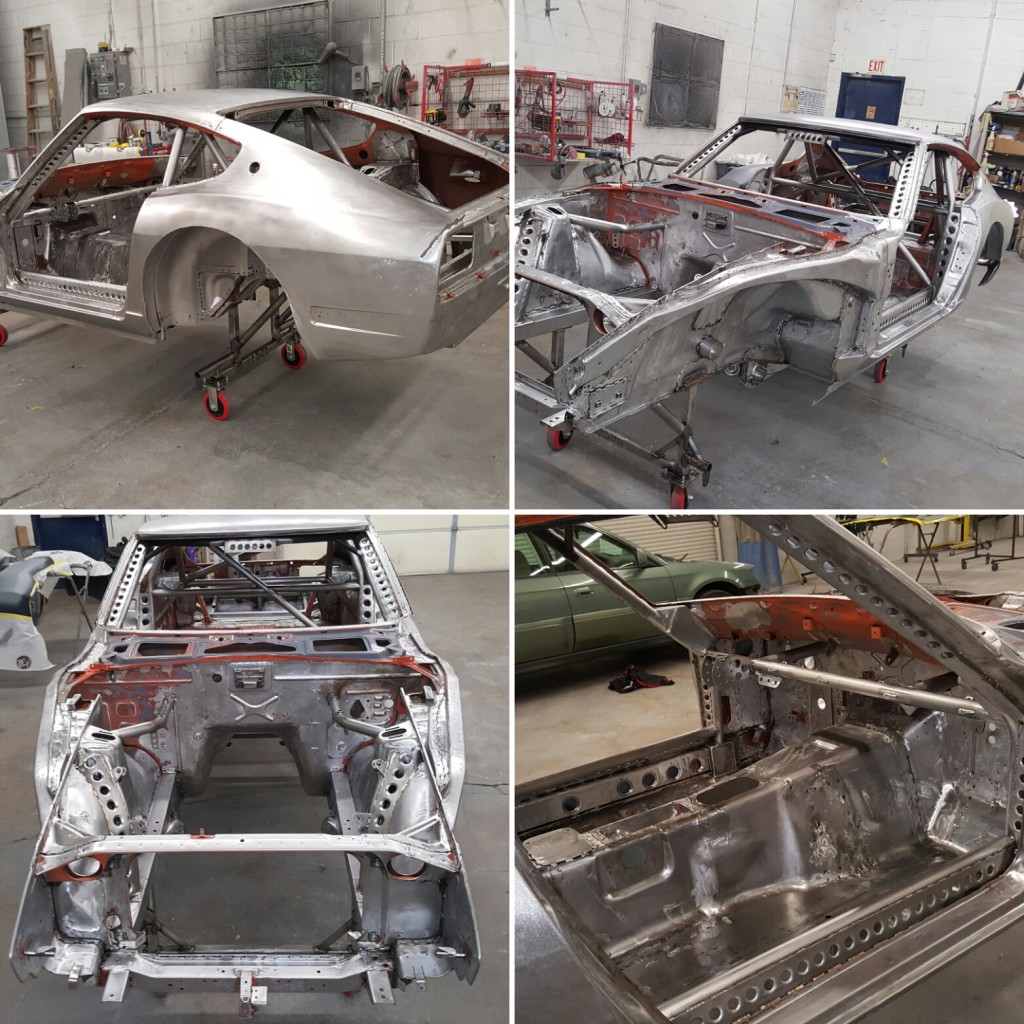
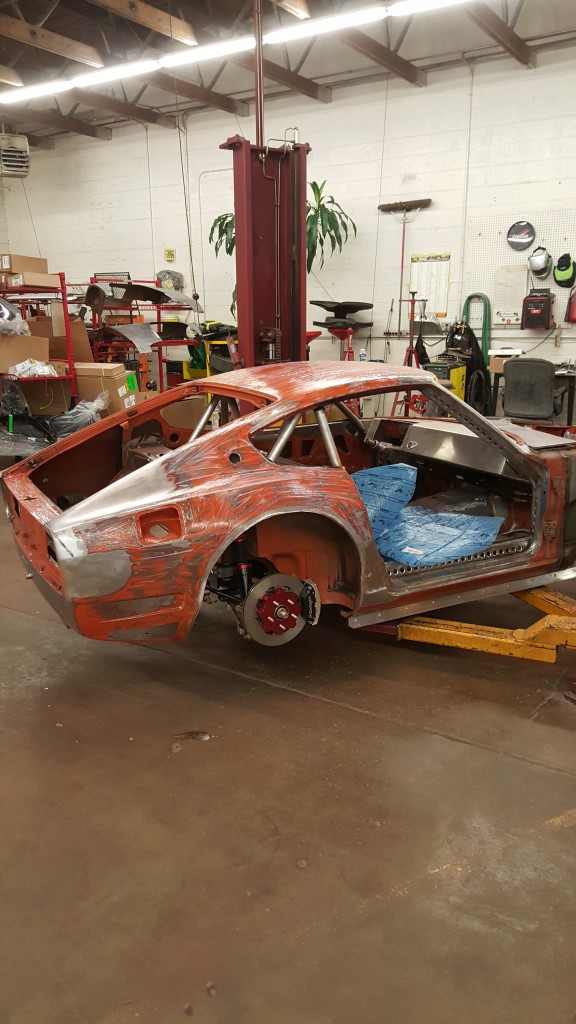
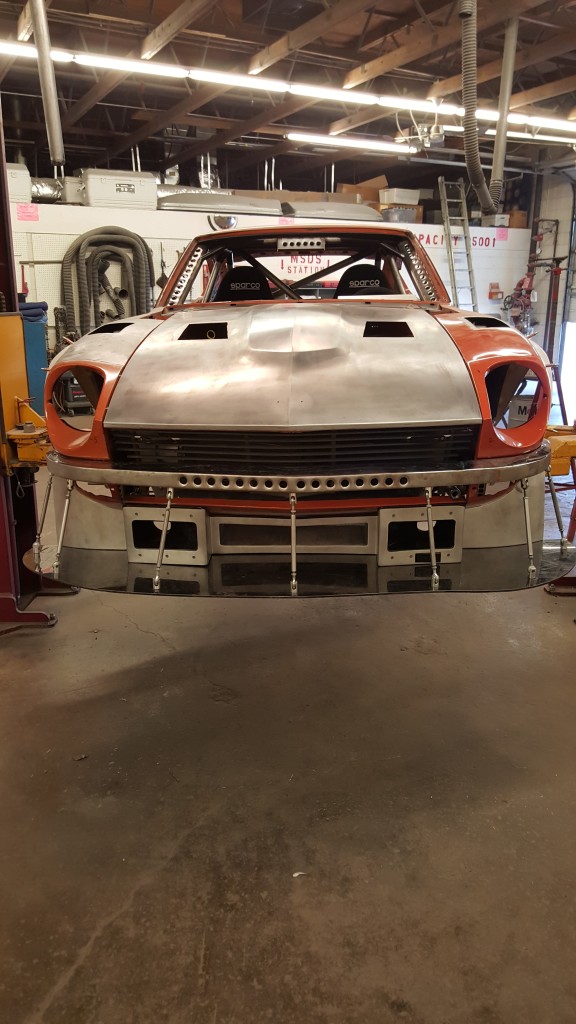
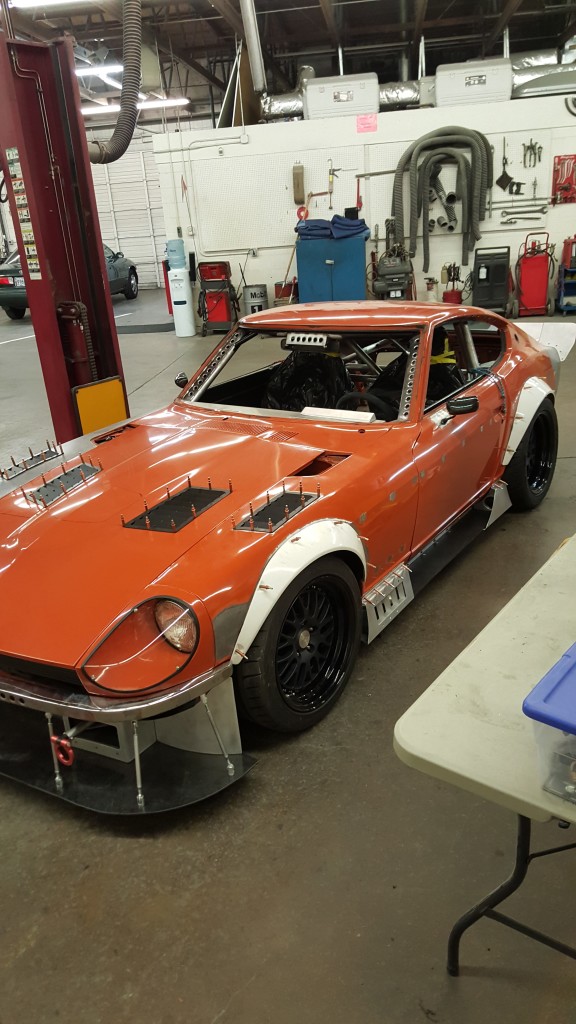
- Unreal to see the exterior of the Z at this stage
-
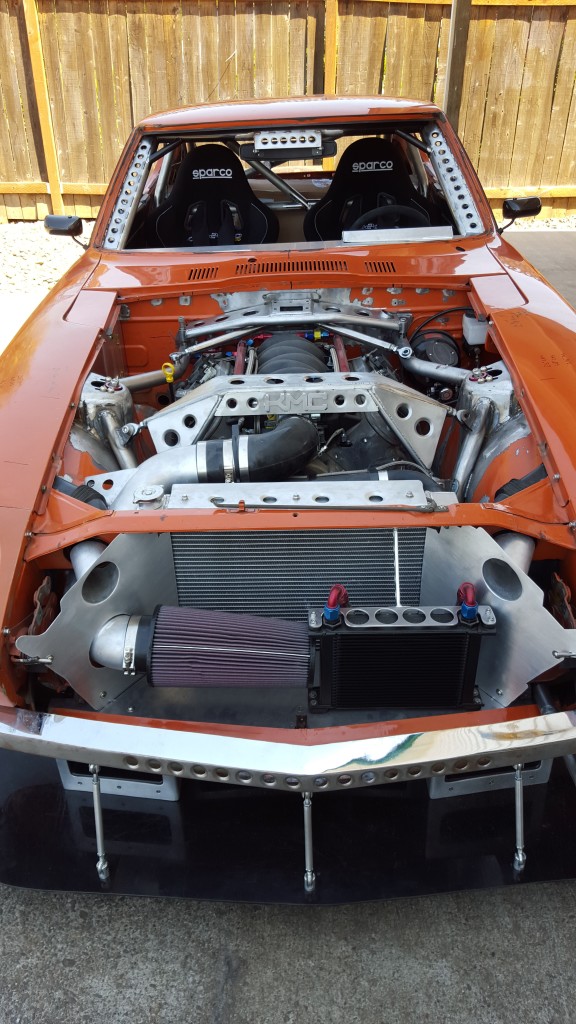
- High performance can also be beautiful
-

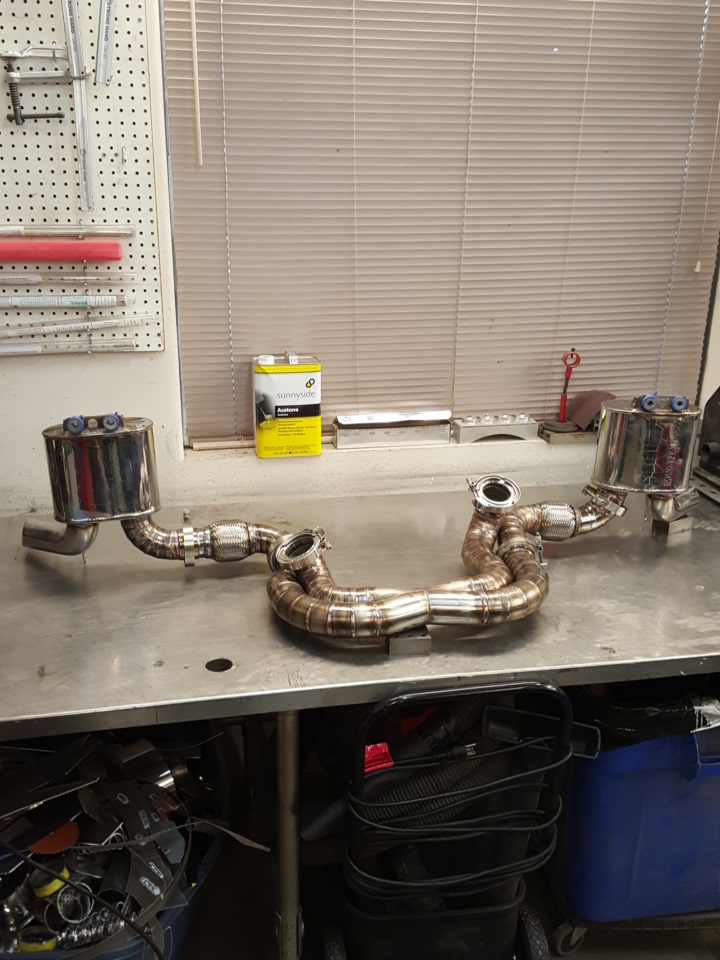
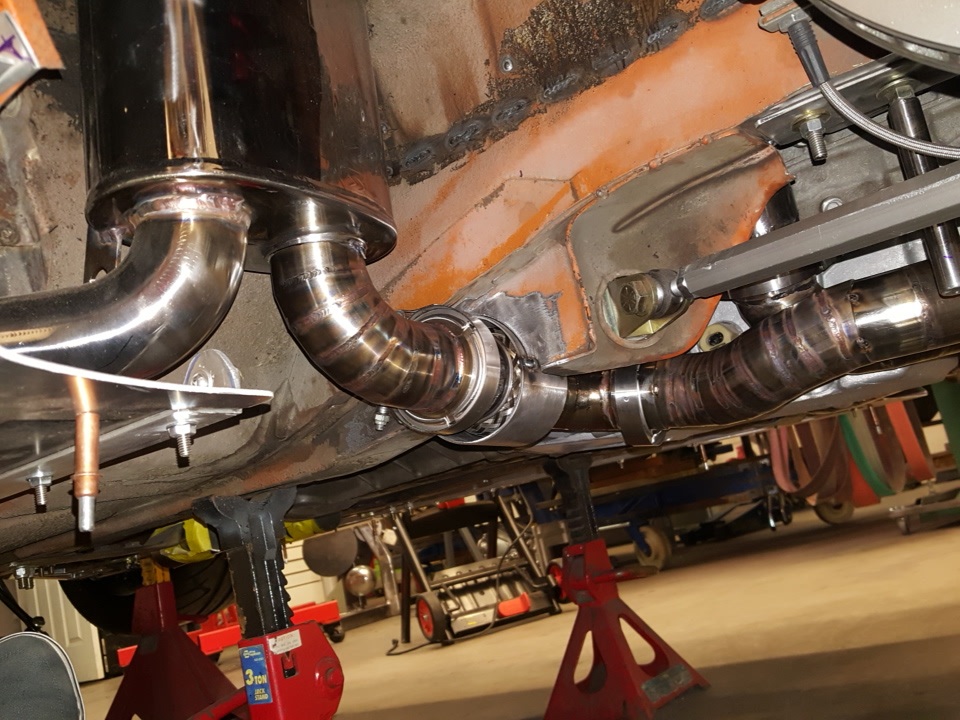
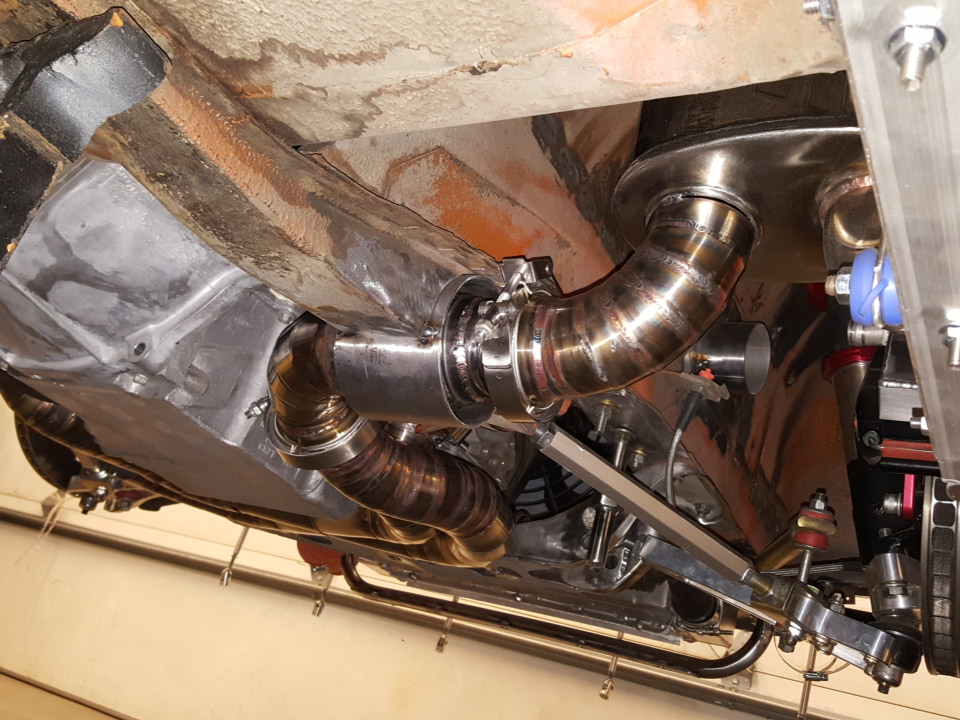
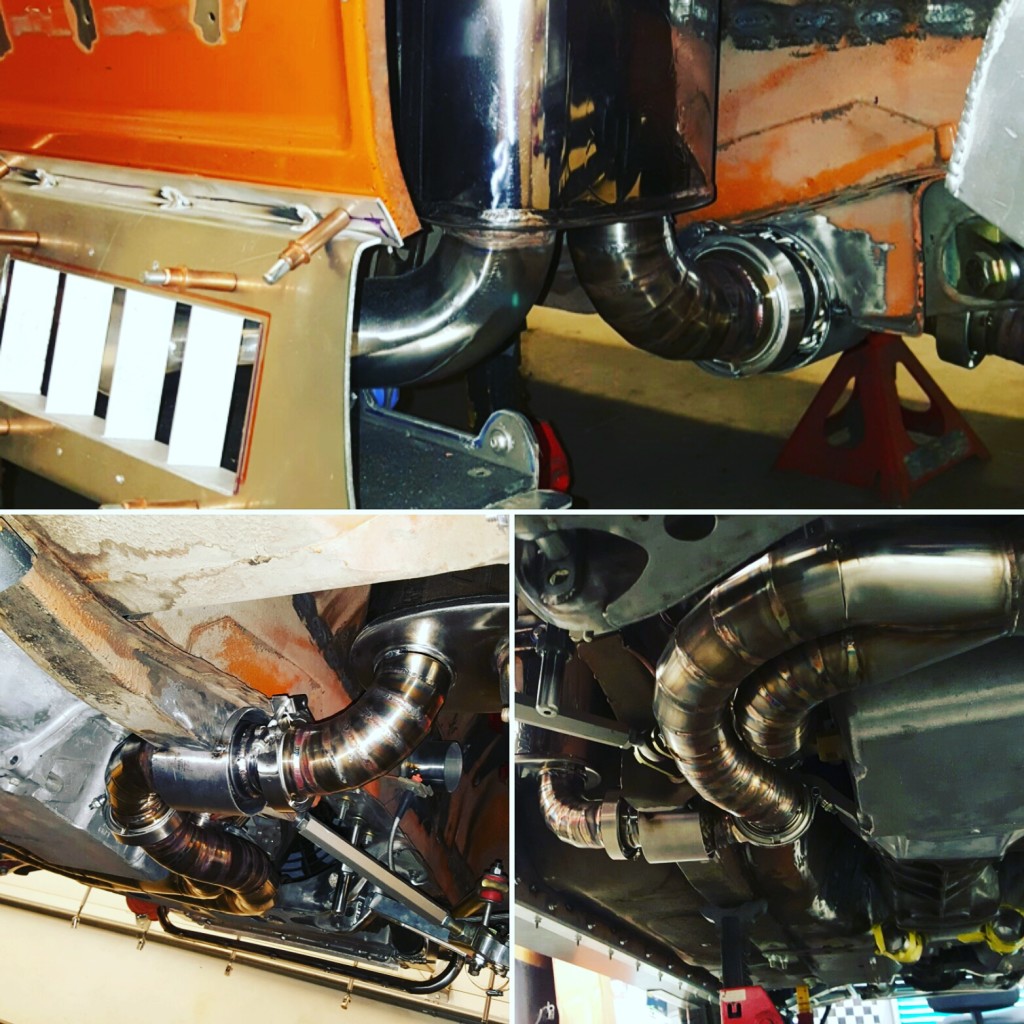
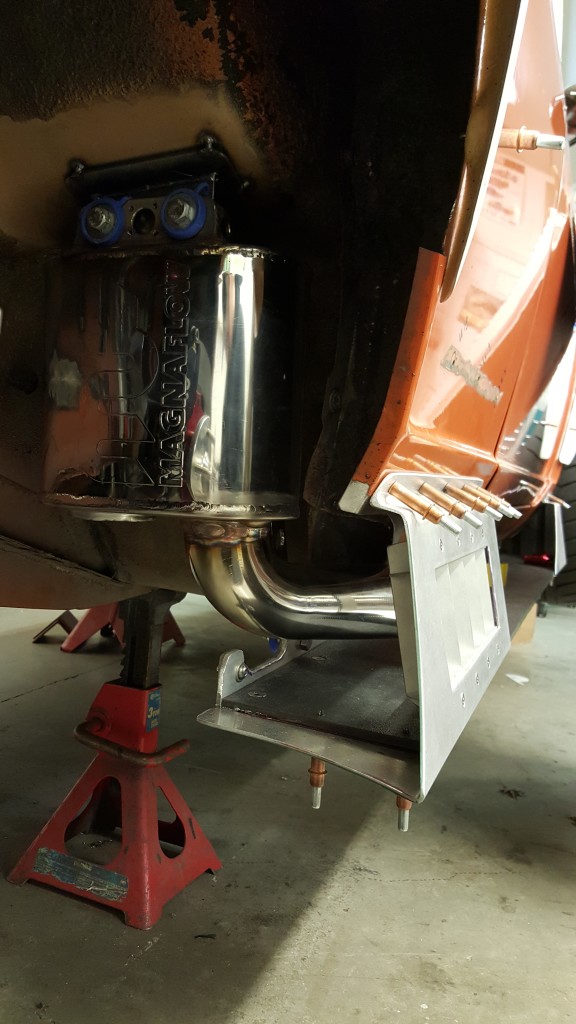
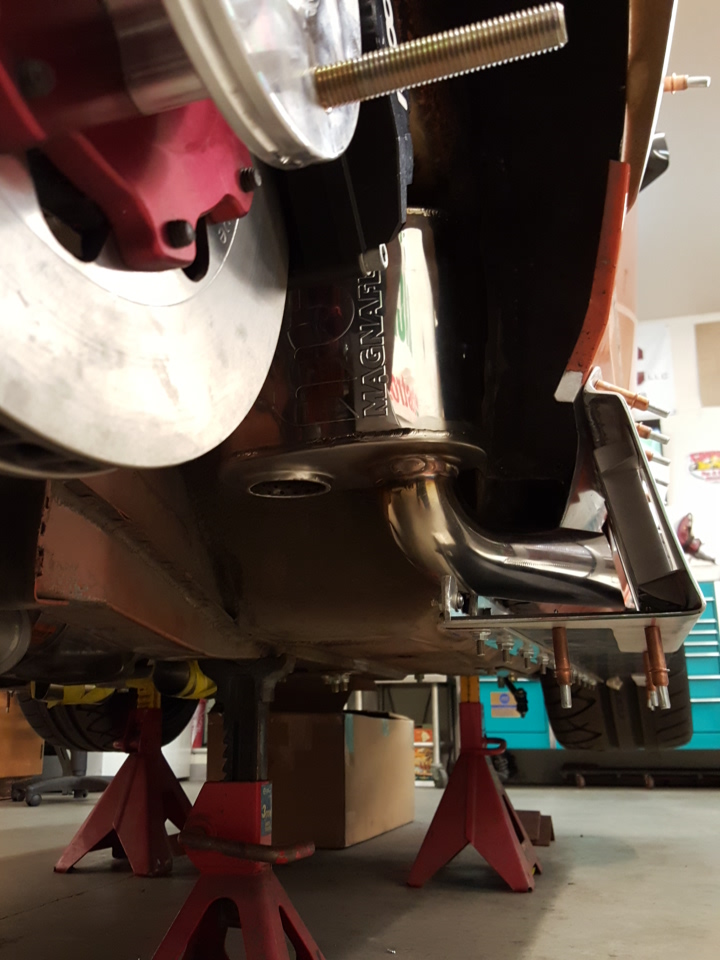
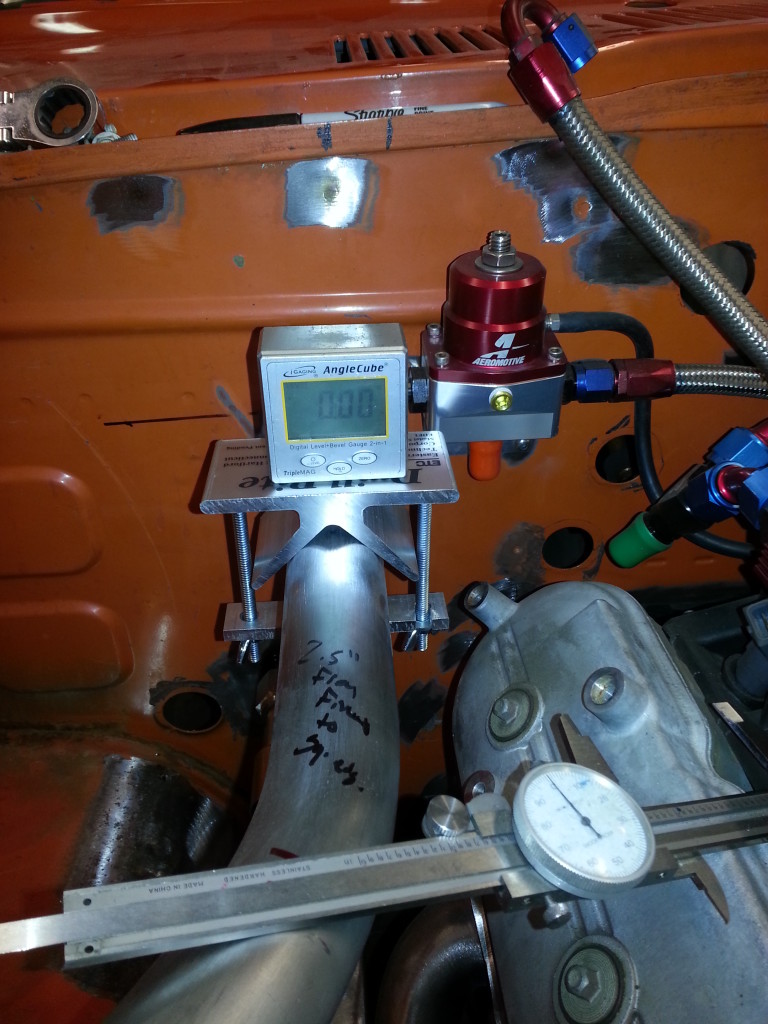
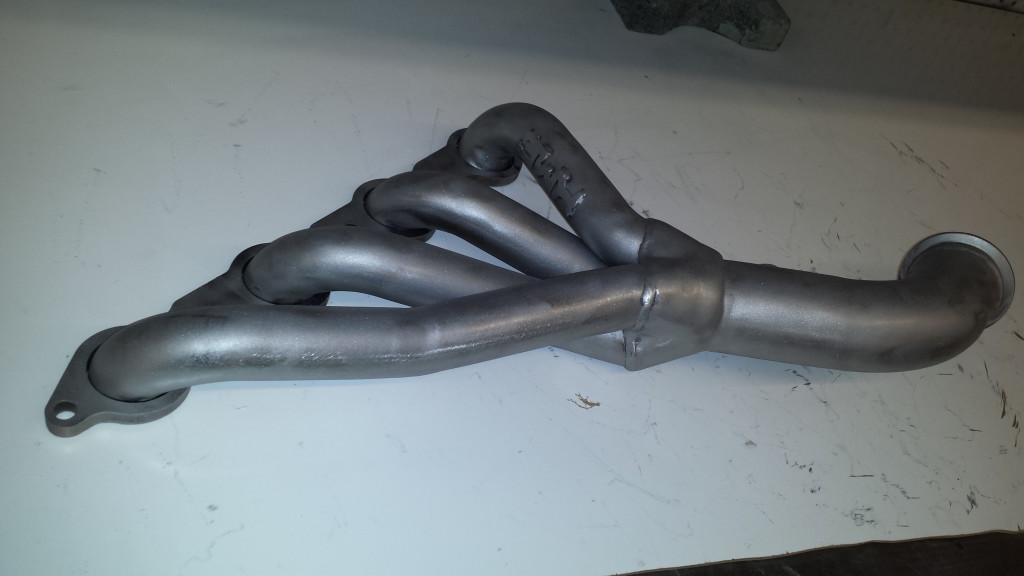
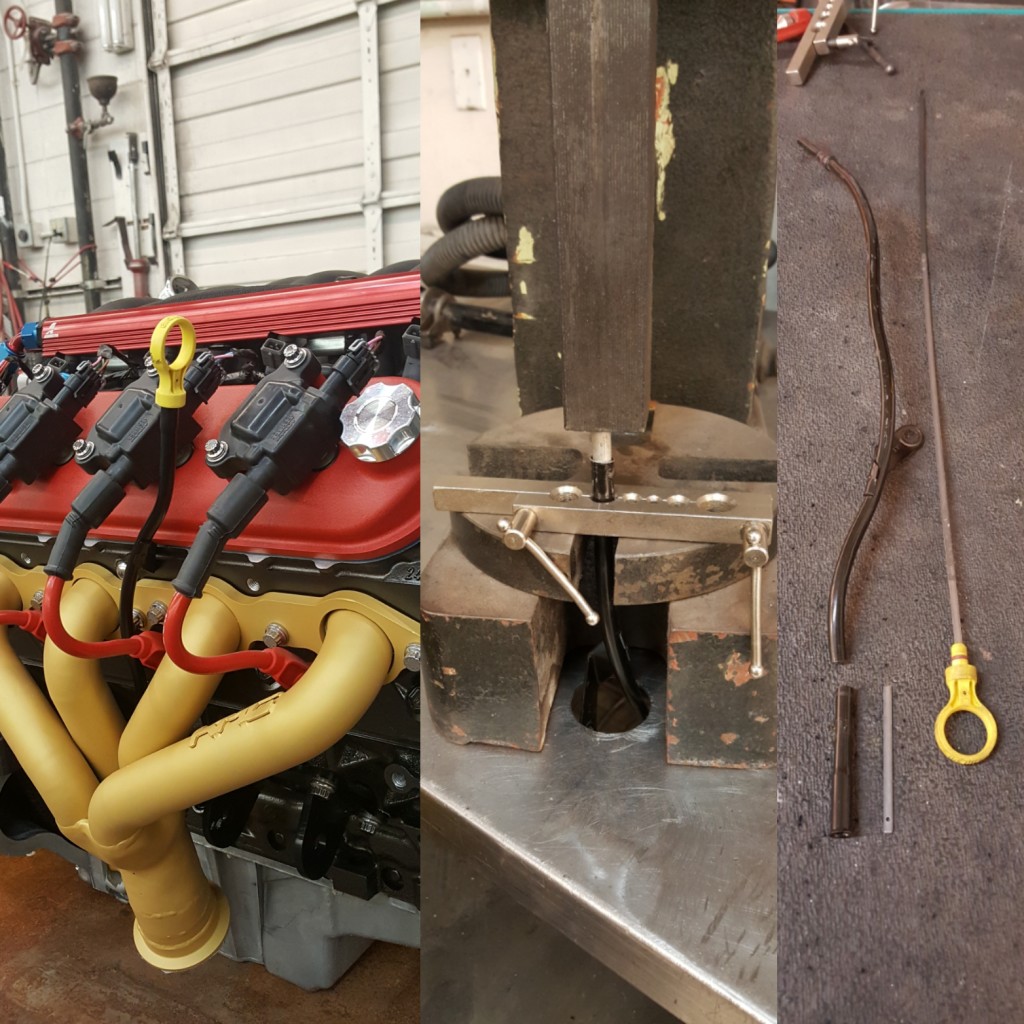
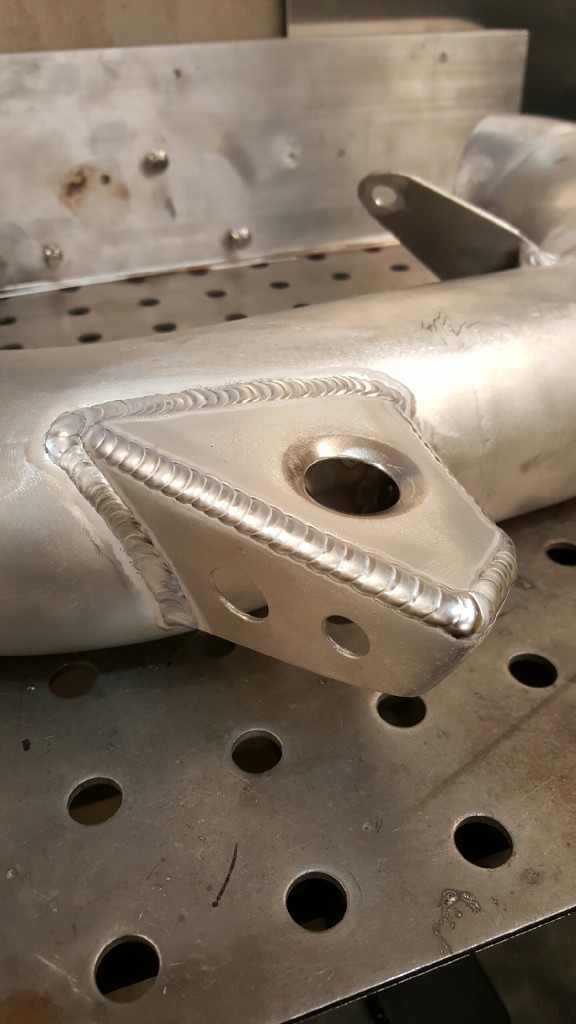
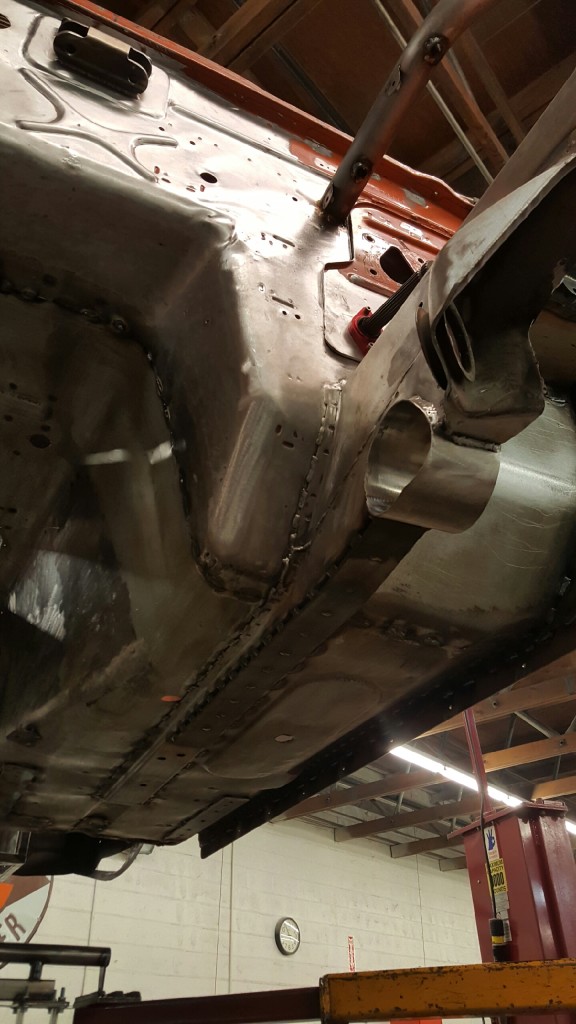
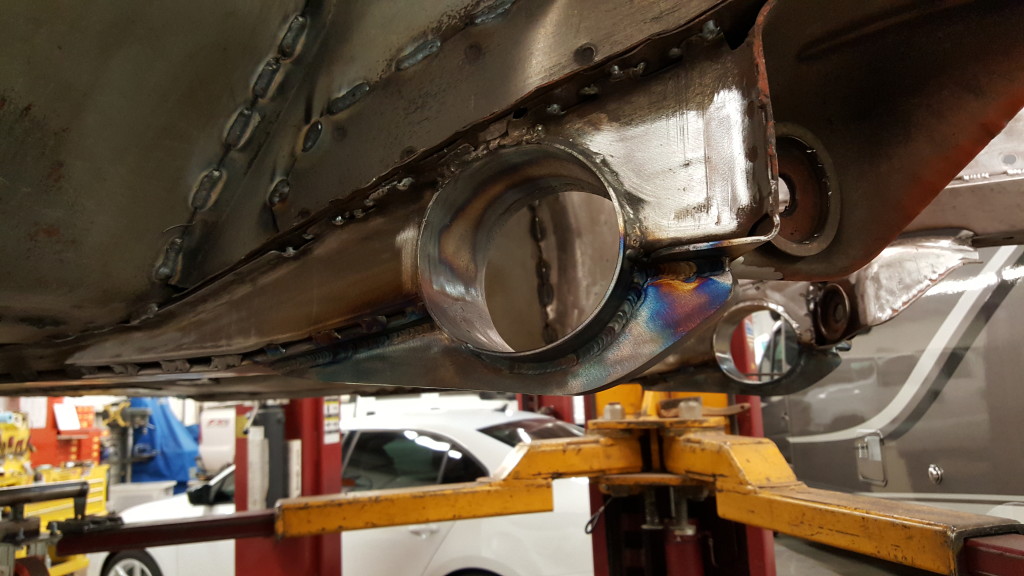
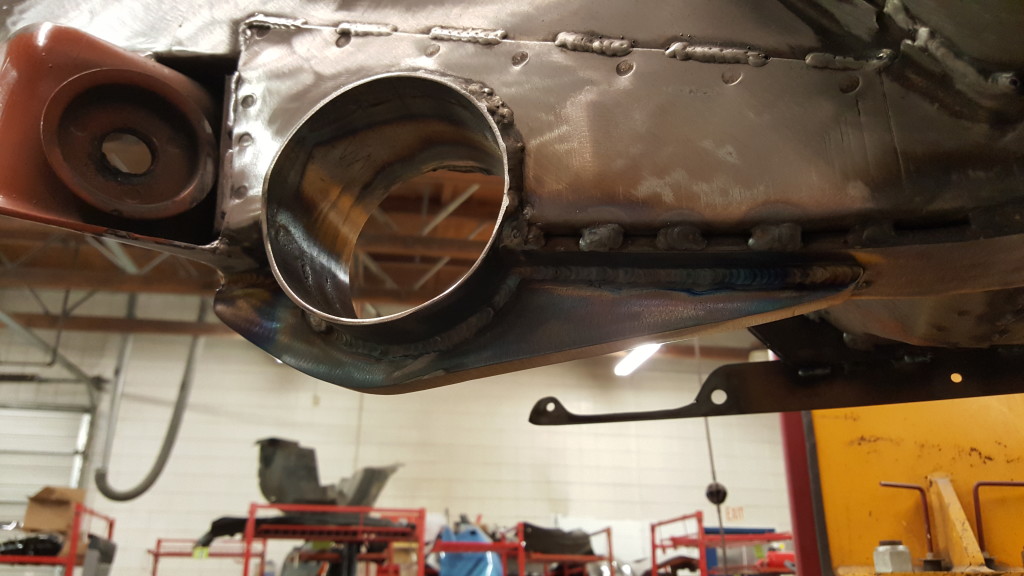
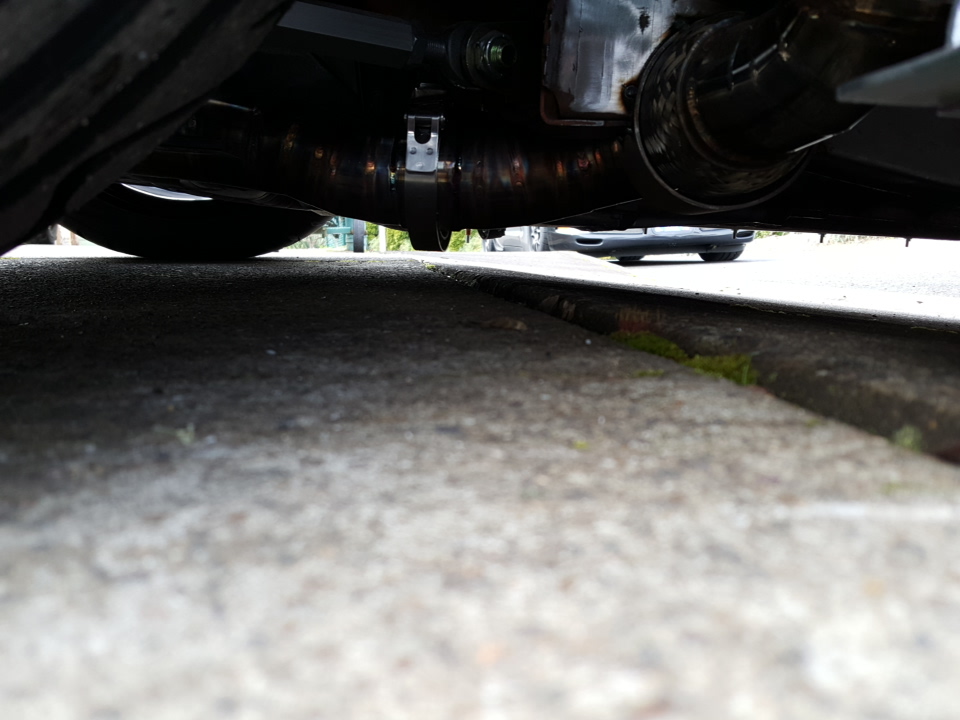
- 2.5″ Pie-cut stainless exhaust, back purged and tig welded to perfection
-
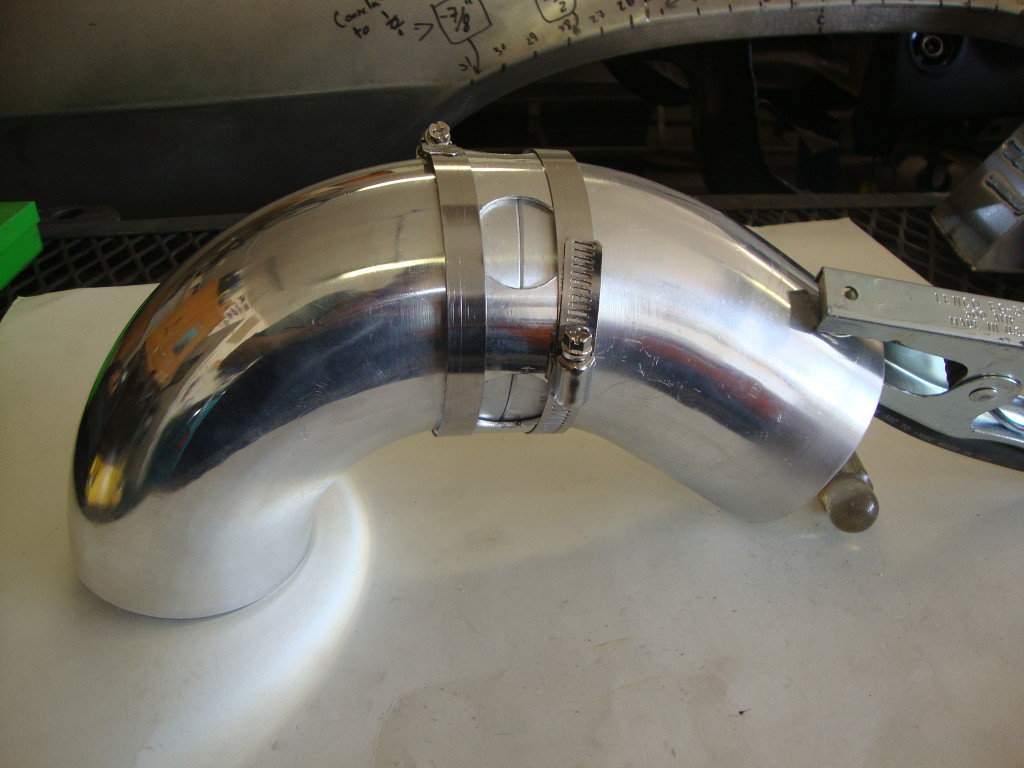
- yes, thats an exhaust pipe
-
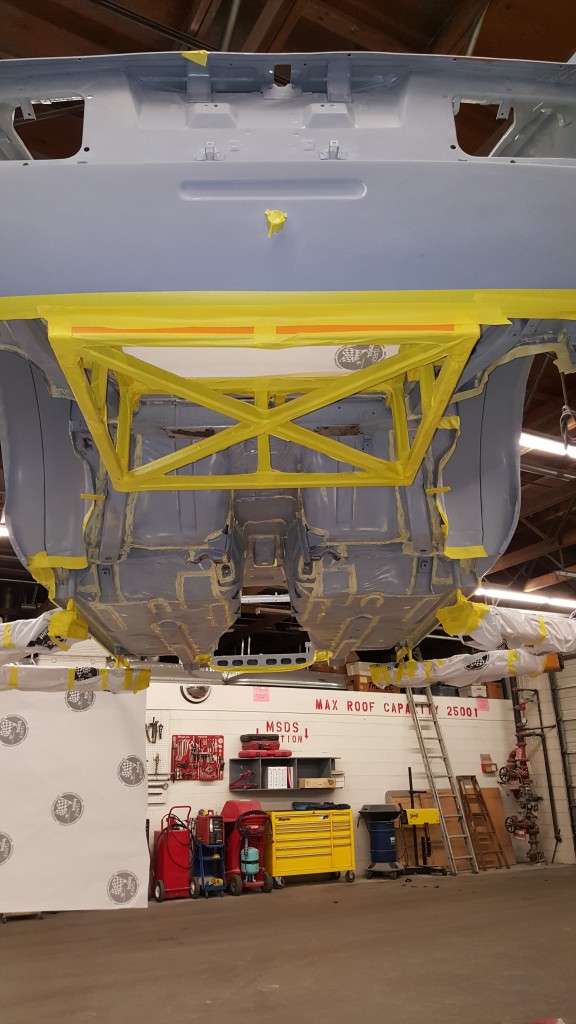
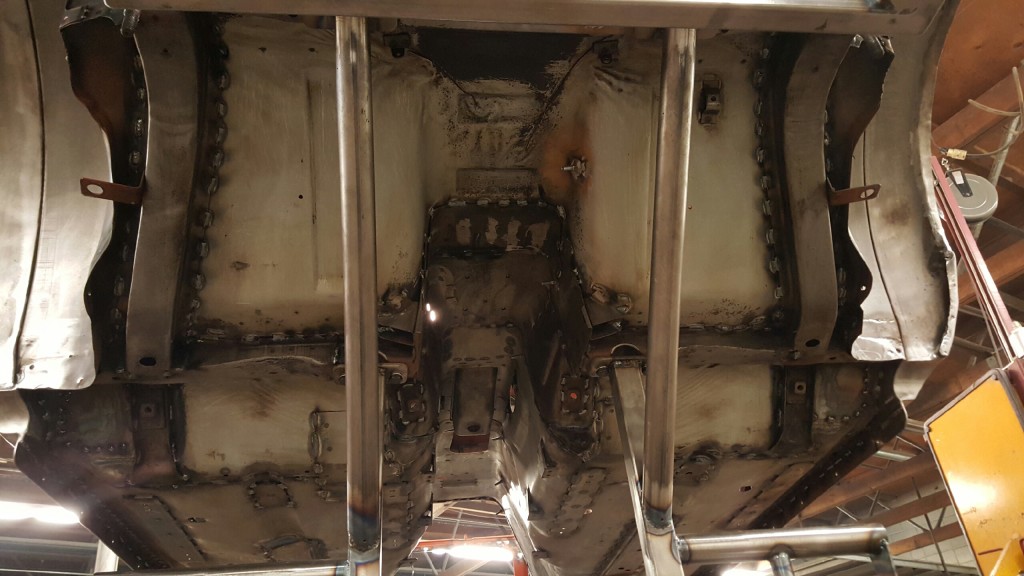
- Applying a bedliner coating to the belly of the beast
-

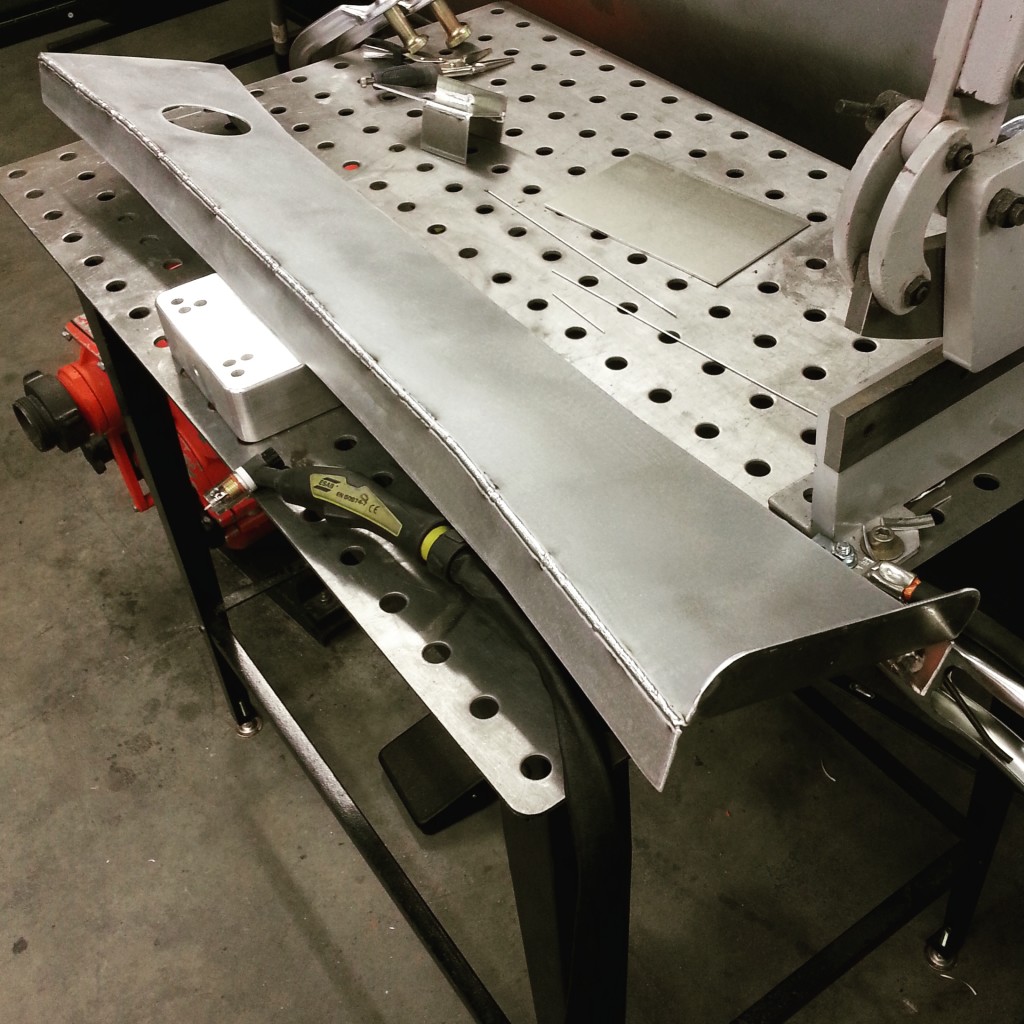
- so many one-off hand made pieces. It brings me great joy to do this styff by hand
-
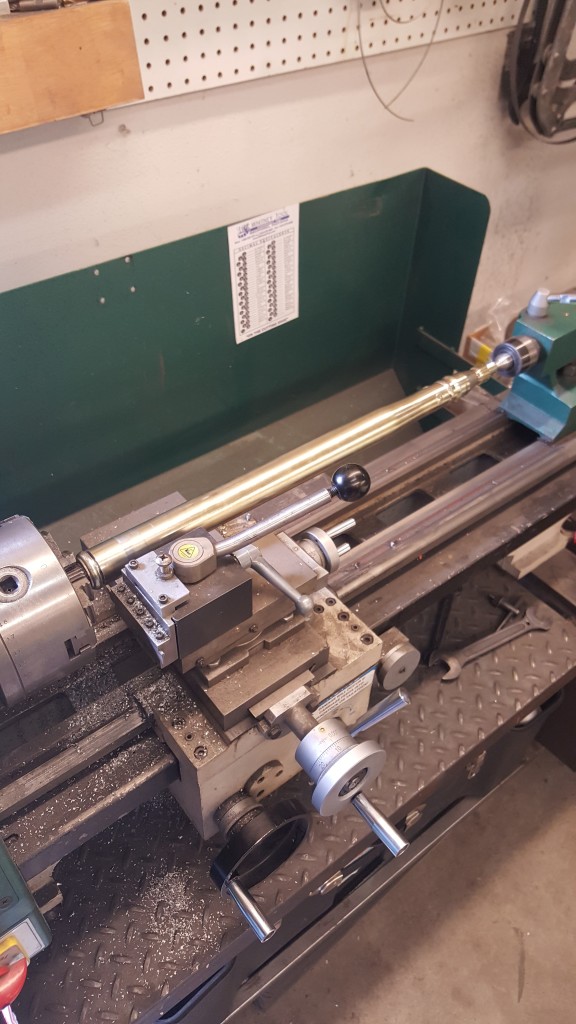
- precision sectioning the woodward steering column to accept the EPAS Power steering motor
-
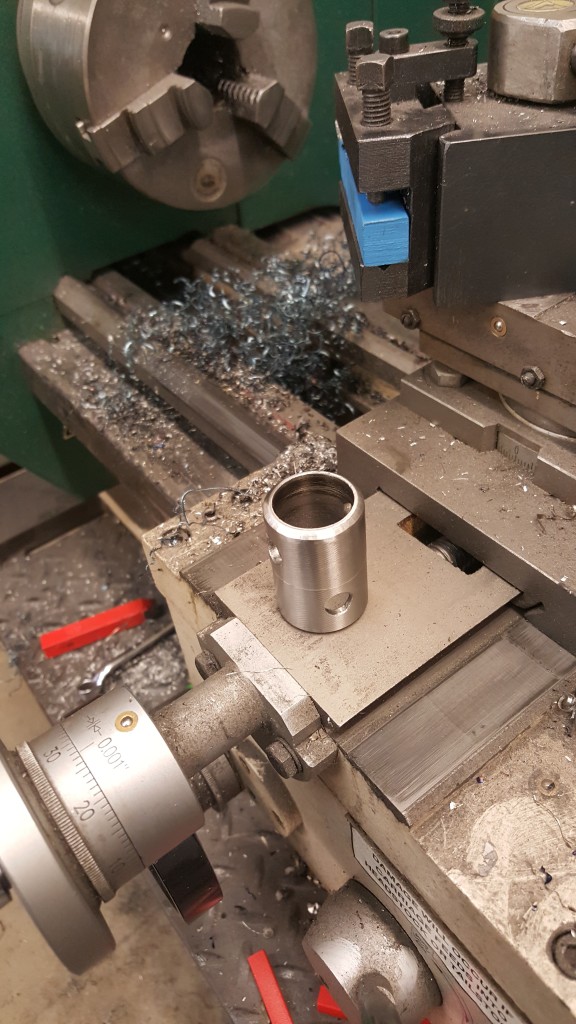
- I machined a weld on shim to accept the O.D. of the EPAS shaft and the I.D. of the Woodward column
-
- Tig welding the shim to the motor
-
- seam sealing the bottom side seams
-
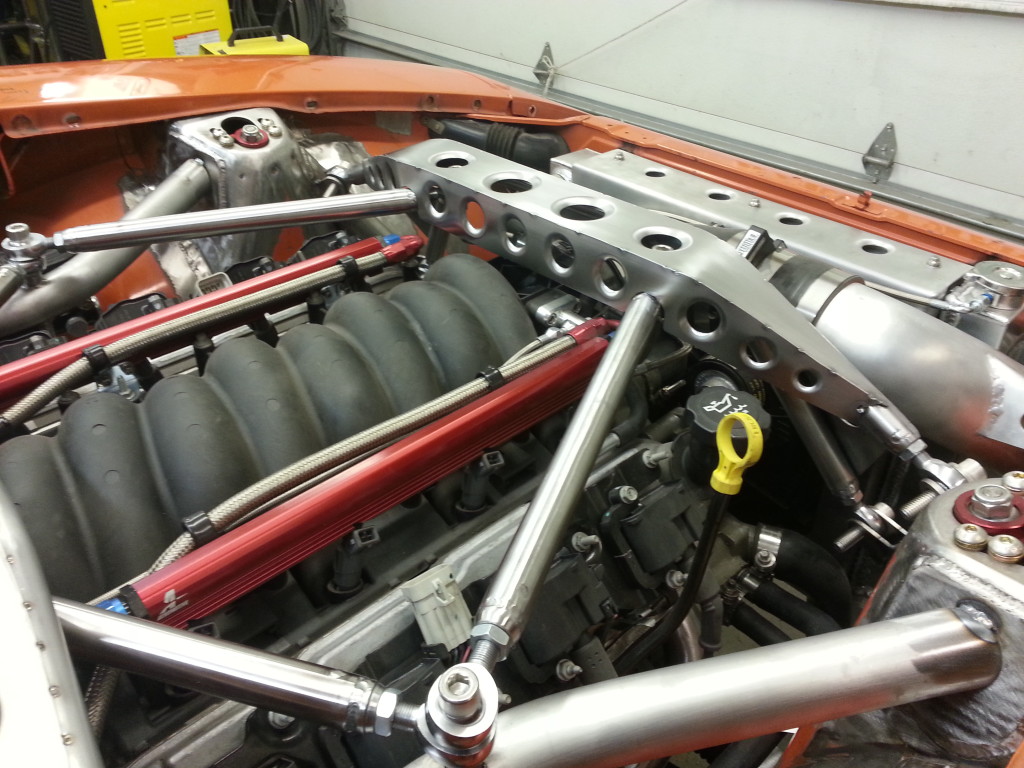
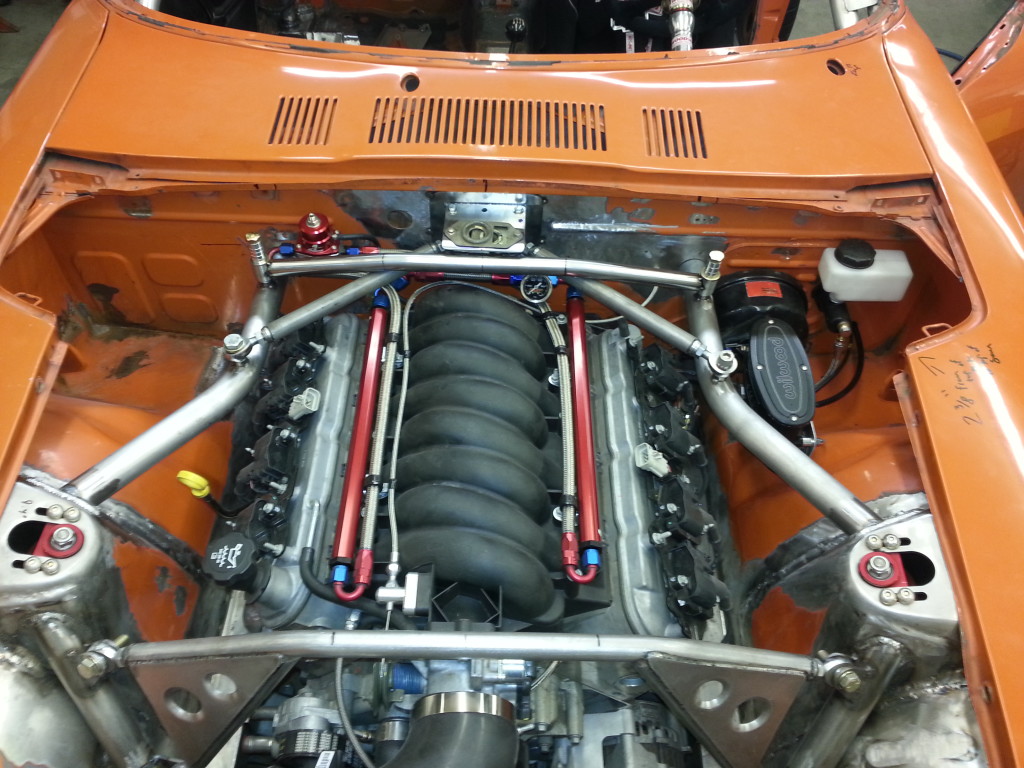
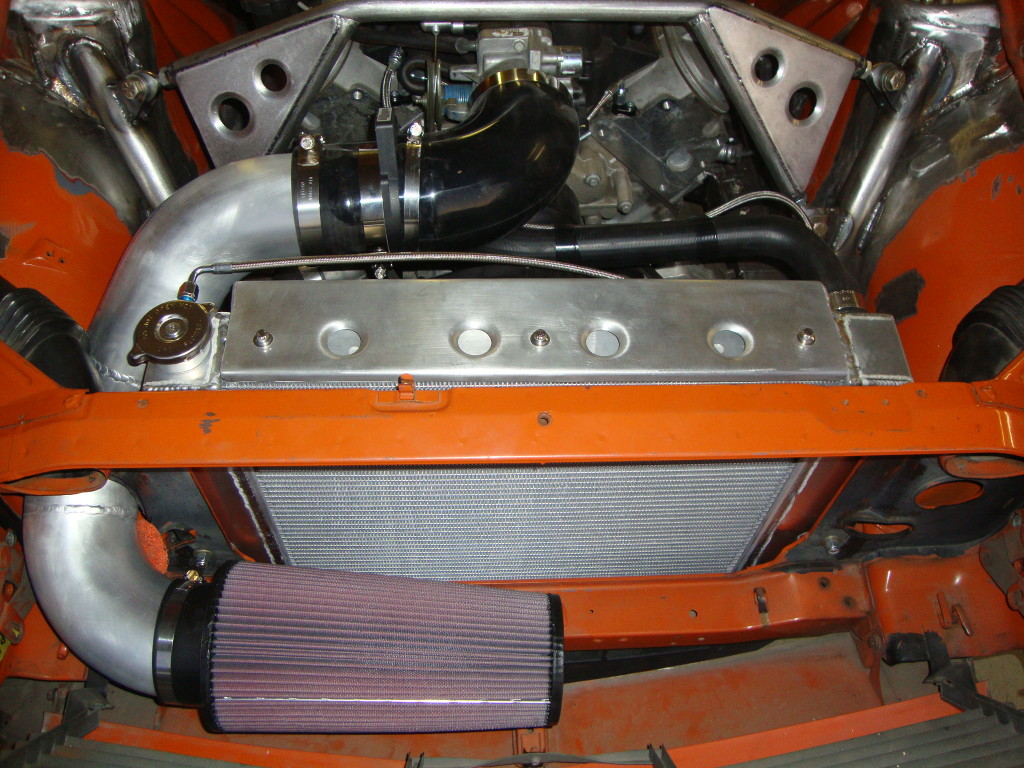
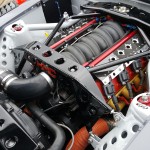
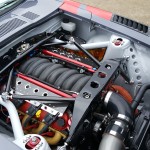
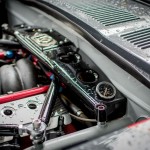
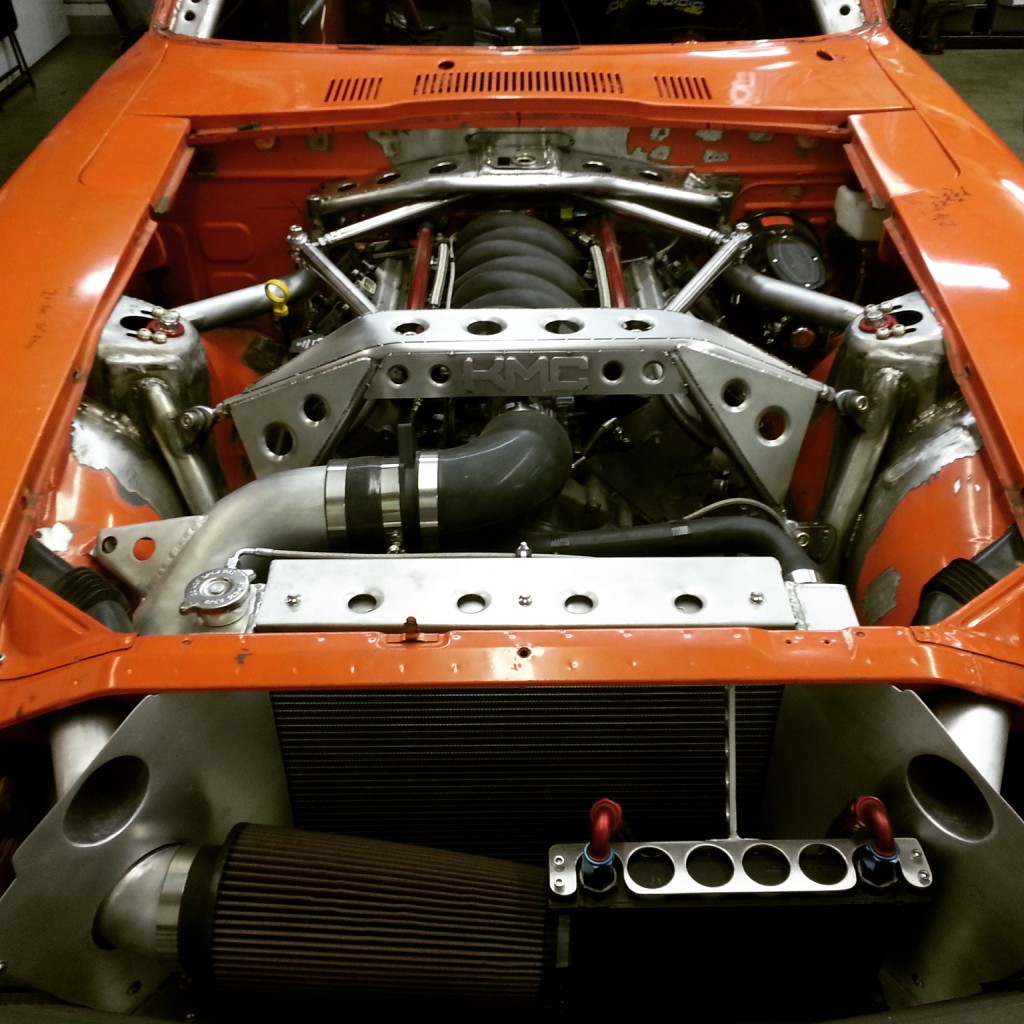
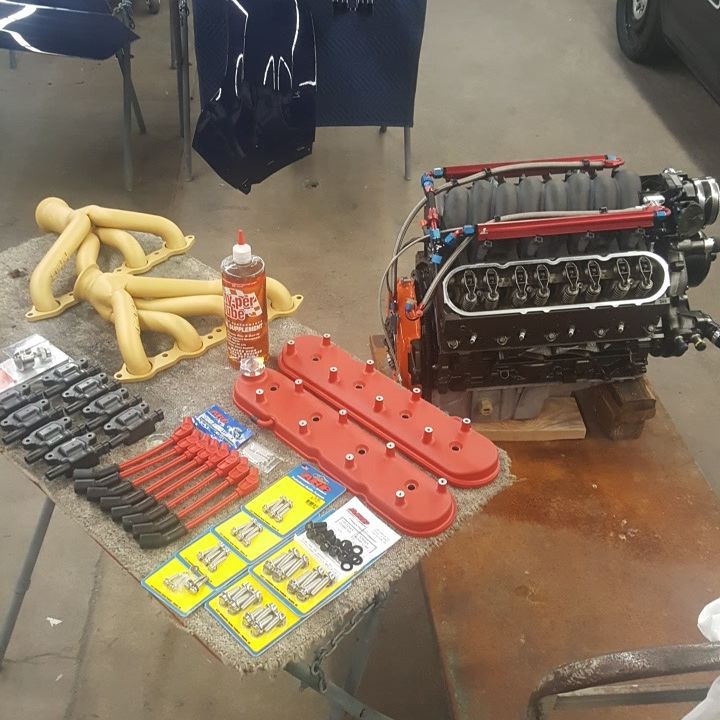
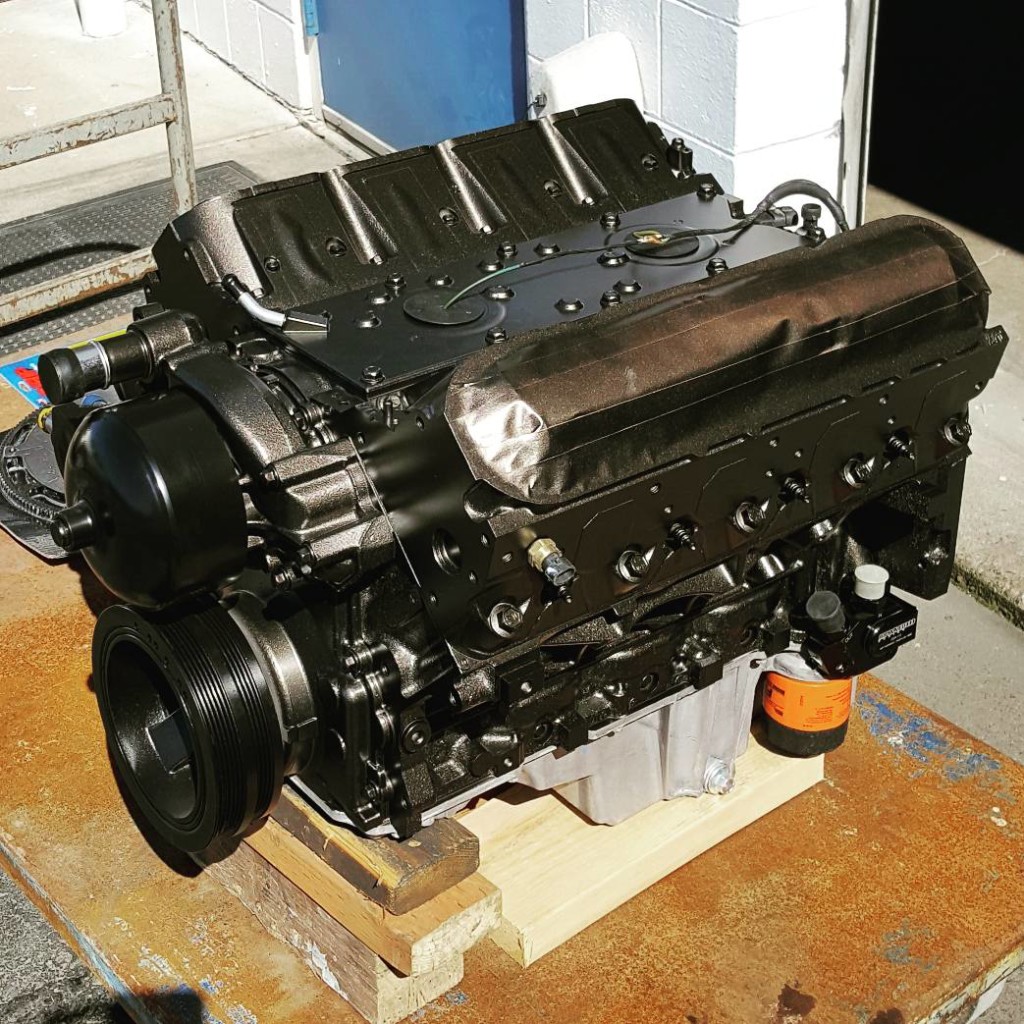
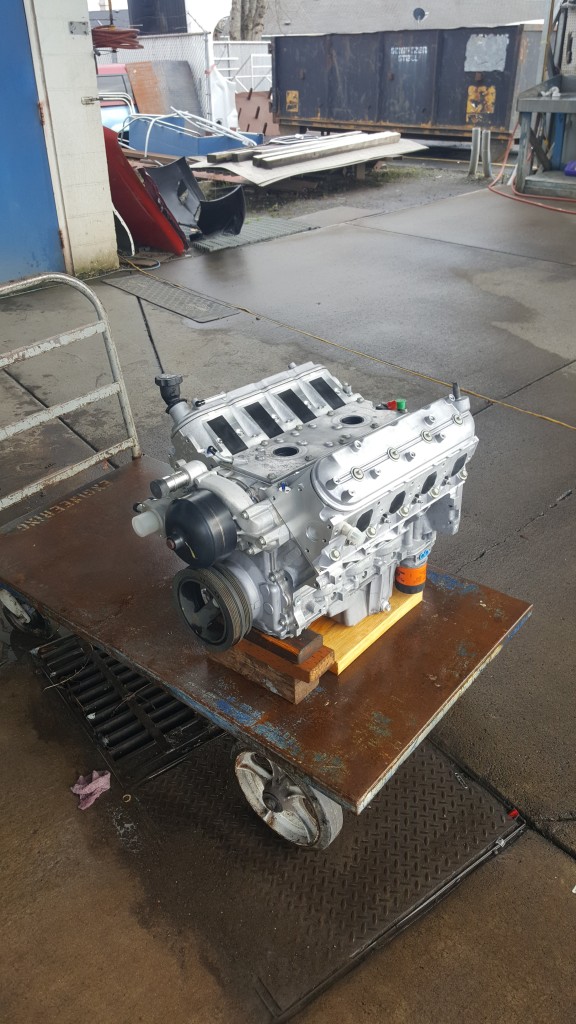
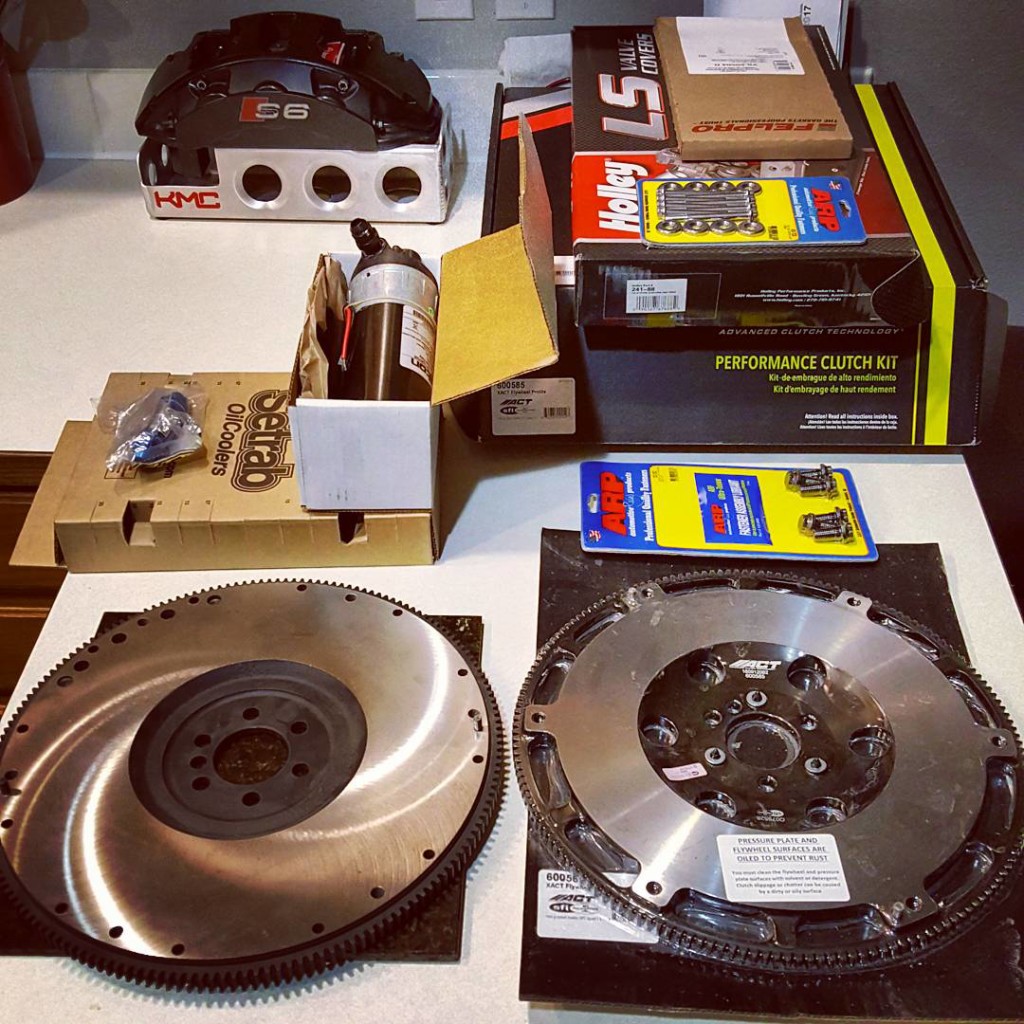
- LS1 looking fresh with the Holley coil on cover Valve covers and LS3 Coils
-
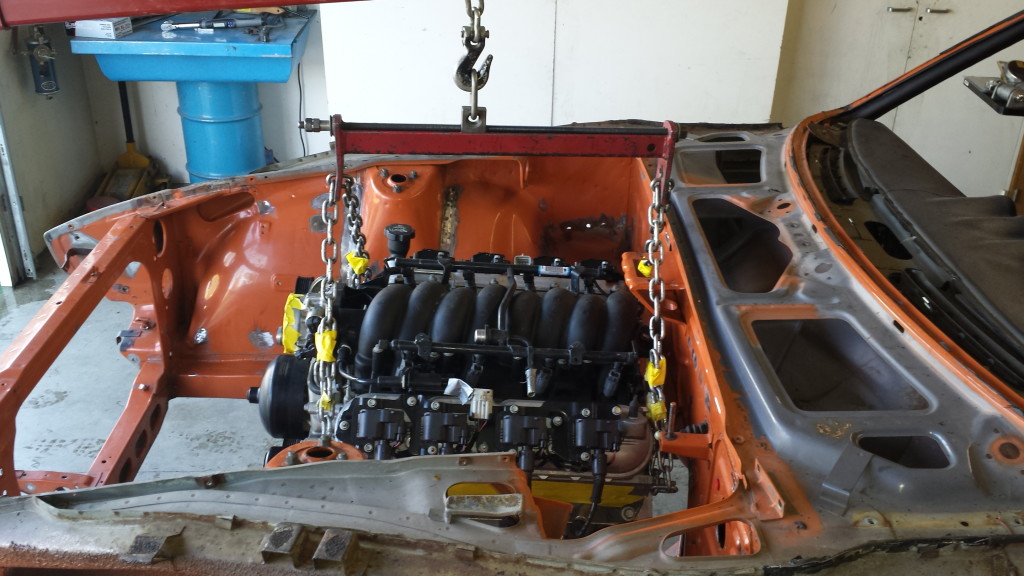
- Re-assembling the engine after paint
-
- Getting the interior and engine bay sprayed with a light gloss grey paint
-
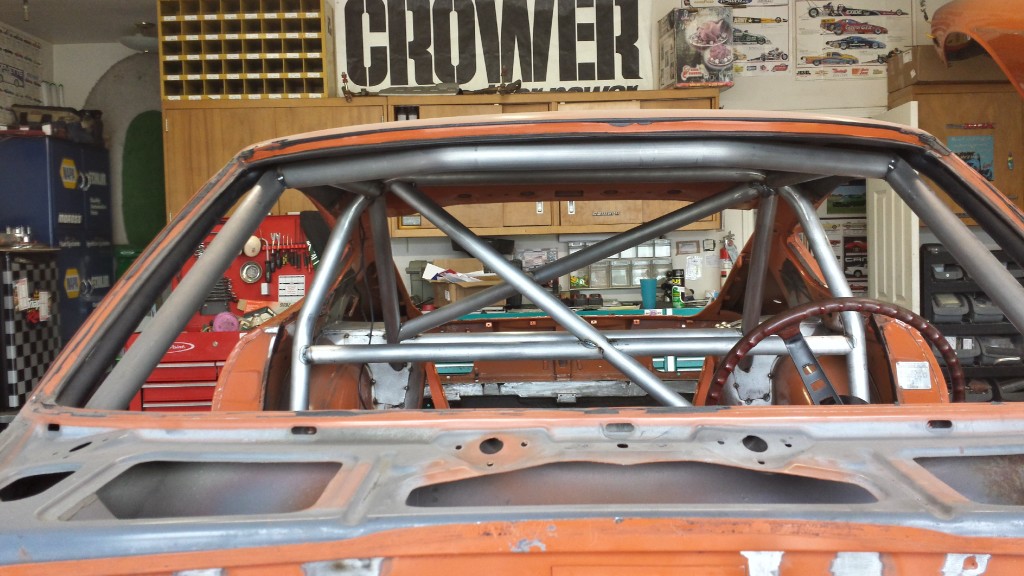
- The cage work looks tidy with a uniform color
-
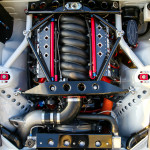
- Satin bronze for the LS1 Block and heads
-

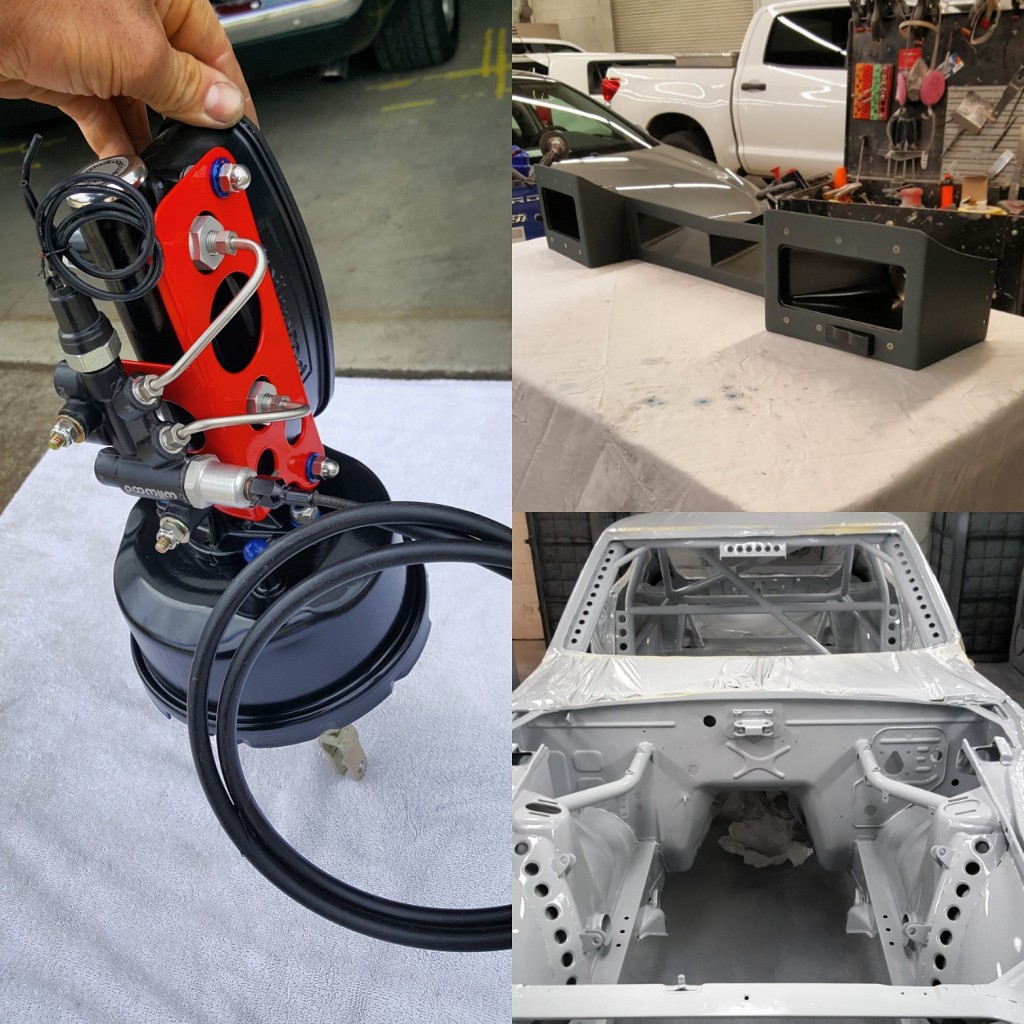
- EPAS electric power steering should make driving this beast a bit more tamable
-
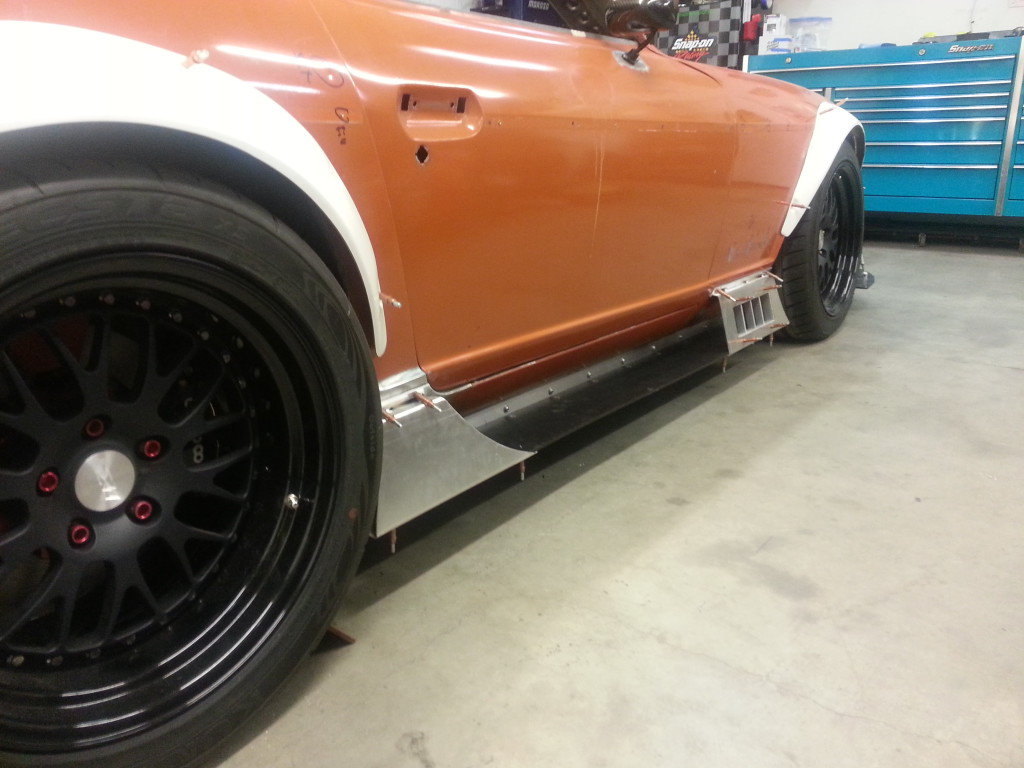
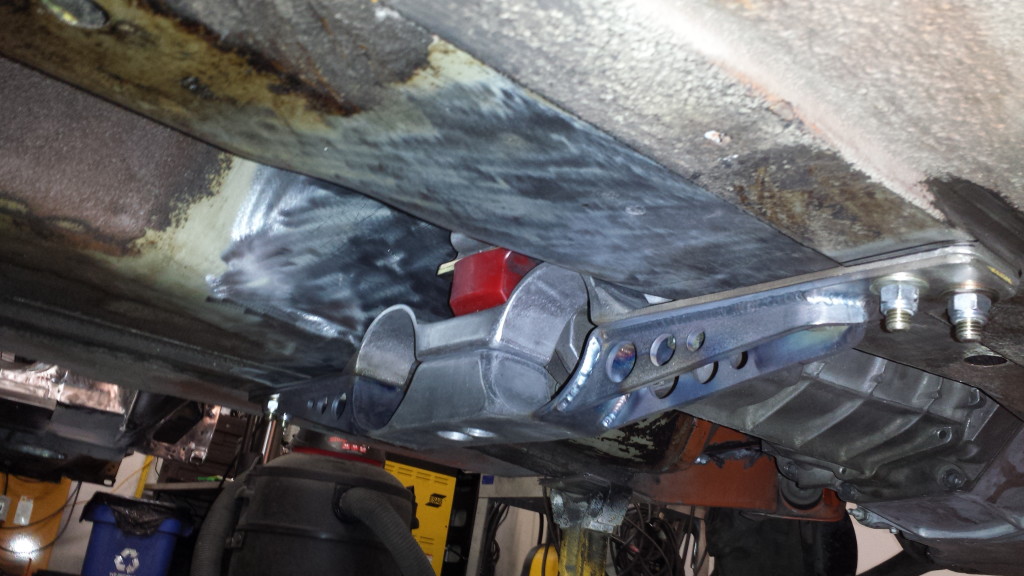
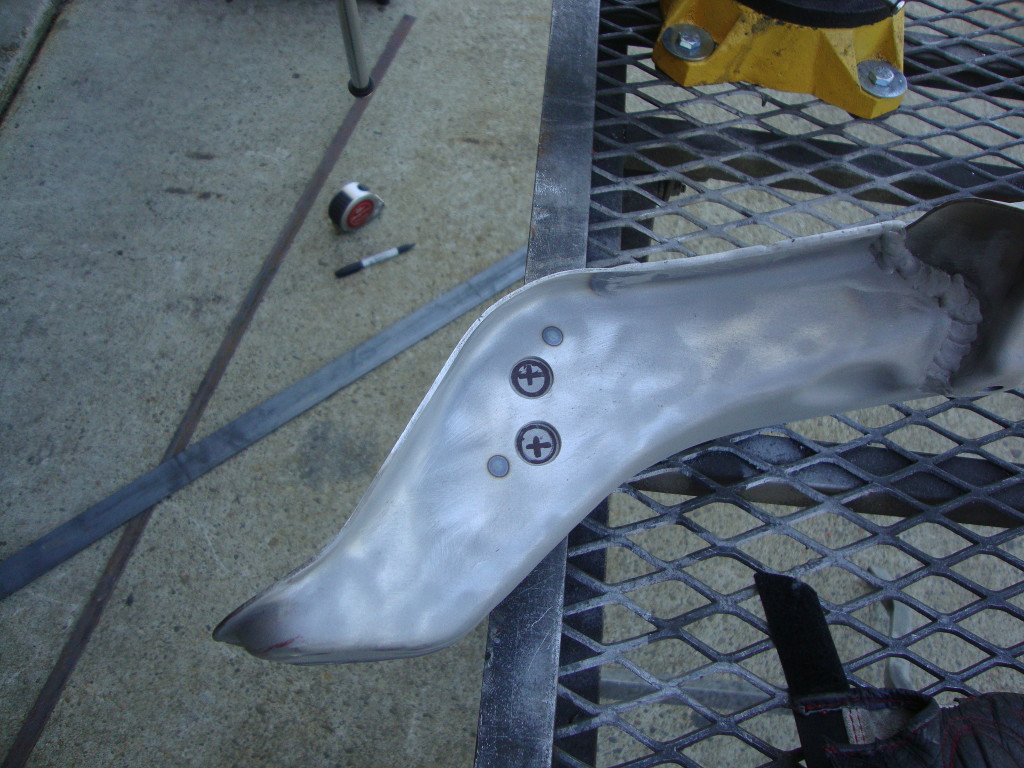
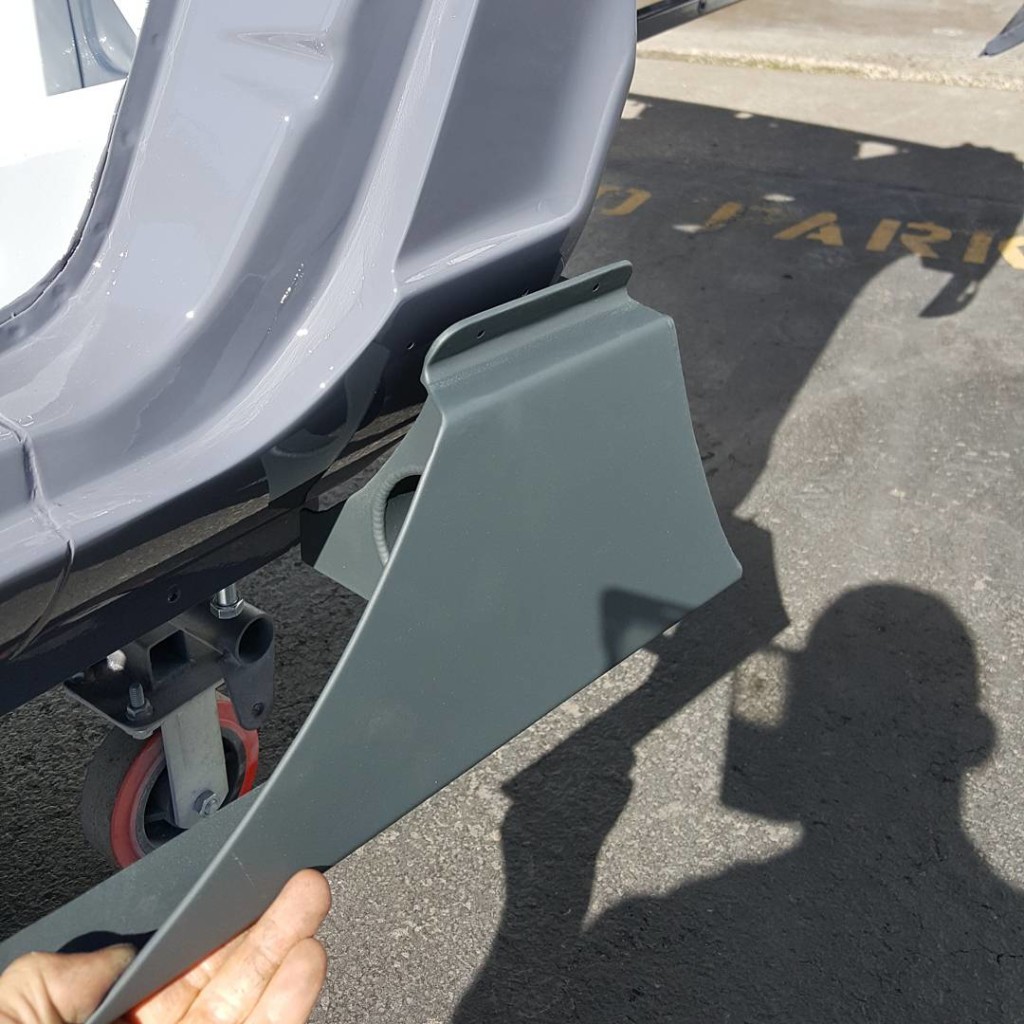
- The front rear diffuser bracket, 100% hand made by me, no cnc just a steady hand and a good tape measure
-
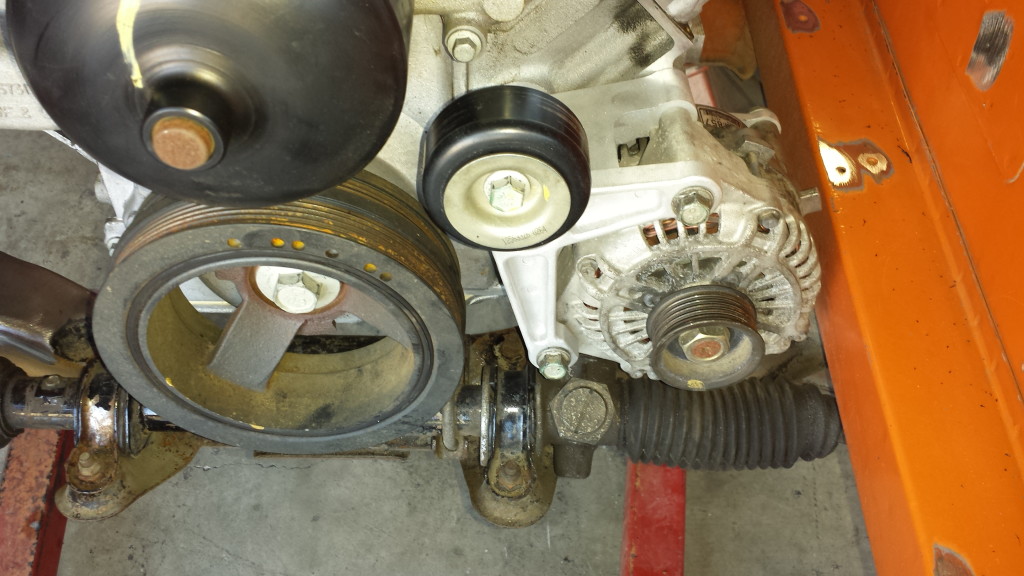
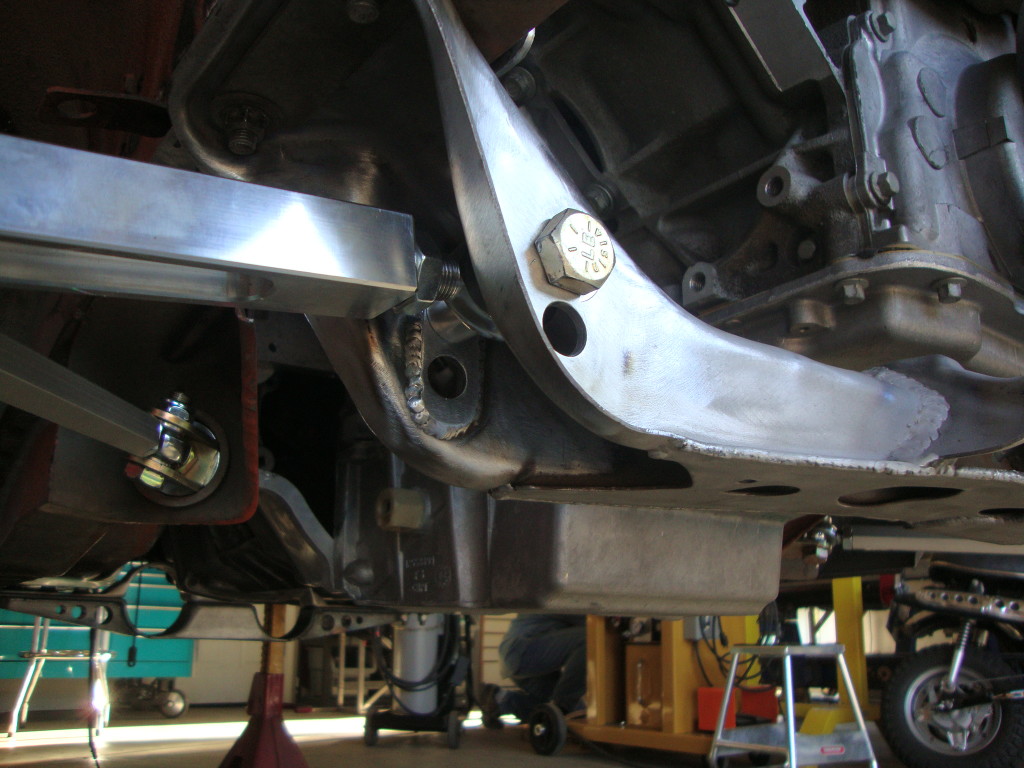
- cleaning up the custom engine mounts for a better appearance and reduced weight
-
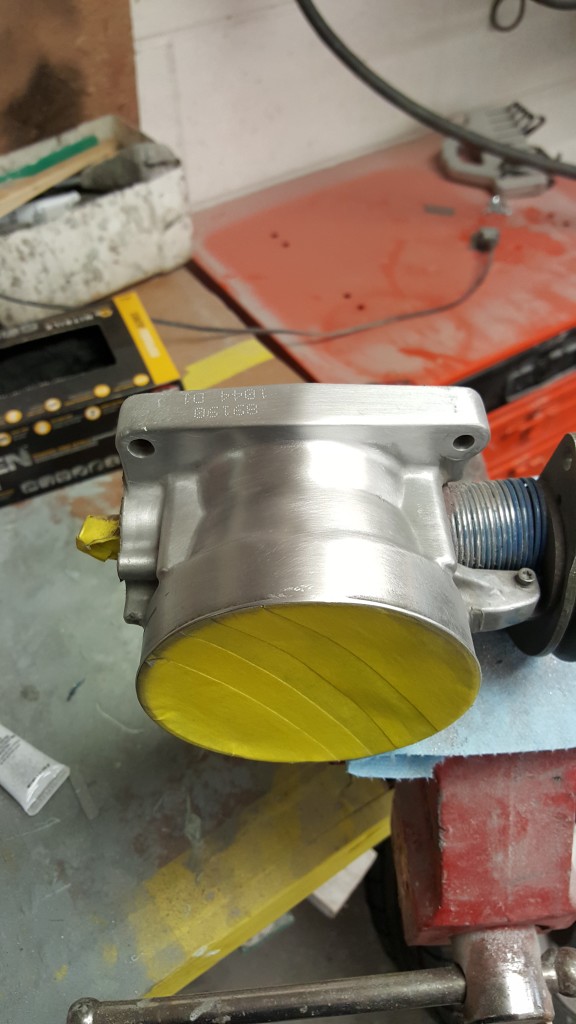
- a sweet throttle body plug I made to ease with reassembly, plus it just looks good.
-
- Saving some weight on thes engine mounts
-
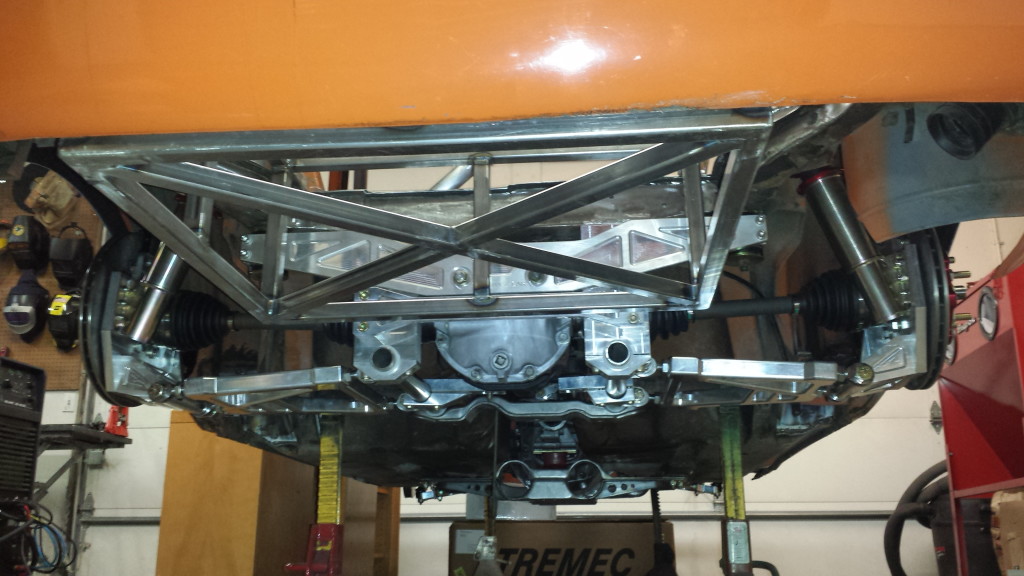
- Chassis jacking points built in to the bottom side of the main cage hoop tie ins, extremely strong!
-
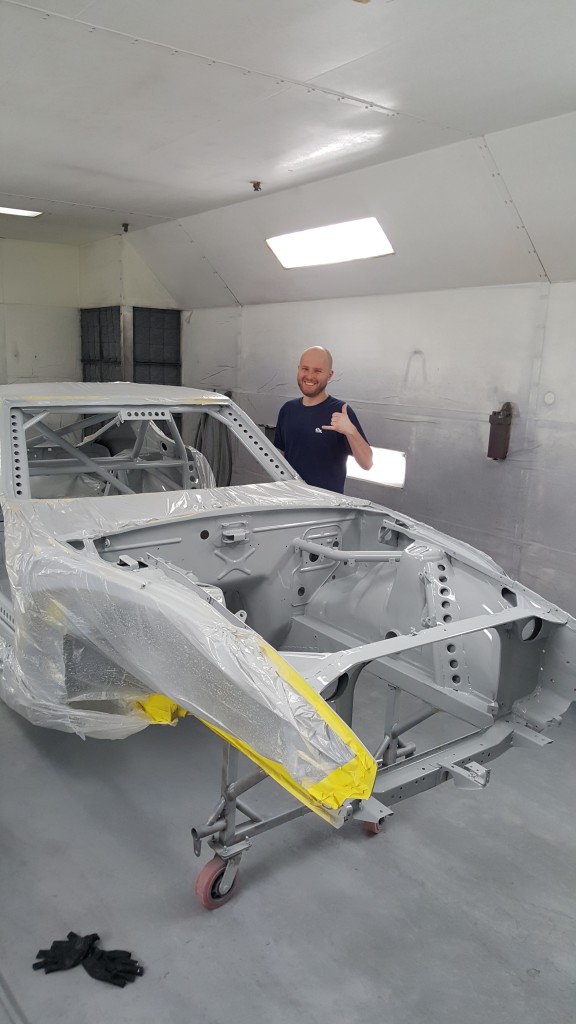
- Bryan the painter after a job well done!
-
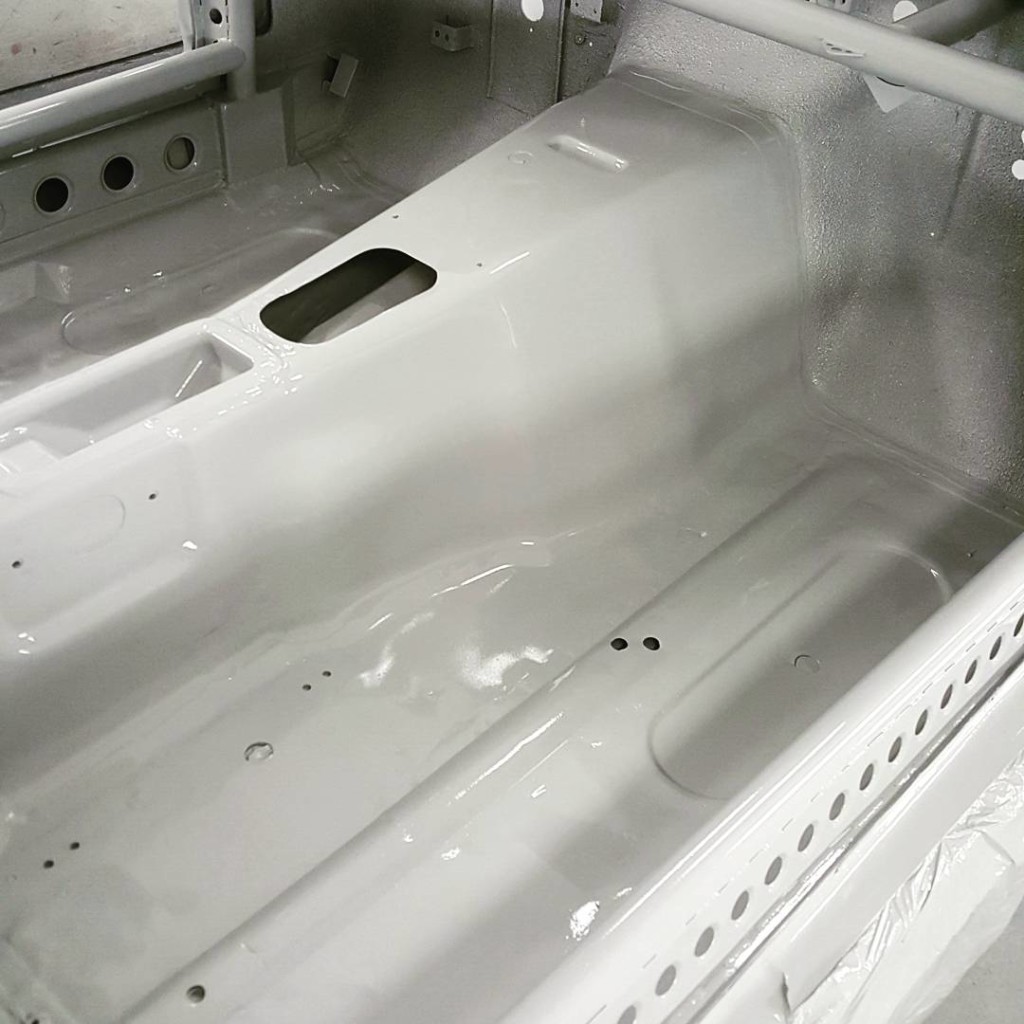
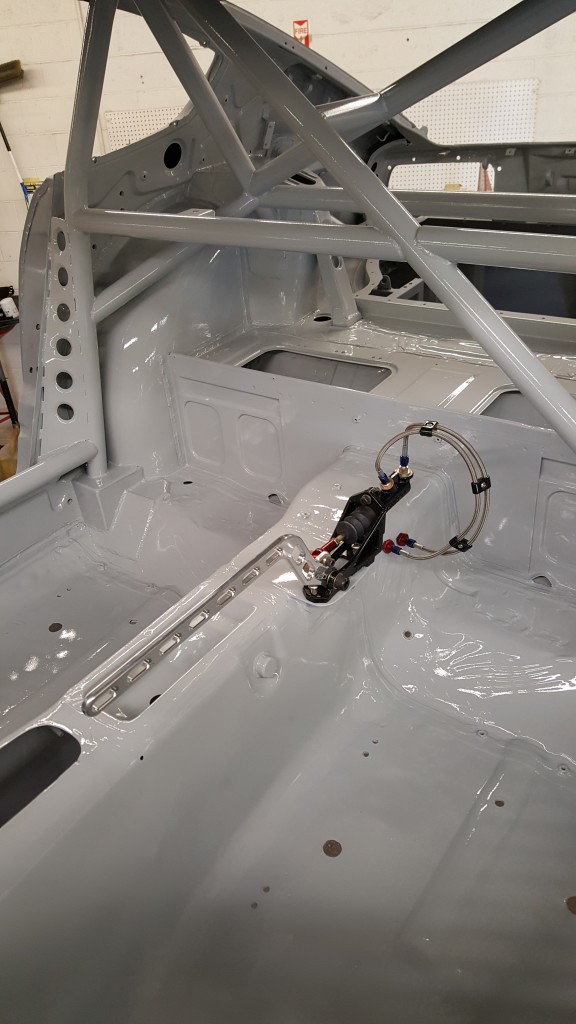
- A tunnel so slick I think we will leave it uncovered
-
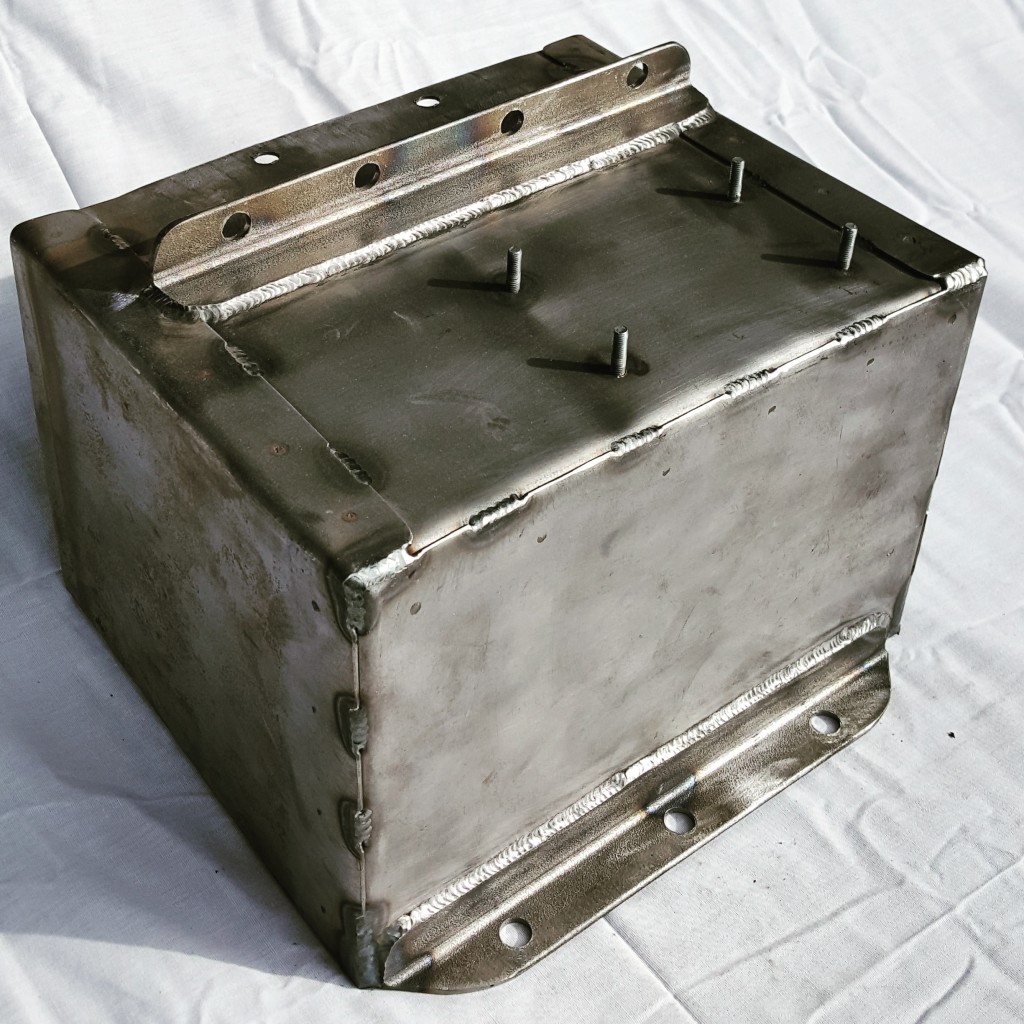
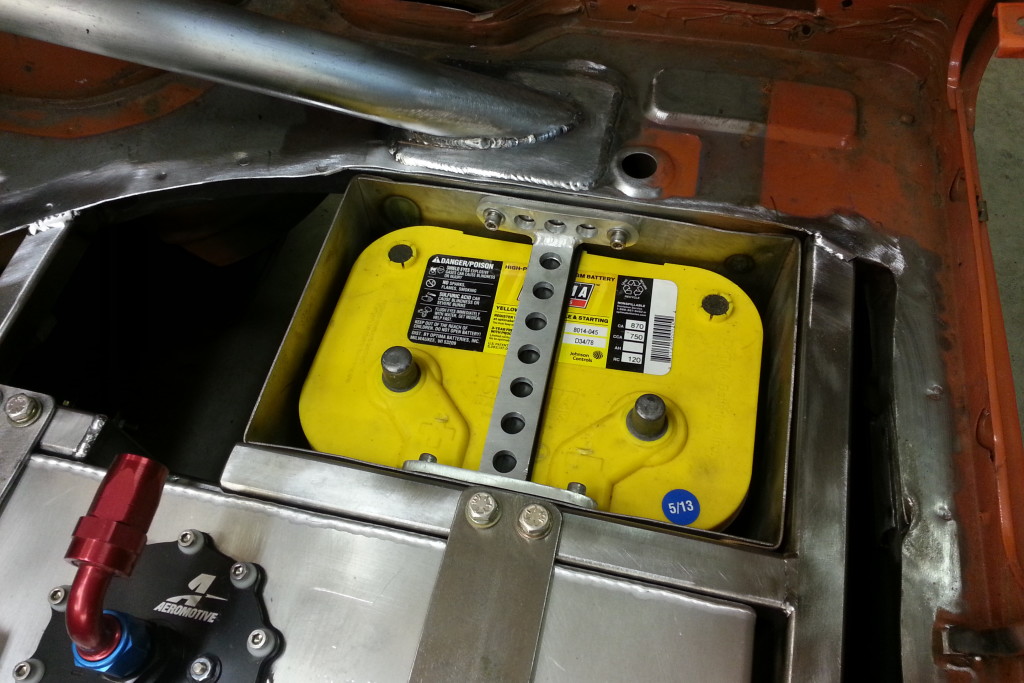
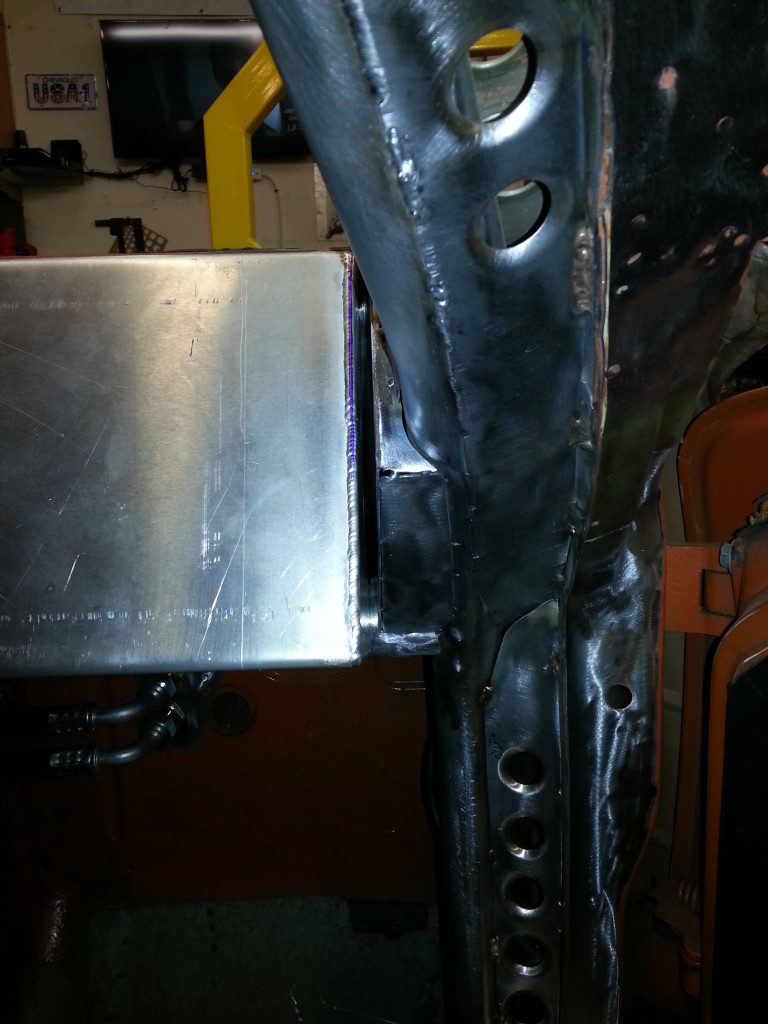
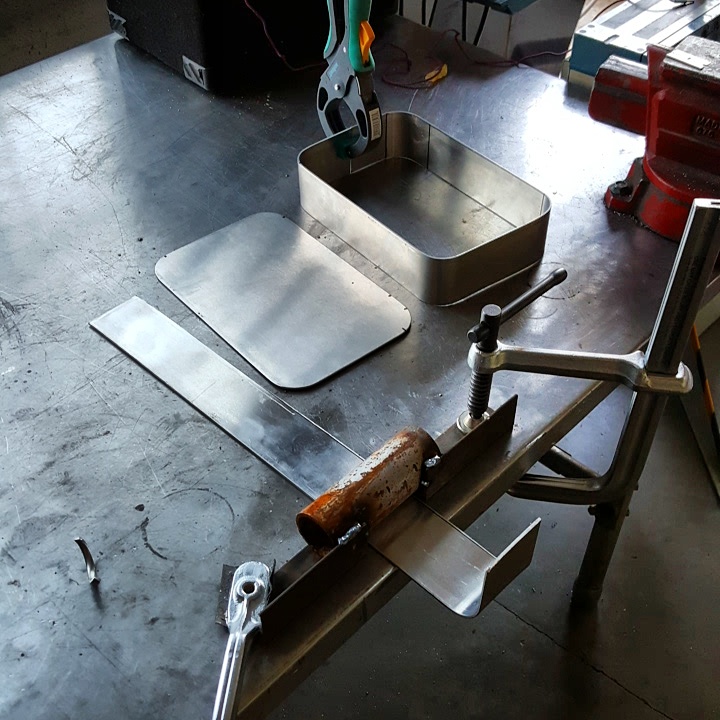
- a custom tig welded rear sub mount battery box
-
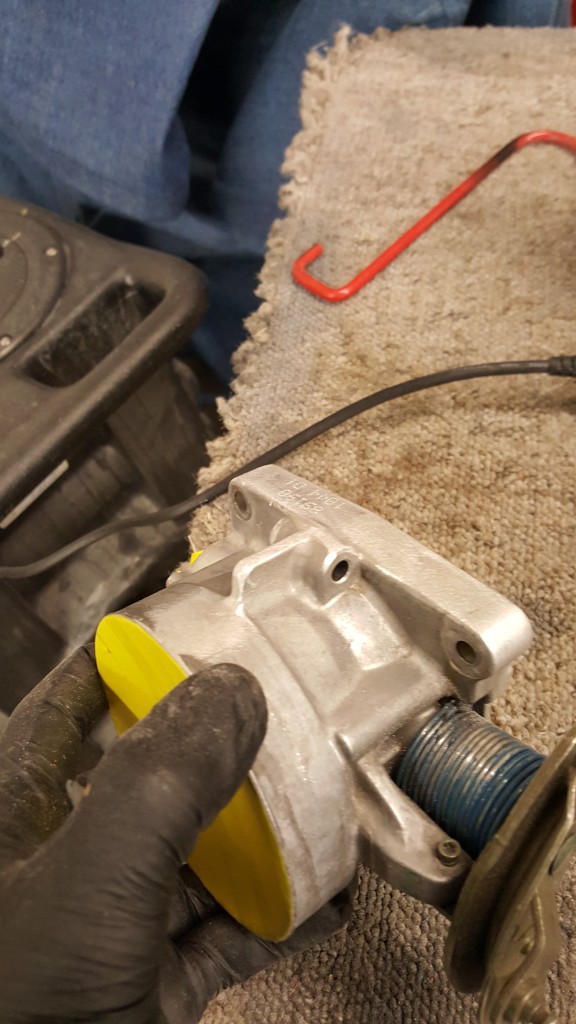
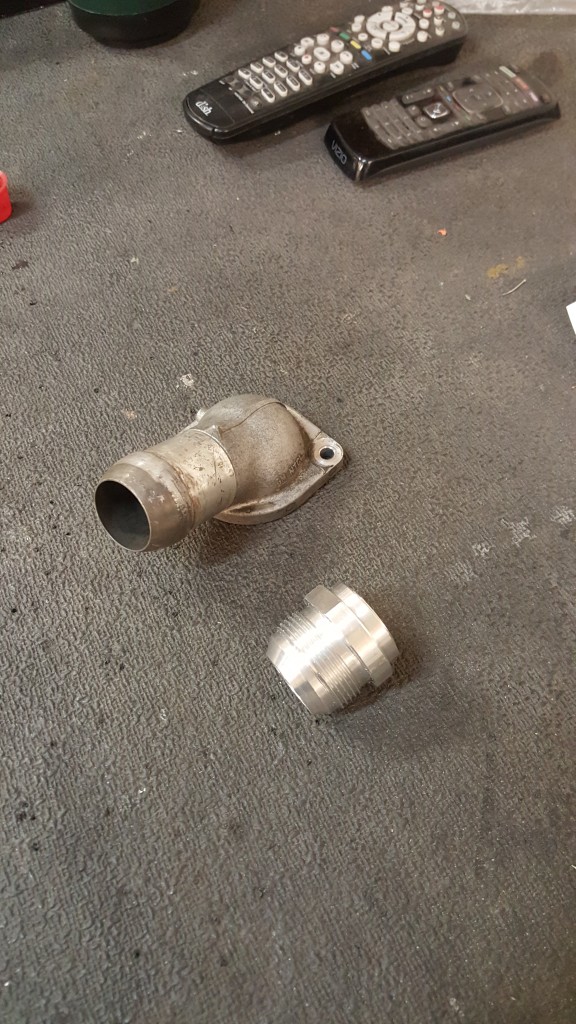
- The factory steam port into the throttle body before removal
-
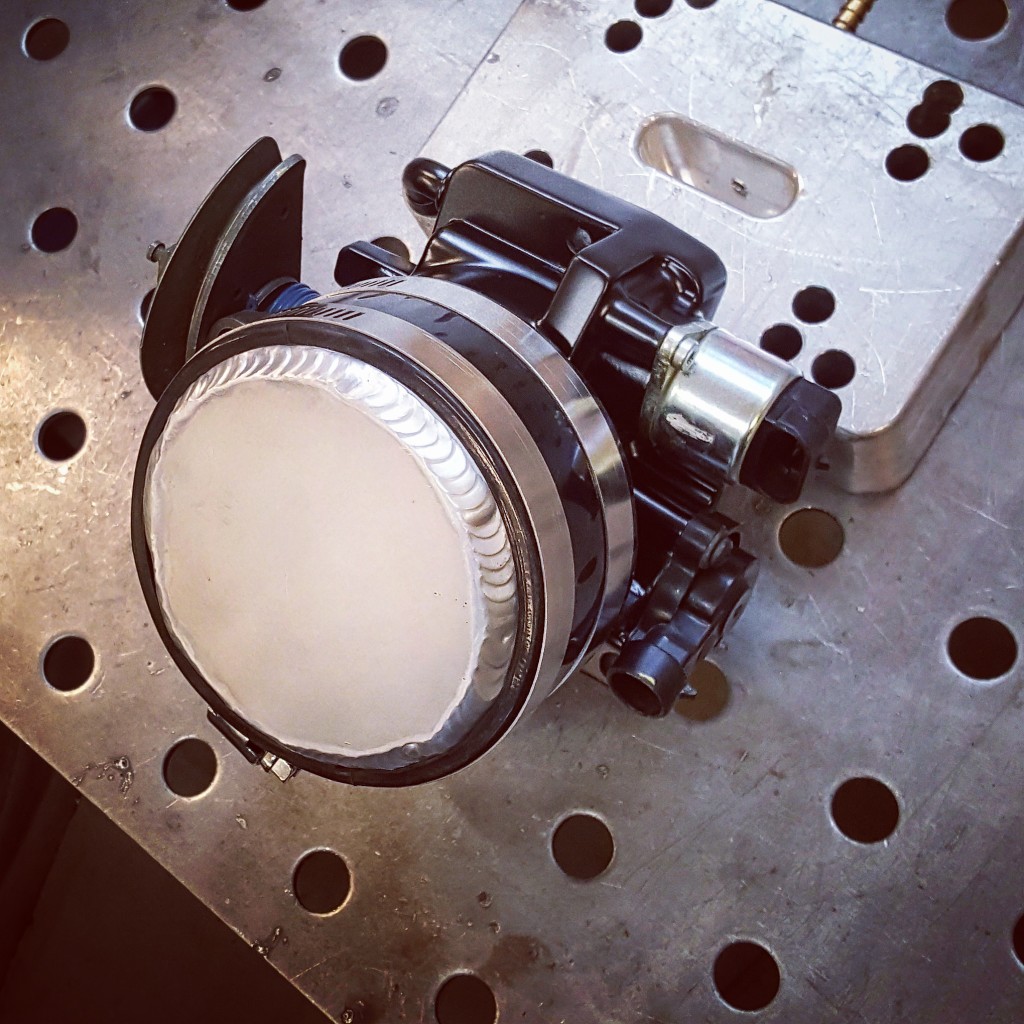
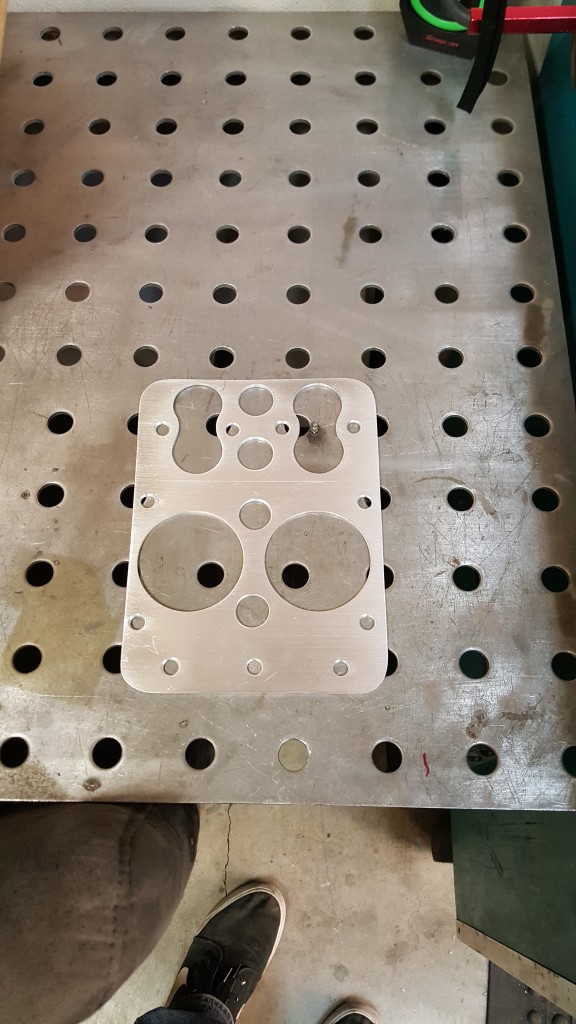
- A nicely detailed and cleaned throttle body, what’s missing?
-
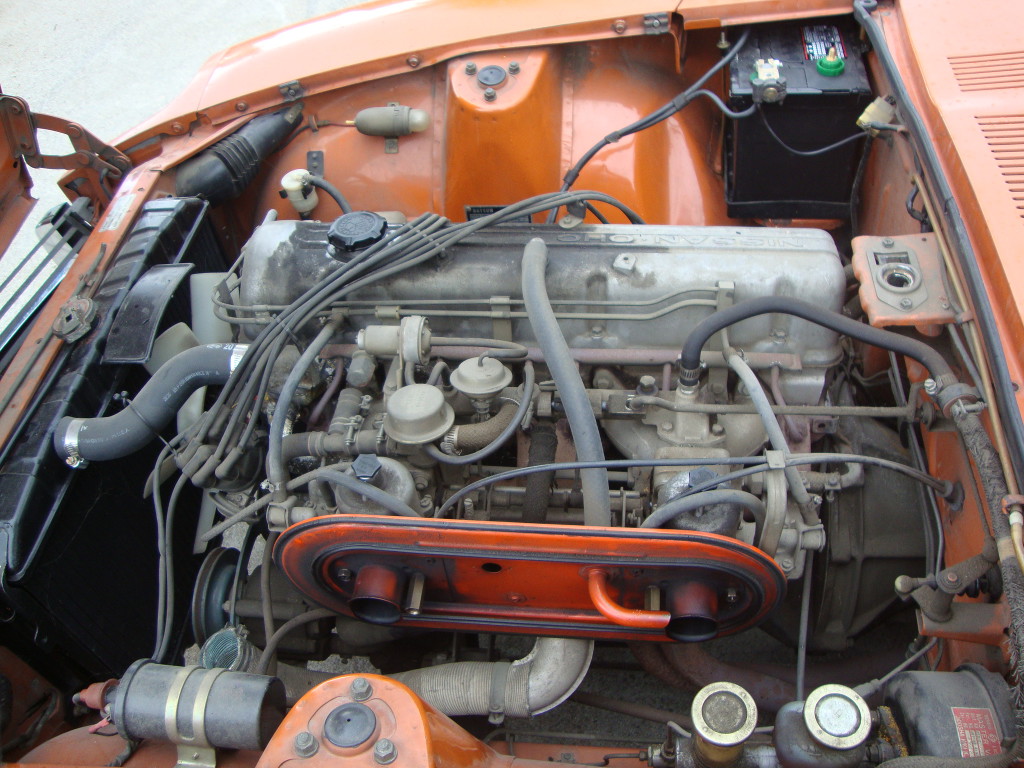
- the dirty motor before cleanup
-
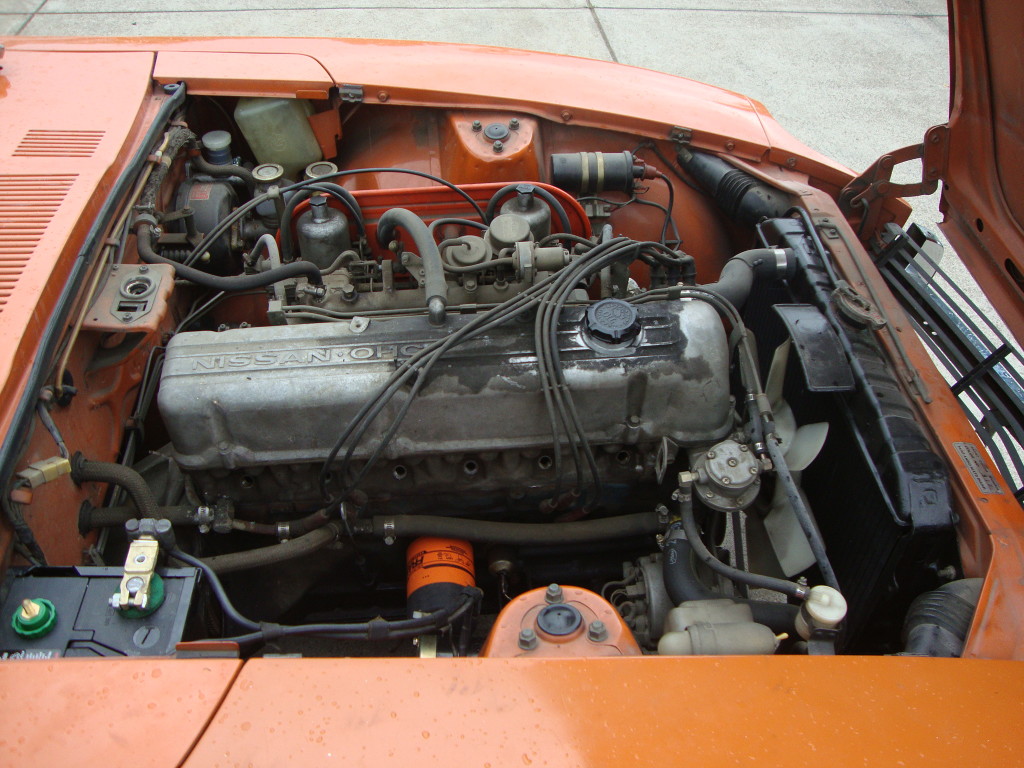
- a few hours of hard scrubbing goes a long way
-
- I must combine these two
-
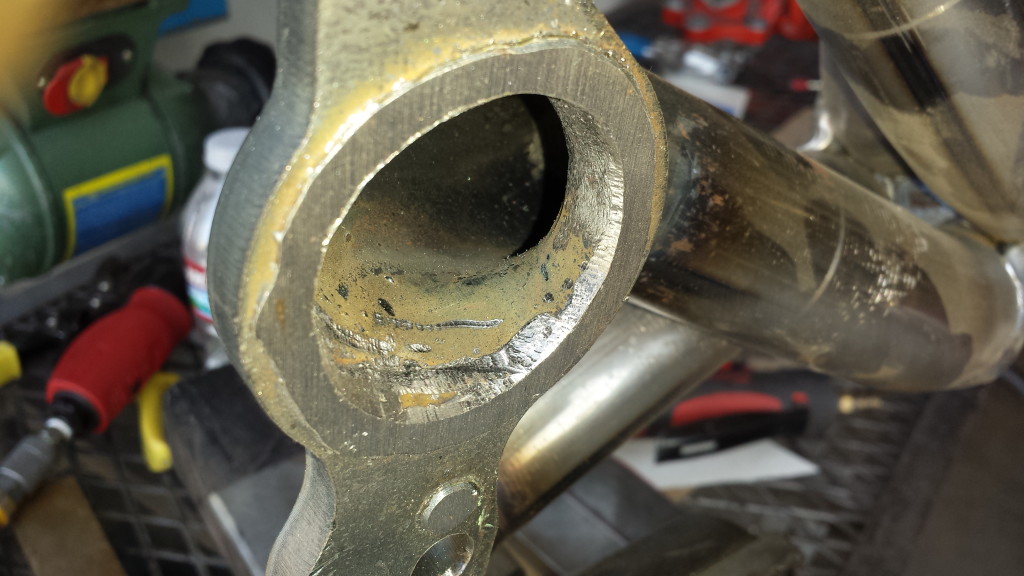
- Ah, much better. All the casting marks are cleaned up too for a truely custom part
-
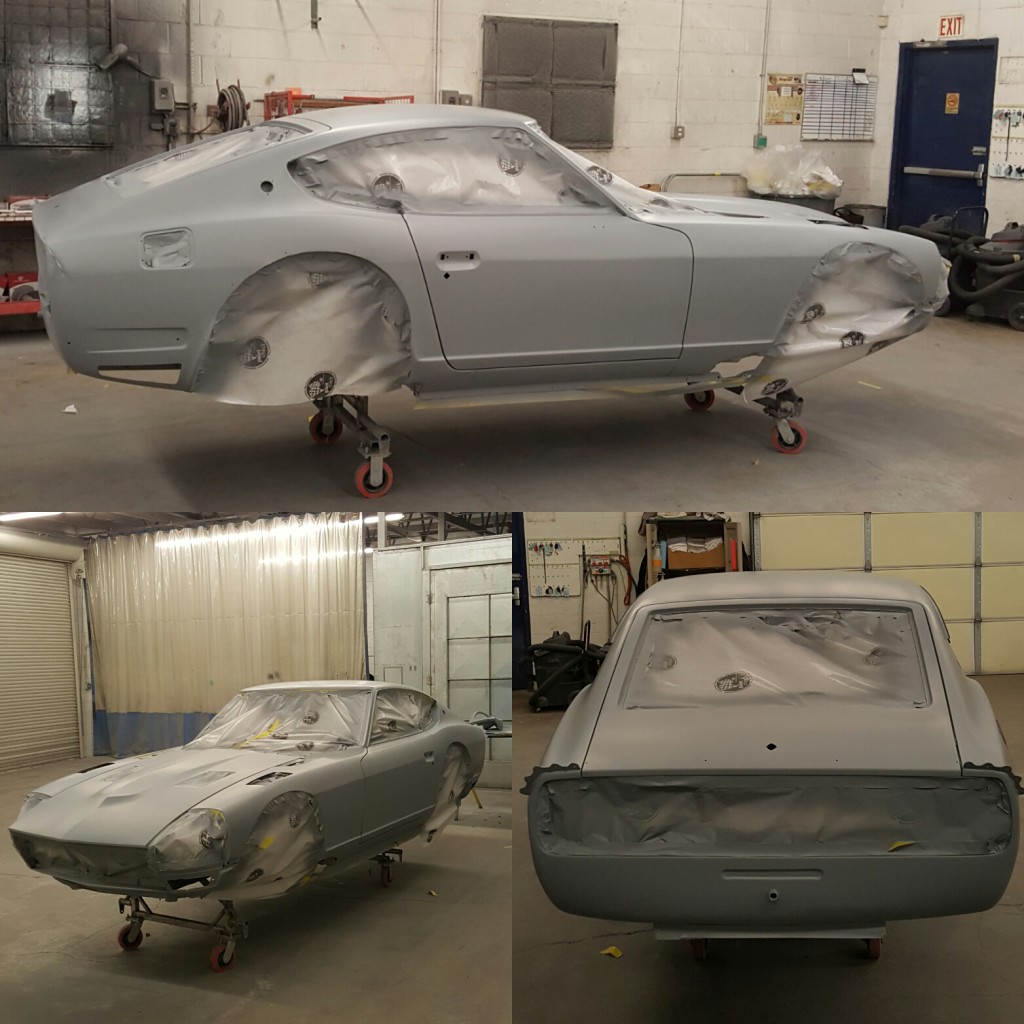
- The last round of primer
-
- Pretty alloy dimes on the coolant overflow tank
-
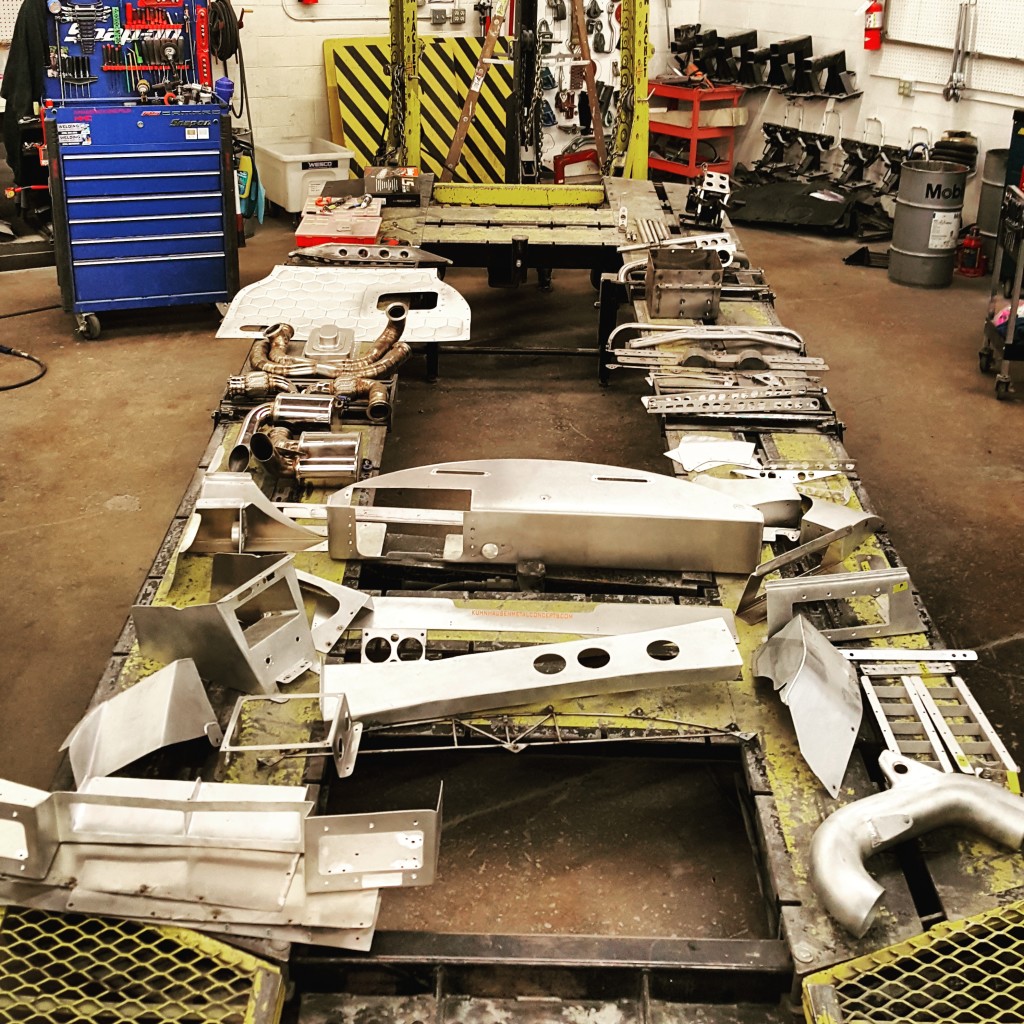
- Most of the custom handmade alloy parts awaiting final checks and the powdercoater
-
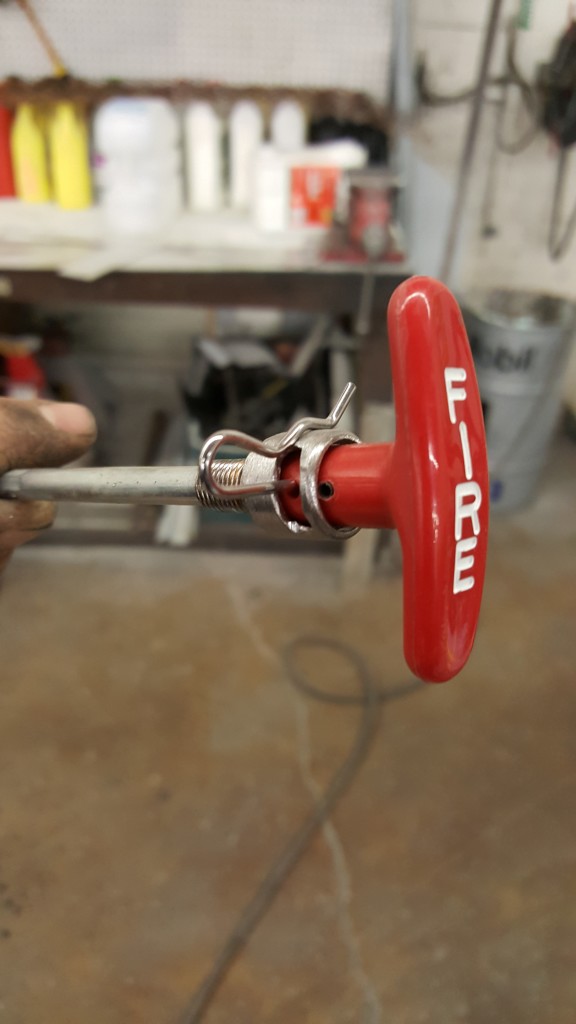
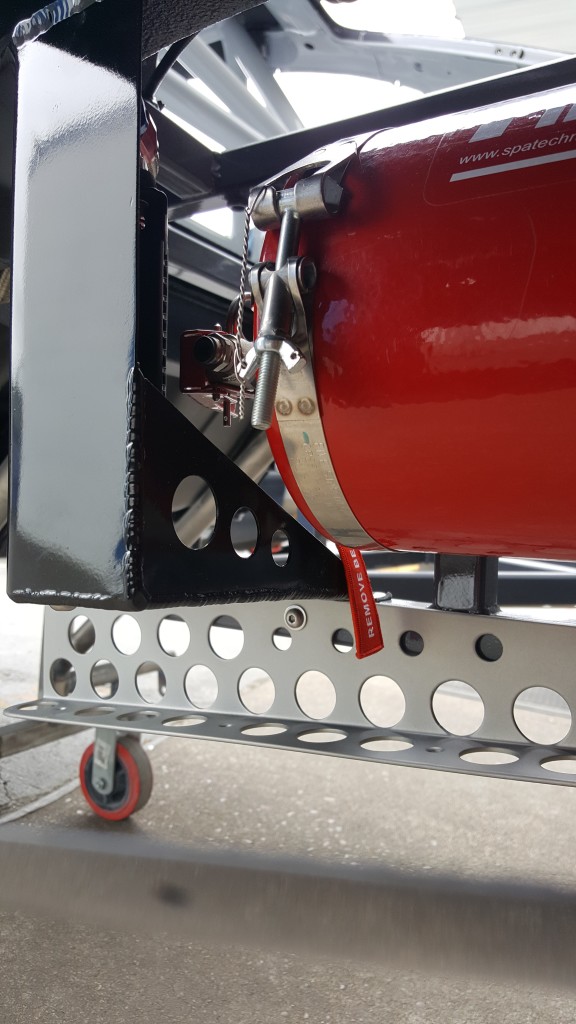
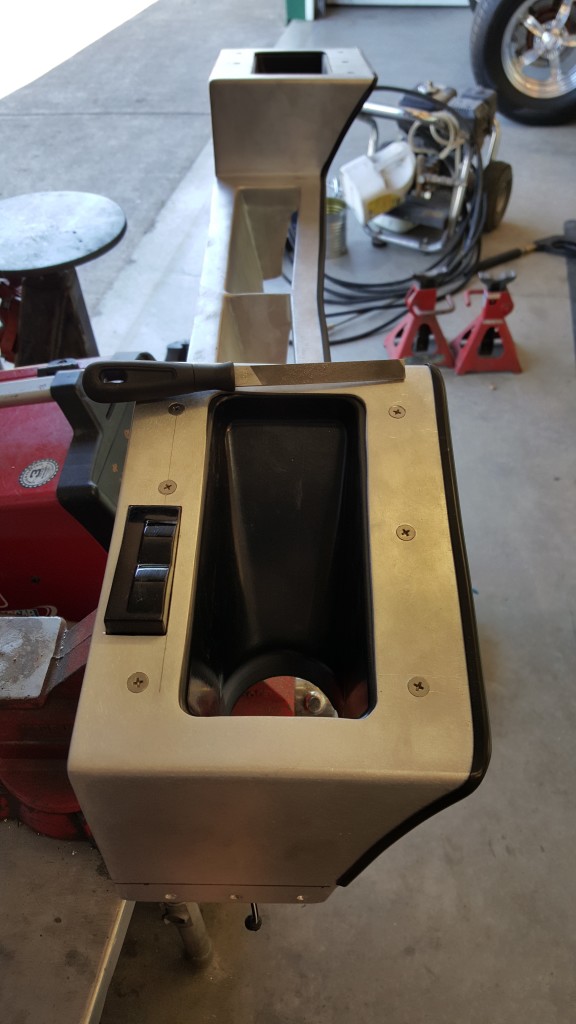
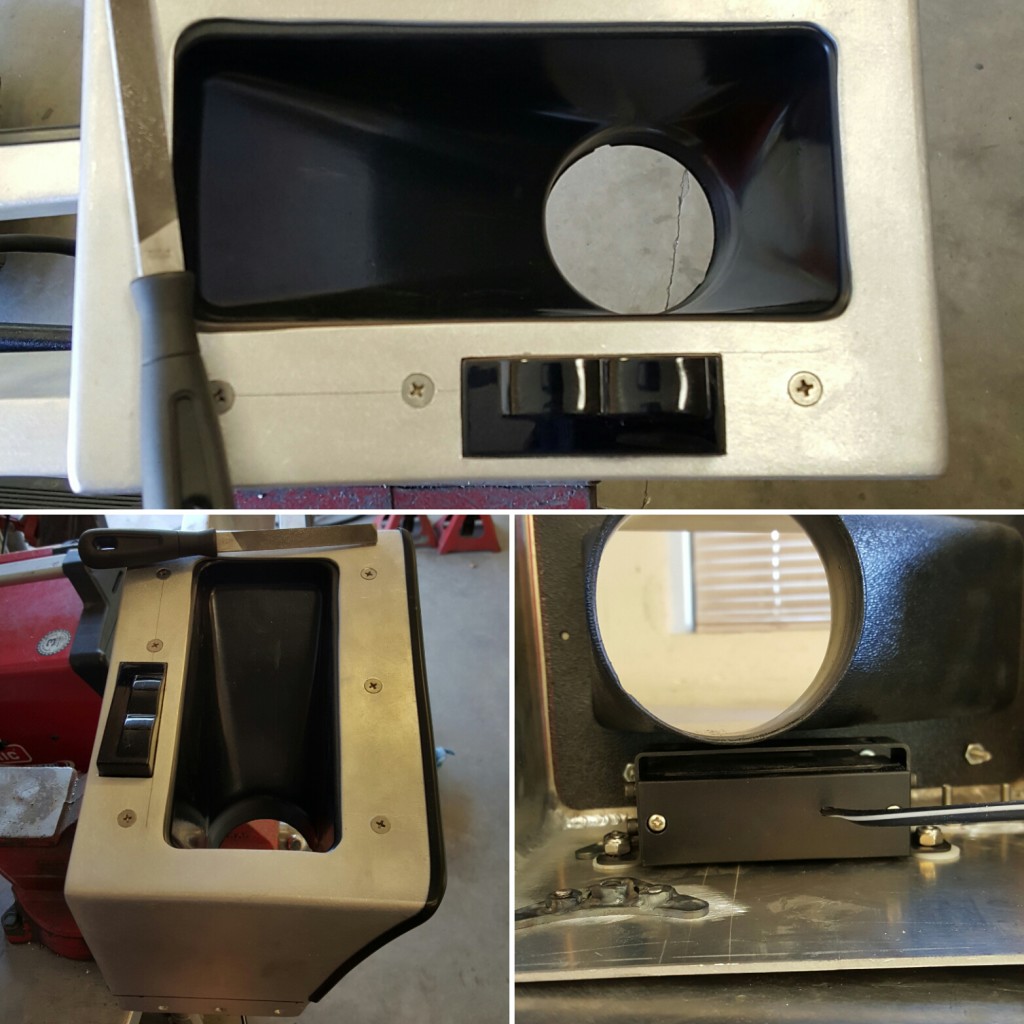
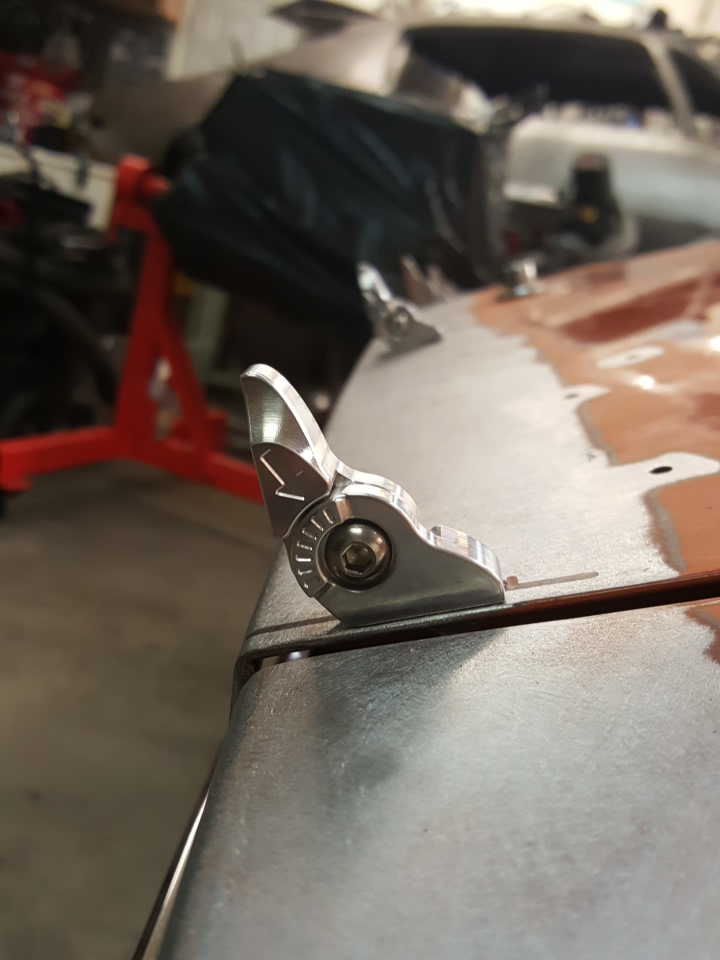
- I modified this SPA Techique fire suppression lever with a collet and pin so no accedental pulling can take place outside of a racing environment
-
- cool new parts to add to the list
-
- First round of primer blocking in the books
-
- final welding on the custom air intake support
-
- Finally, no more orange
-
- Quality gaps make the bodywork. I spent many hours welding and filing to perfection. All metal edges to boot.
-
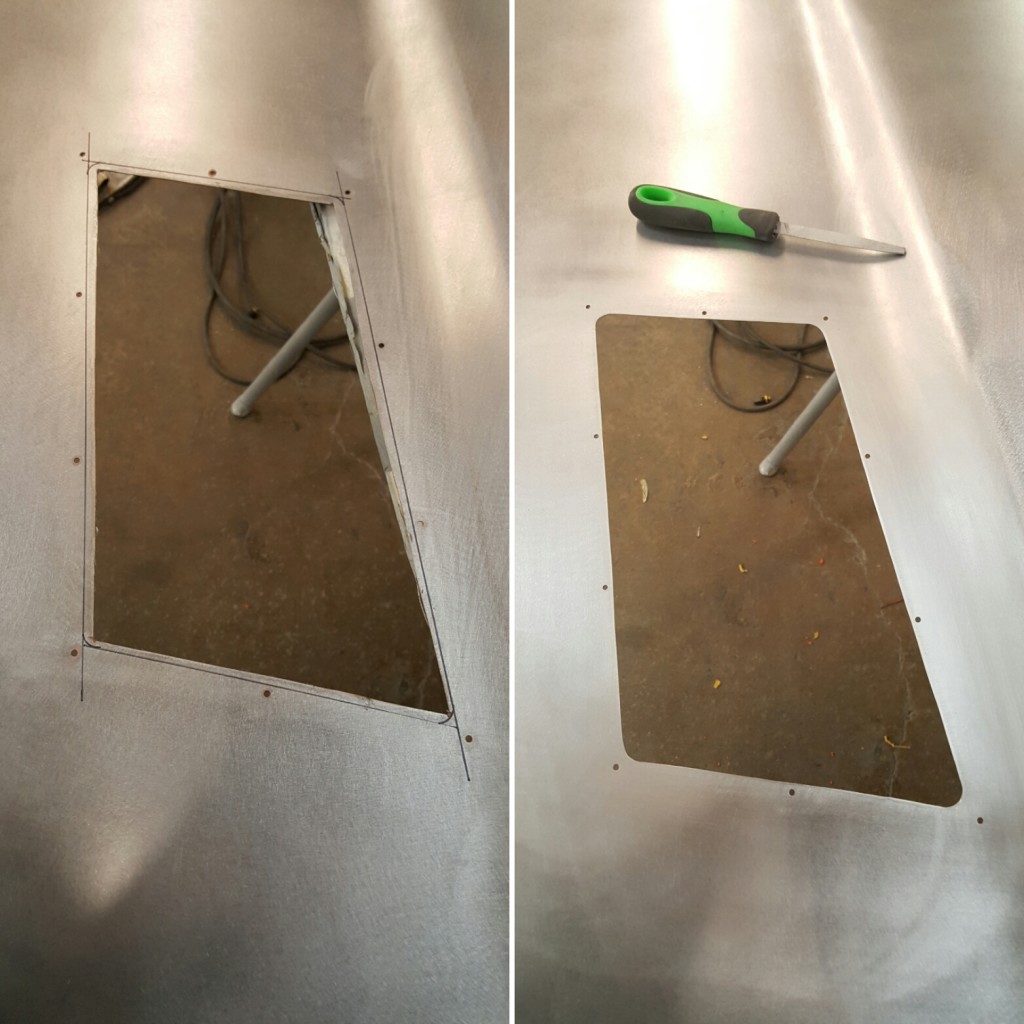
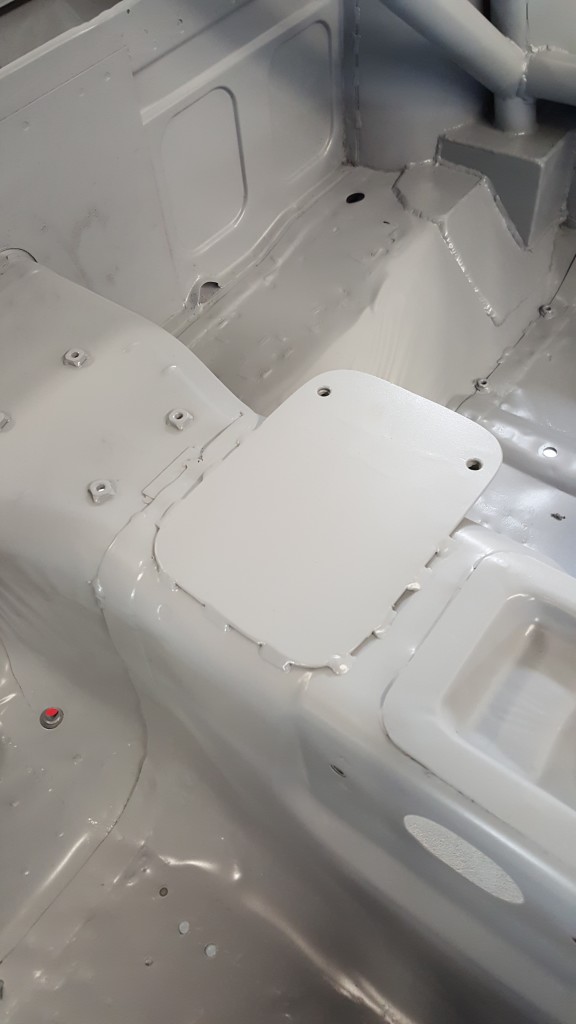
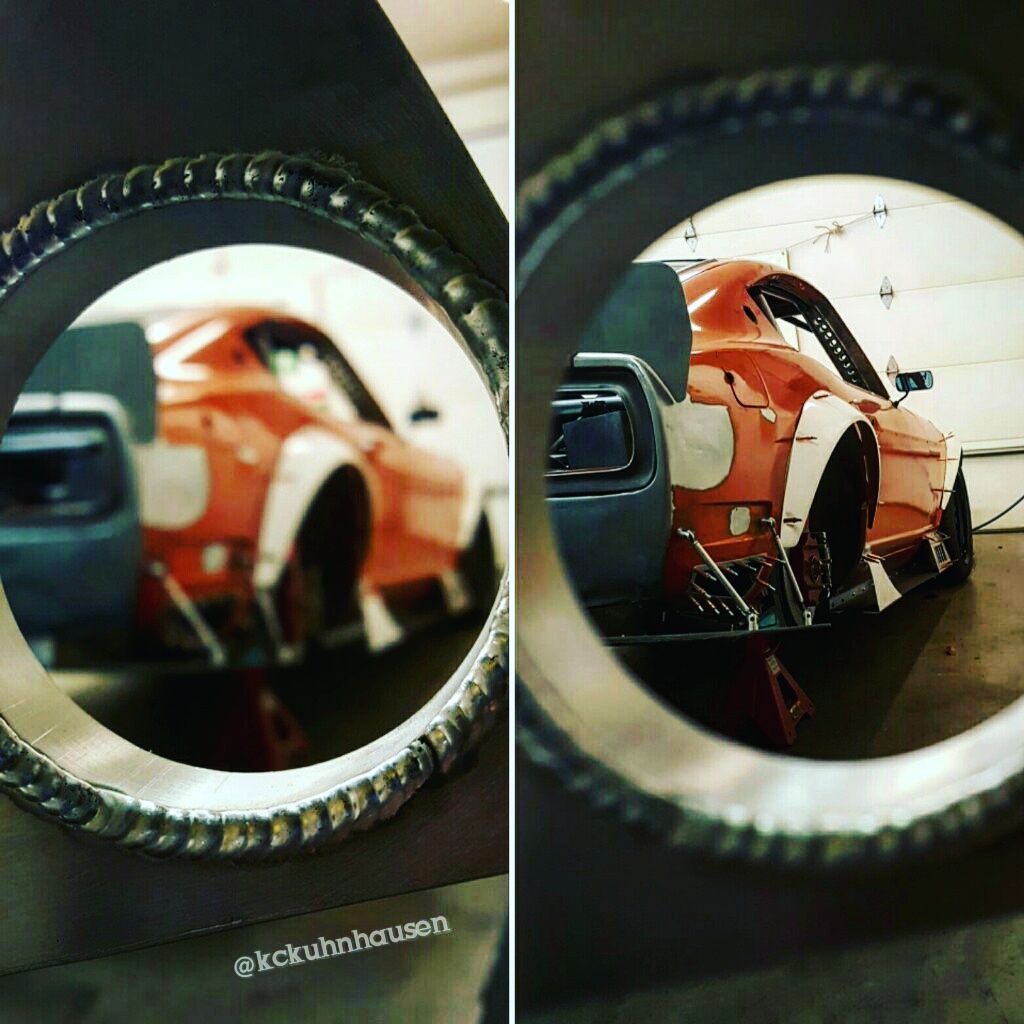
- The peep hole I cut to access the center deck spoiler mounts
-
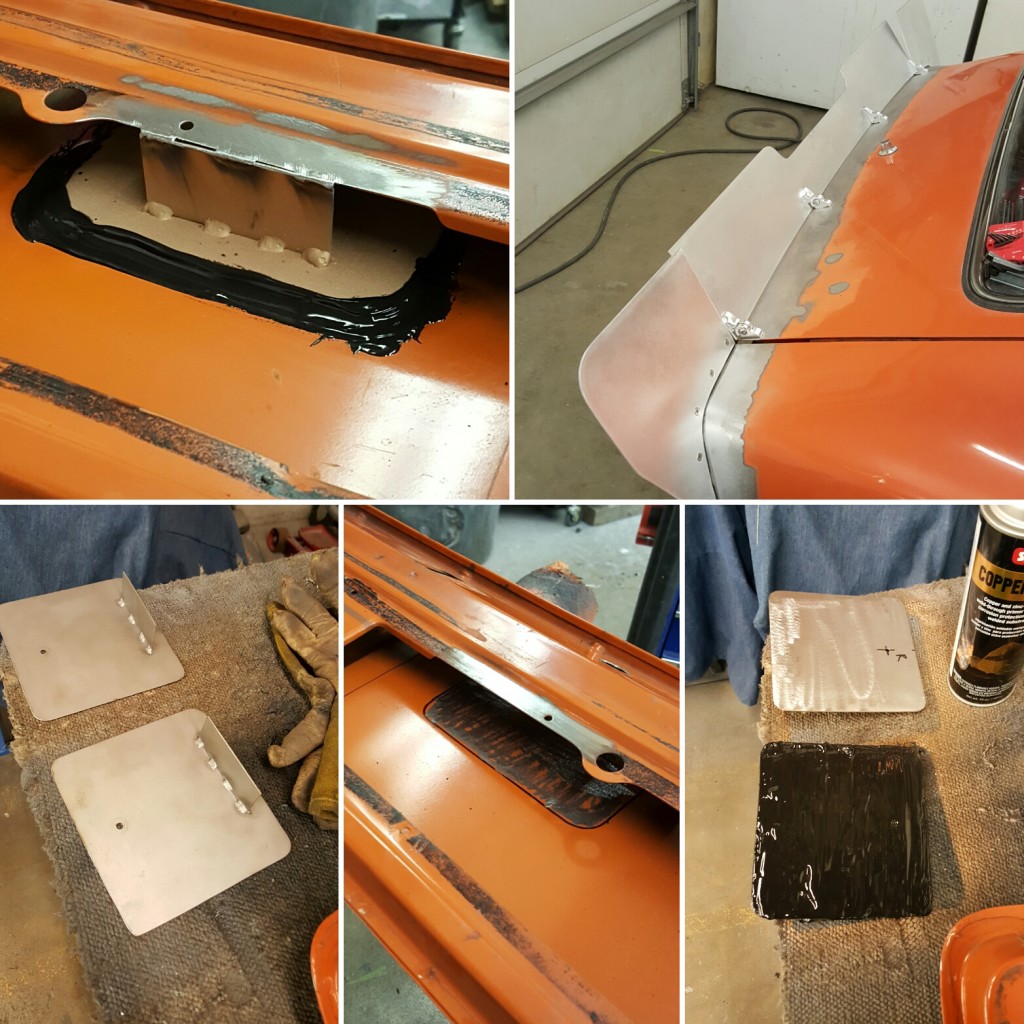
- Adding stiffness to the deck lid spoiler mounting points. Nothing ever just bolts on
-
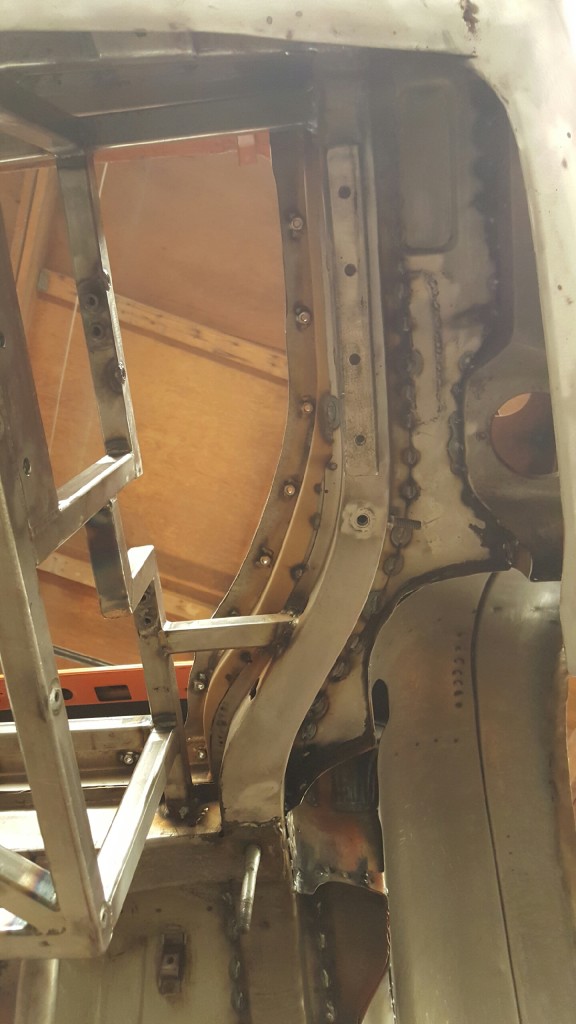
- Major reinforcement and armour to the unibody main rails
-
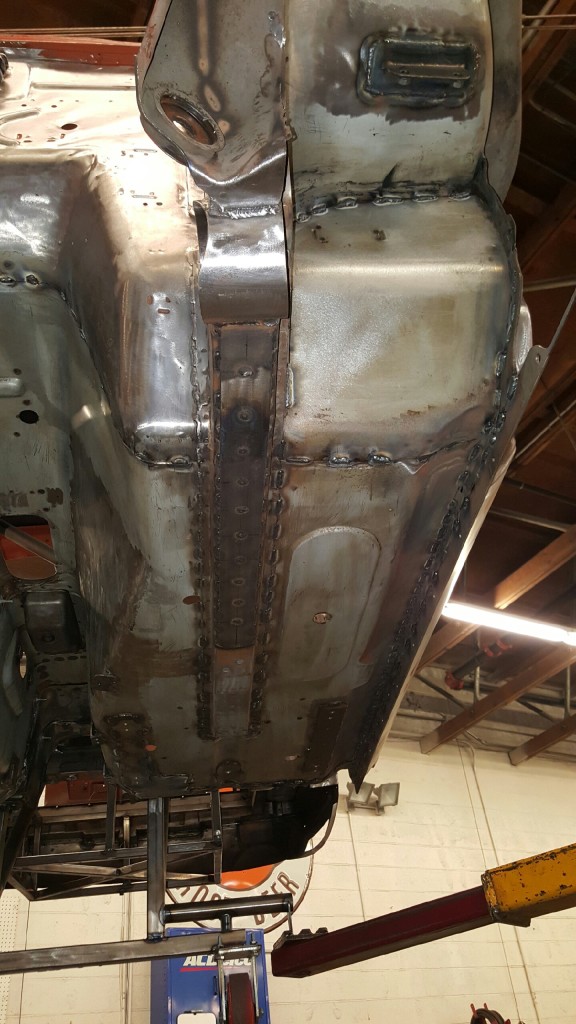
- stitch welded seams everywhere topside and underneath
-
- aditional seam welding for torsional strength
-
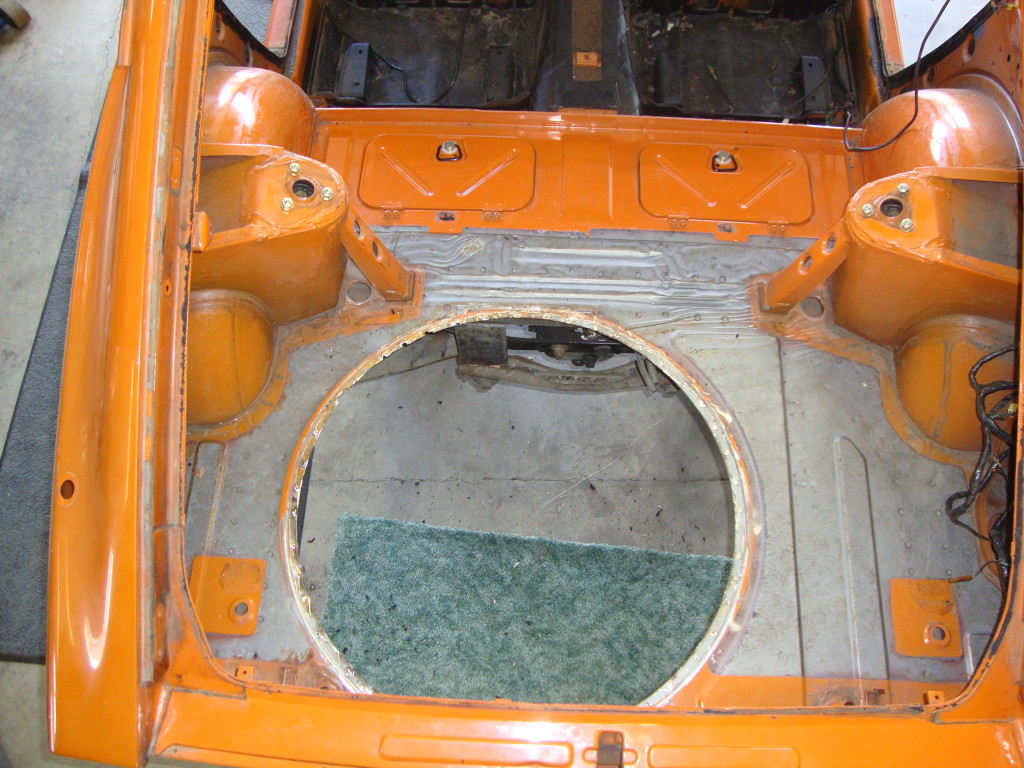
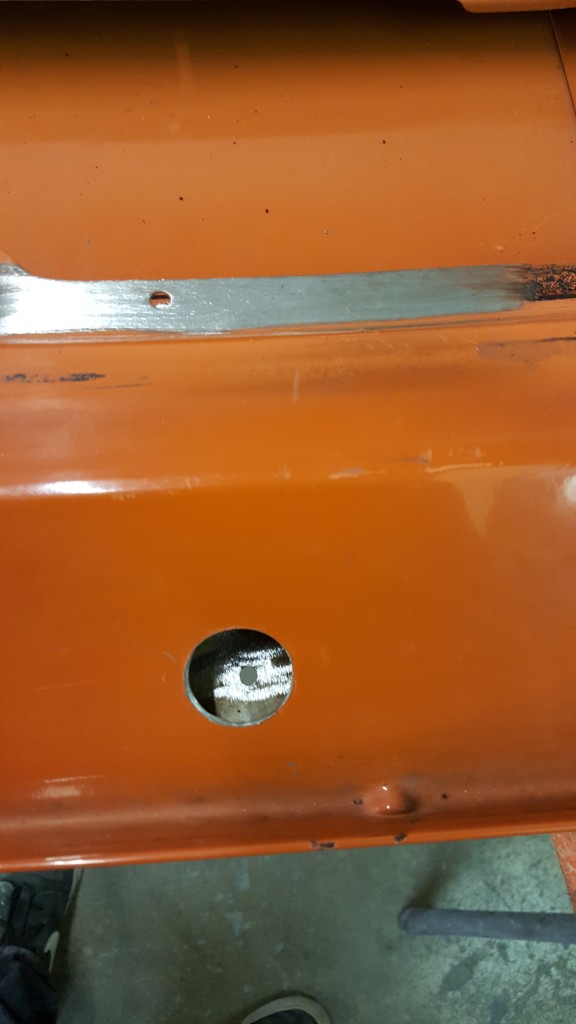
- is that hole factory? no, no it is not
-
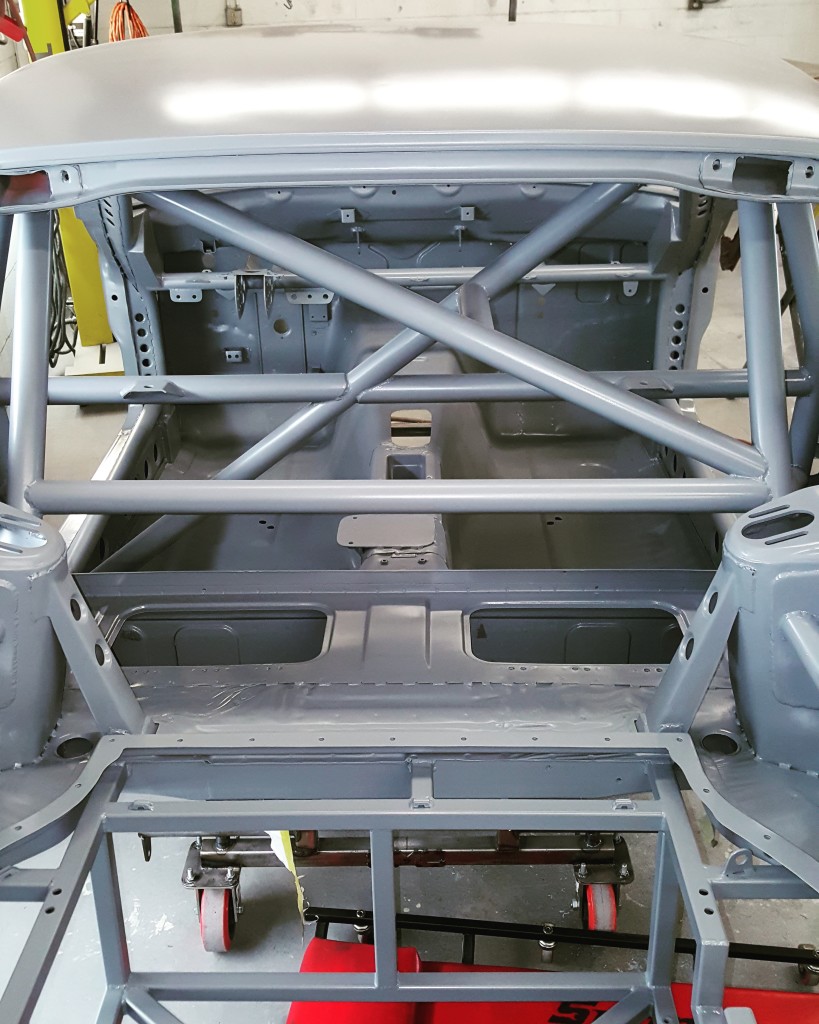
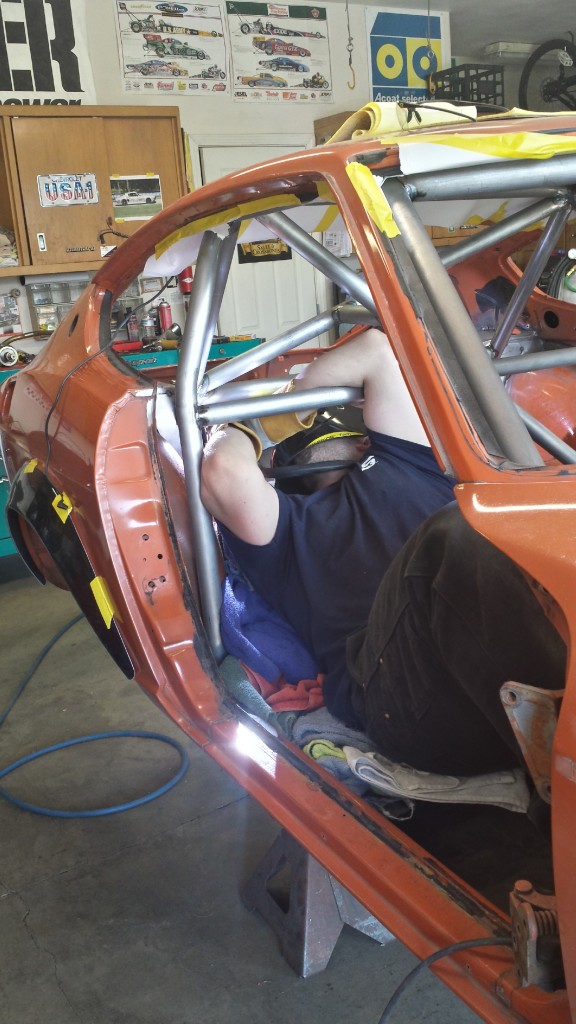
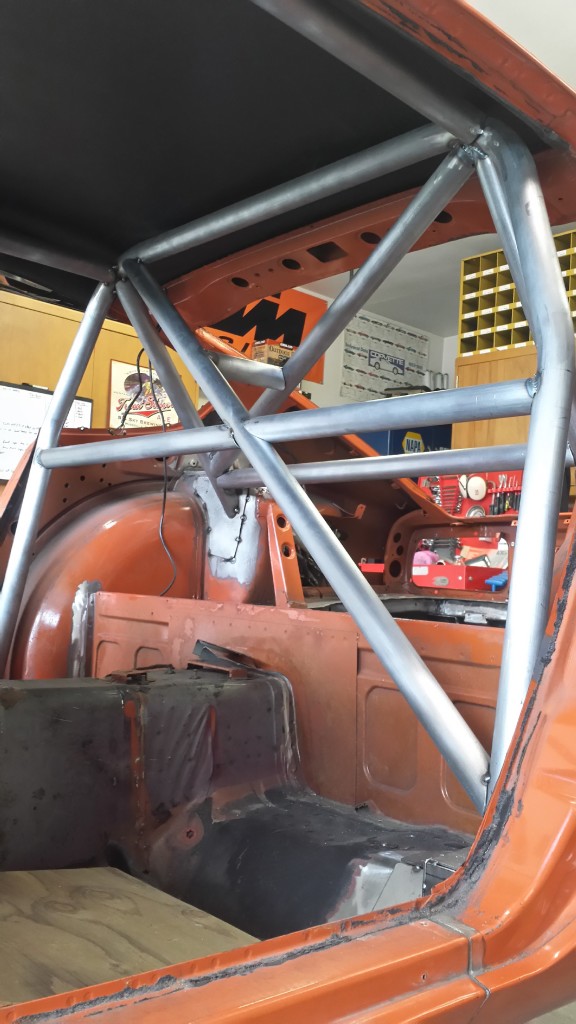
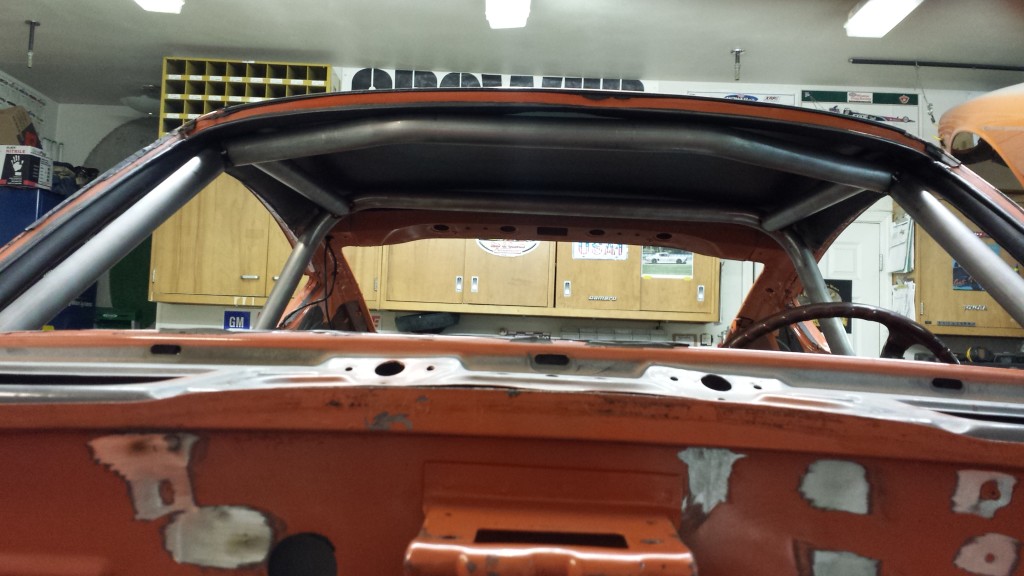
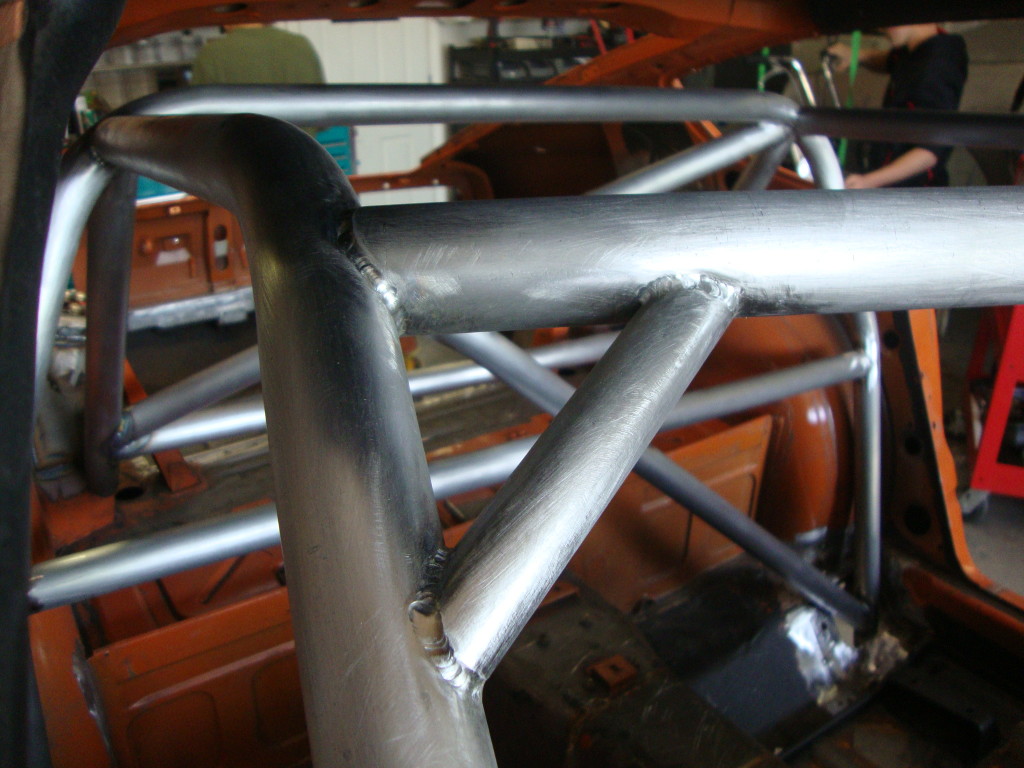
- I love good cage work
-
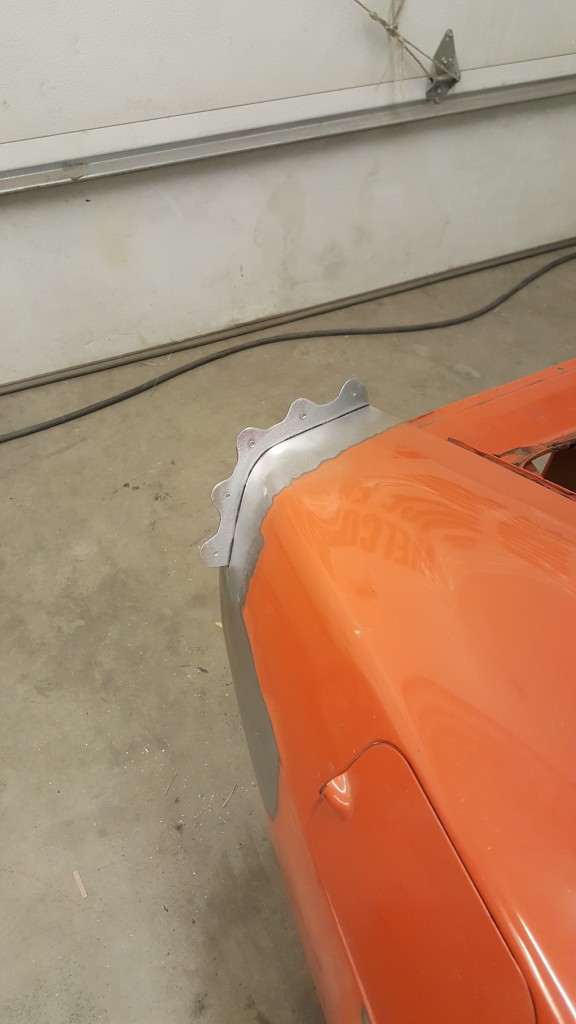
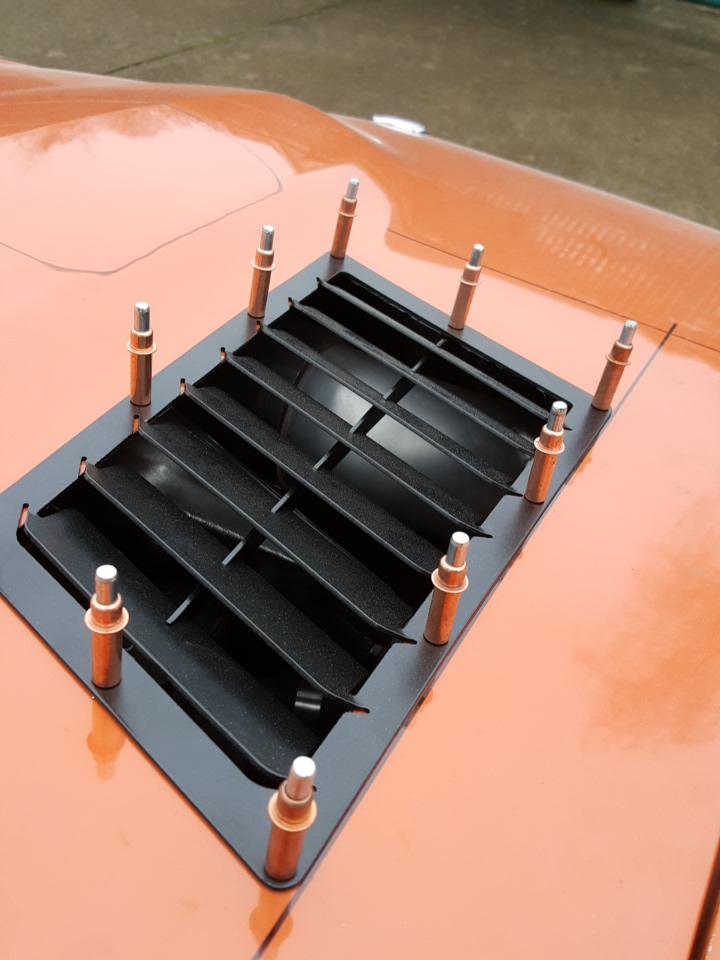
- Cleaning up the hood heat extractor vent openings
-
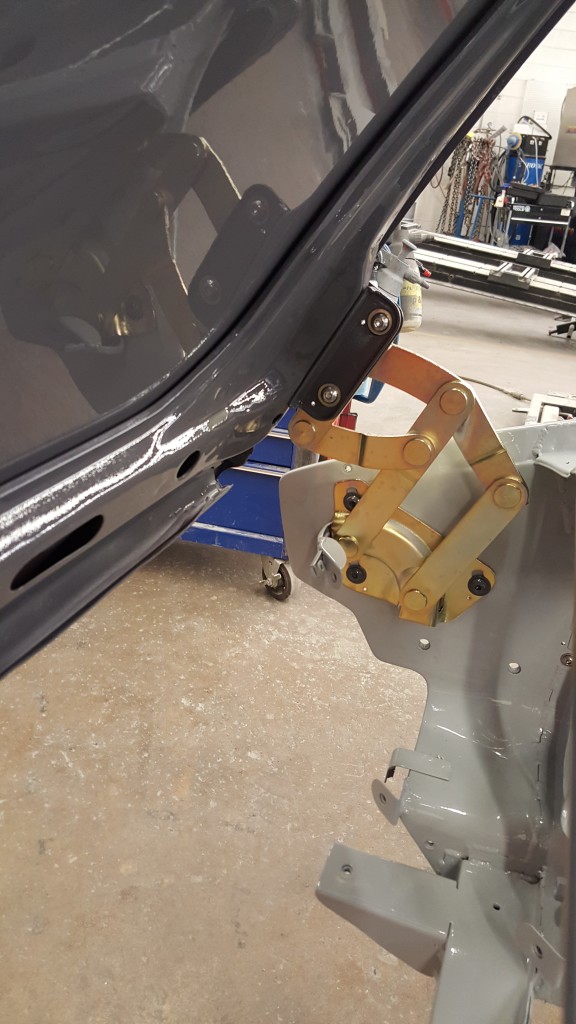
- a solid mount for the hydraulic slide lever
-
- The last hoorah before sealer
-

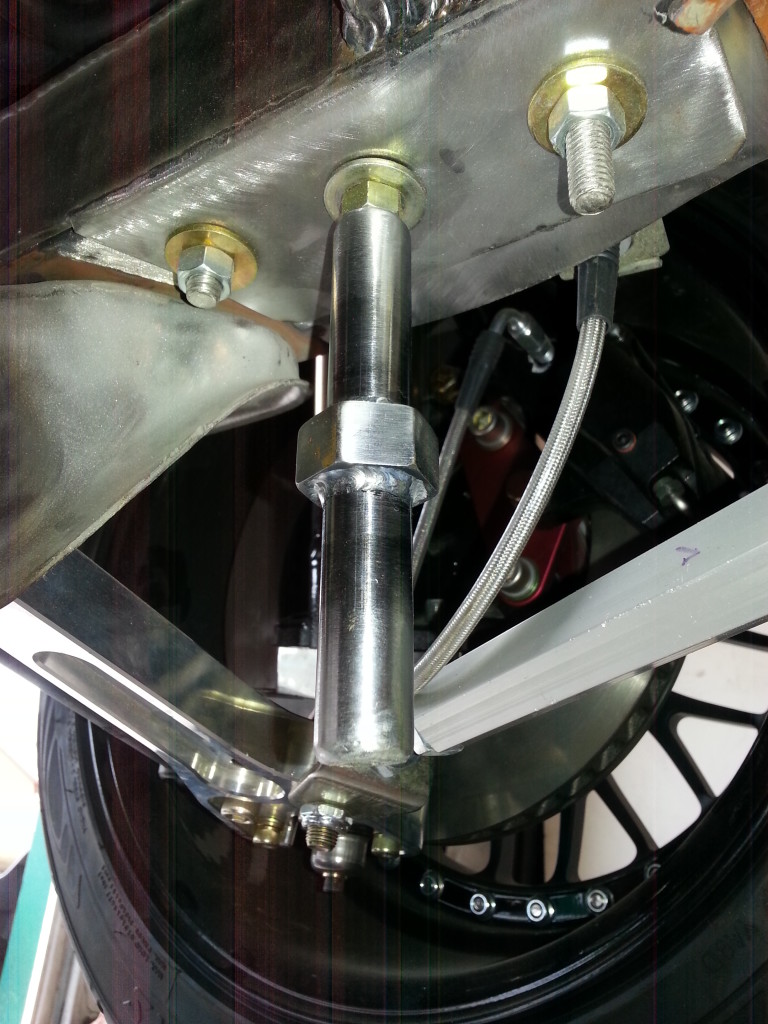
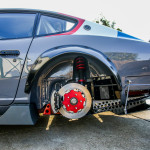
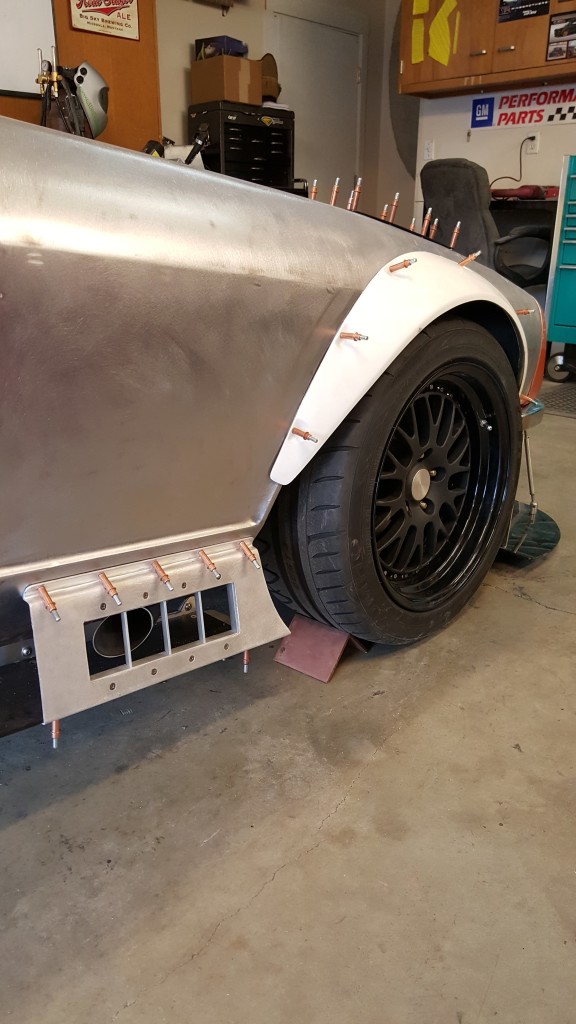
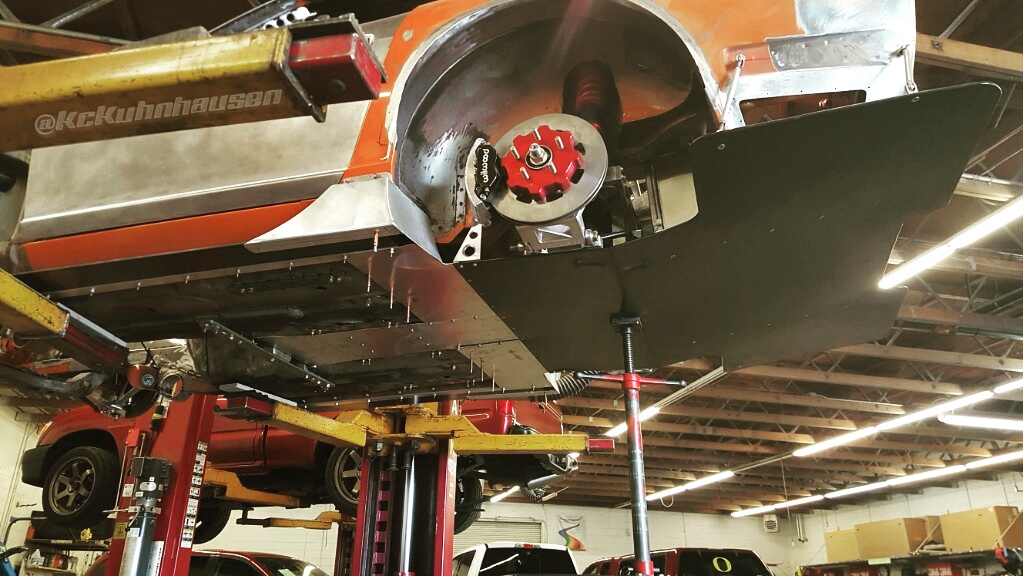
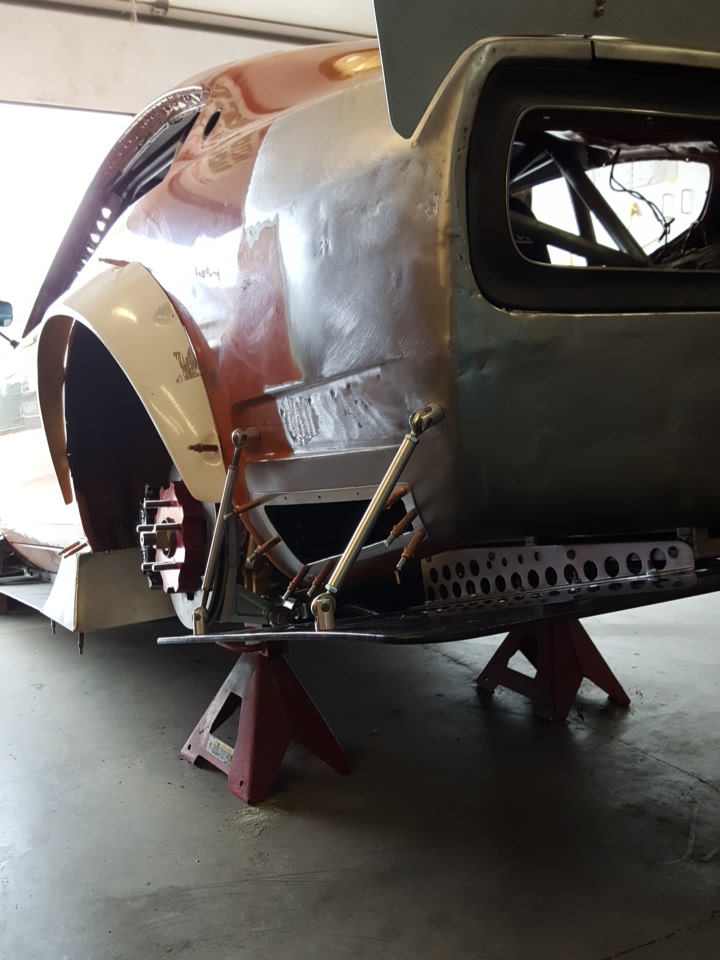
- Rear brake duct rocker clearancing and solid tow/jacking points
-
- nothing like cutting .750″ hardened steel by hand, but its for a good cause, protecting that beautiful exhaust
-
- reinforcing the rail exhaust cutouts
-
- fire suppression brackets added to the engine bay
-
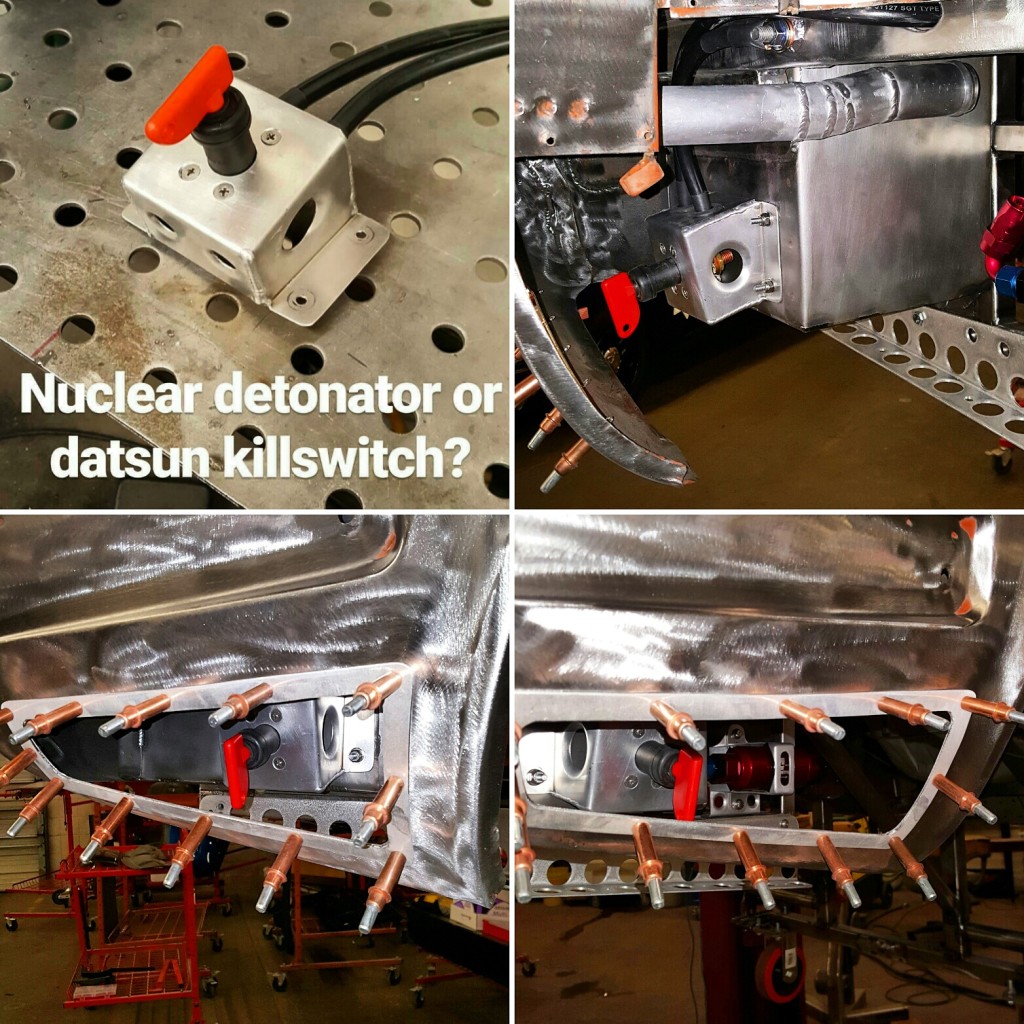
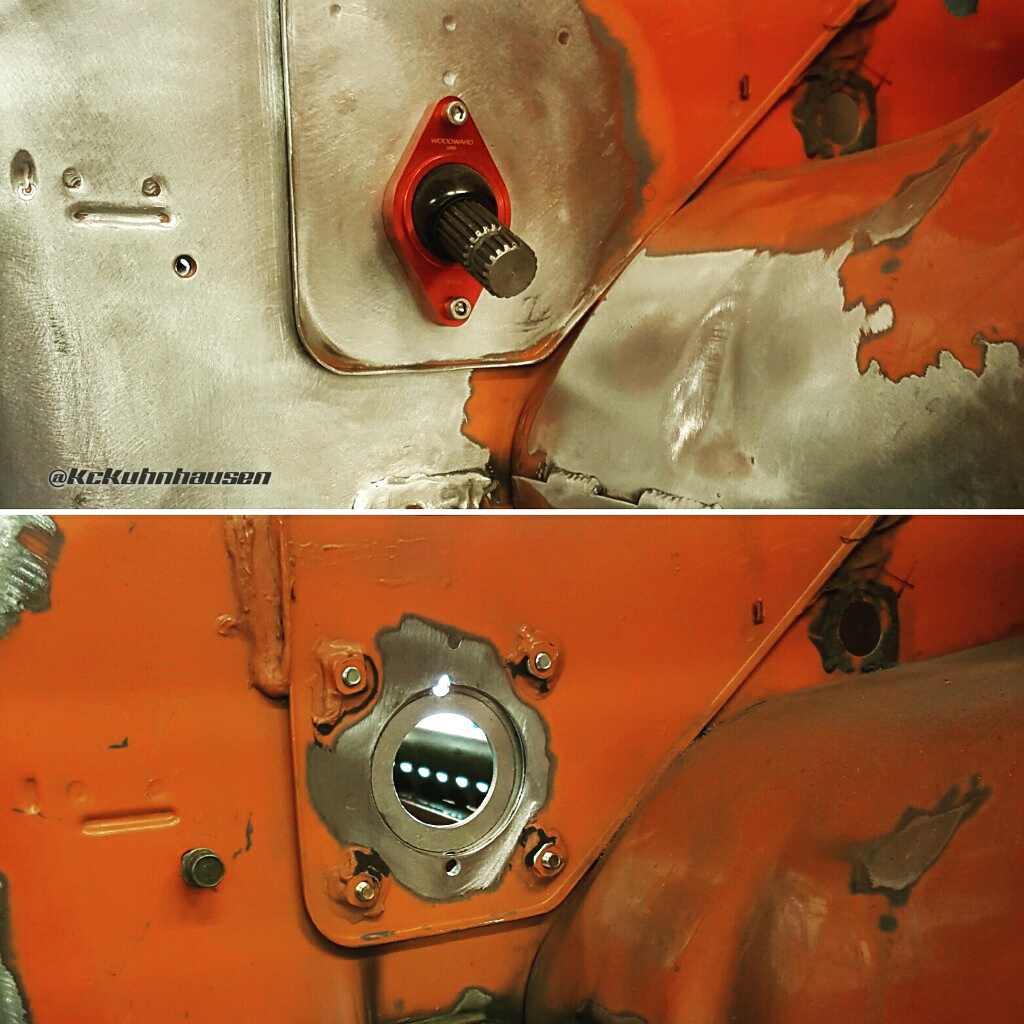
- battery kill switch with a little flair
-
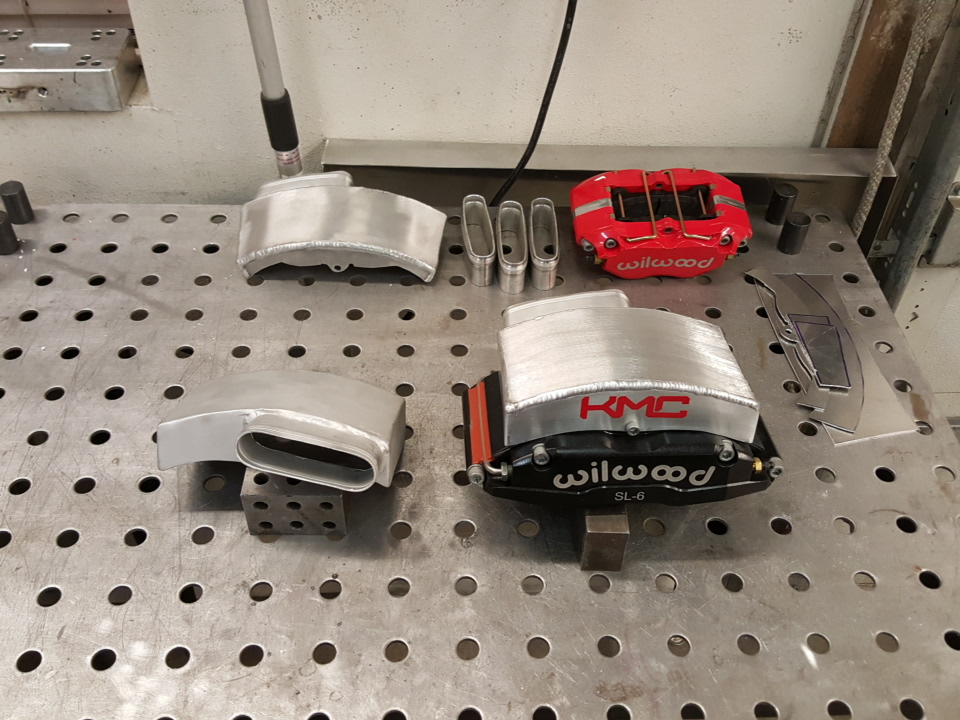
- The humped alloy pieces leave room and easy access to the fuel pump and check valve
-
- sometimes its best to walk away when a design isnt working. The abomination on the left is idea #1, need I say more?
-
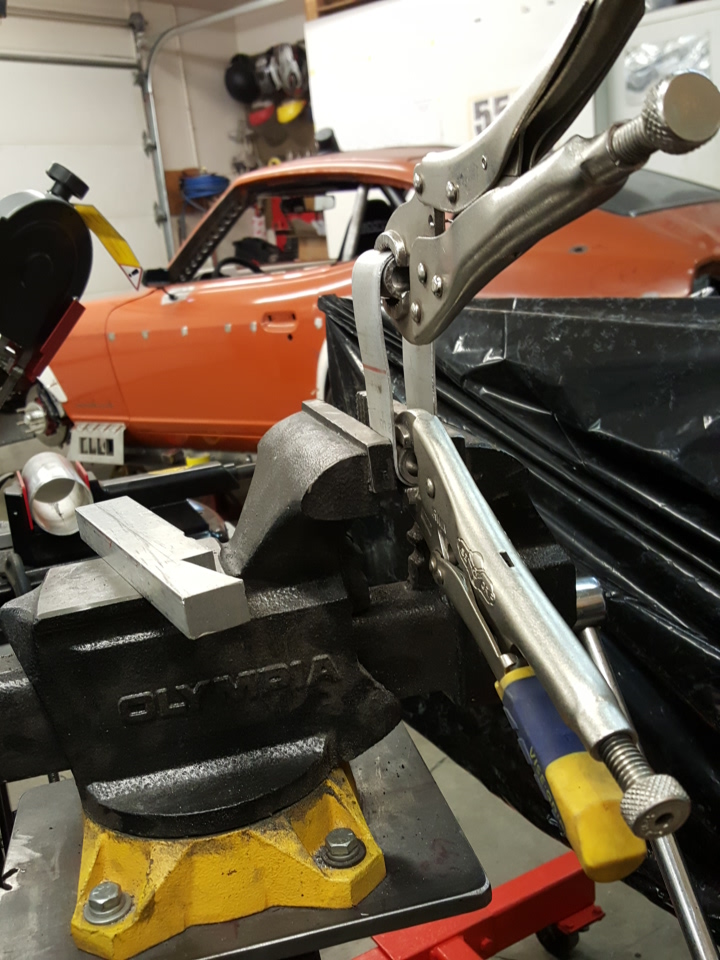
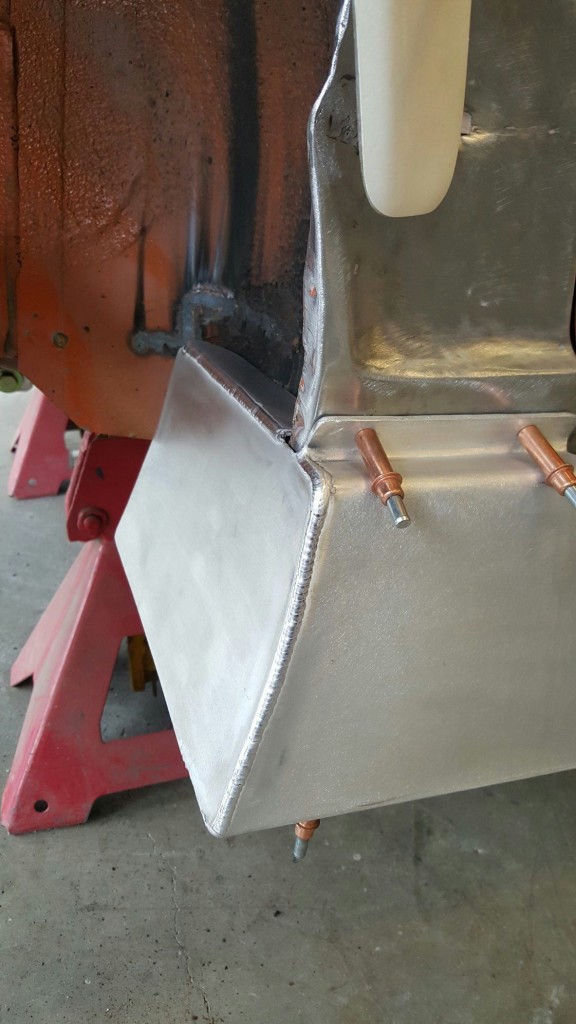
- The steel riser gets welded to the chassis and flanged nuts welded to the backside for easy removal of the aluminum top piece. It began life as a flat sheet of 18 ga. the shrinker/stretcher did the rest
-
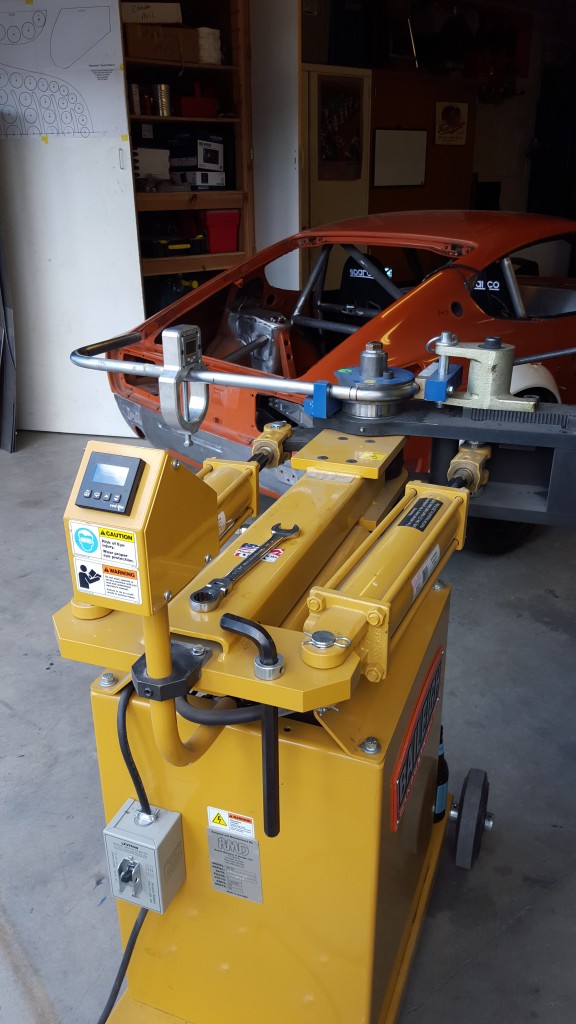
- making the tools to make the things. This was done before I purchased the electromagnetic break
-
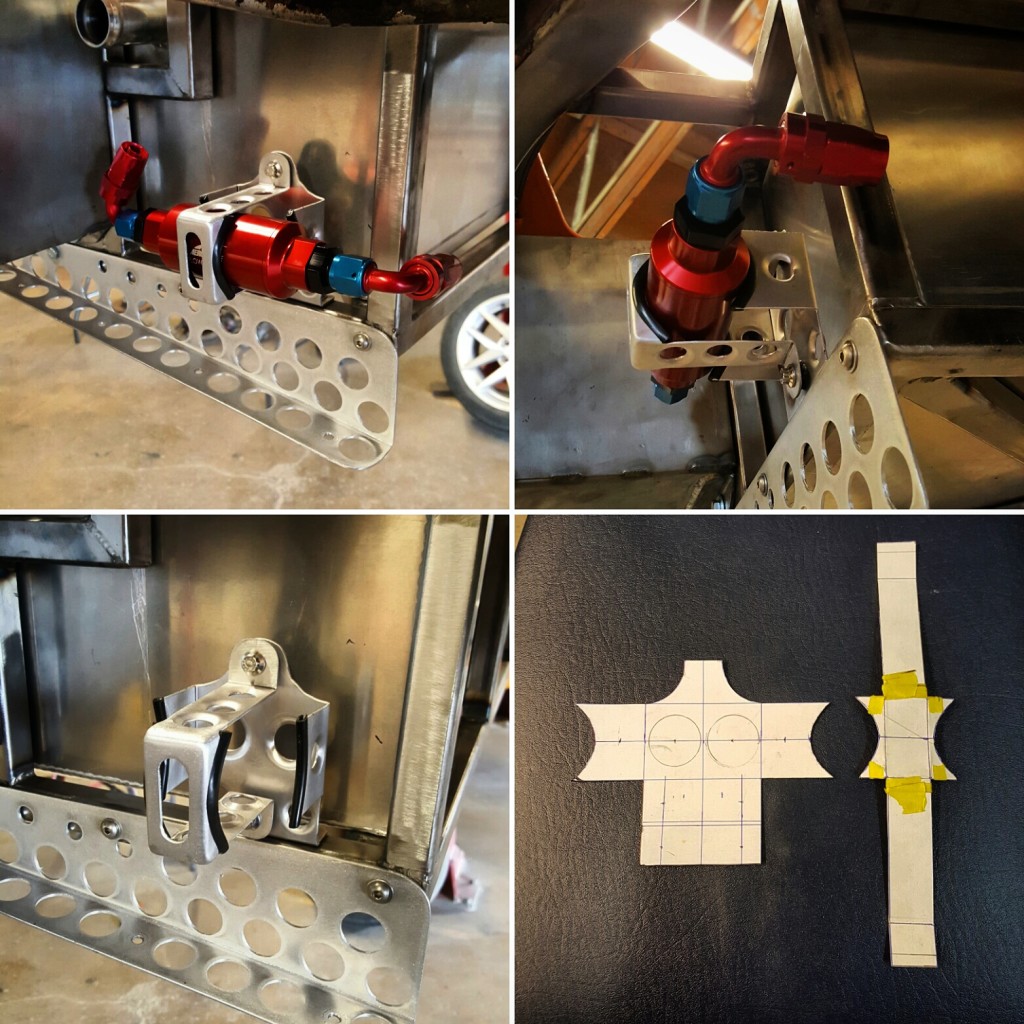
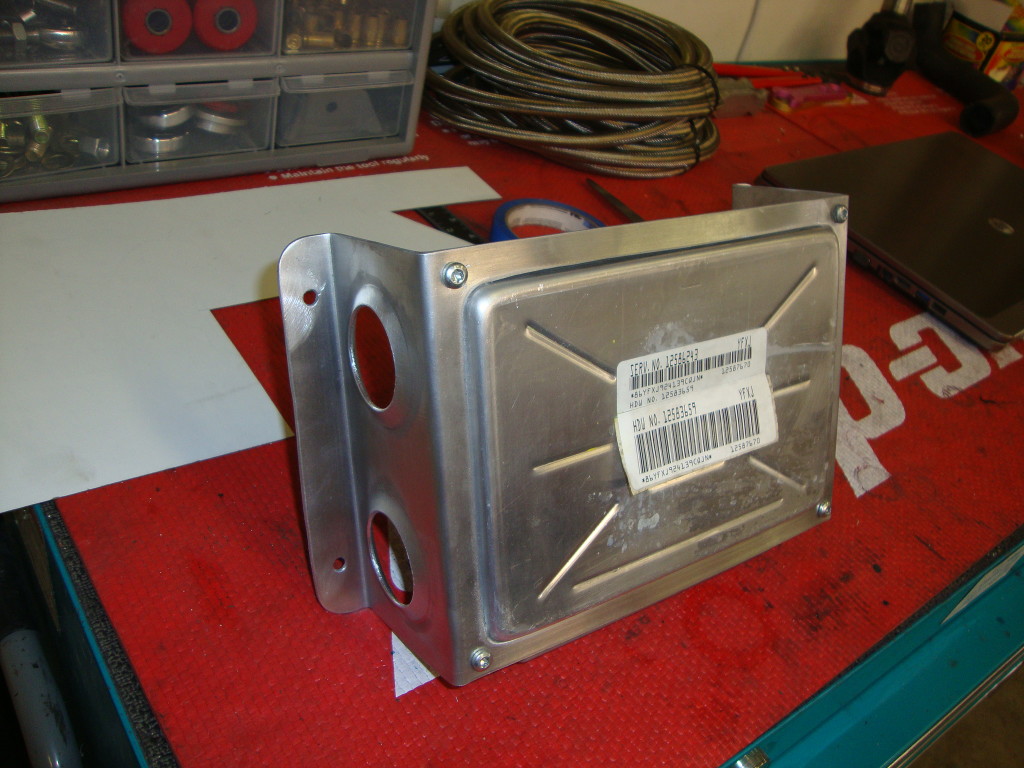
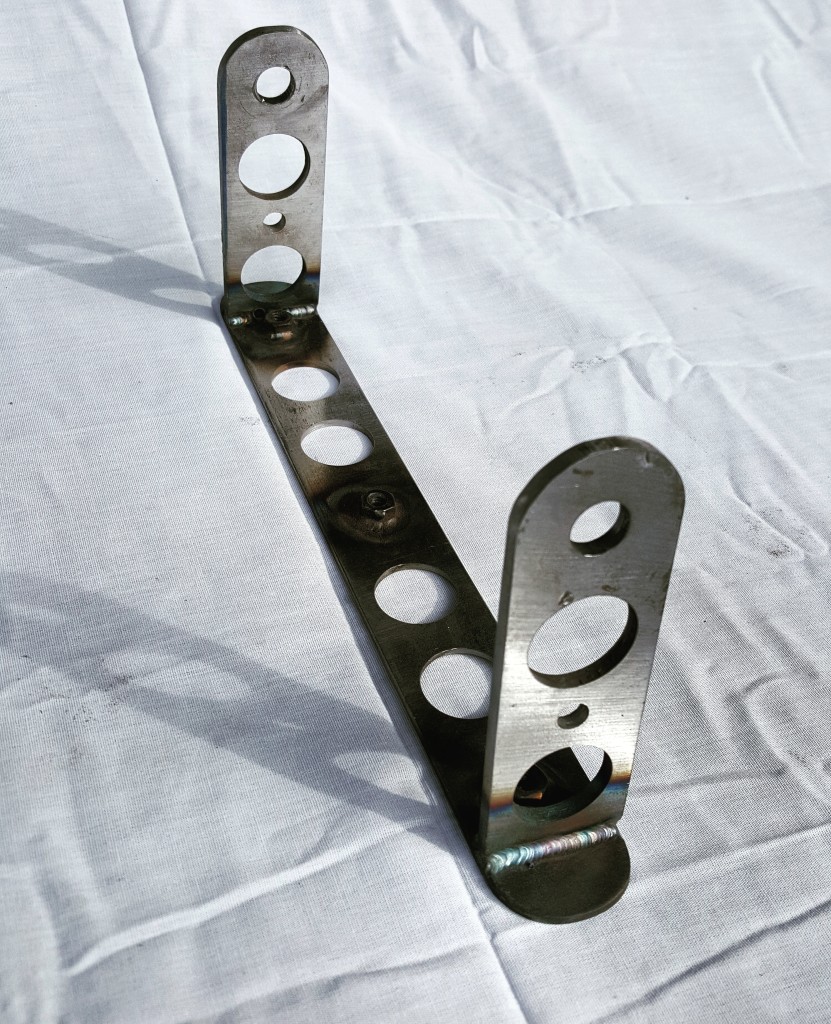
- A handmade fuel filter bracket
-
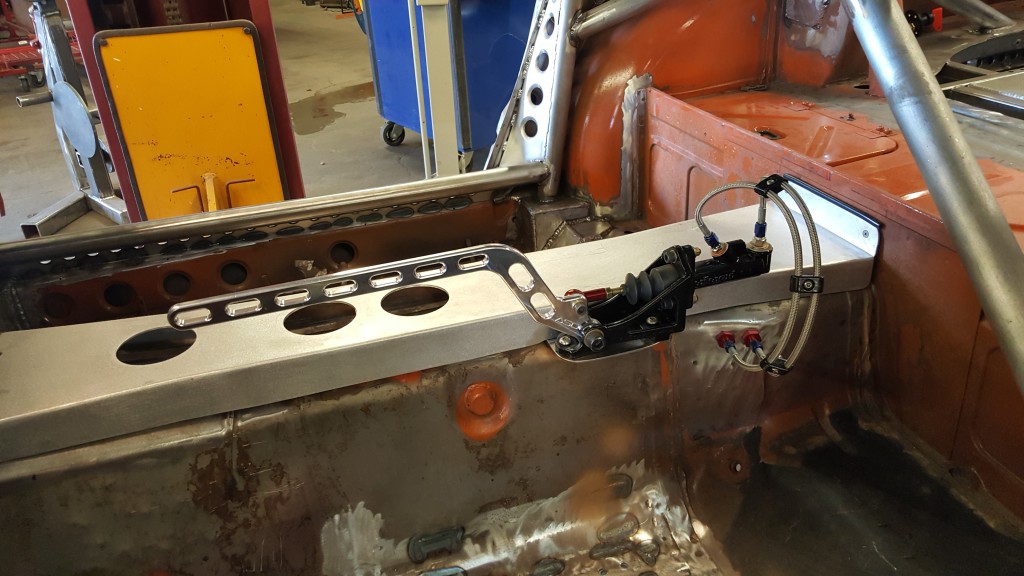
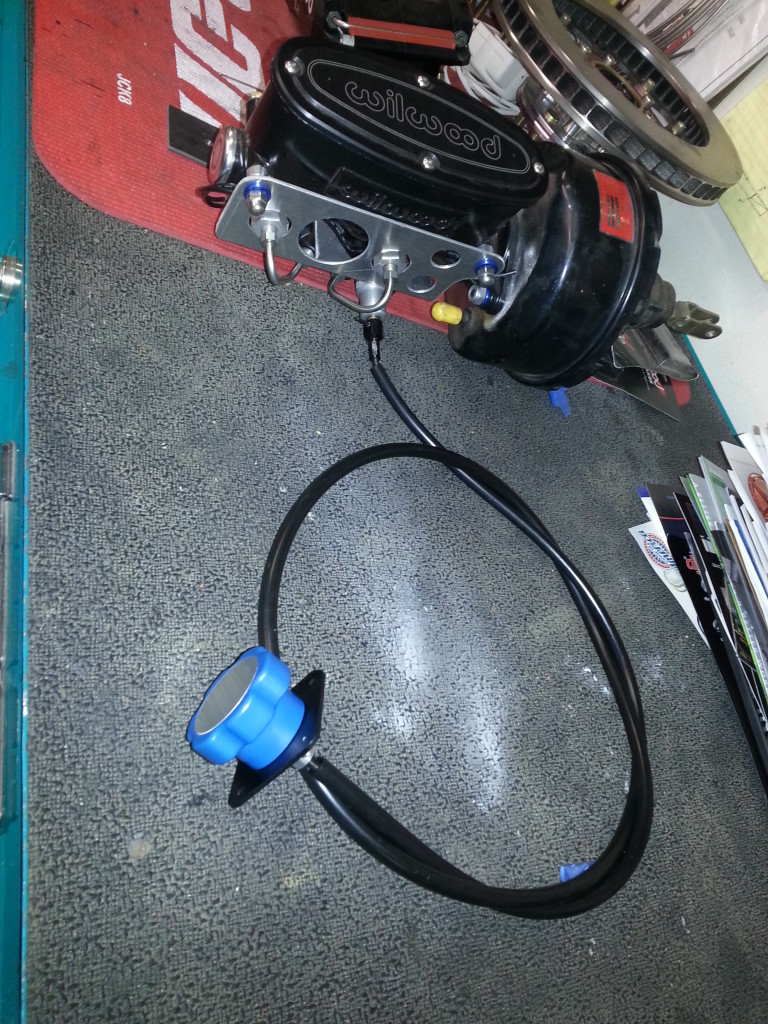
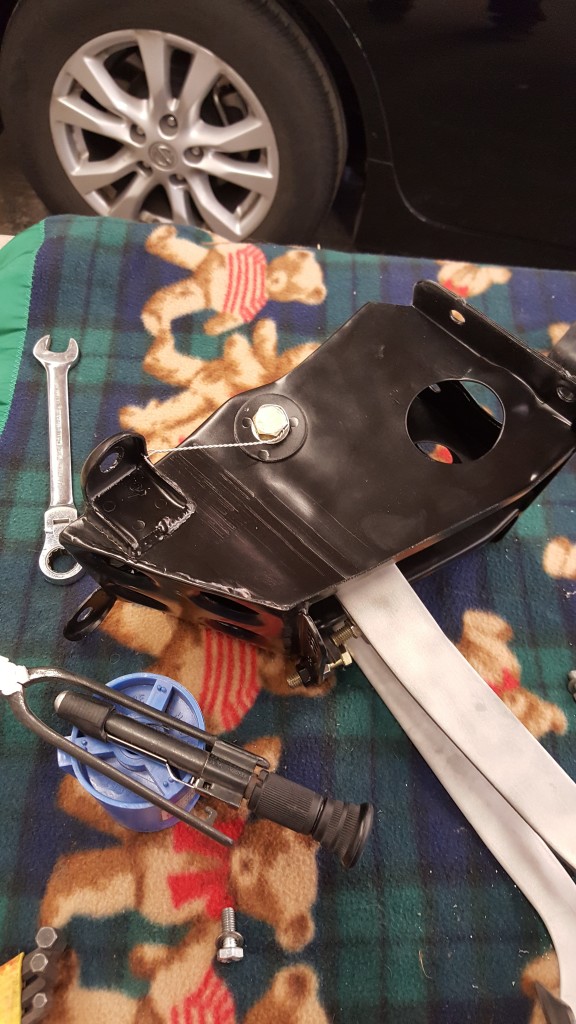
- Hydraulic rear break lockup at the pull of a lever
-
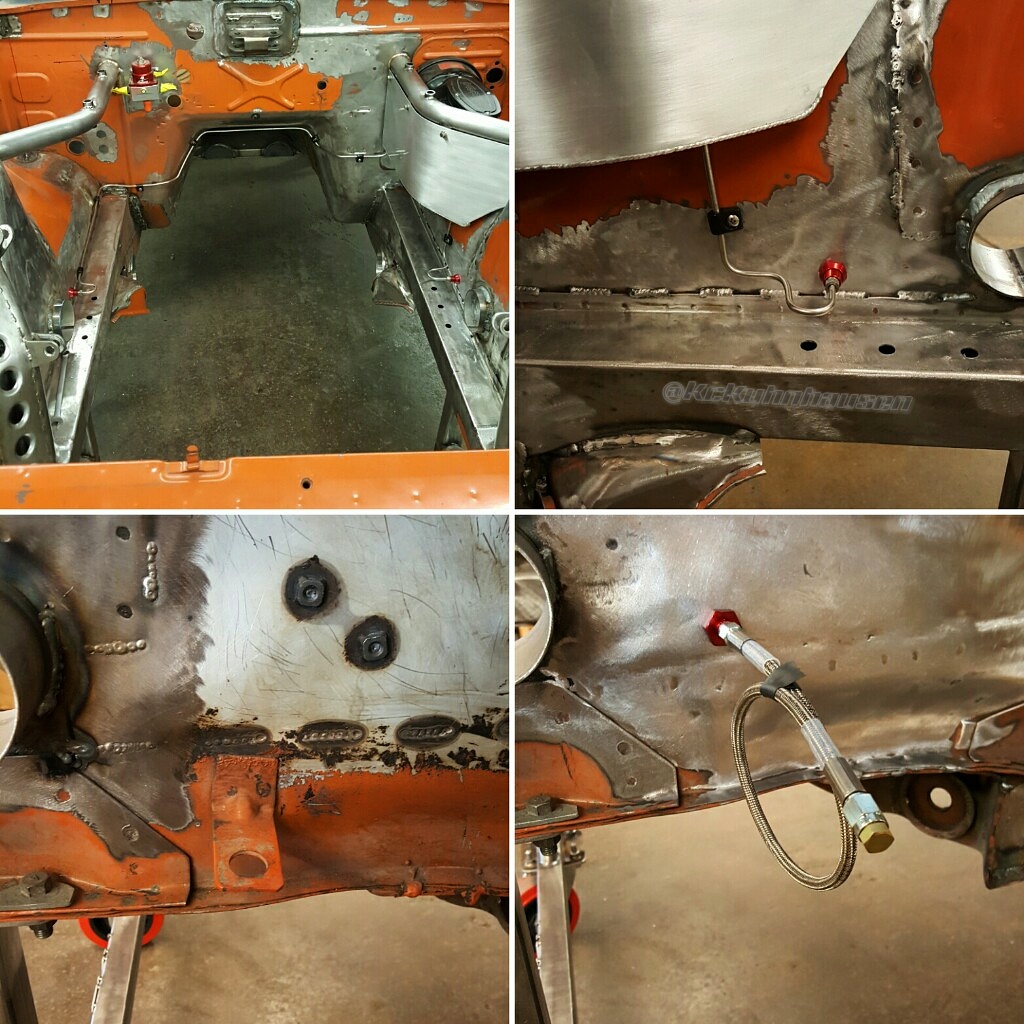
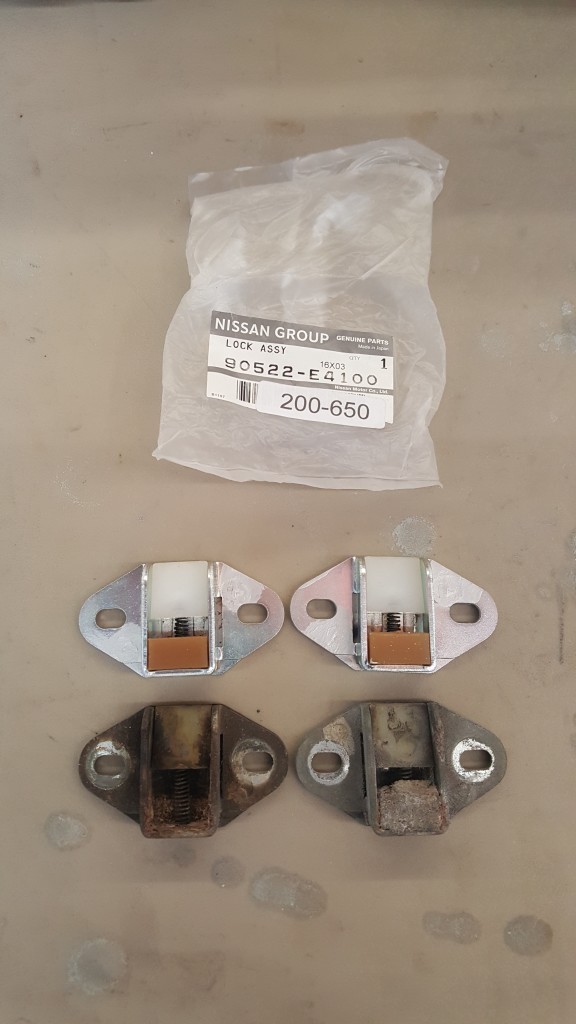
- Out with the old, in with the cleaner new brake lines
-
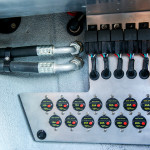
- A whole lot of custom in one place
-
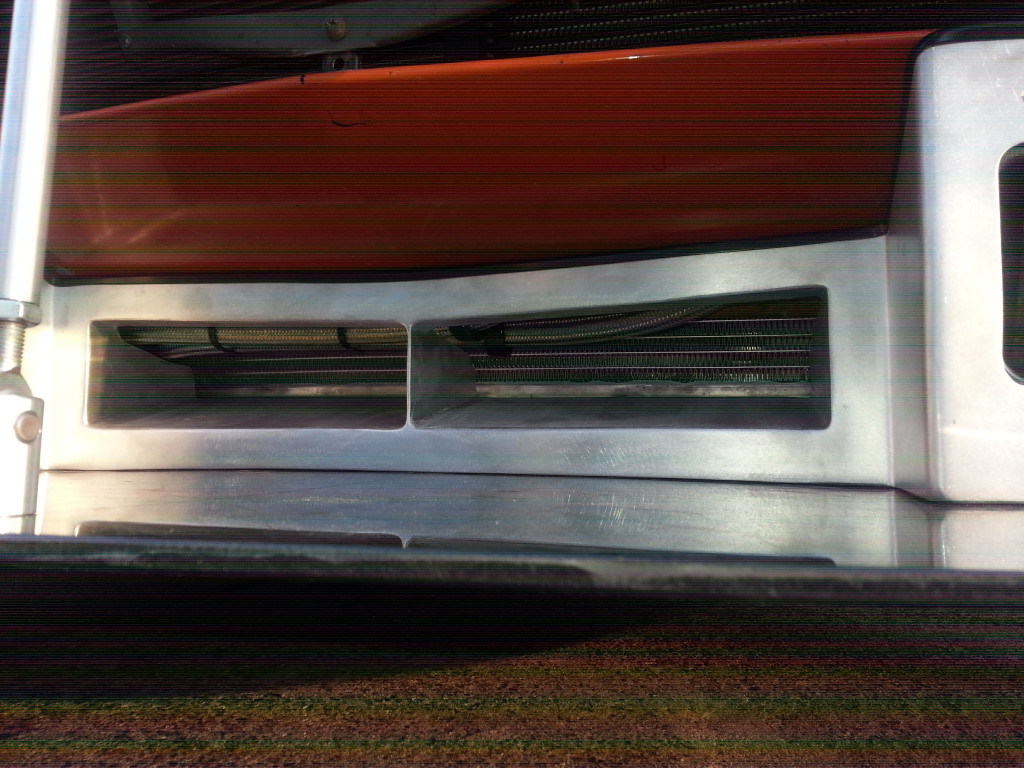
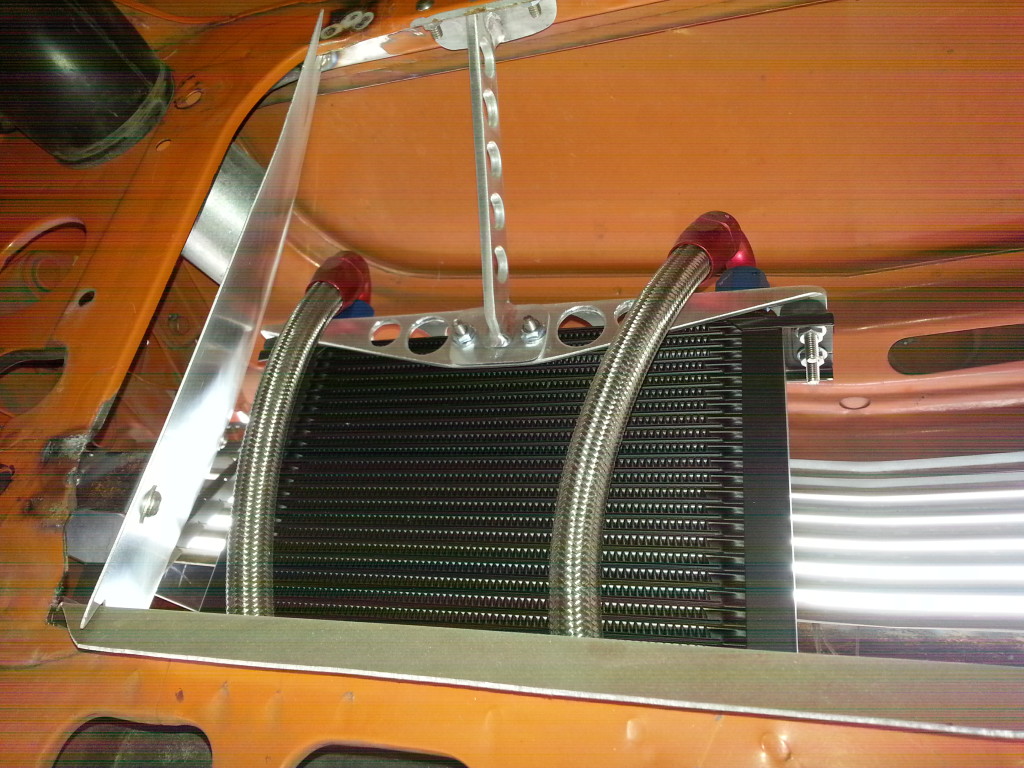
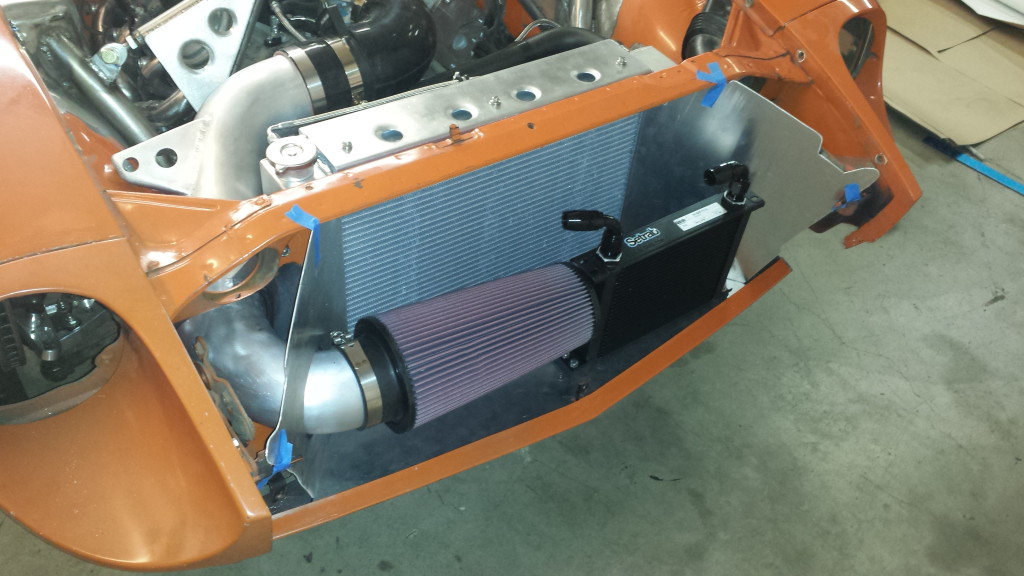
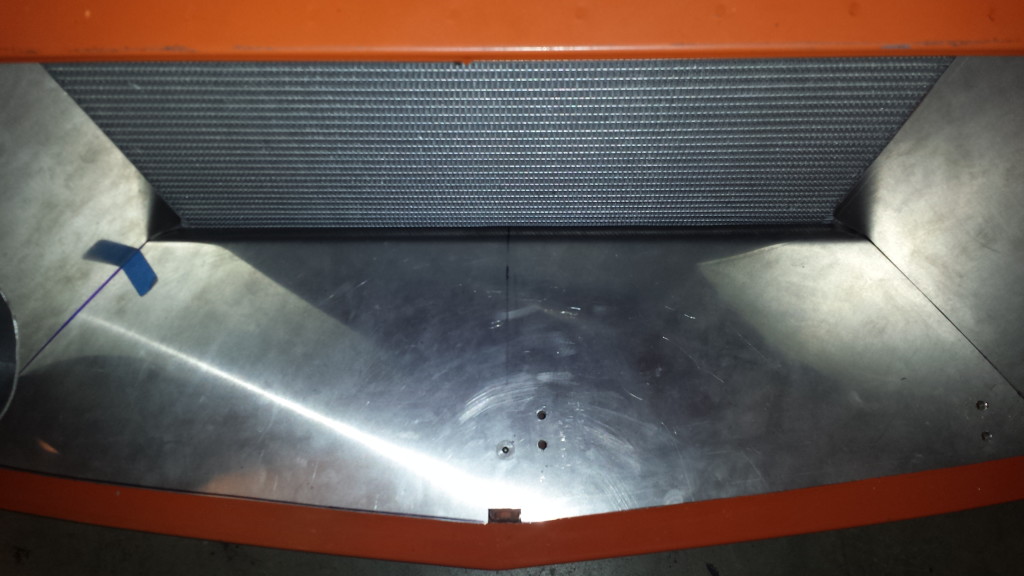
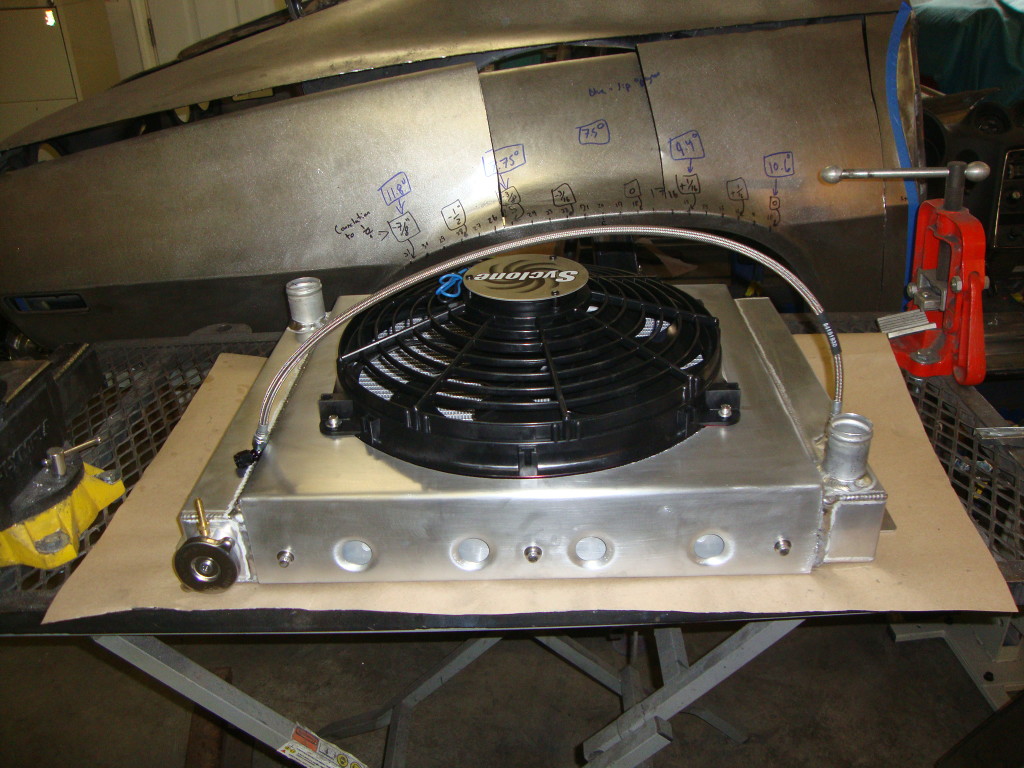
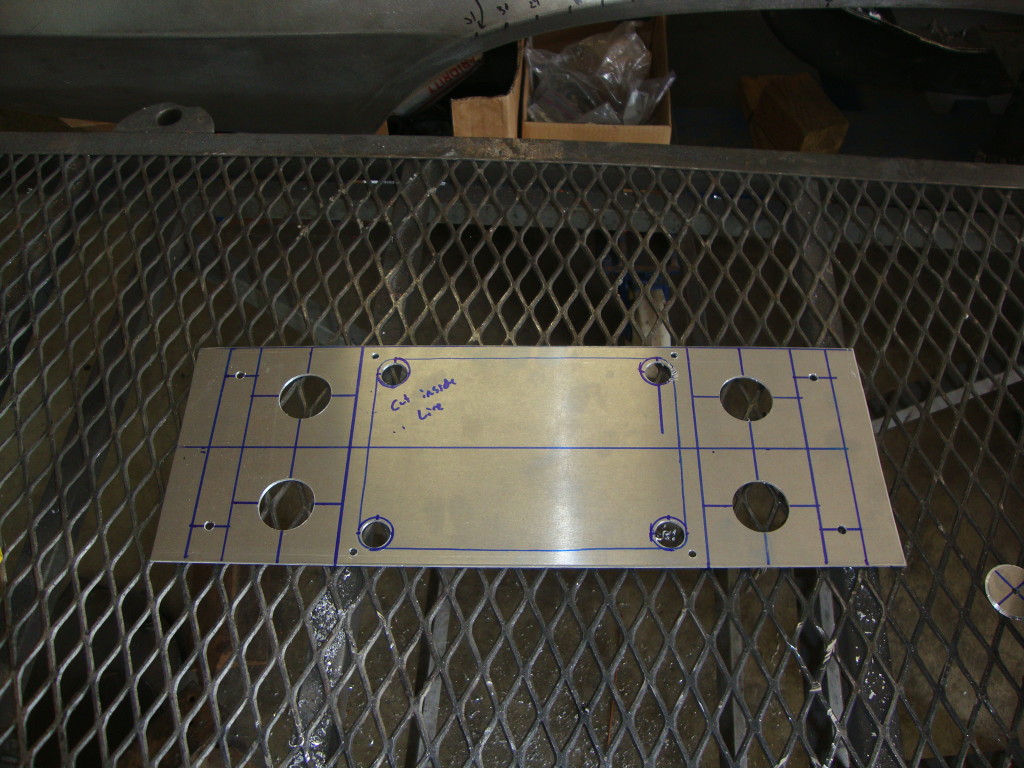
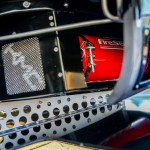
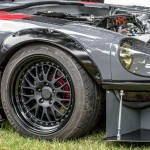
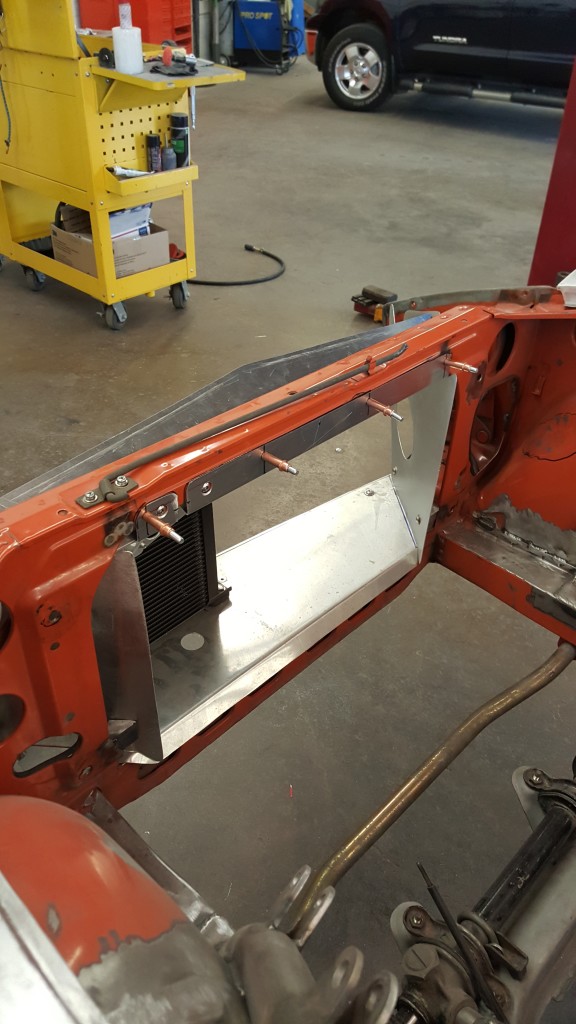
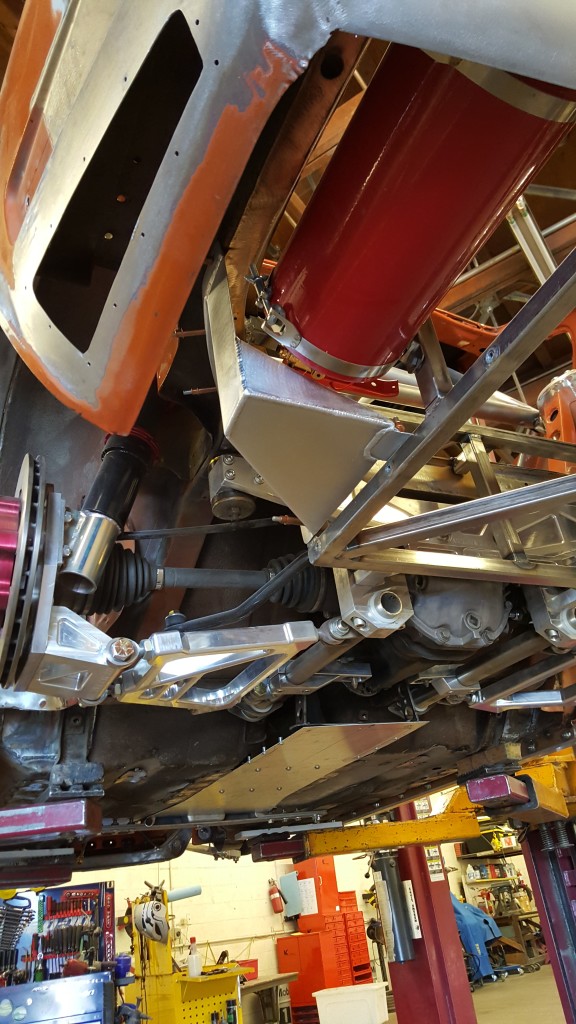
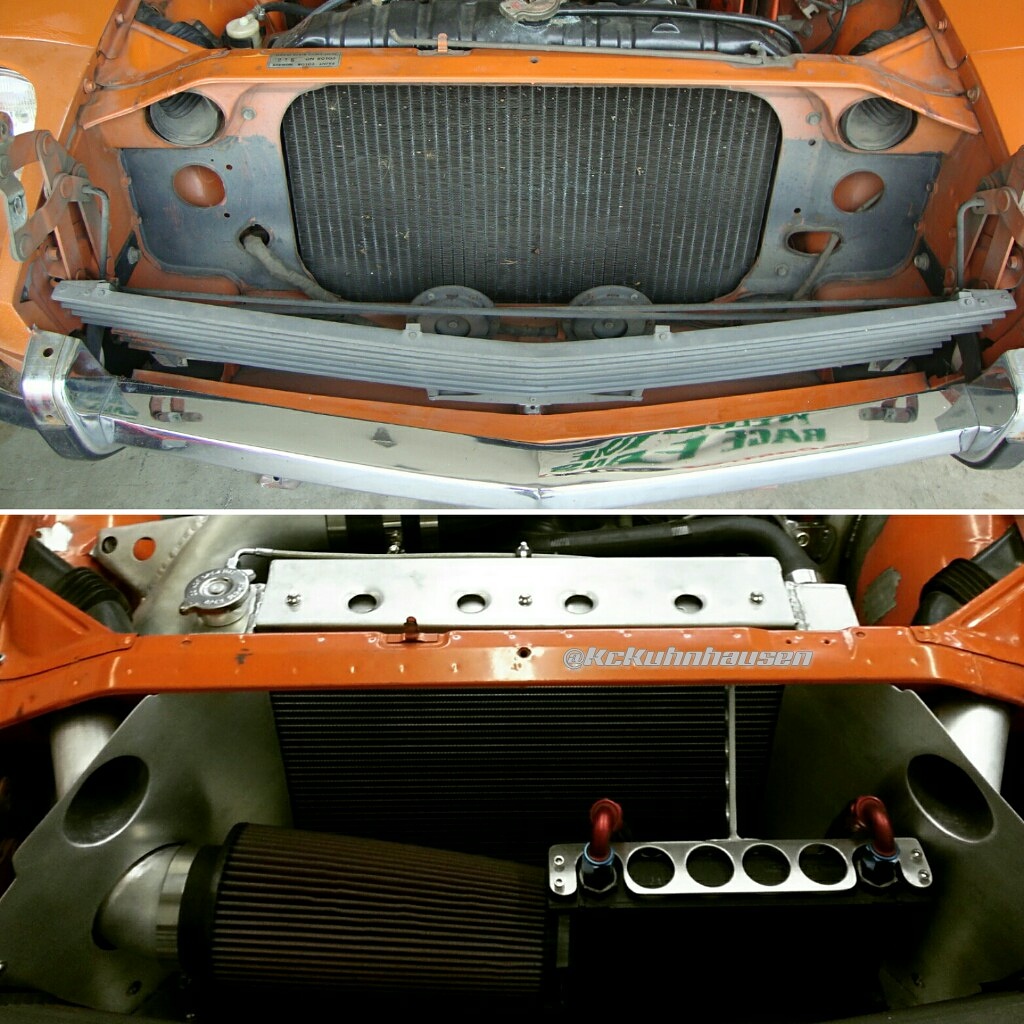
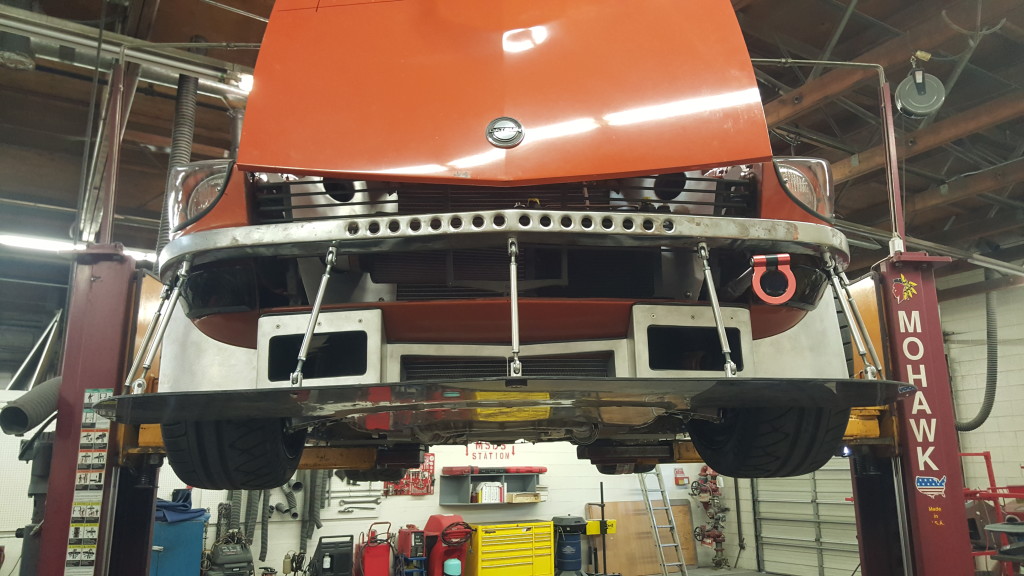
- Radiator air ducting done right. All light guage alloy and bolt on
-
- Inside the Brake master heat shield
-
- From the bottom, this will get coated with gold heat reflective material
-
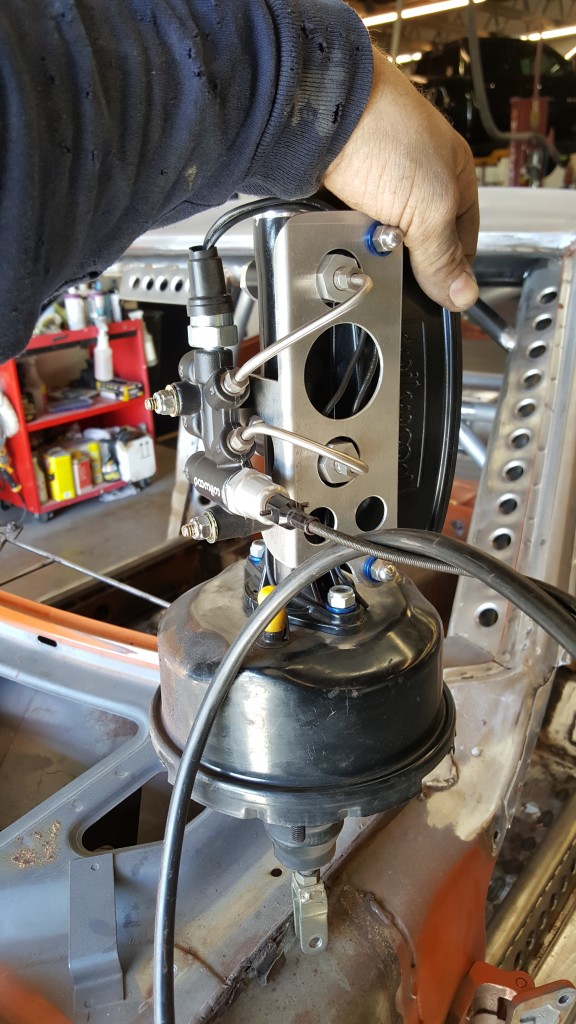
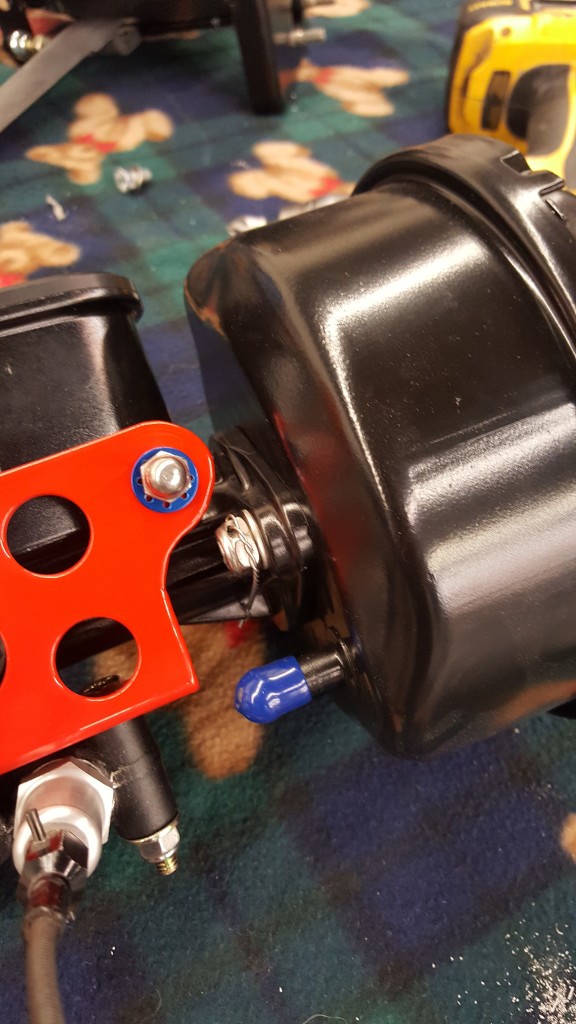
- The prop. valve hides nicely under the master cylinder
-
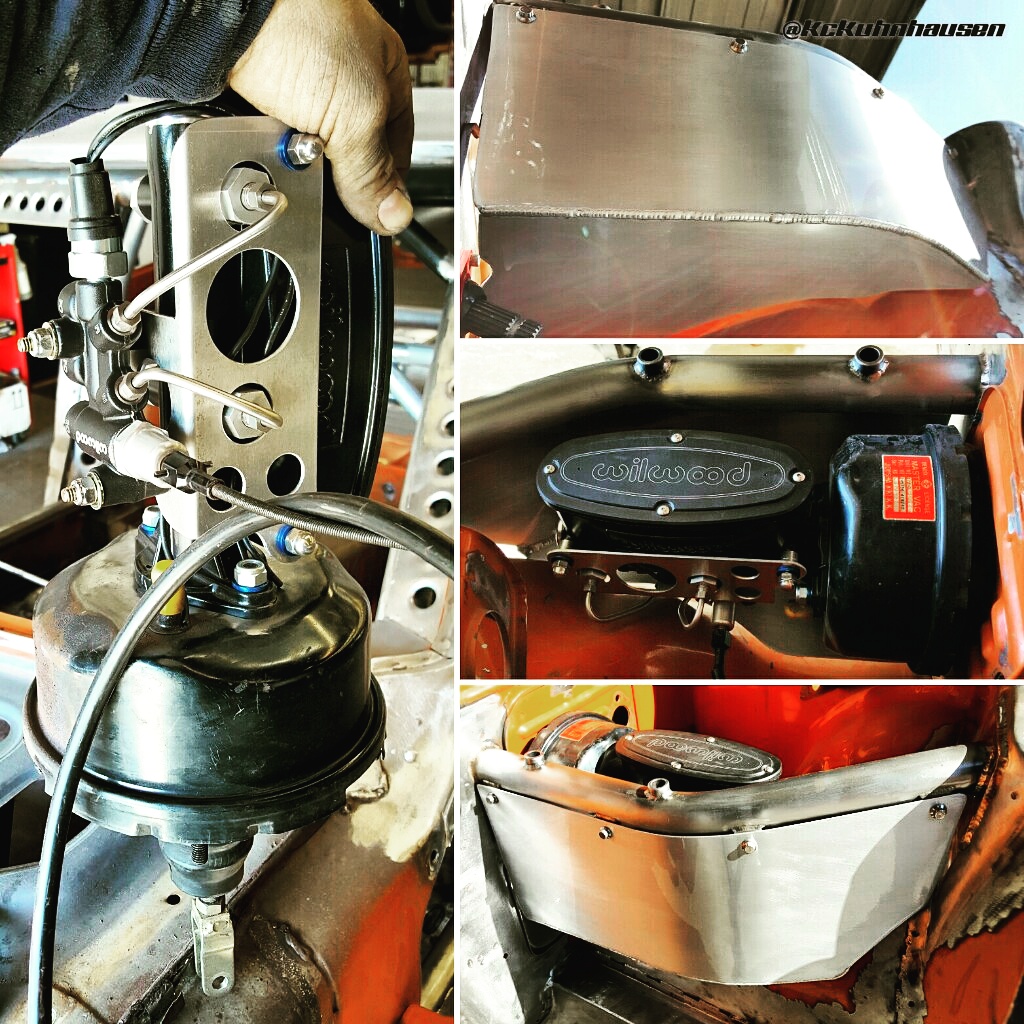
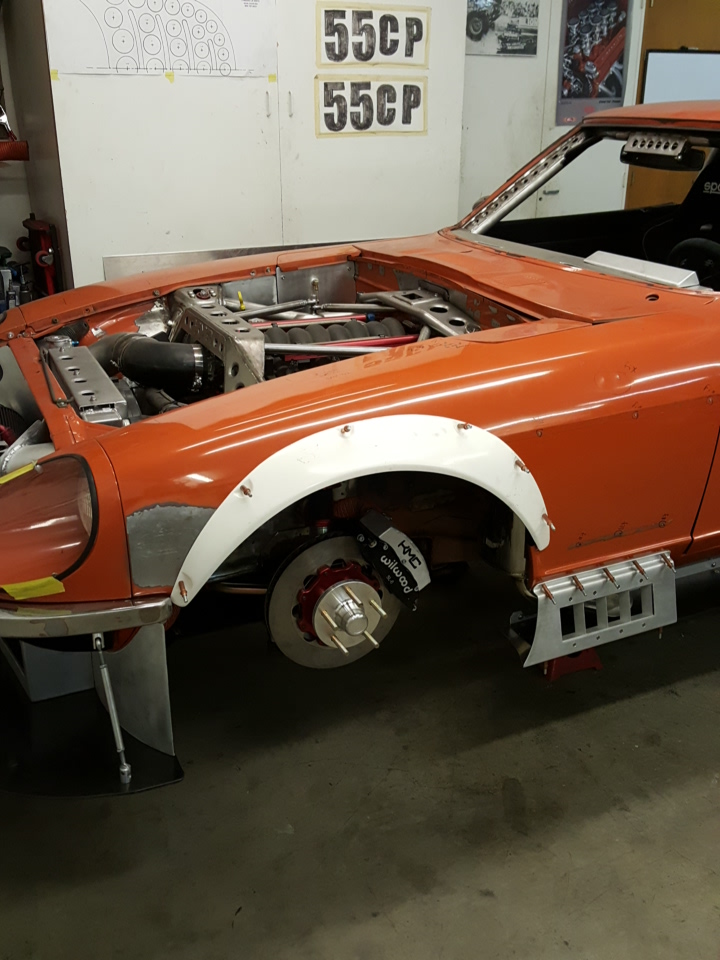
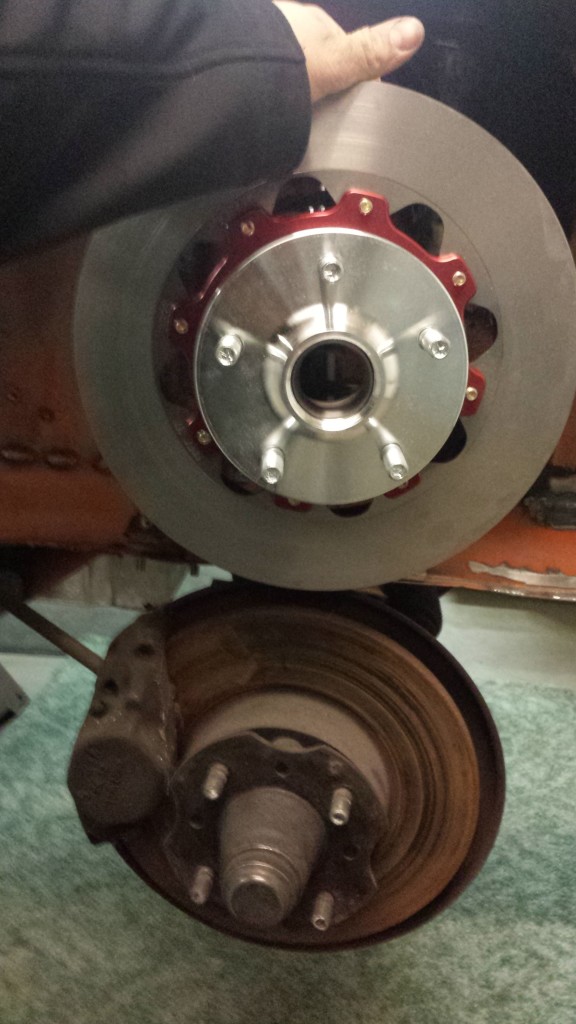
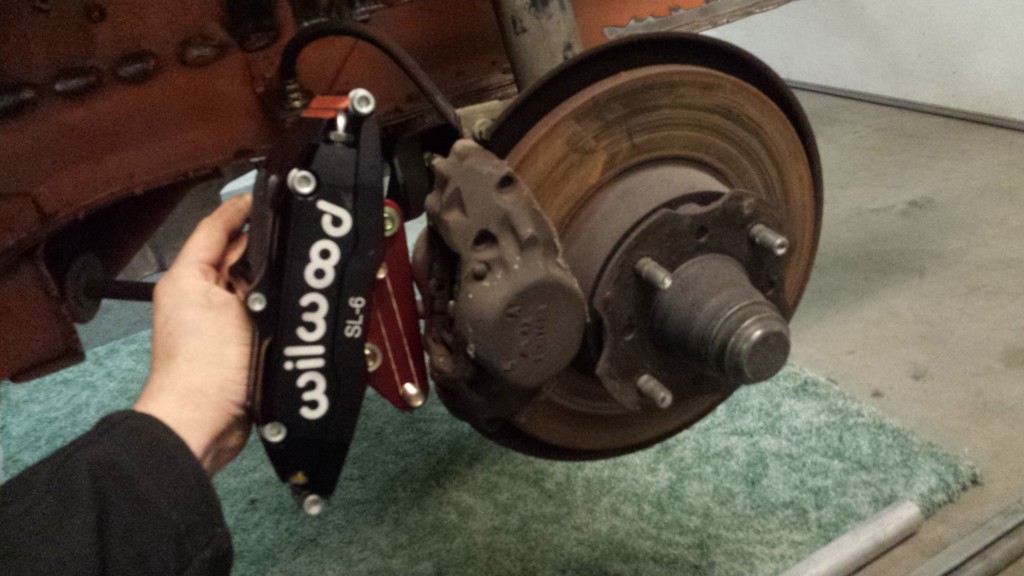
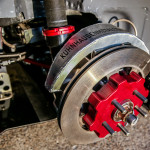
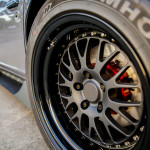
- Im a big fan of cool brakes
-
- Streamlining the factory systems once again
-
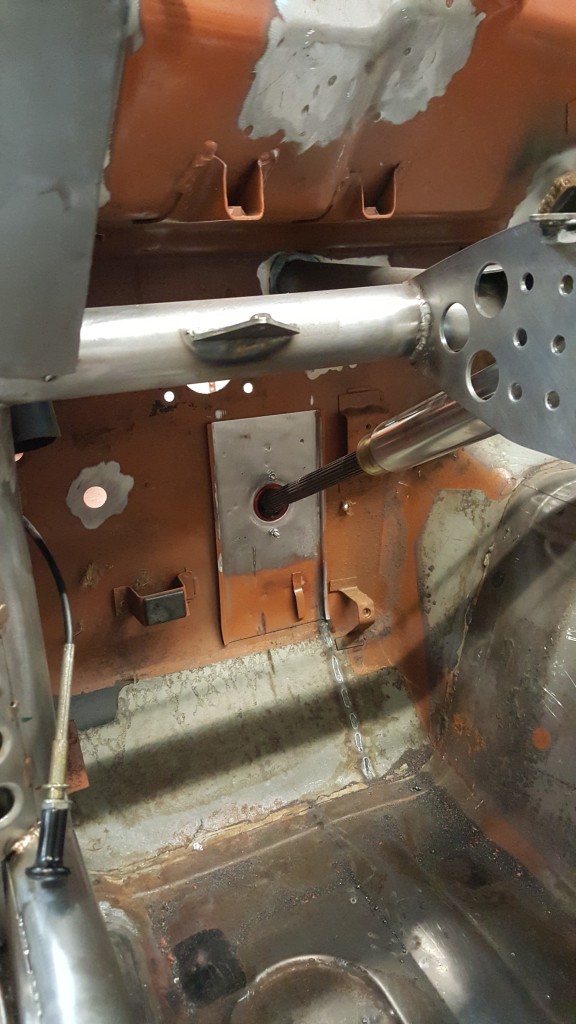
- From inside you cant tell Datsun didnt provide this column from the factory
-
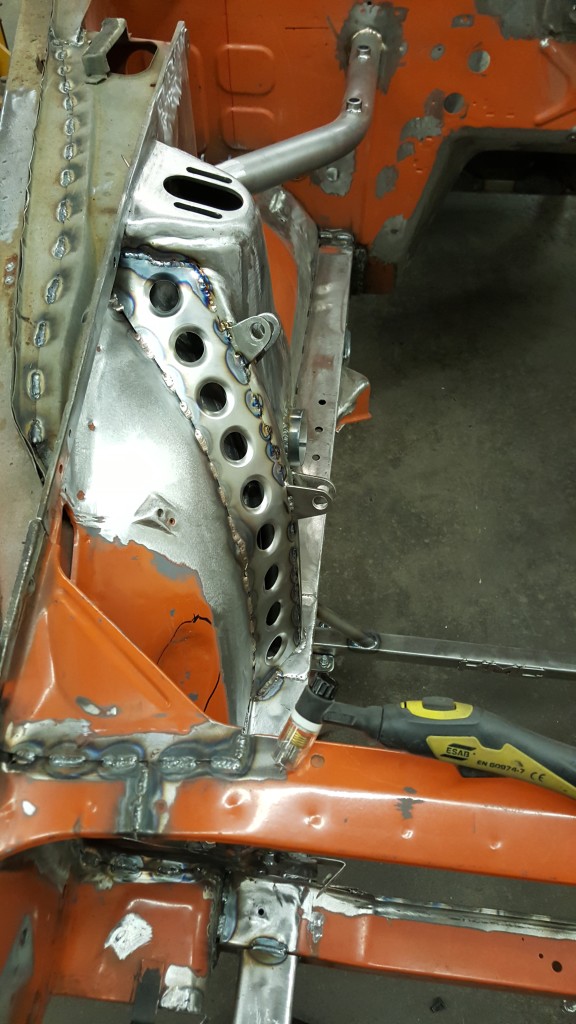
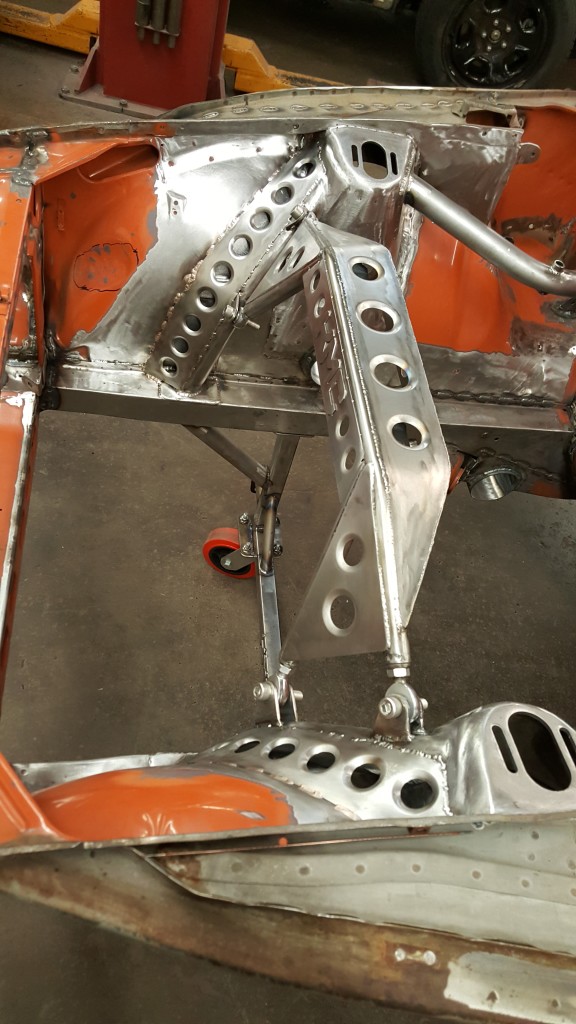
- tig welding the flared hole gussets to the aprons.
-
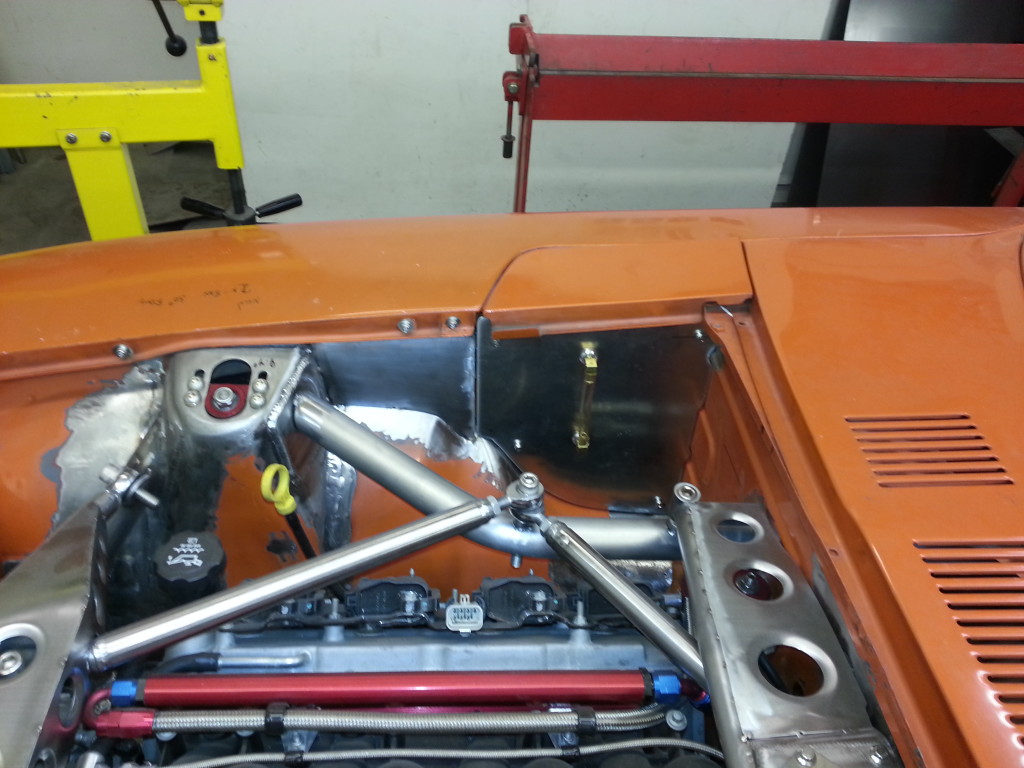
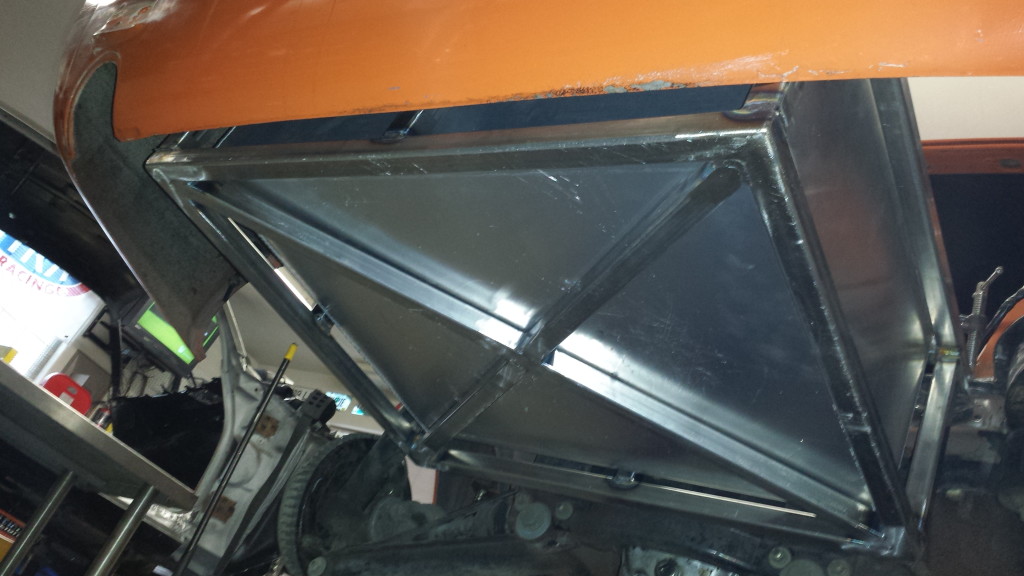
- I really like this functional design. those towers aren’t going anywhere
-
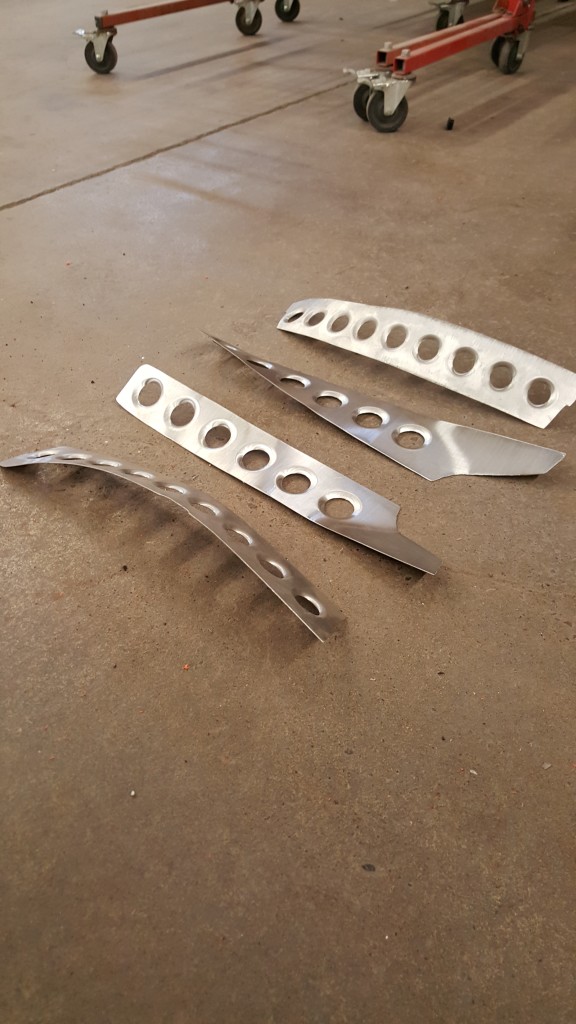
- This shows how extreme the curvature is on these cage gussets
-

- From concept to reality, the poormans no CAD way
-
- strong
-
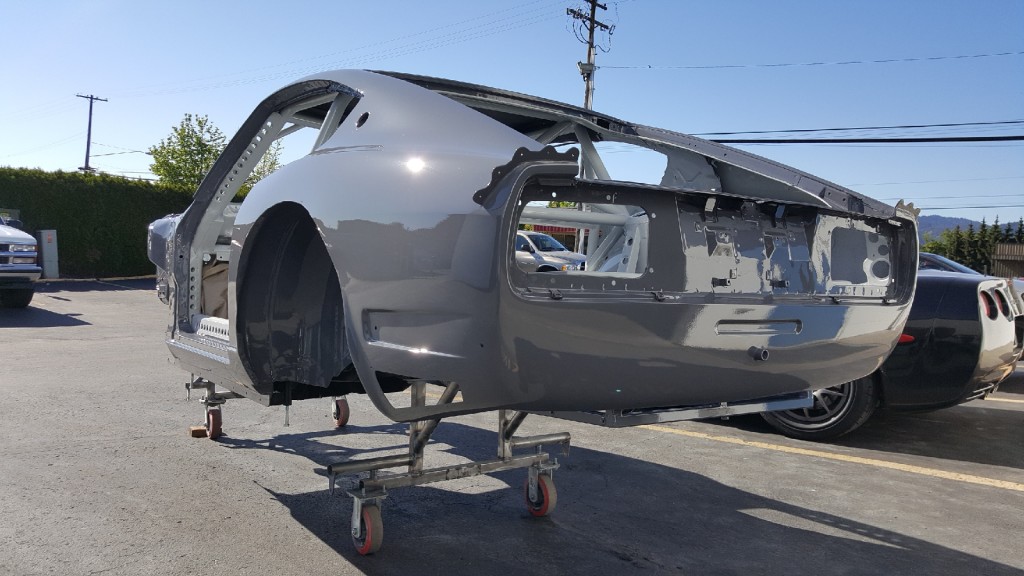
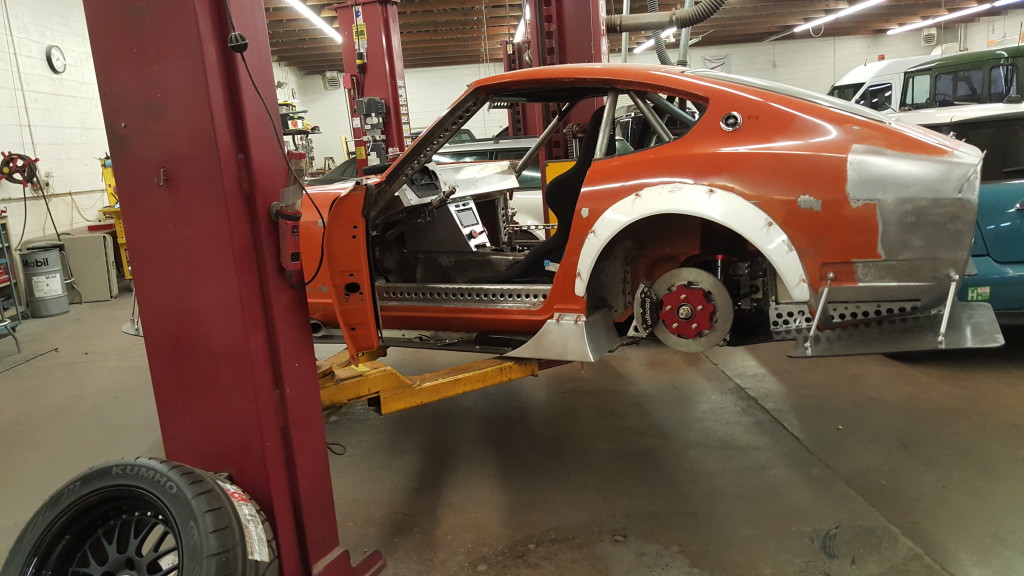
- It has come a long ways, looking this clean before any finish work too
-
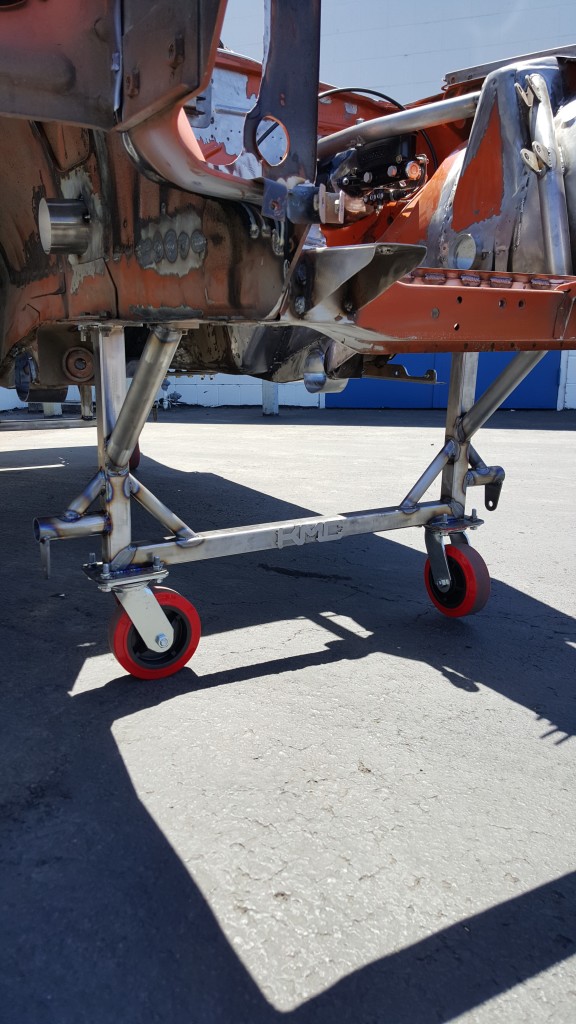
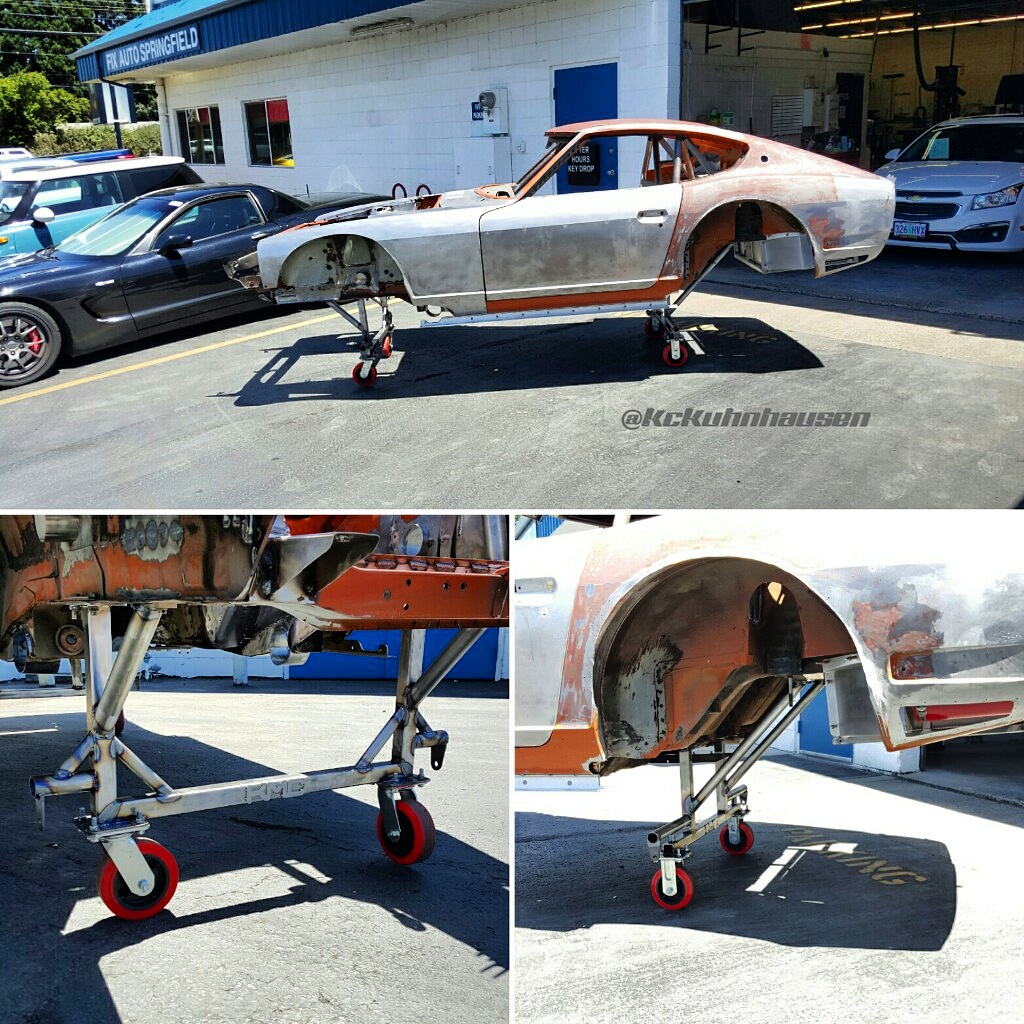
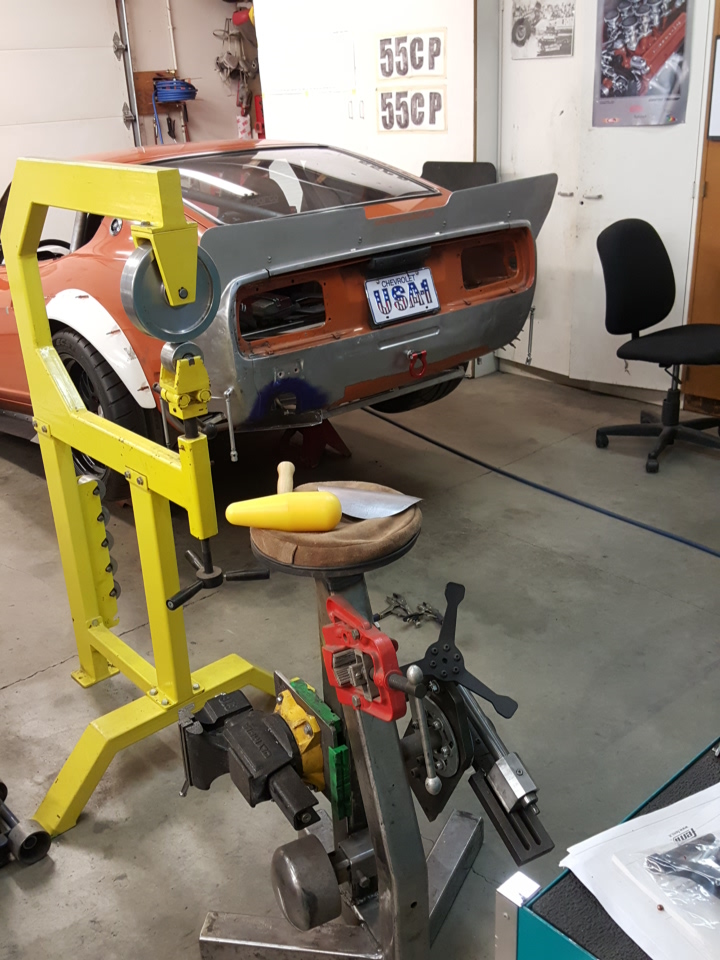
- I fabbed this custom dolly to keep the Z mobile during the bodywork stage
-
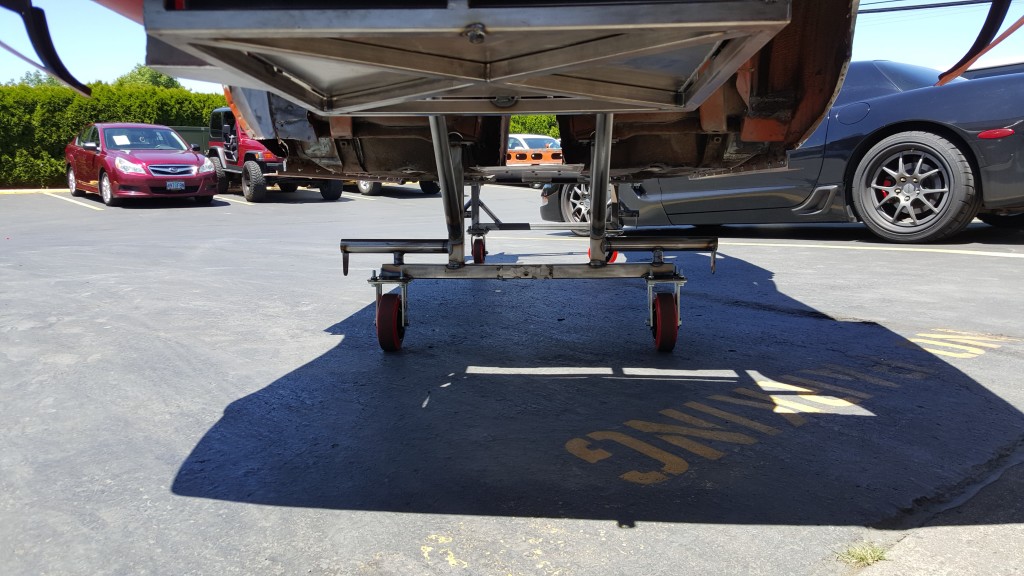
- The rear custom dolly stand
-
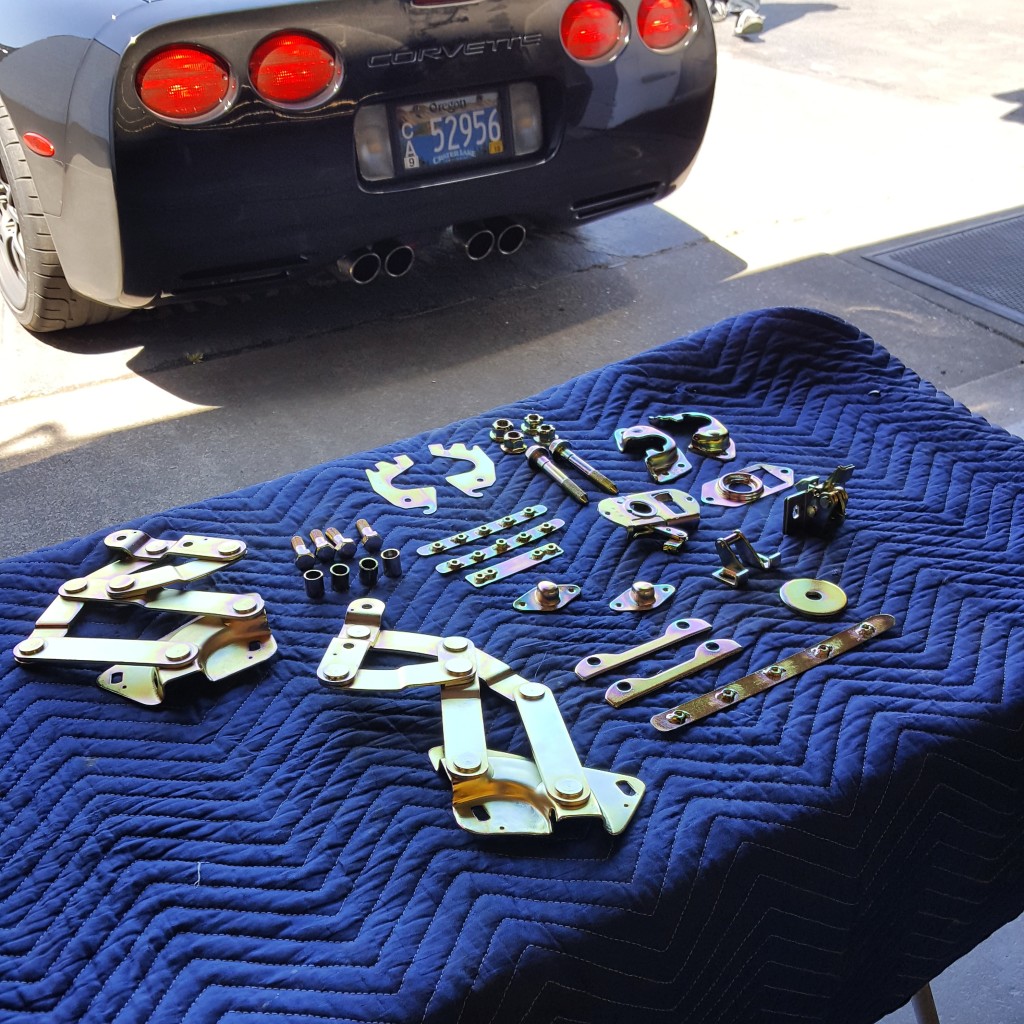
- MY Z06 is scared and this car doesn’t have a motor
-
- AZC Billet goodness
-
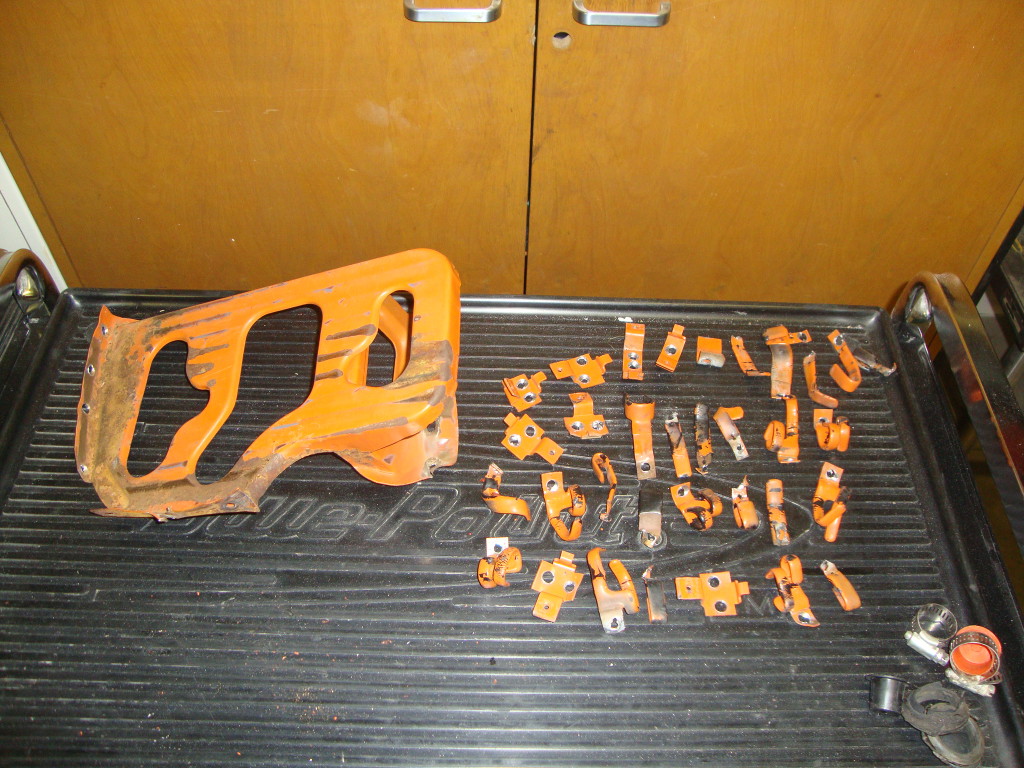
- Chemically Stripping 40ish years of paint
-
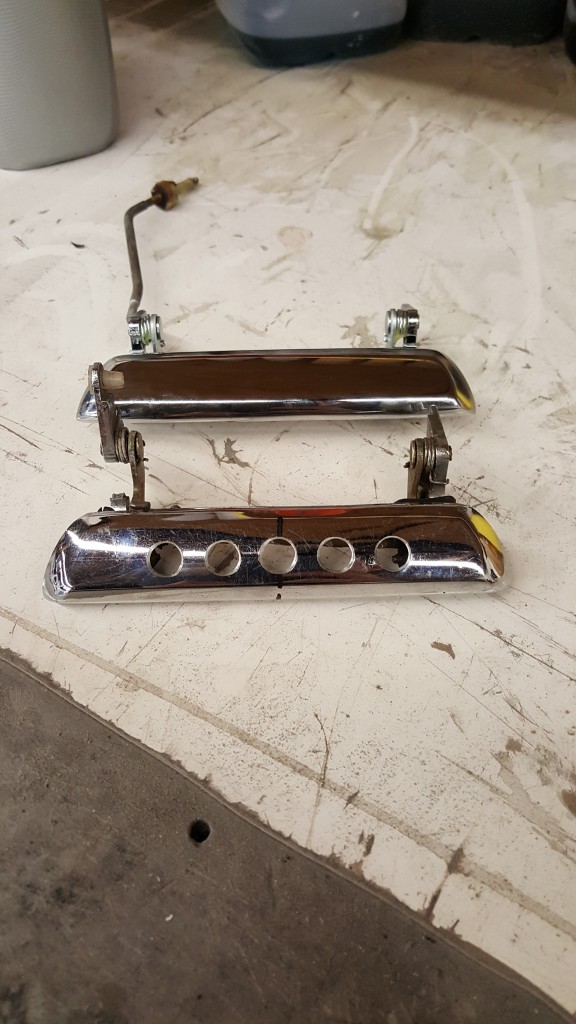
- It has a horn, therefore it must be a “streetcar”
-
- Duct work
-
- Keeping all that air directed where it should go for better cooling and aerodynamics
-
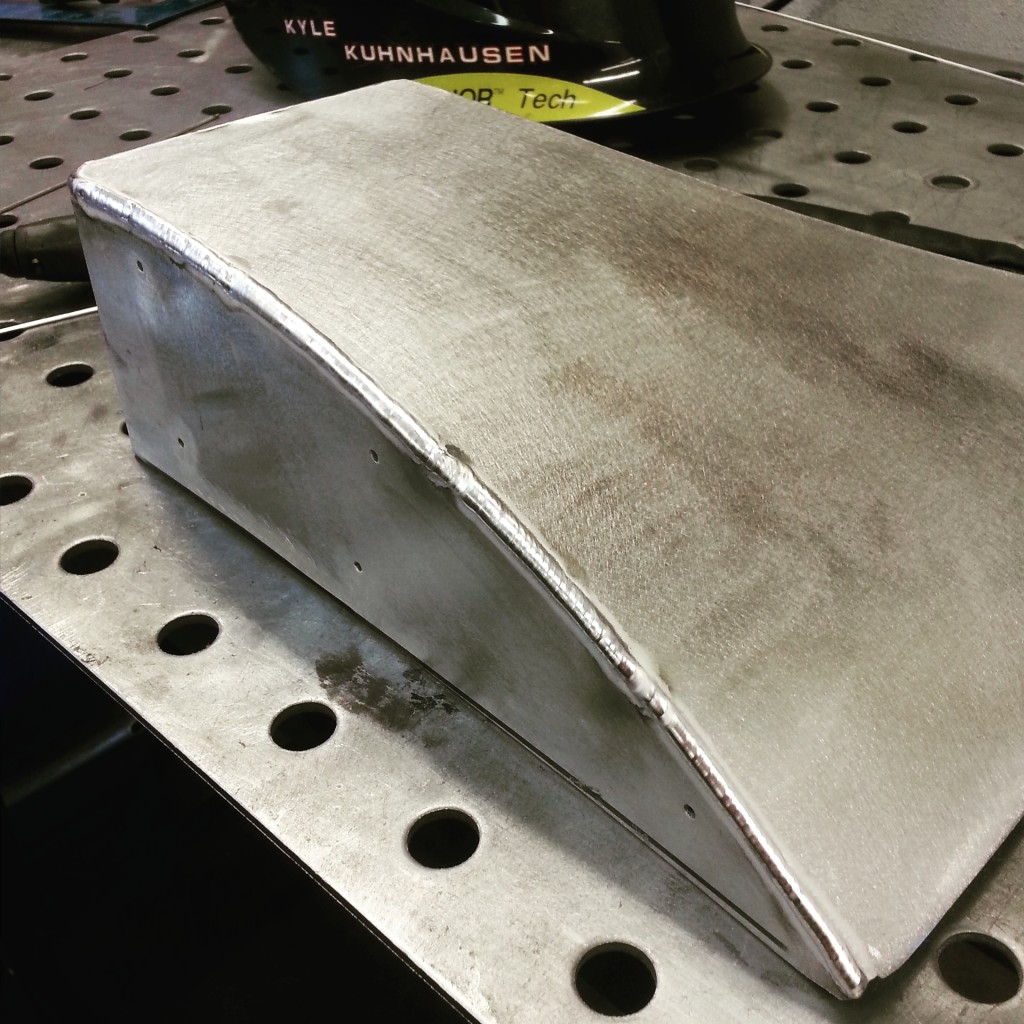
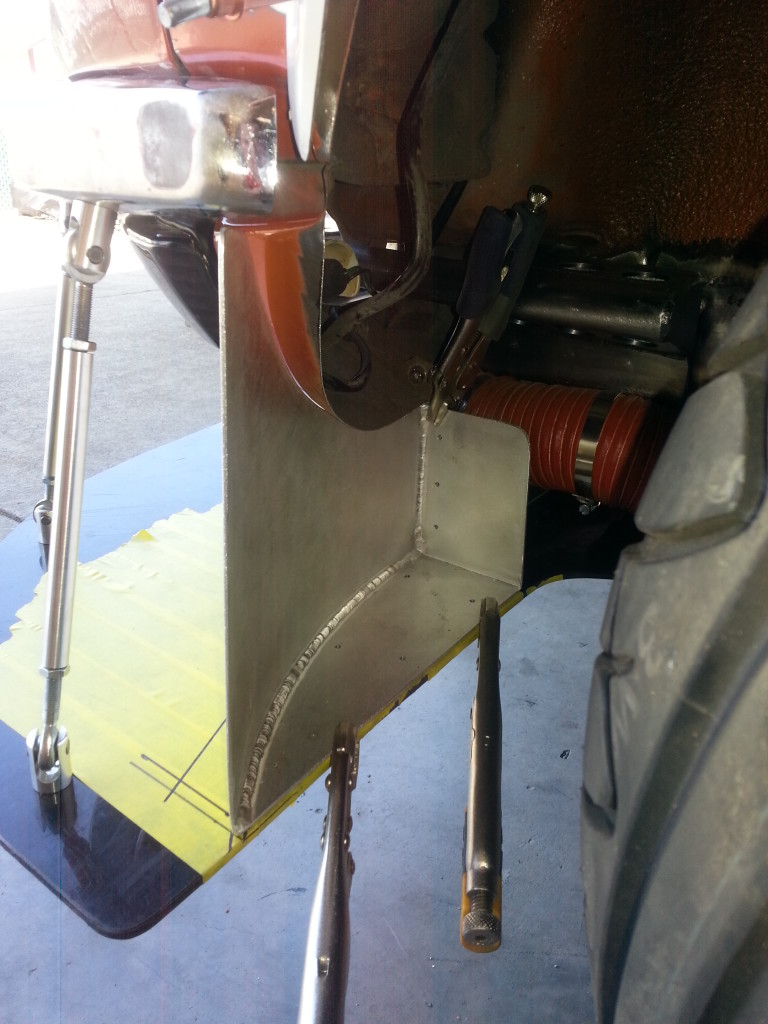
- A shield to keep tire debis off the fire tank
-
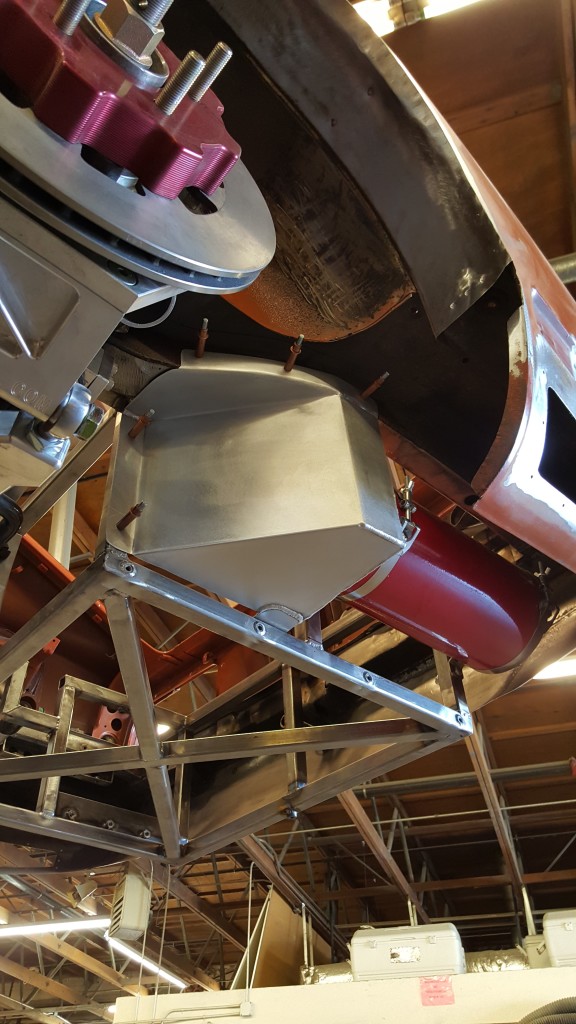
- This cover protects the fire bottle and directs turbulant air off the tire out the quarter panel vent, win win.
-
- Keeping the ultra thin guage alloy cool while welding
-

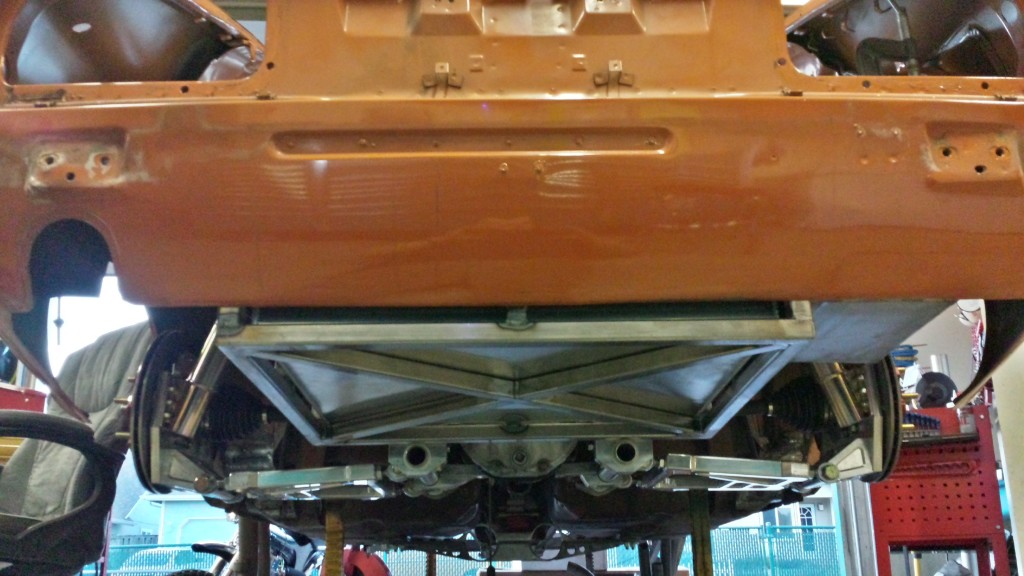
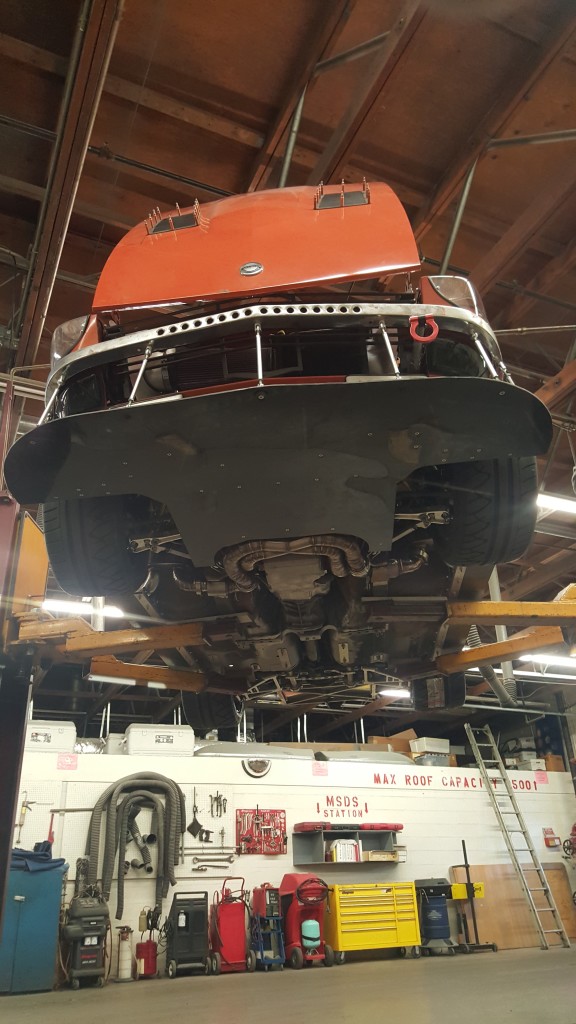
- The hdpe rear diffuser
-
- aluminum bellypan work keeps the air headed where it should
-
- Triming the main duct for integrated radar detection
-
- What’s that, don’t worry about it…
-
- I think she’s smiling
-
- Radar refractors hidden in the grill
-
- Dissasembly taking place
-
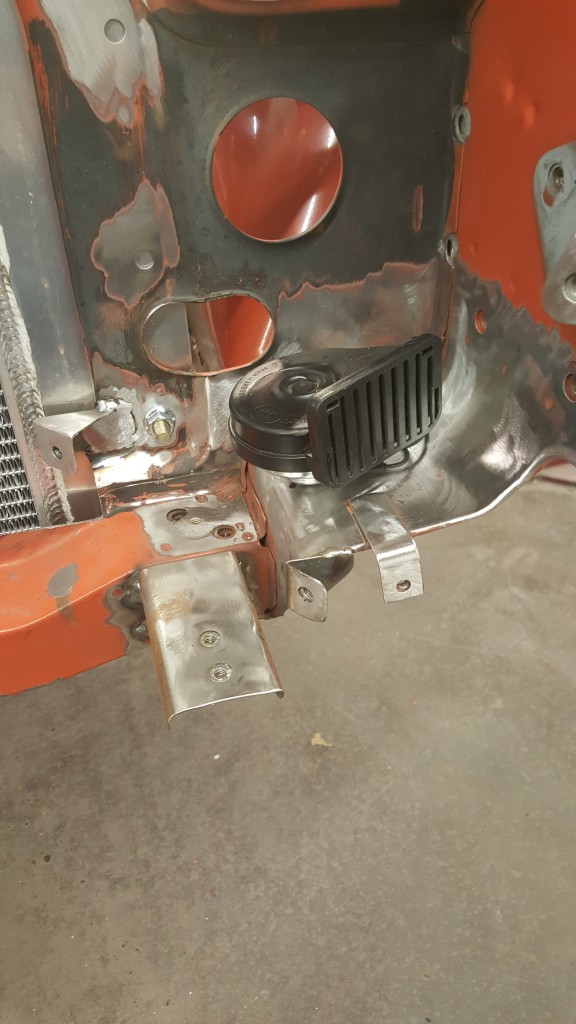
- A minor upgrade ahead of the core support
-
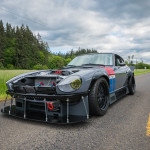
- form meets function
-
- DAMN, i mean dam…
-
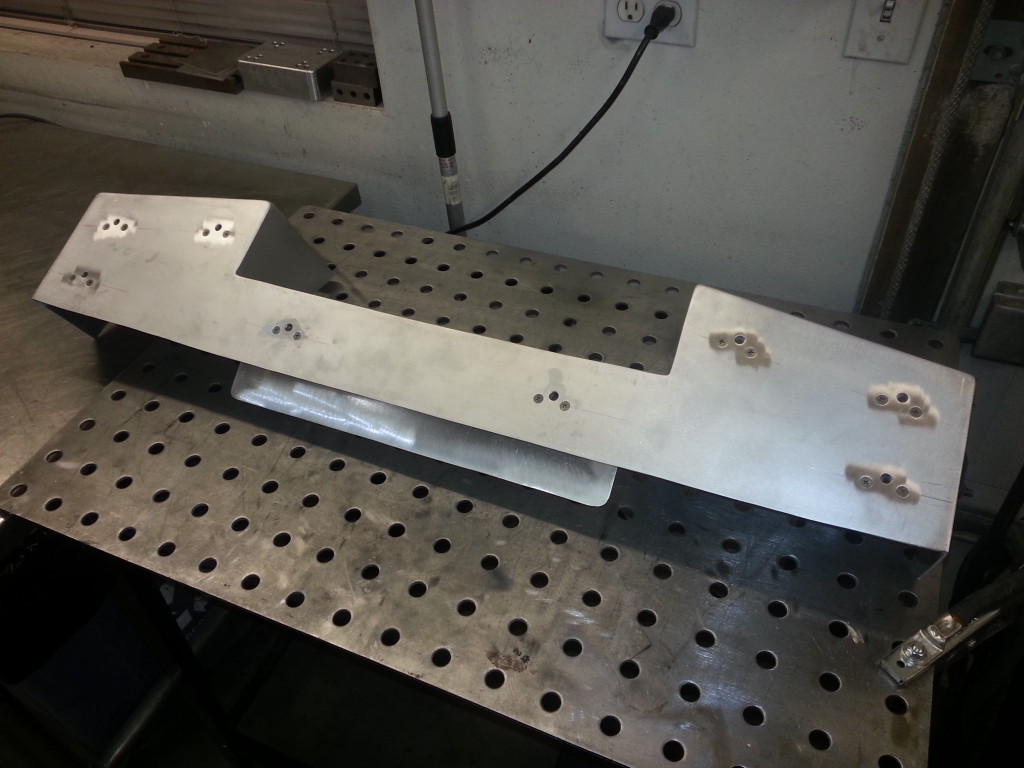
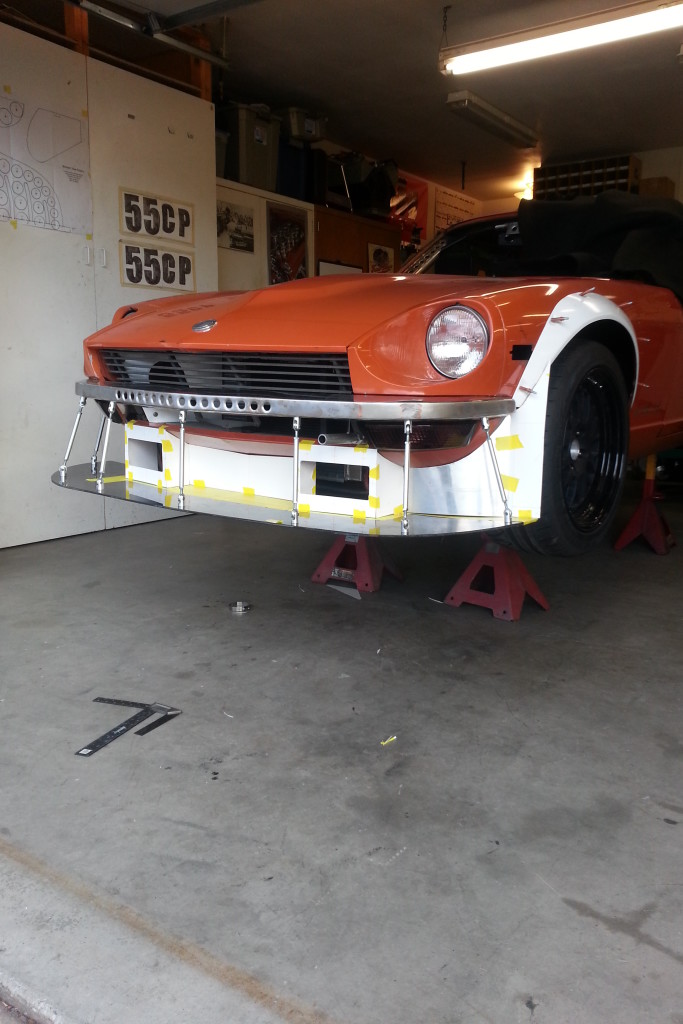
- Front splitter
-
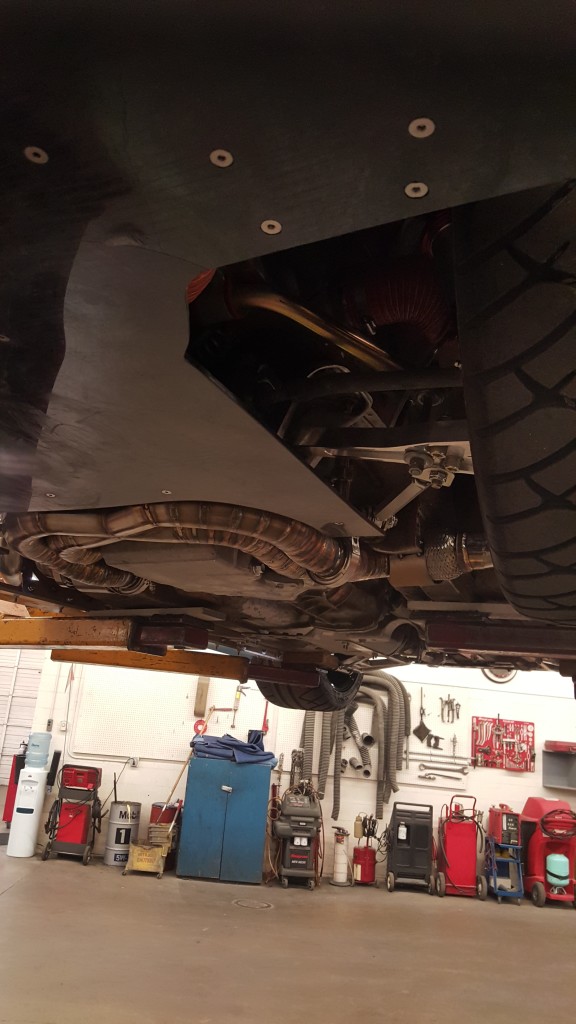
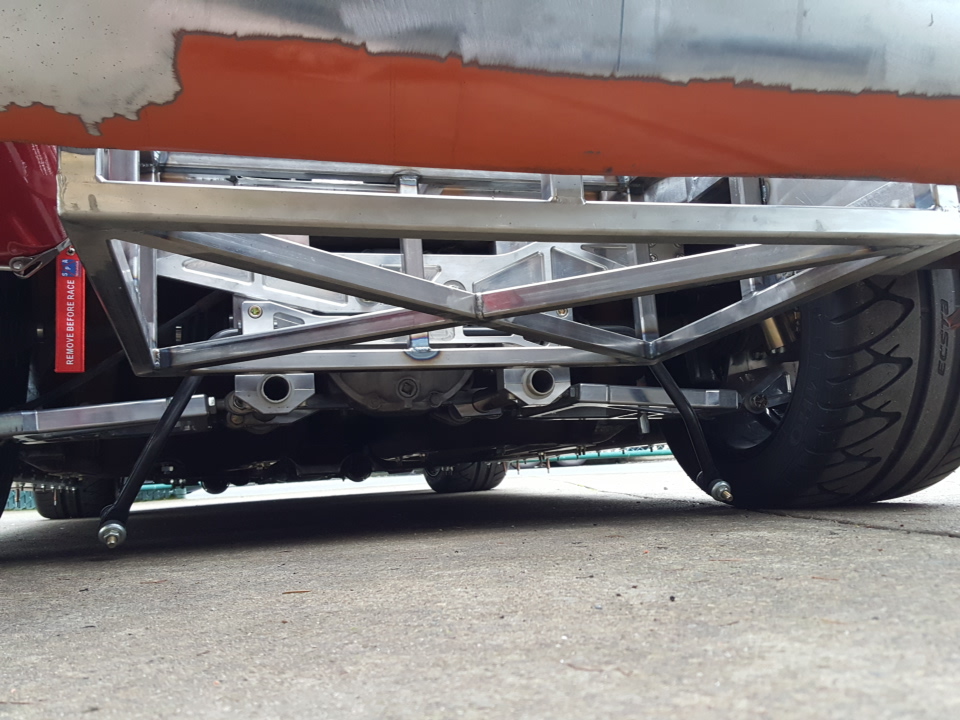
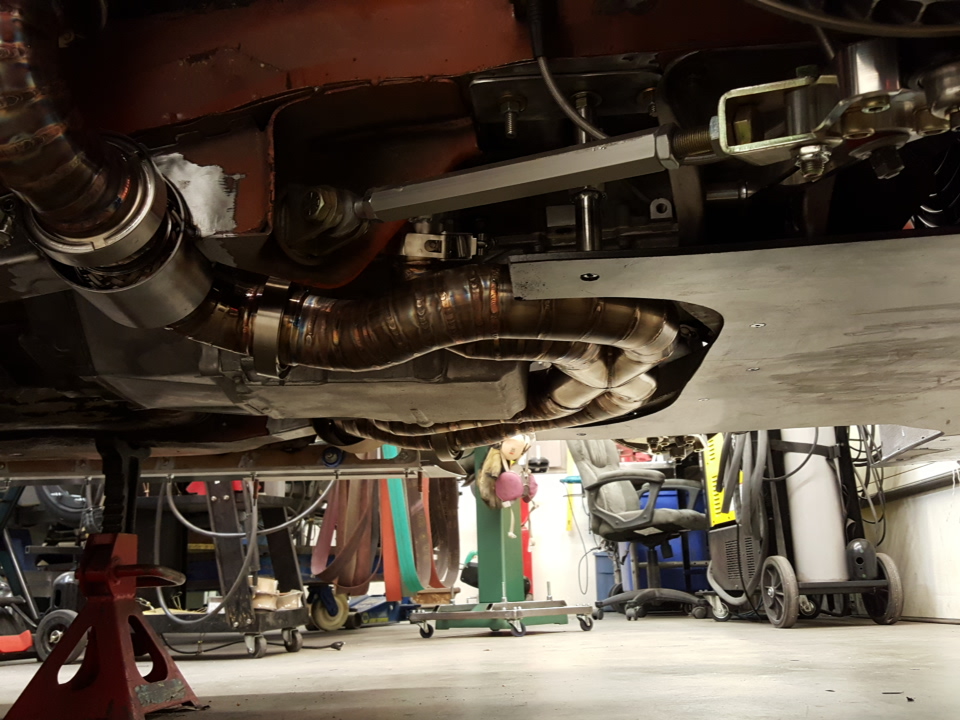
- the x-pipe sits in front of the oil pan sump
-

- pre-rear aerodynamics
-
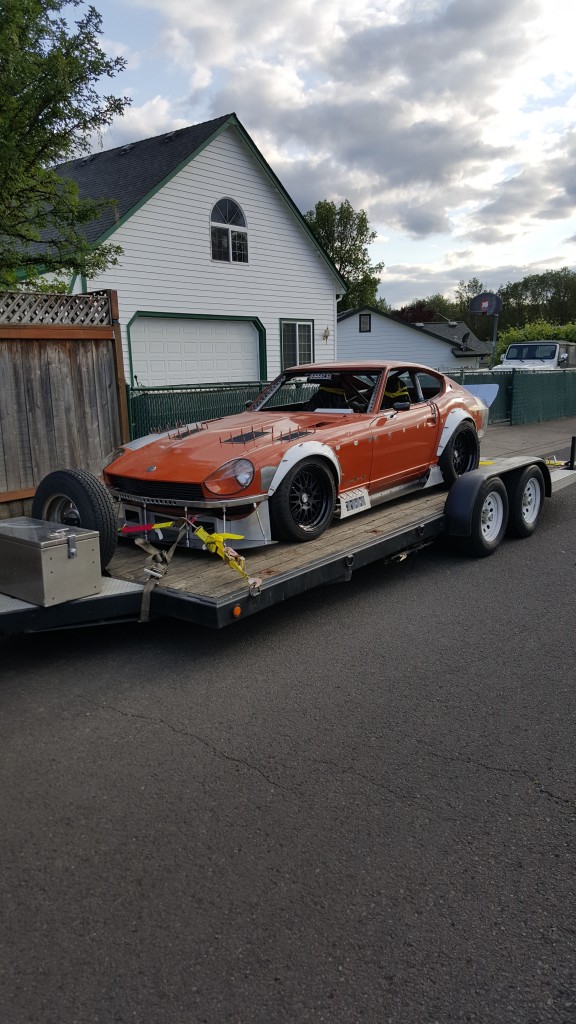
- Leaving the fab shop en route to body and paint
-
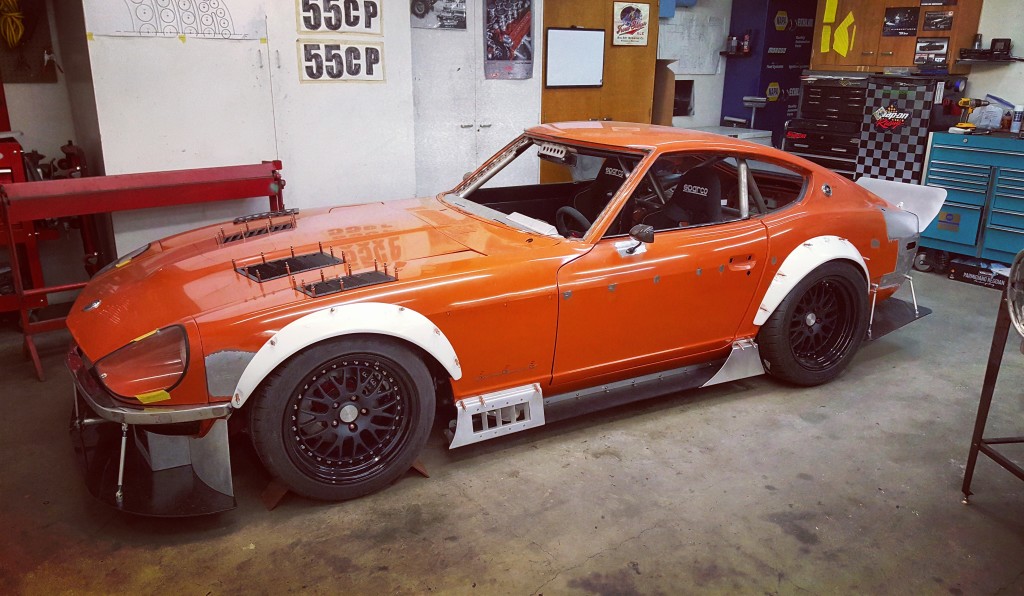
- every angle leaves you wanting more
-
- beauty
-
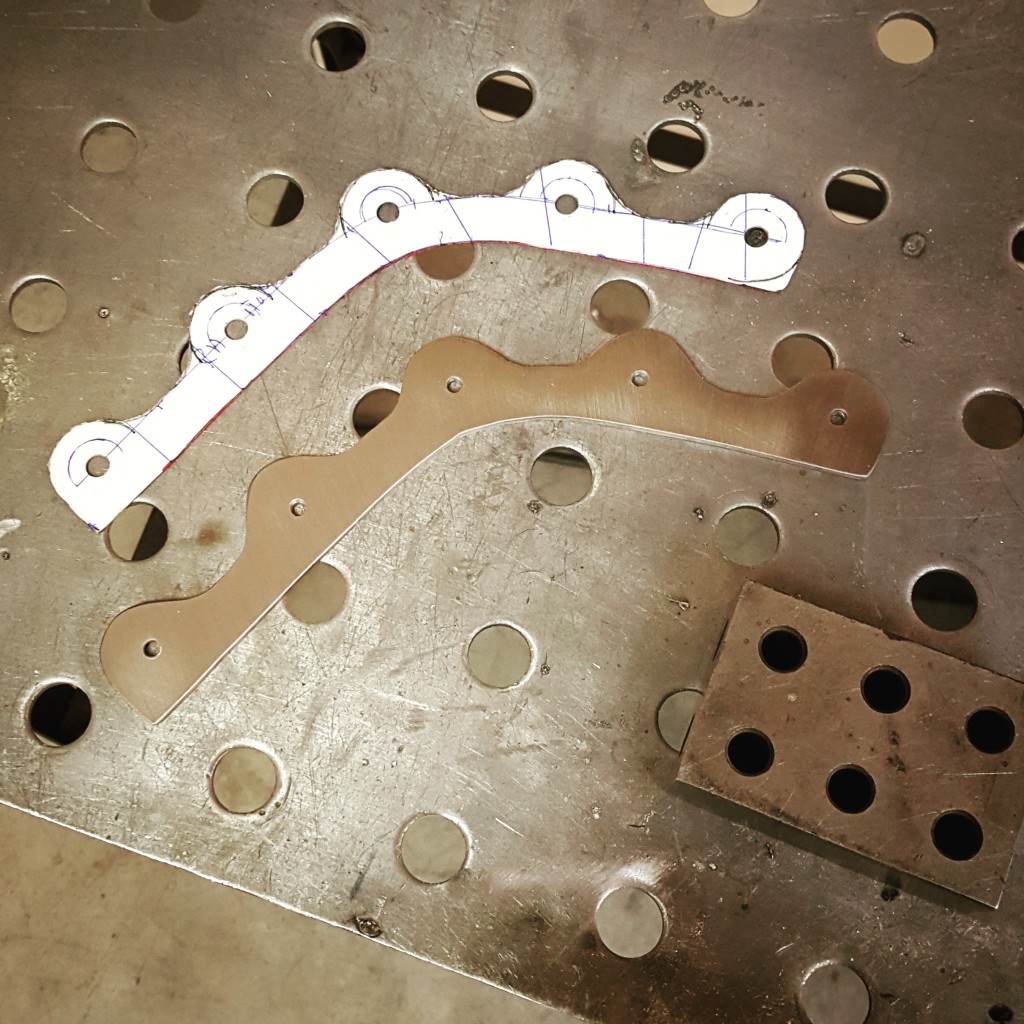
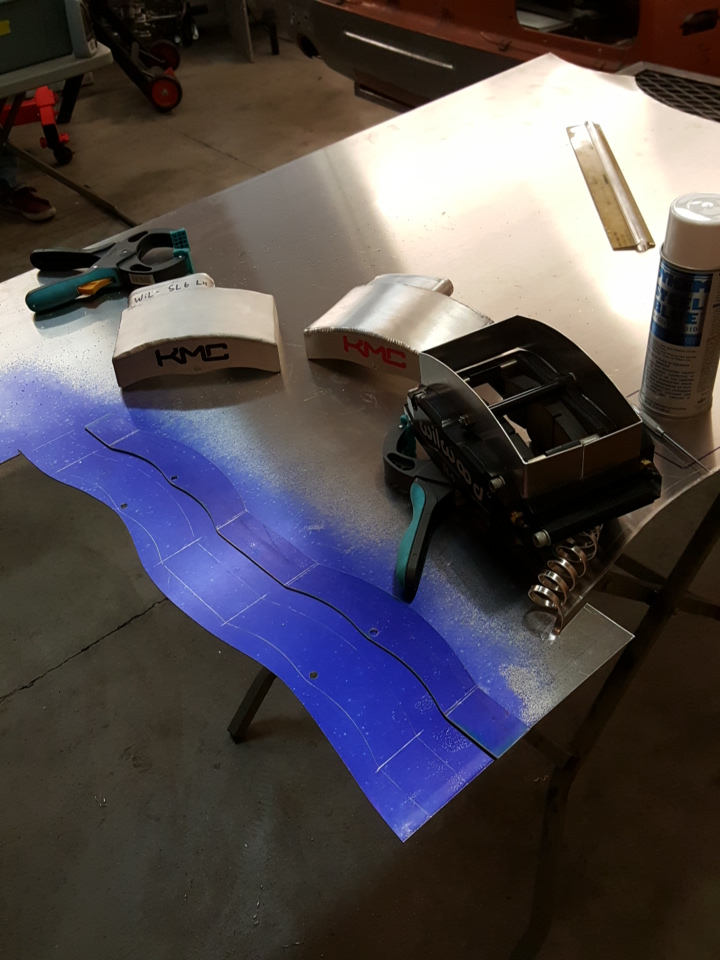
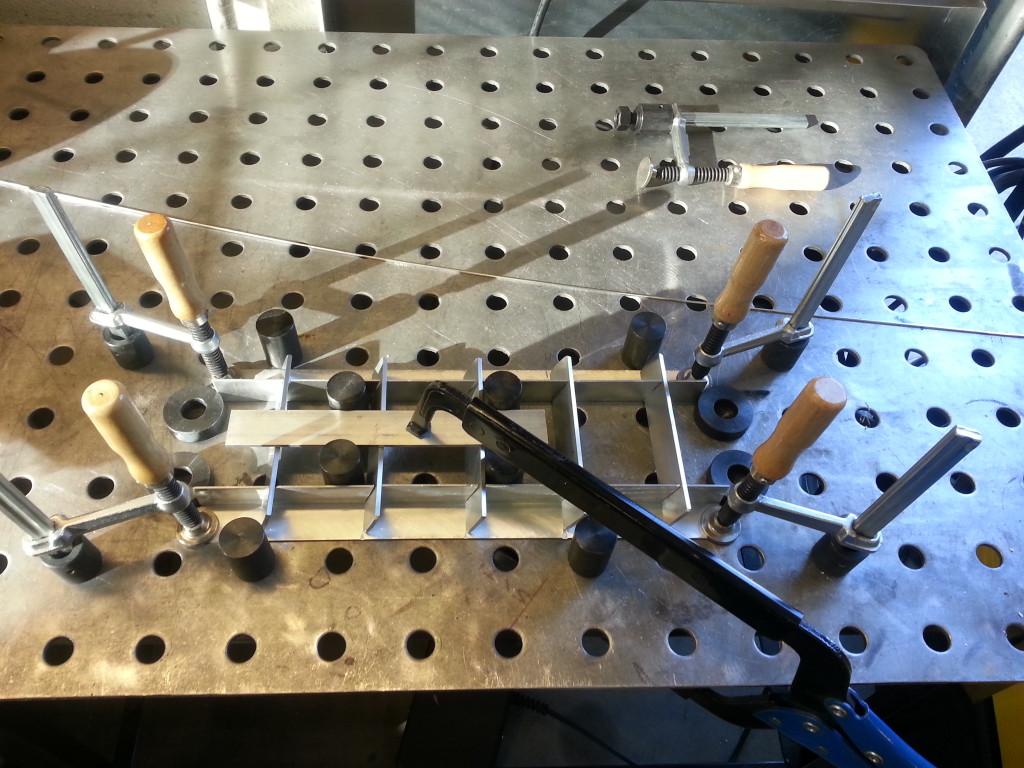
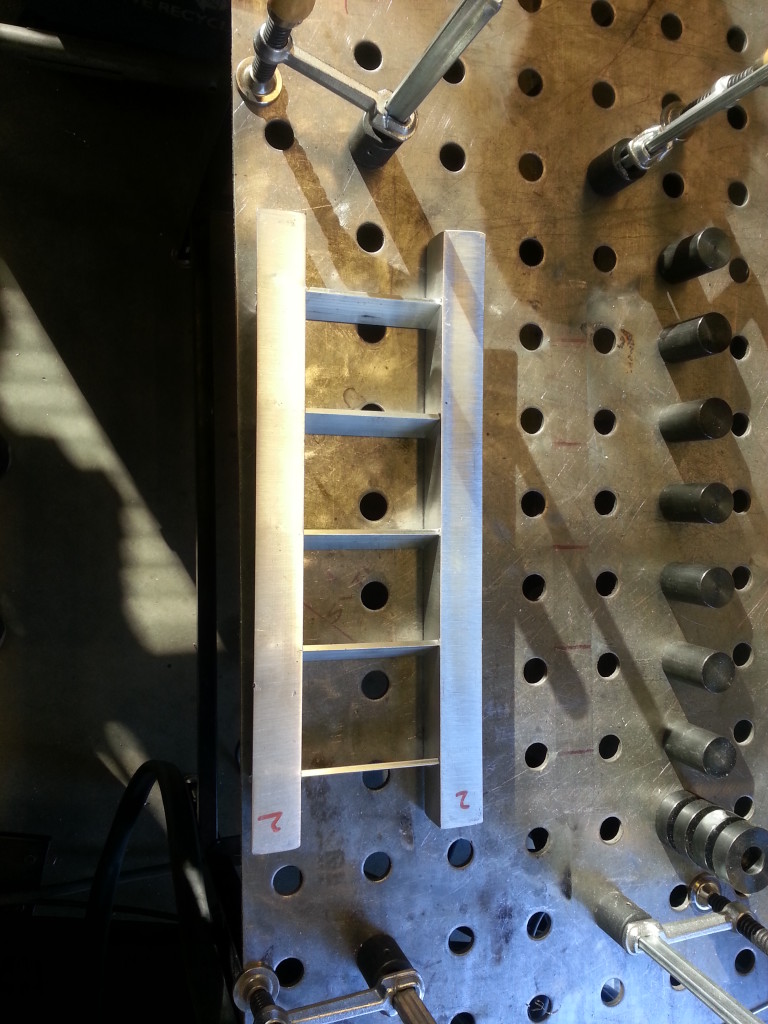
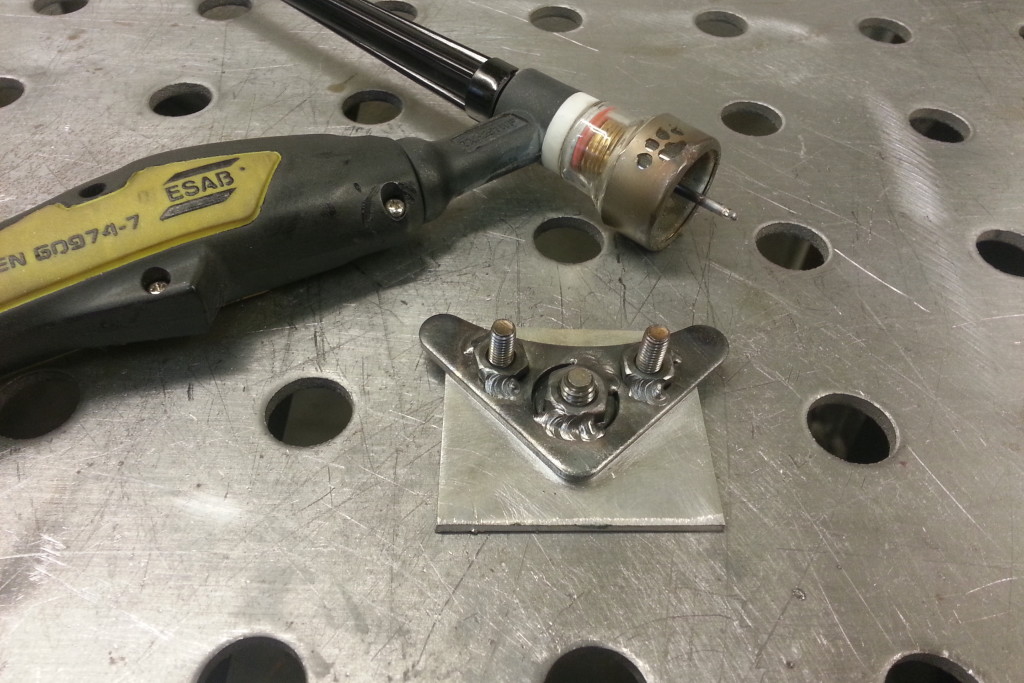
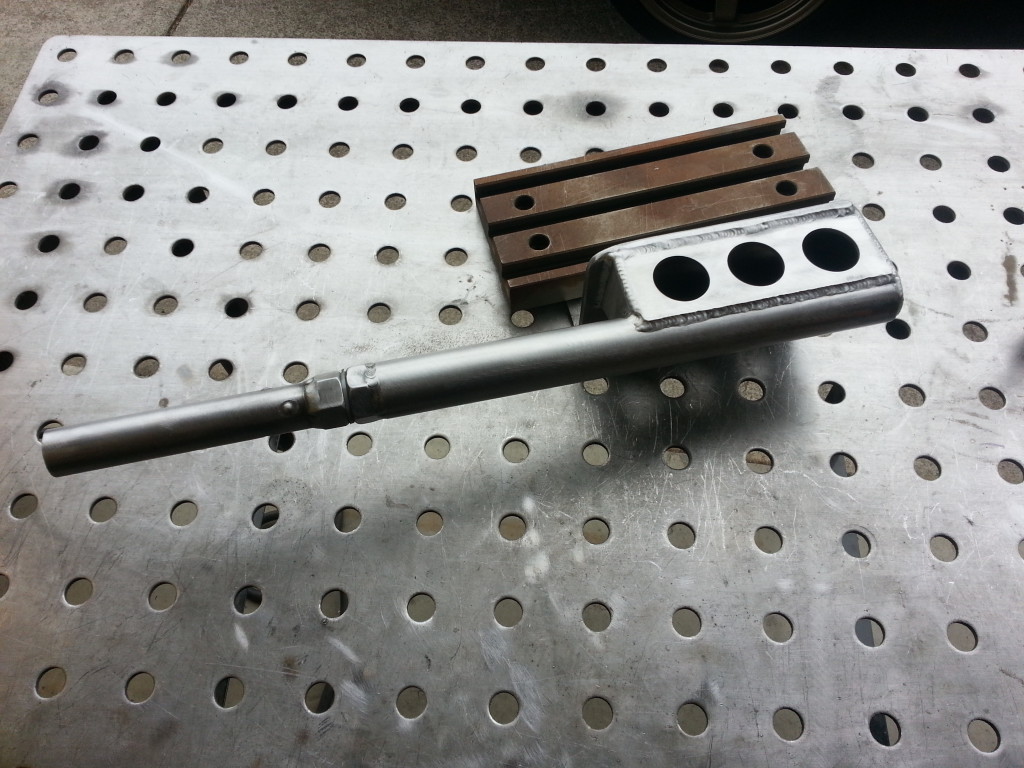
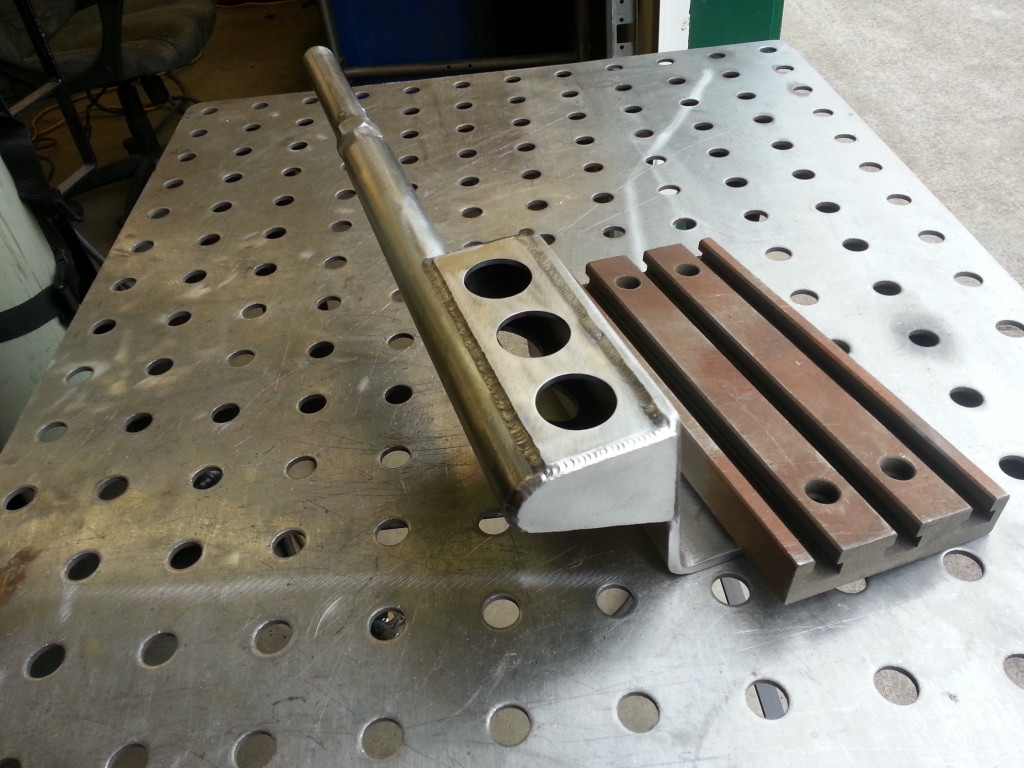
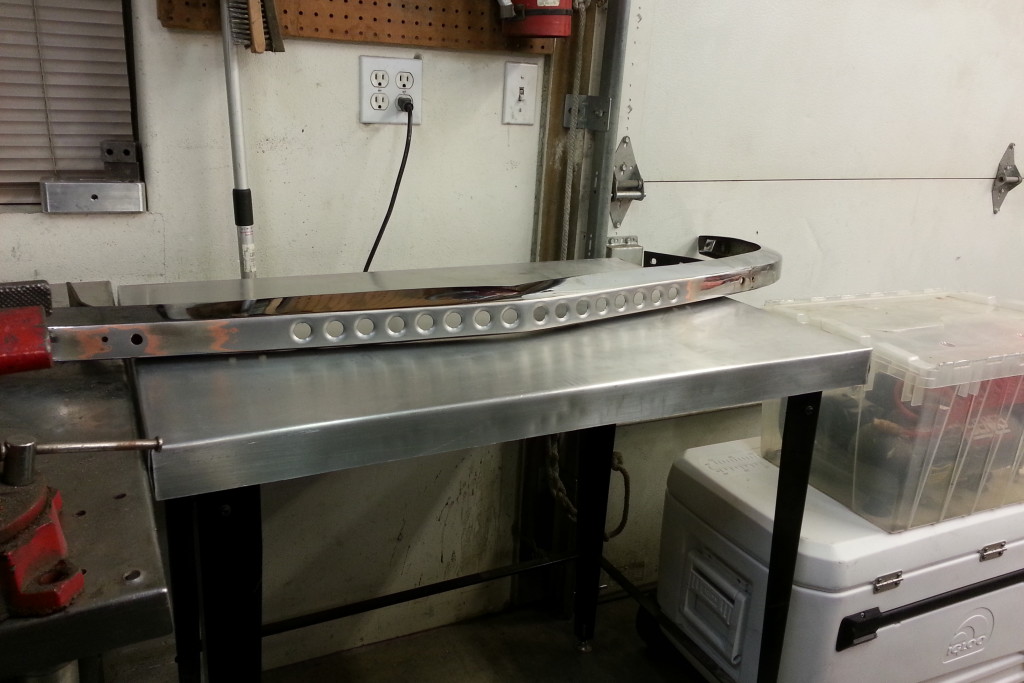
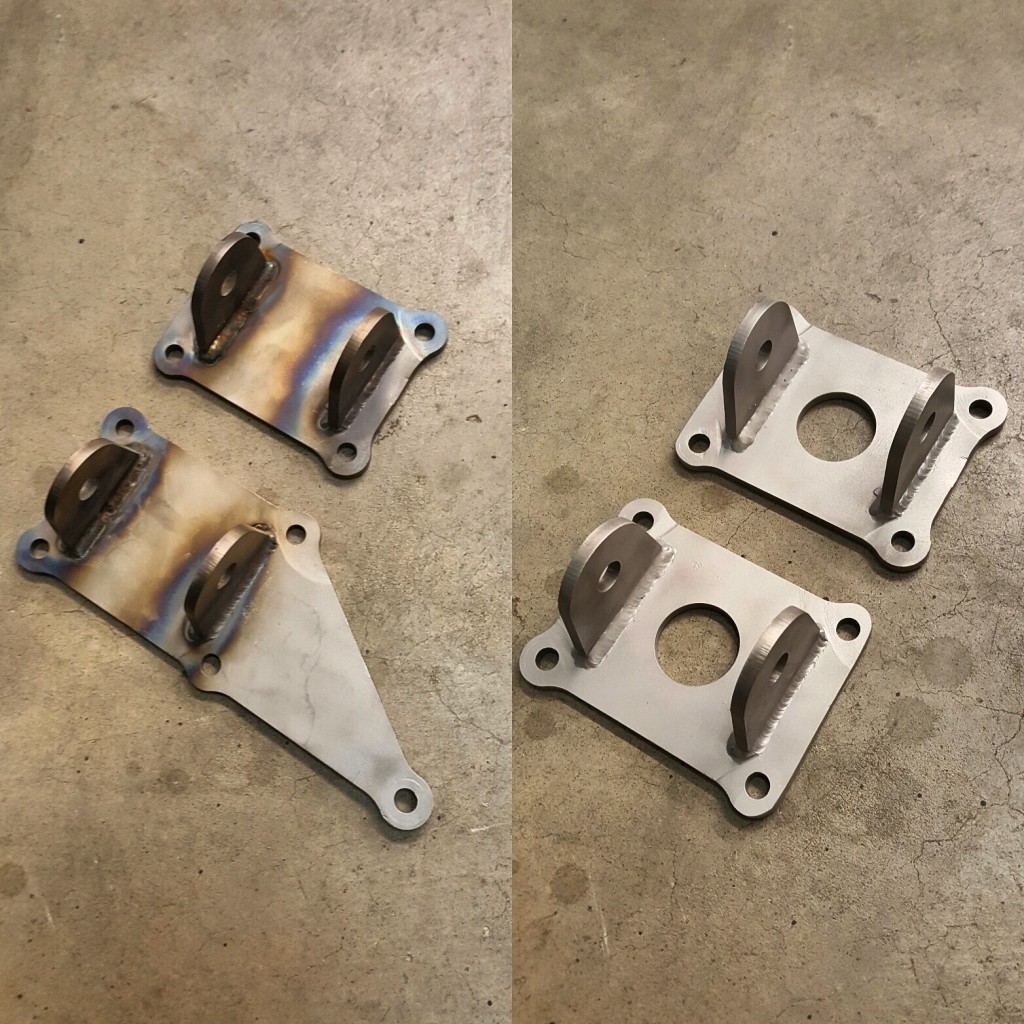
- Hand cut 14 ga. brackets
-
- solid mounts to the body for the winglets
-
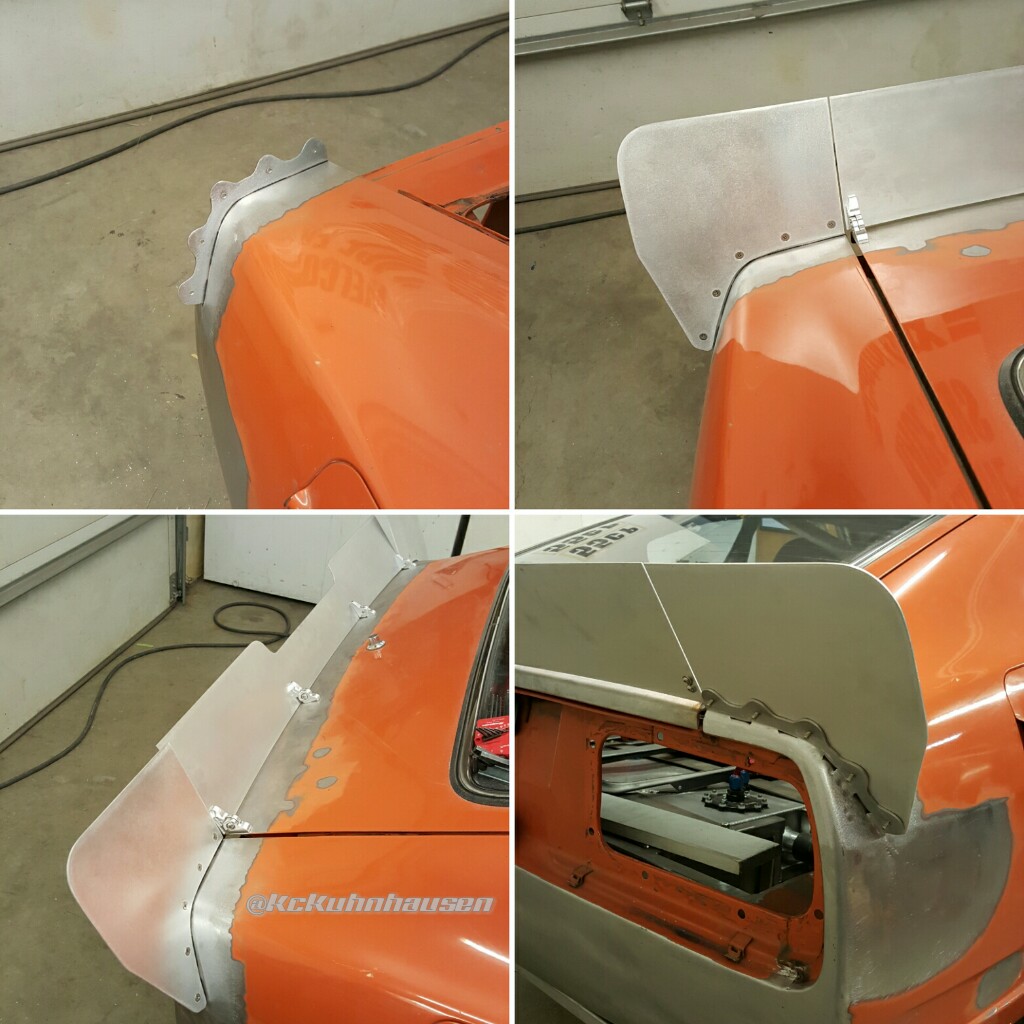
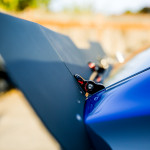
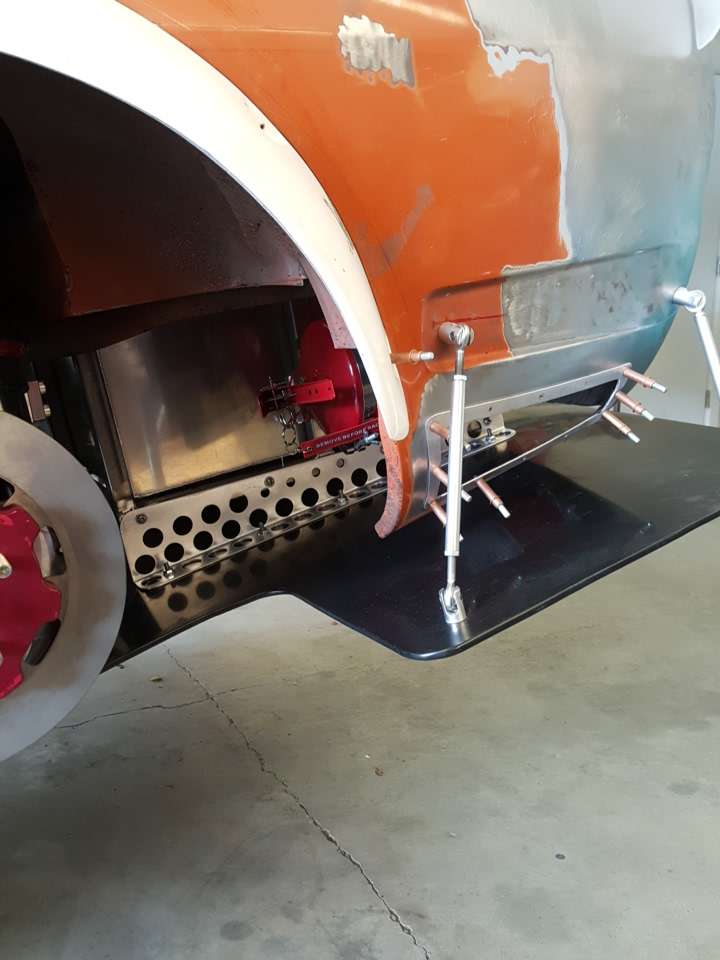
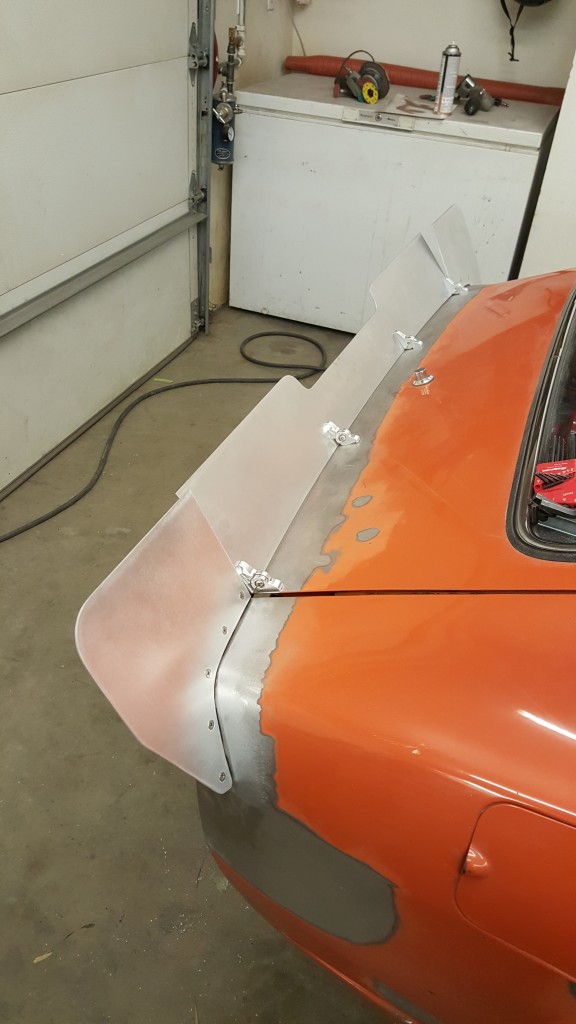
- Pitch adjustable rear spoiler
-
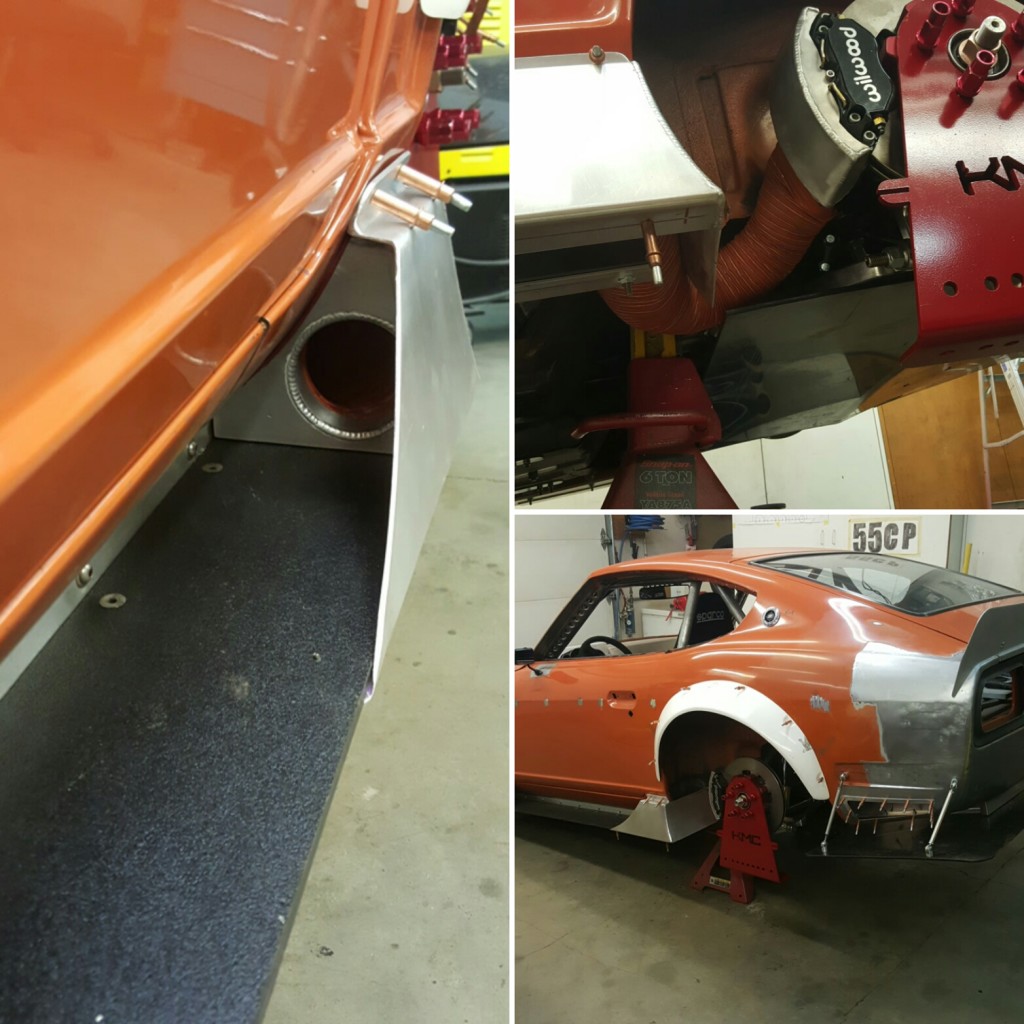
- rear brake duct detail
-
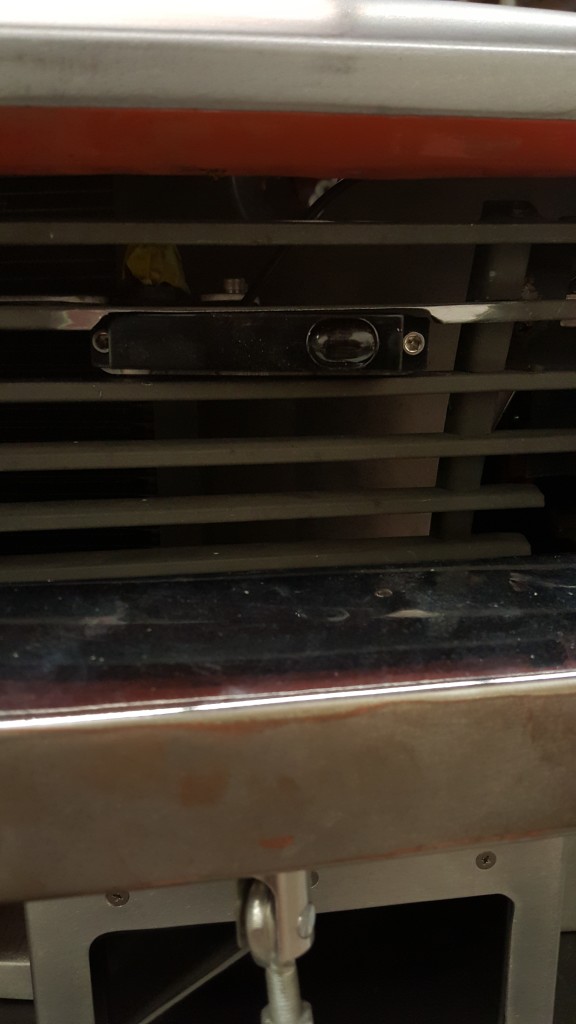
- I see you, hidden backup camera/ rearview in the dash
-
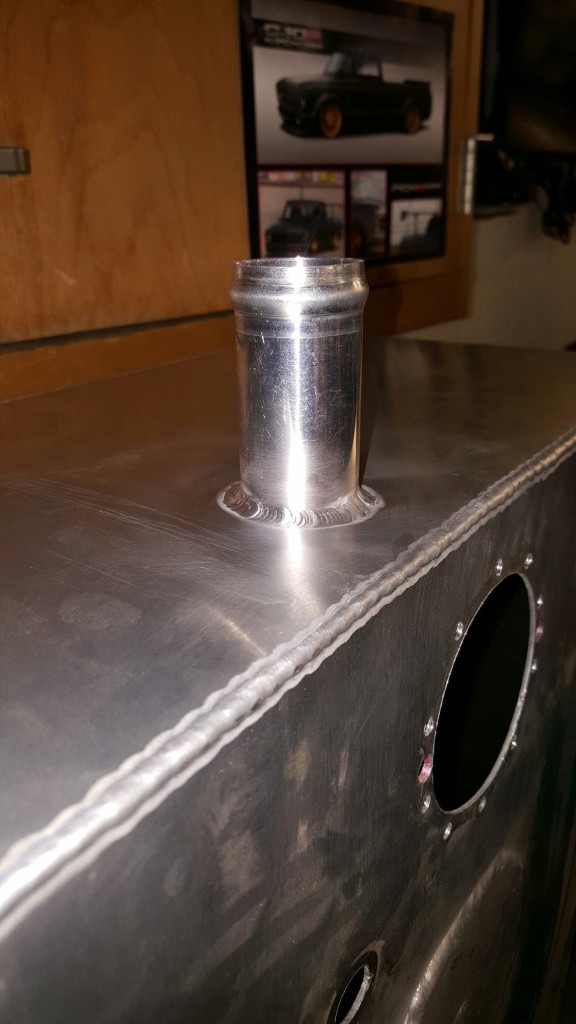
- Moving the filler neck from the top to the side
-
- air extraction alloy beauty rings
-
- muscular hips
-
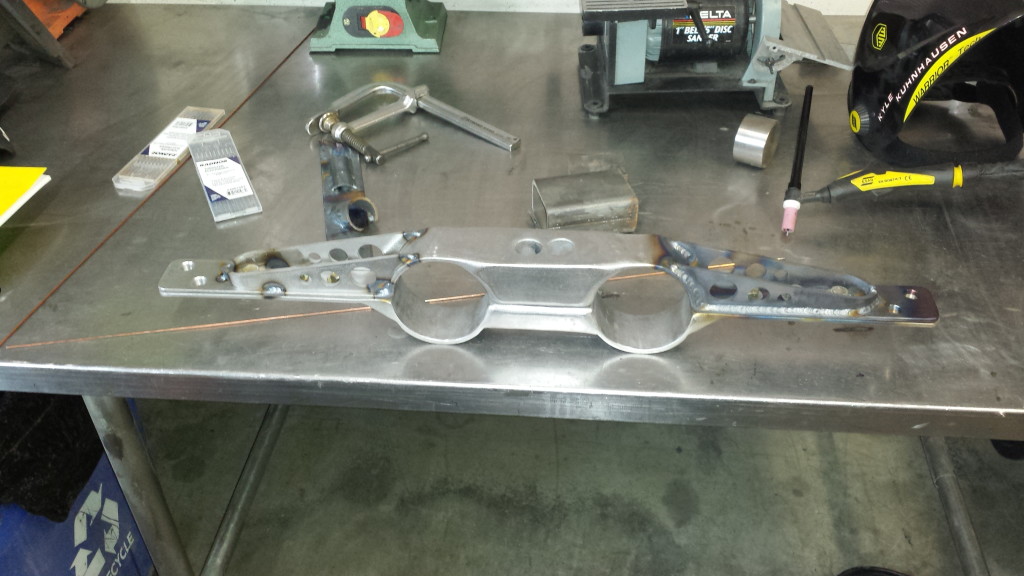
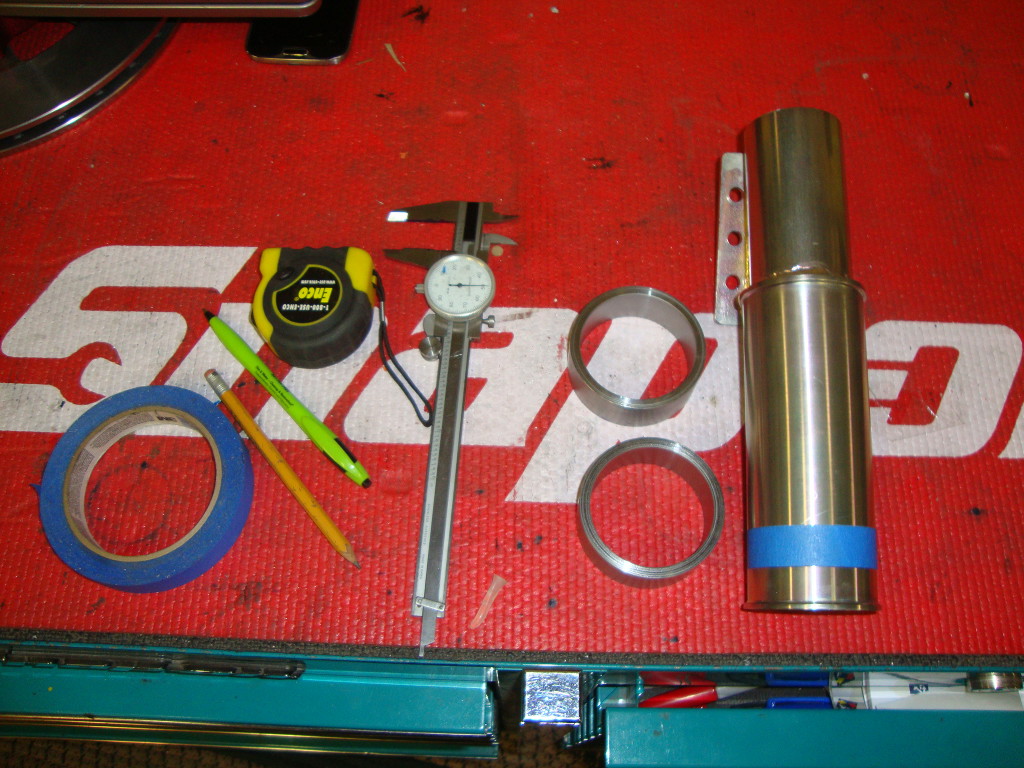
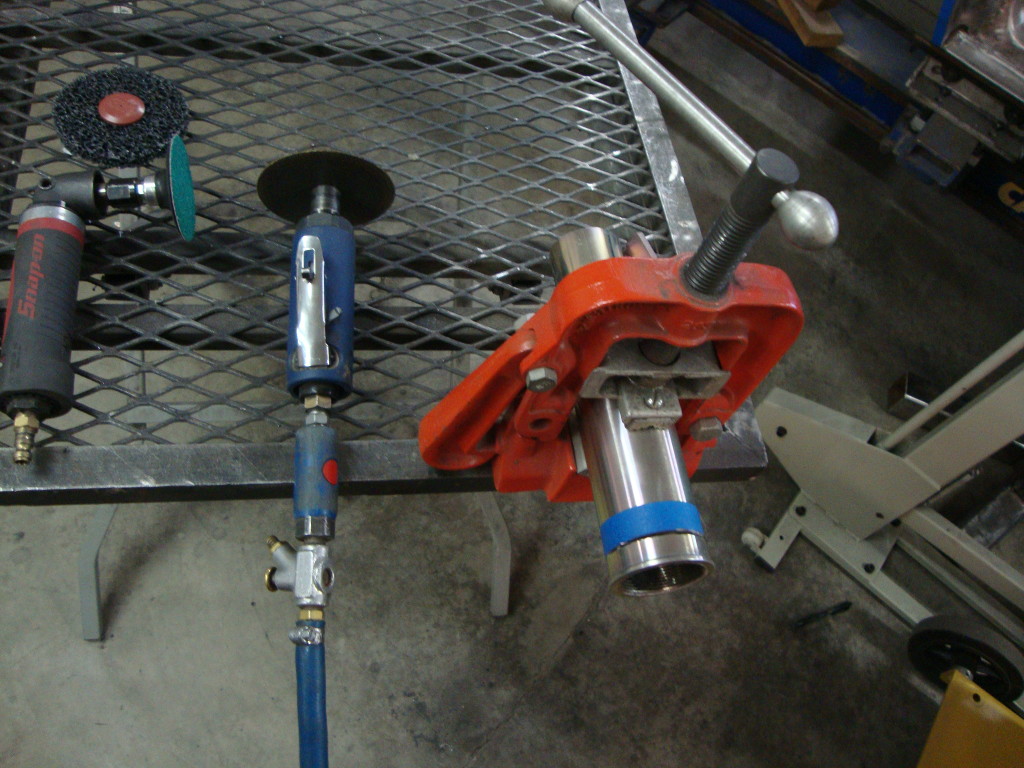
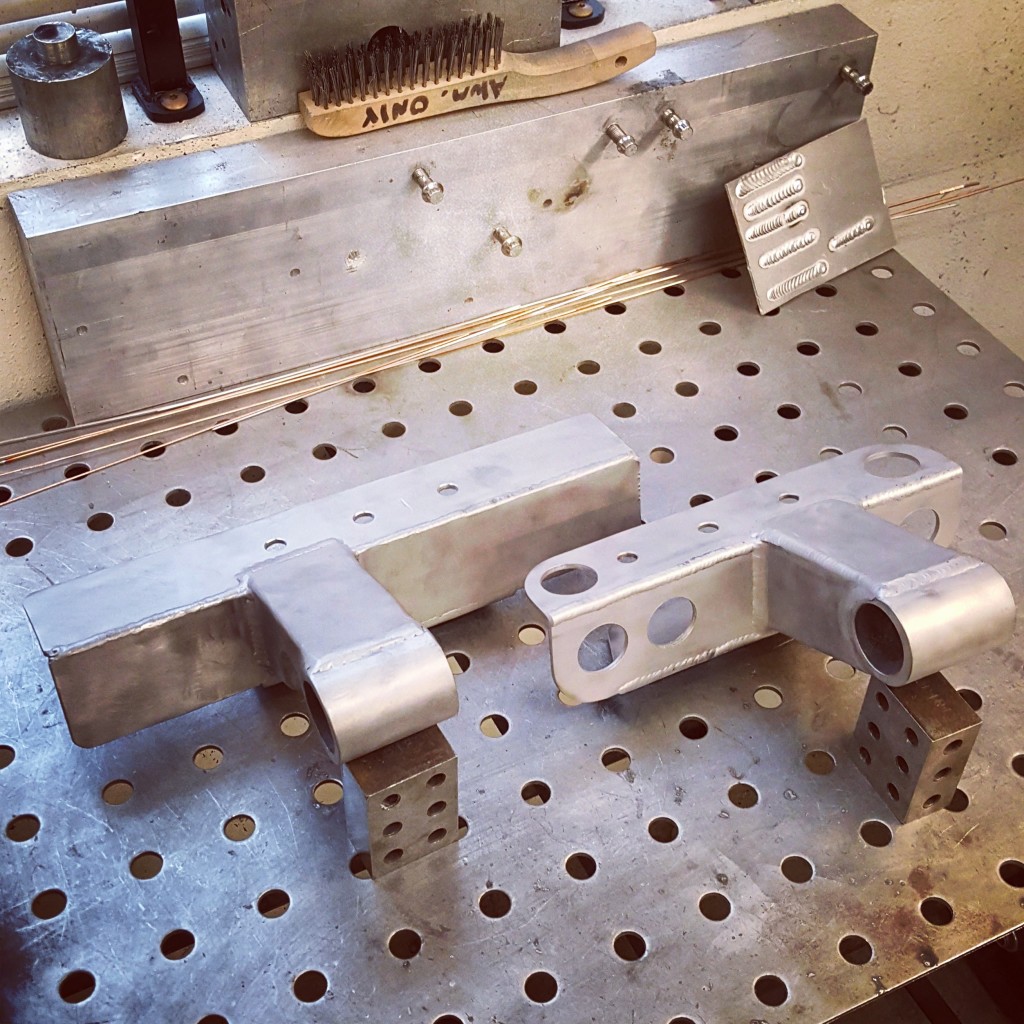
- How all my bracketry starts
-
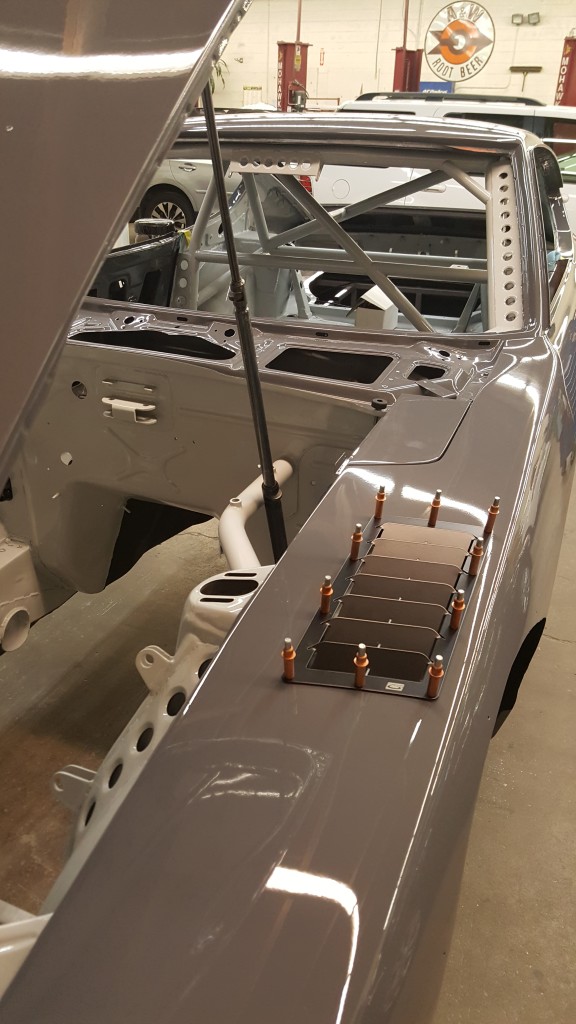
- Fuel tank and differential vents
-
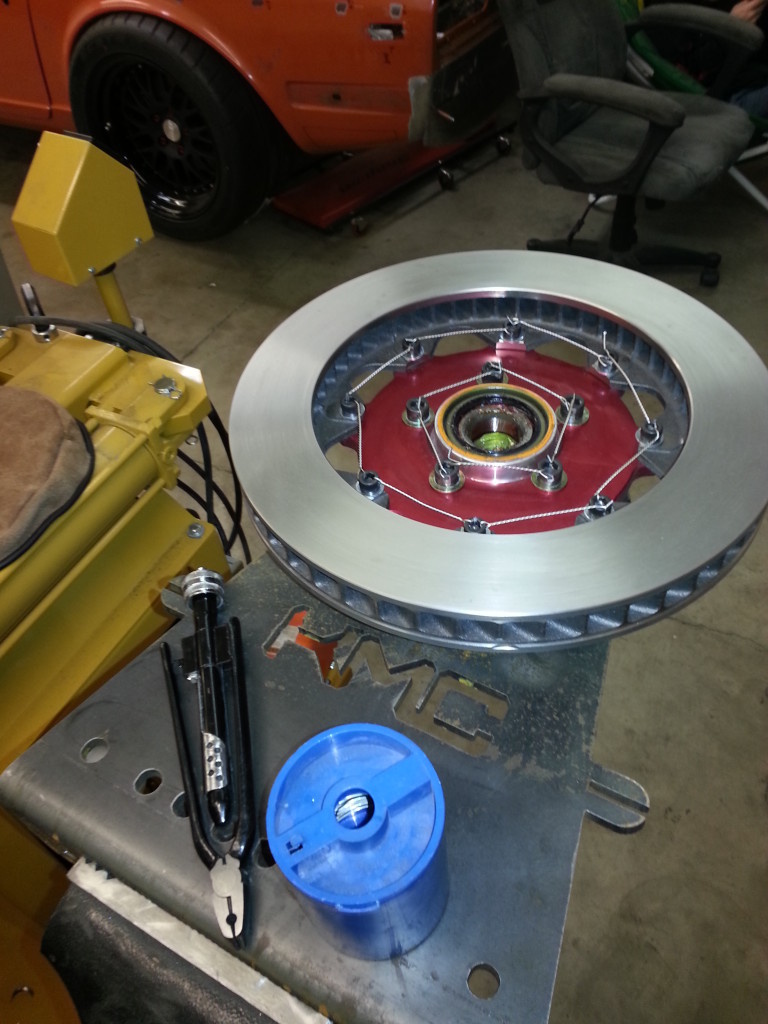
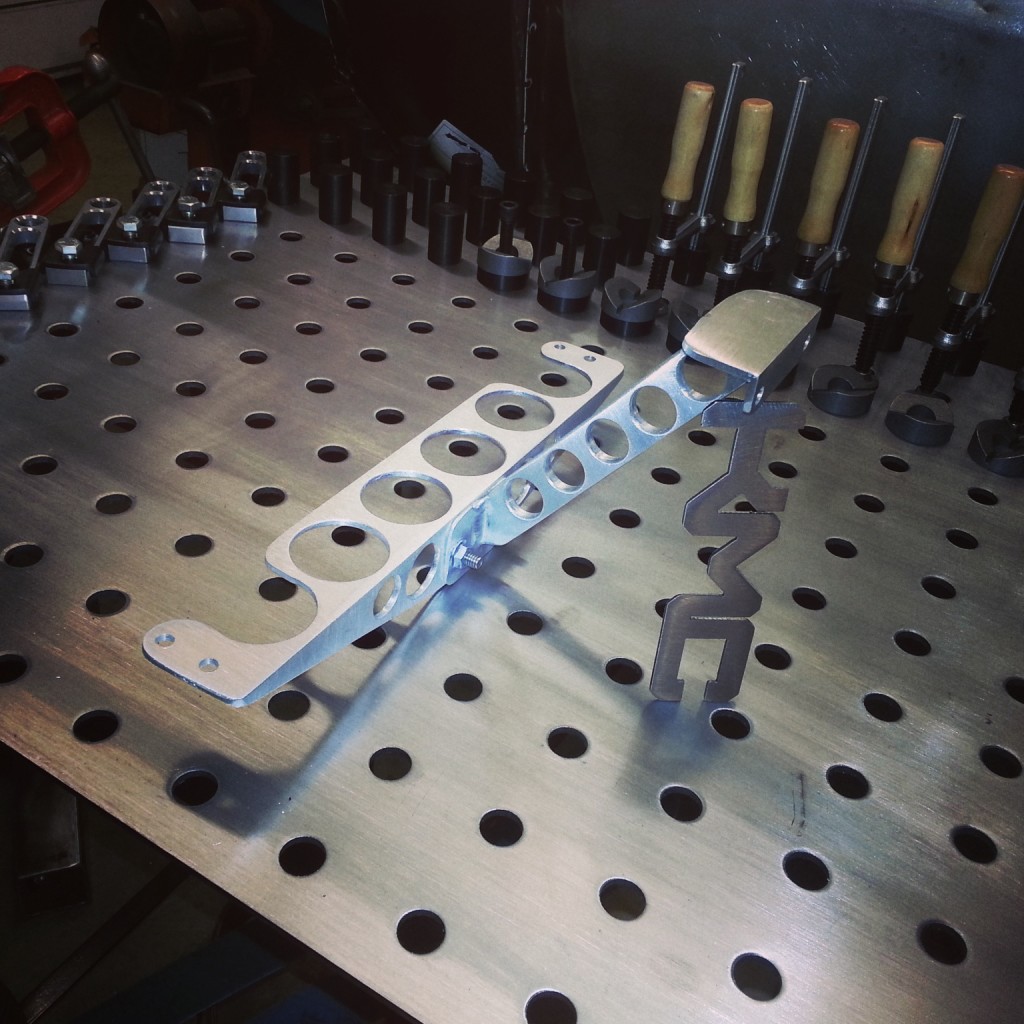
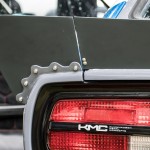
- “KMC” you know the rest
-
- A builders perspective, each part is used to create the bigger picture
-
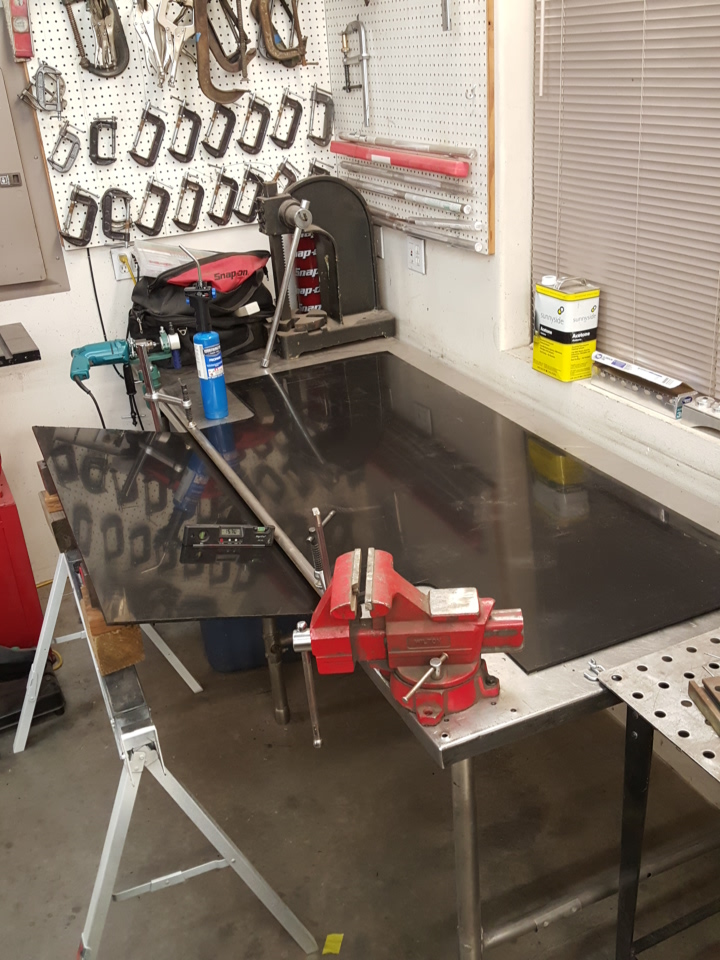
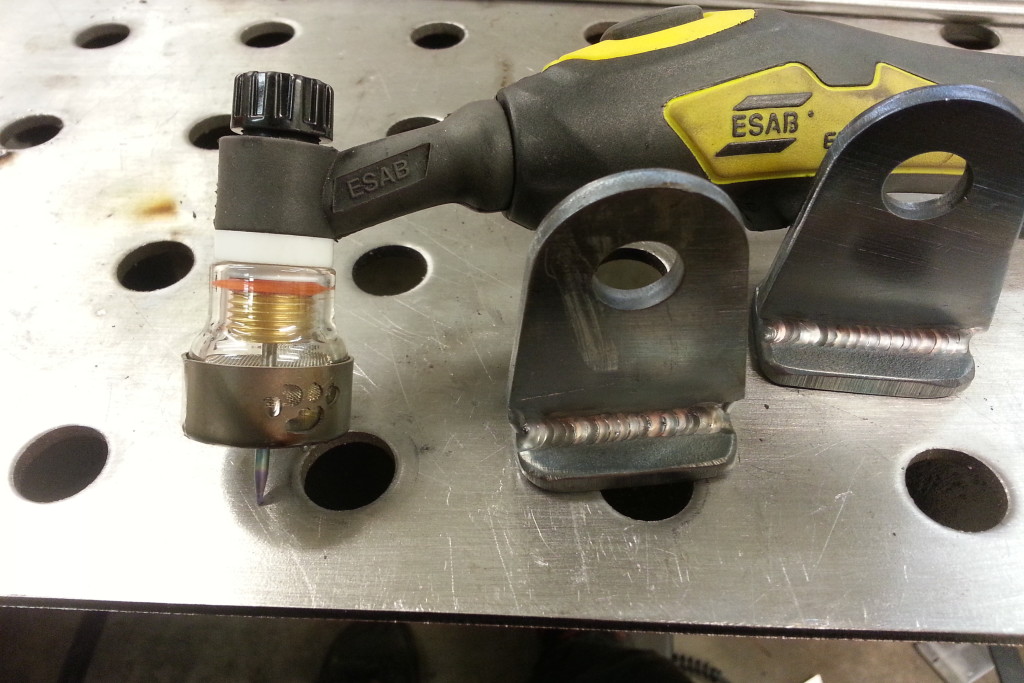
- Tidy Tig welding with my trusty ESAB machine
-
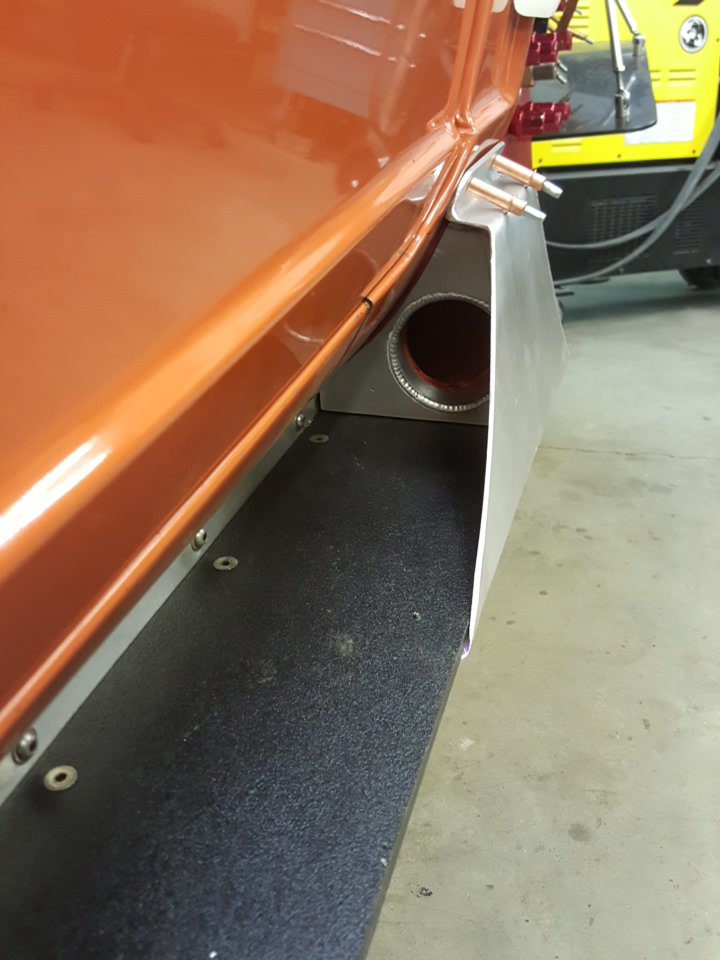
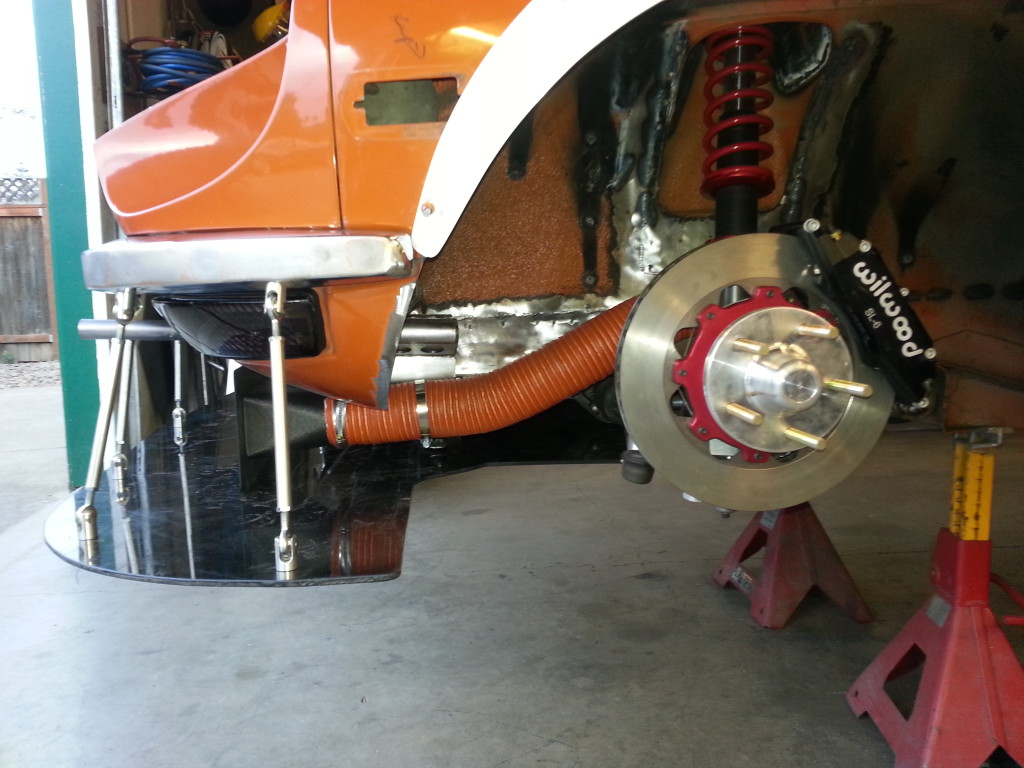
- Rear brake duct

-
- Doing things the old fashioned way, always a pleasure
-
- Ugly bumper bracket
-
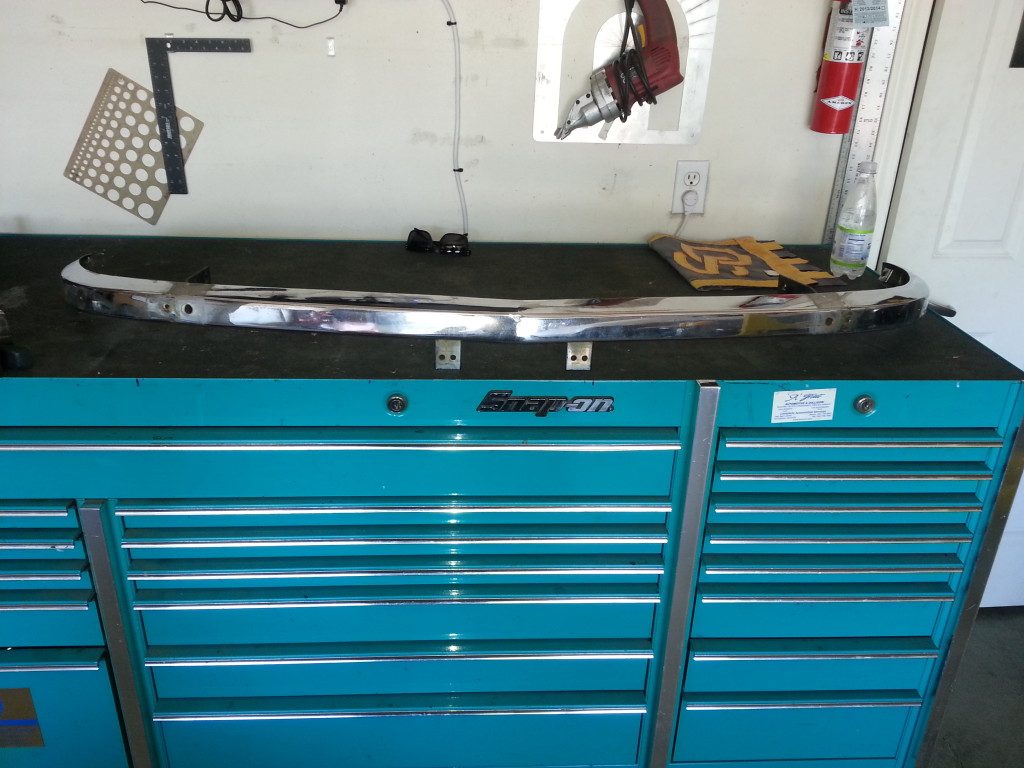
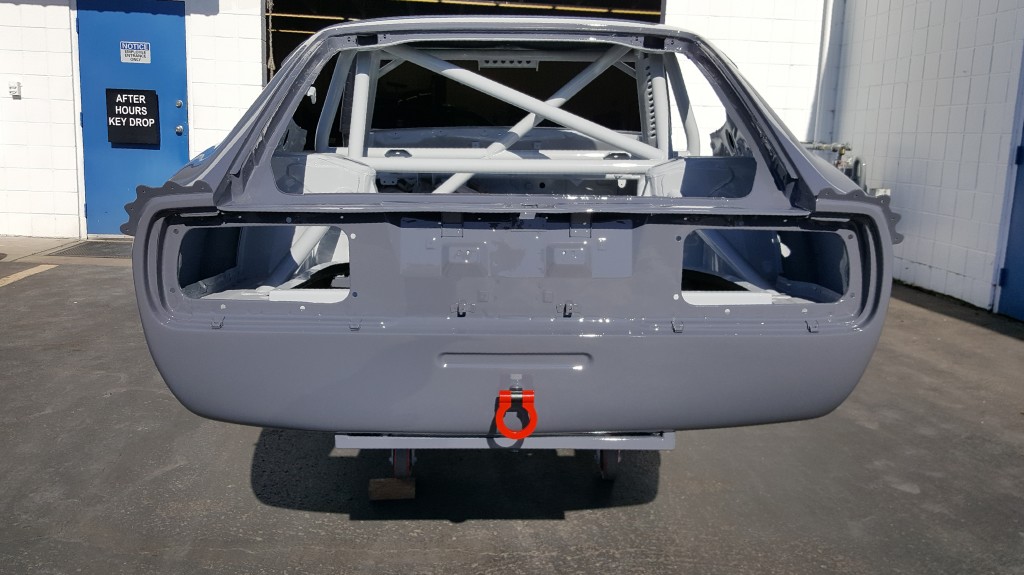
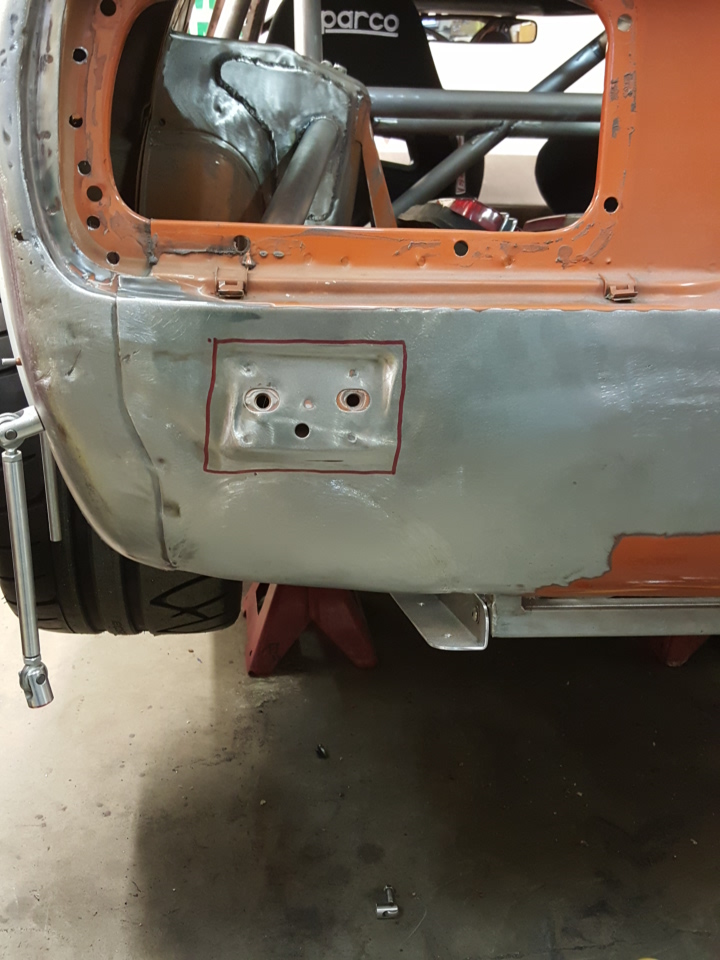
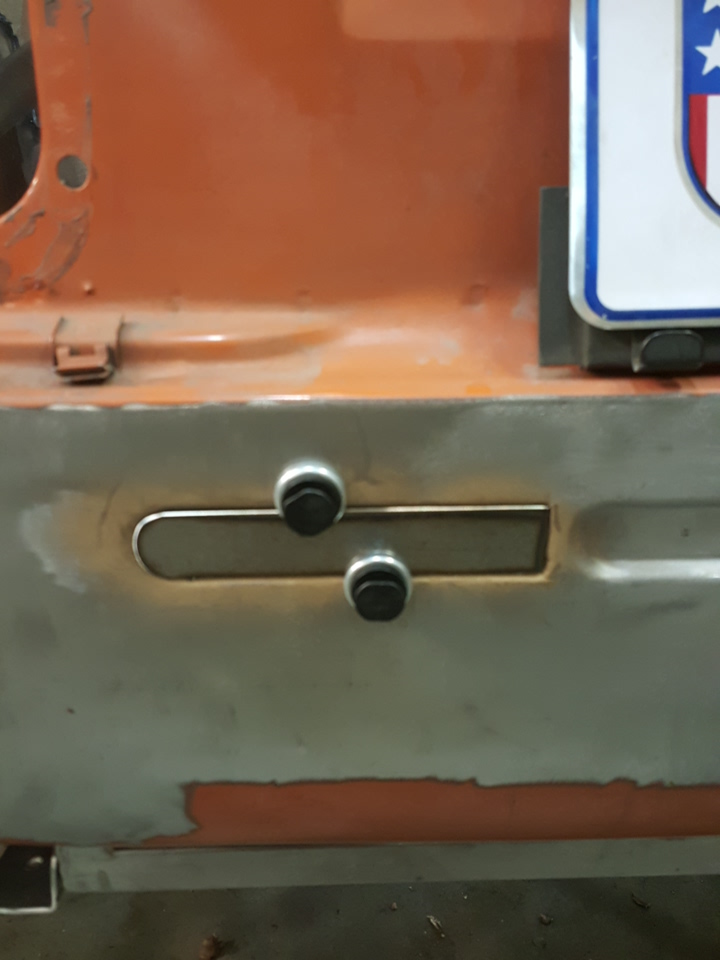
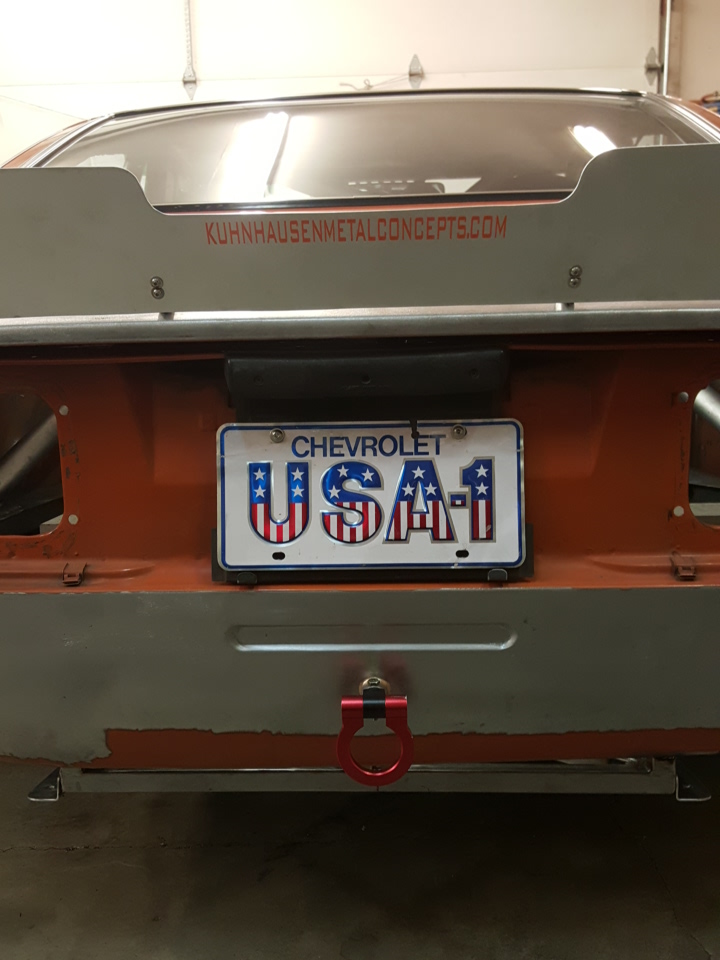
- No more bumper in the rear
-
- shaving side markers
-
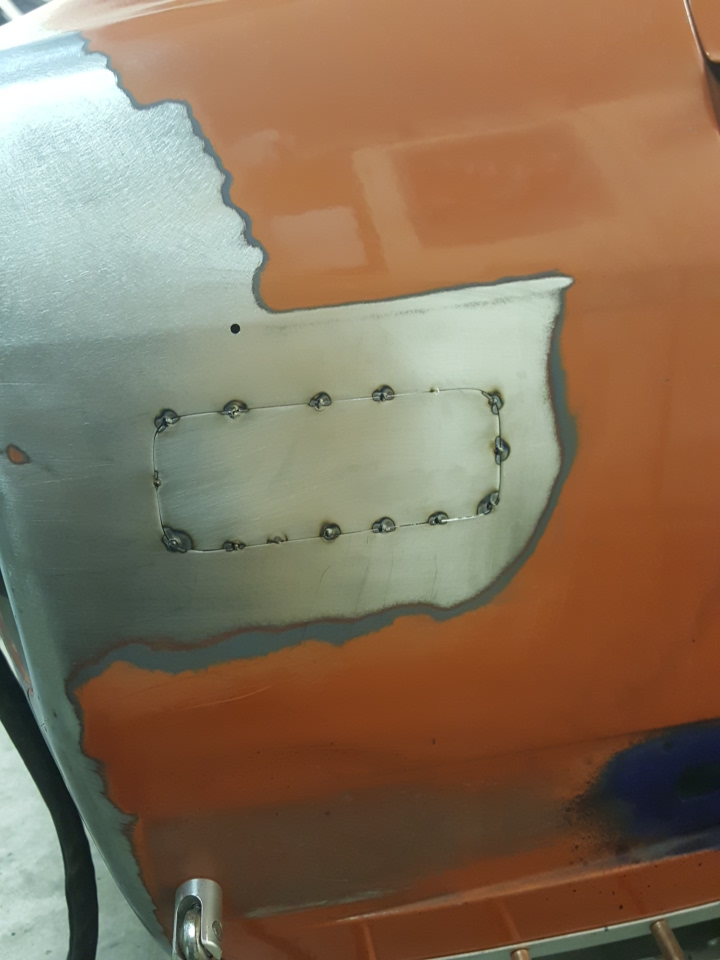
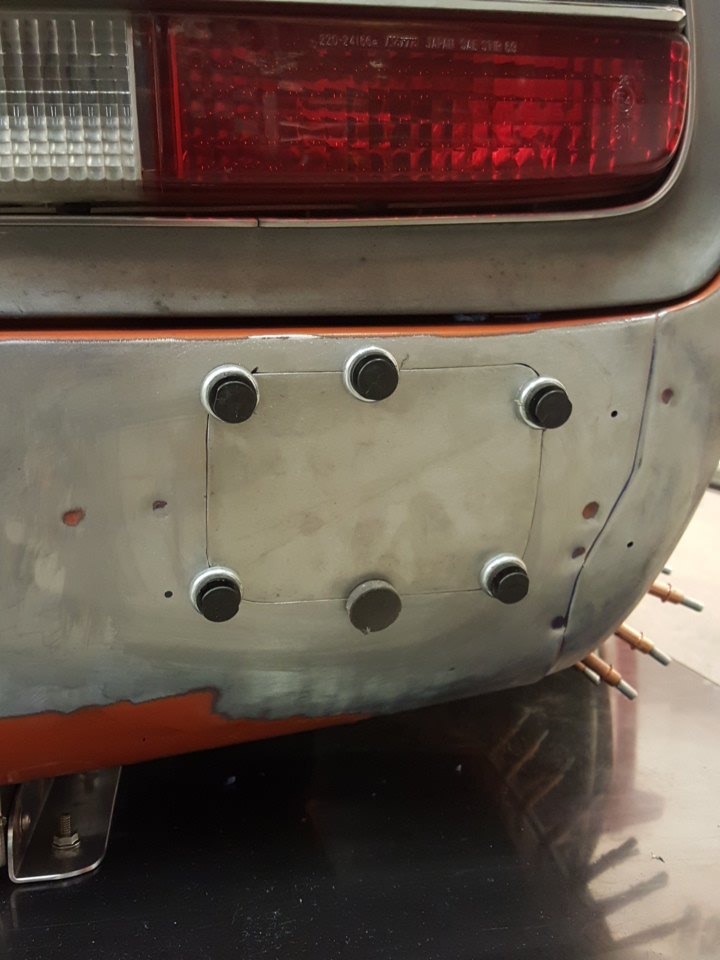
- making this unsymetrical recess symetrical
-
- The symetrical inset really sets off the rear end
-
- a tight fitup for the tig welding
-
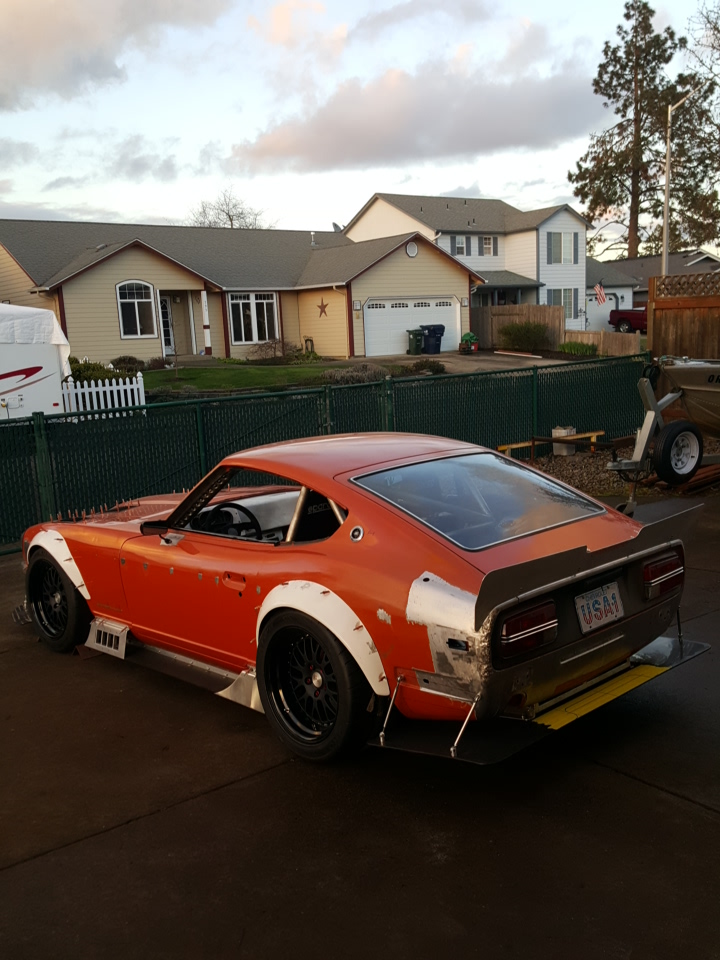
- She has come a long way, lots left to go though
-
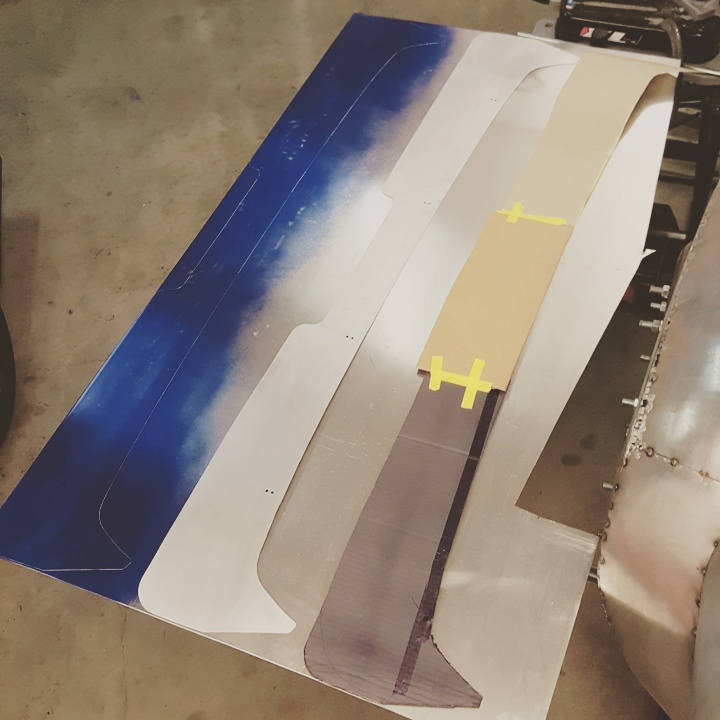
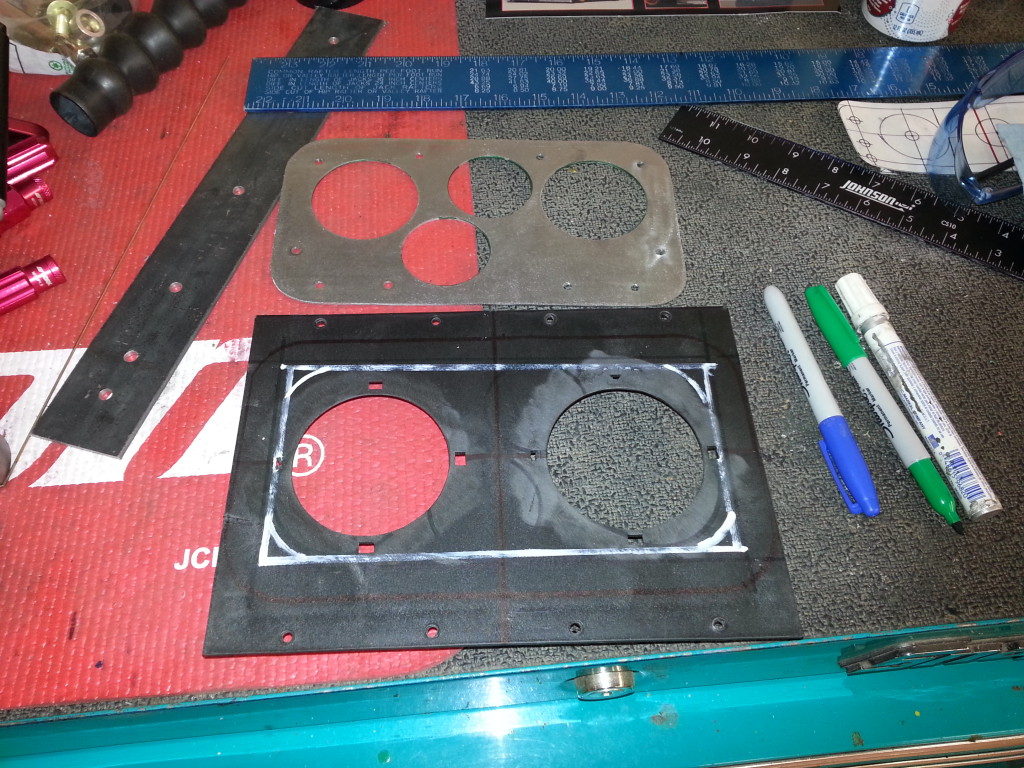
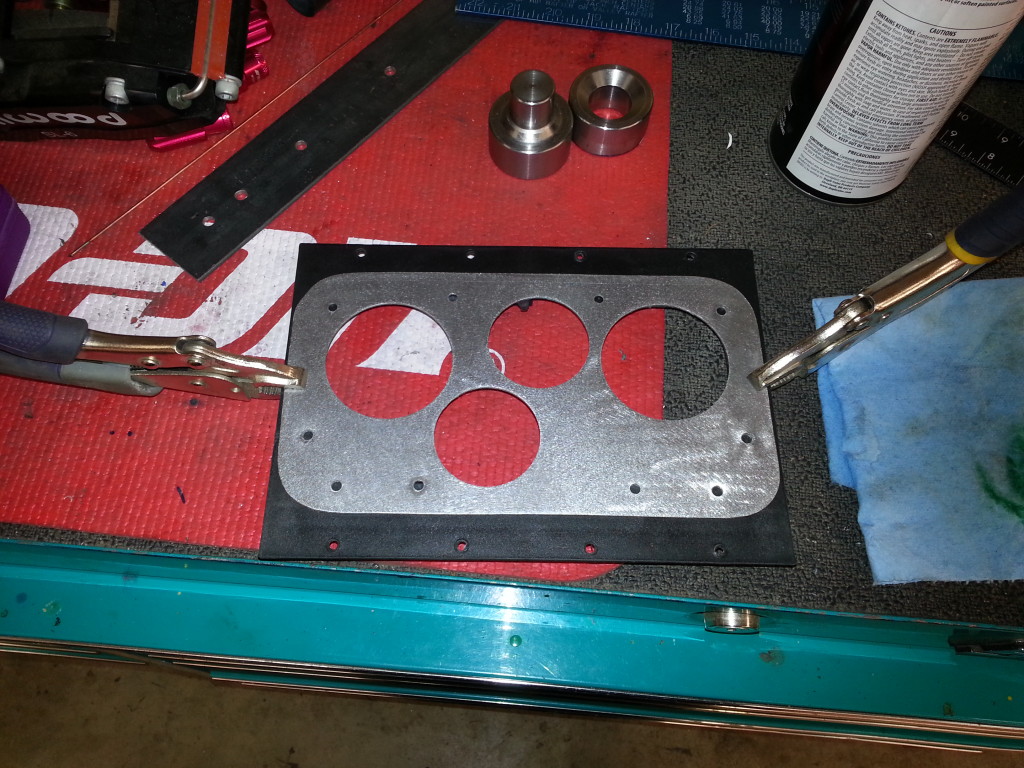
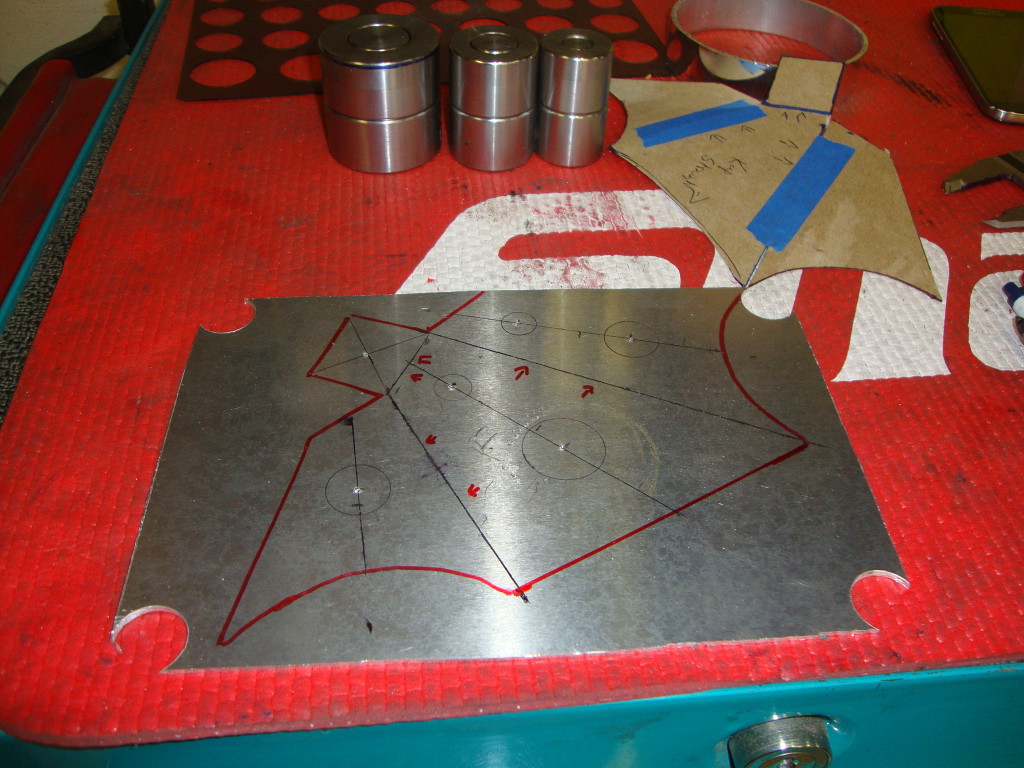
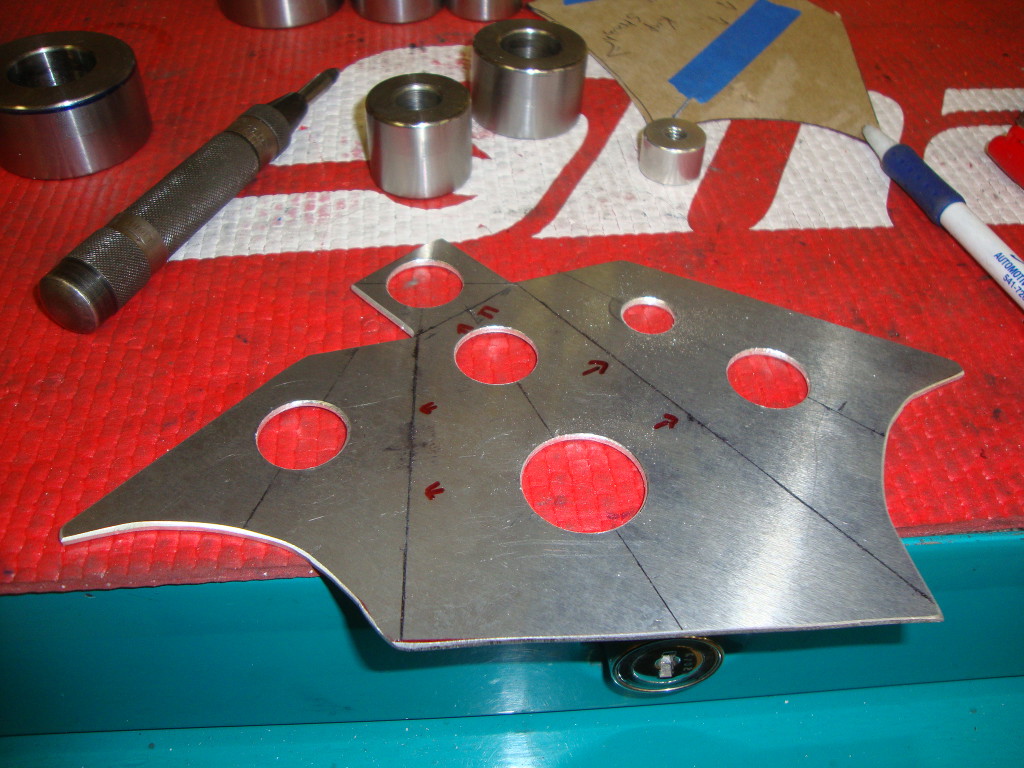
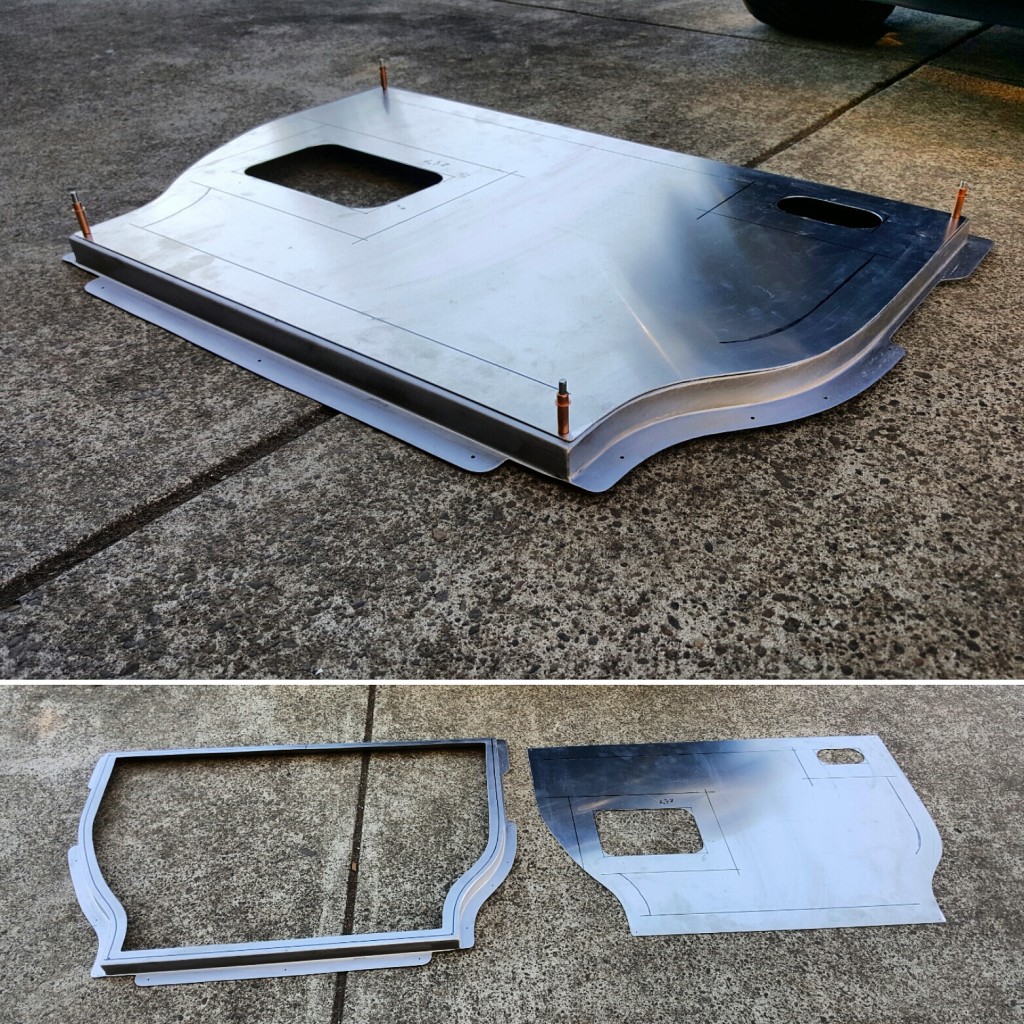
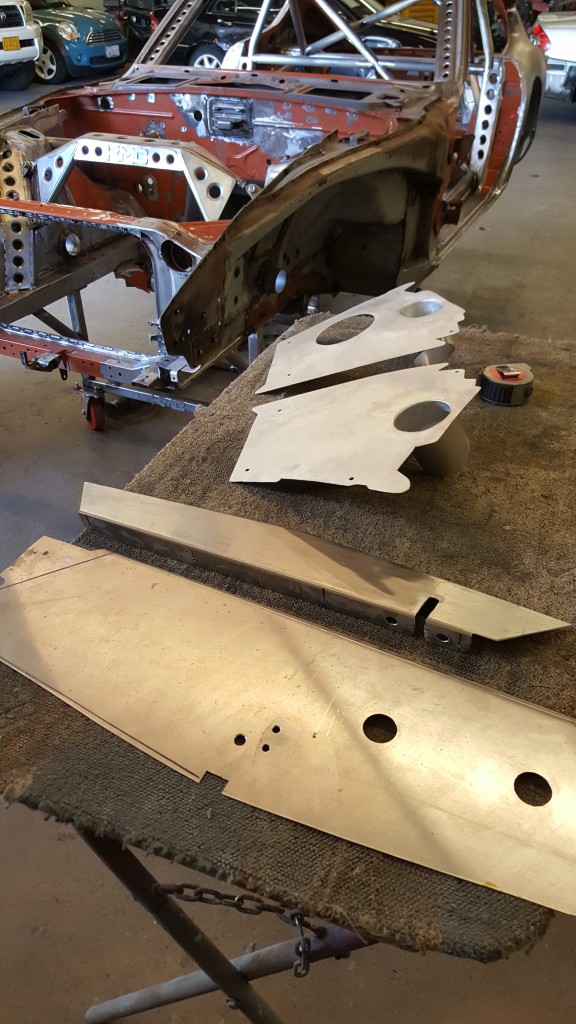
- The progression of templates

-
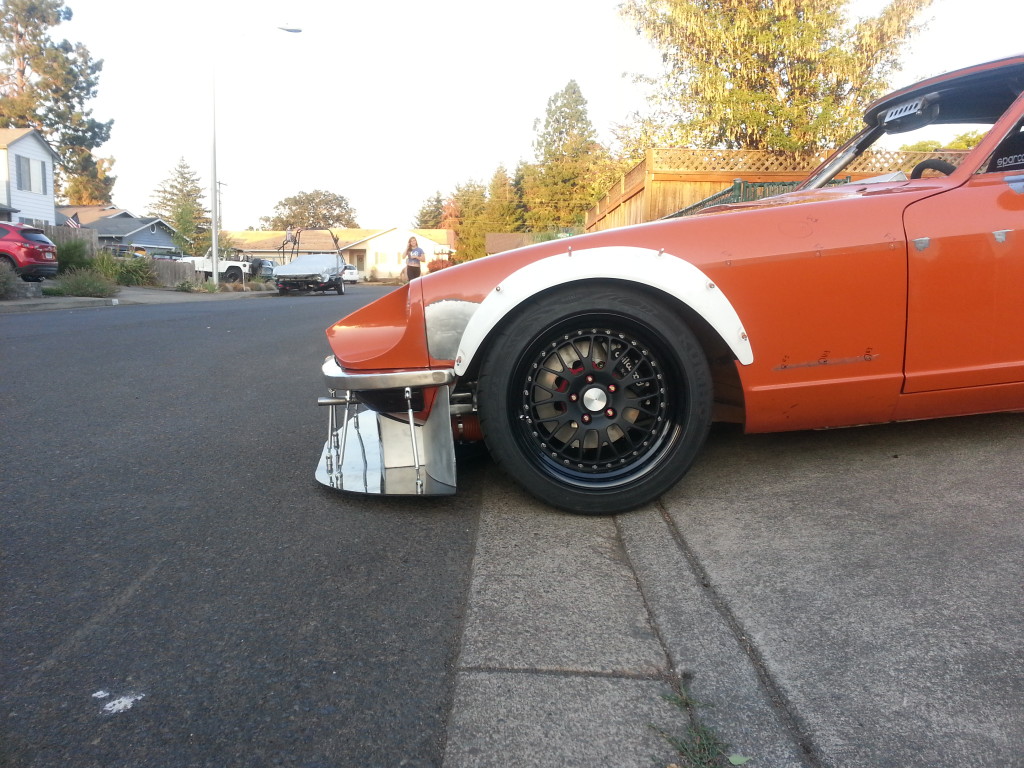
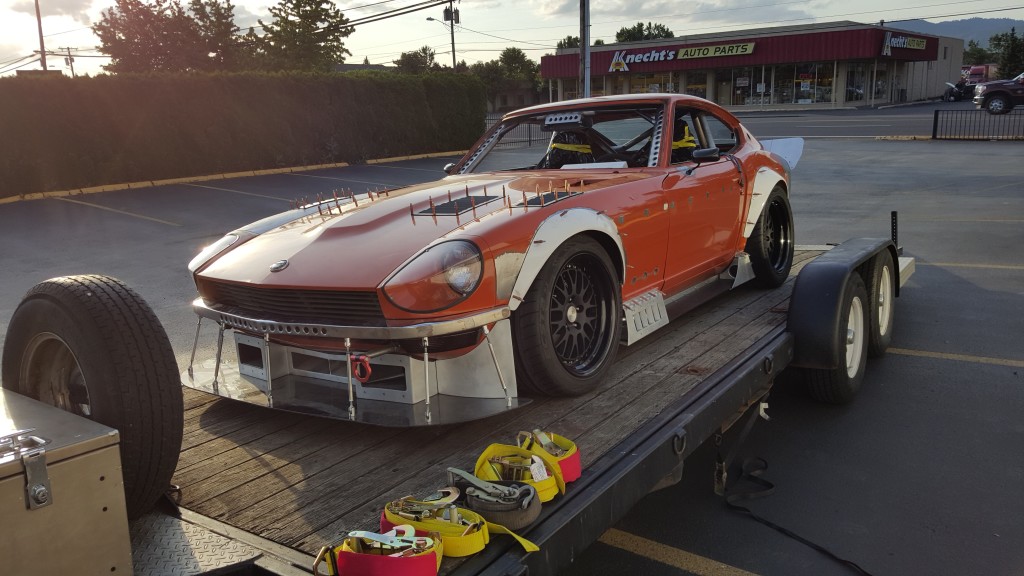
- Ground clearance leaving the driveway, no scrapes!
-
- Hood air vents give you a taste of whats under